|
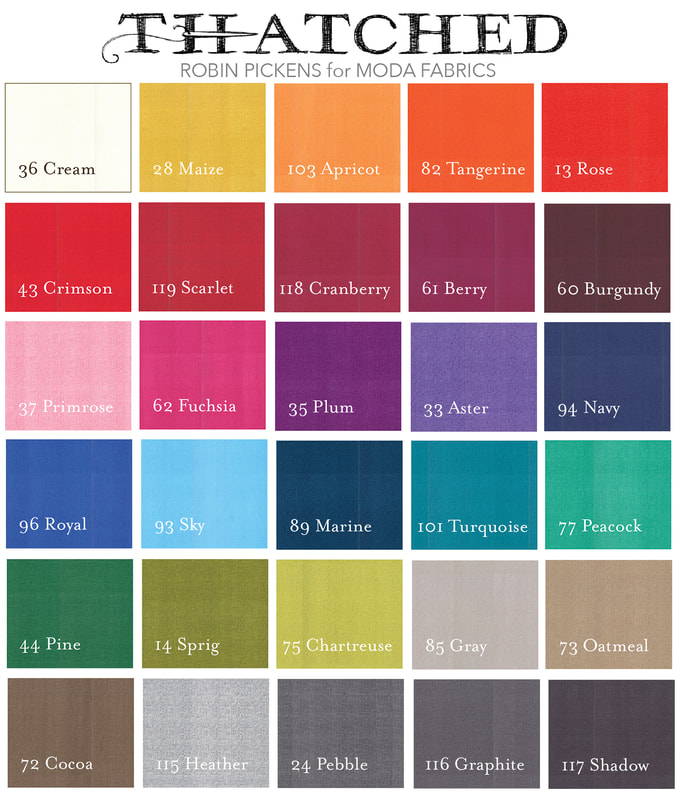
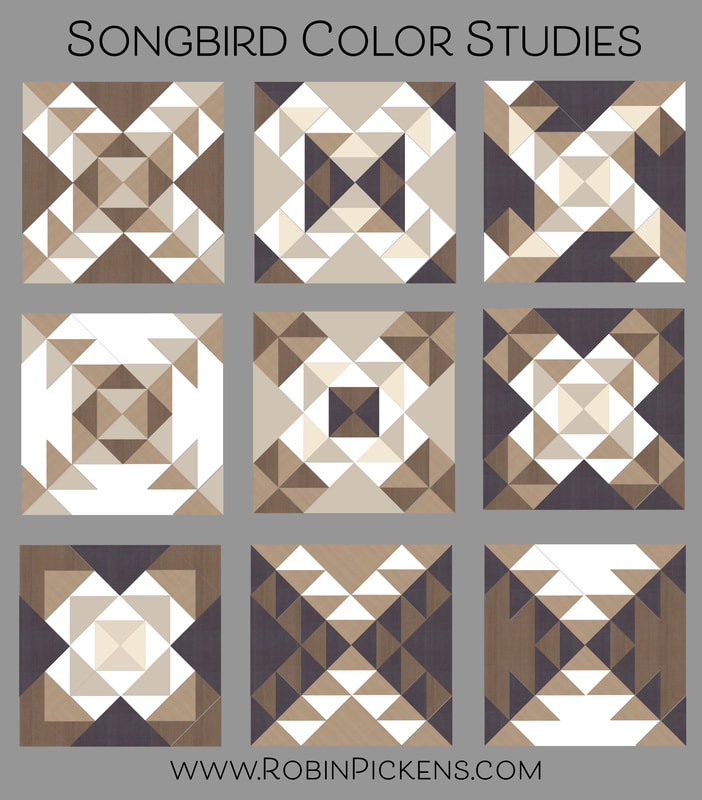
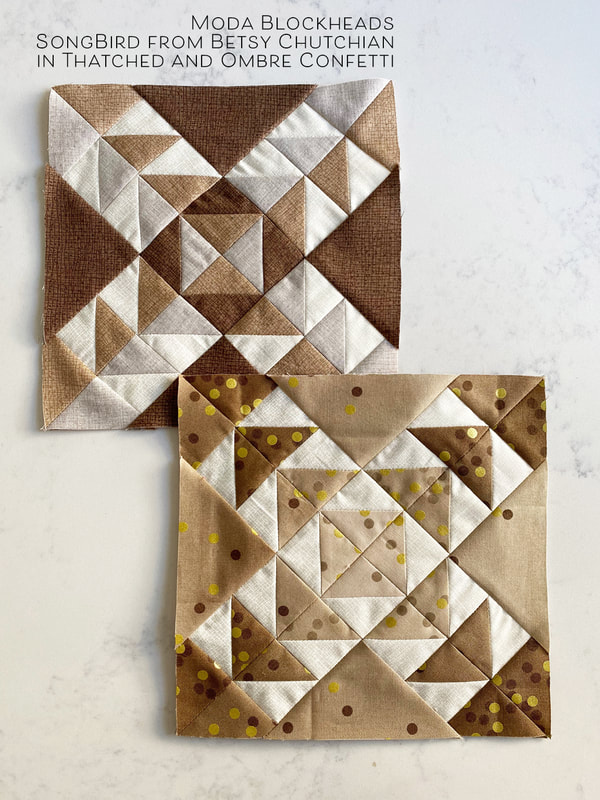
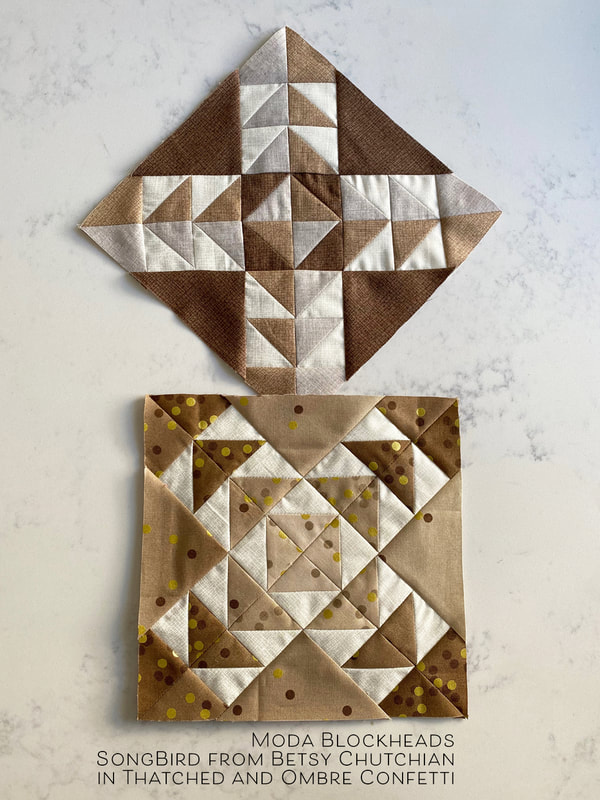
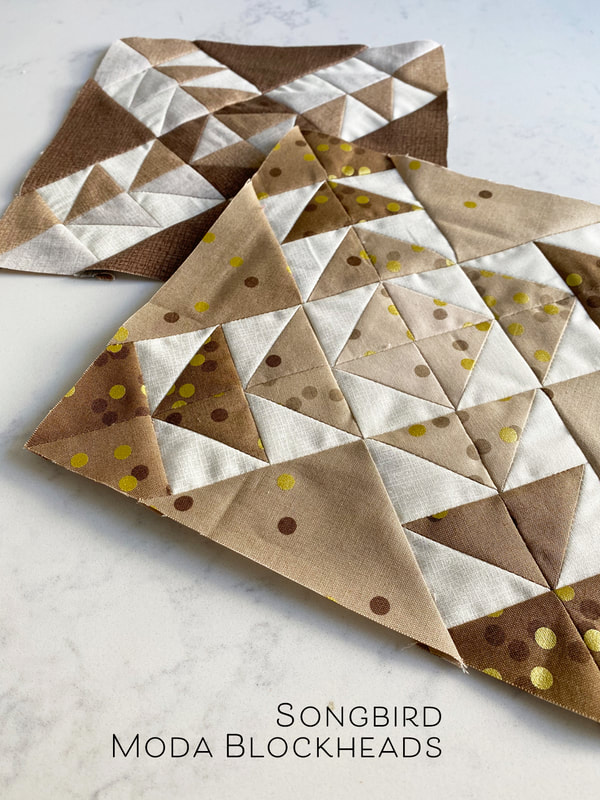
Half square triangles in rows can be straight lines of direction or create more square formats within the space. Here are a few experiments in playing with different lights and darks on the half square triangle colors. When I squint my eyes, I can see things more as overall shape and not be influenced by the smaller pieces. Xs, bowties, circles...do you see them? My blocks are for my brown row. I have Thatched browns but not many prints so Ombre Confetti is my go-to for brown blocks. I just love those metallic gold polka dots! Visit Betsy Chutchian's blog for the pattern at athttp://betsysbestquiltsandmore.blogspot.com/ Did you know there are giveaways going this last round of patterns?? Yes! See Betsy for more details on this week's giveaway! Happy sewing!
5 Comments
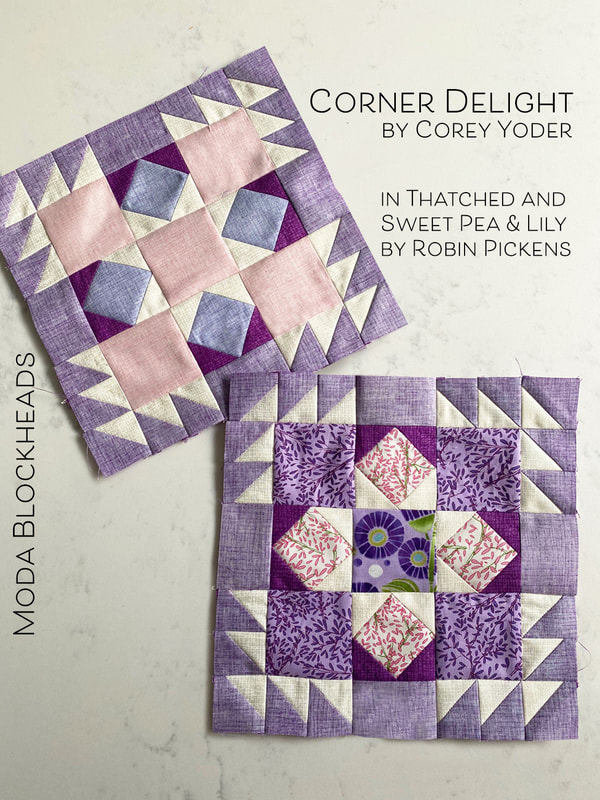
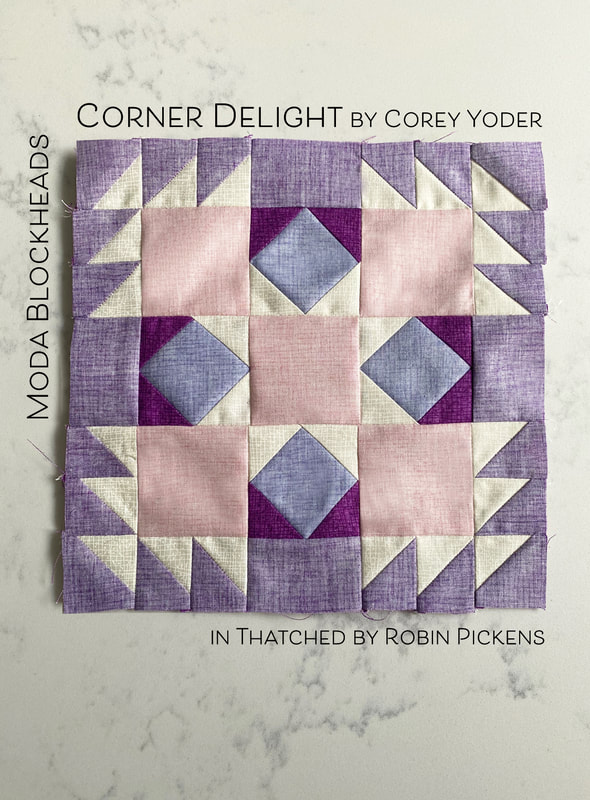
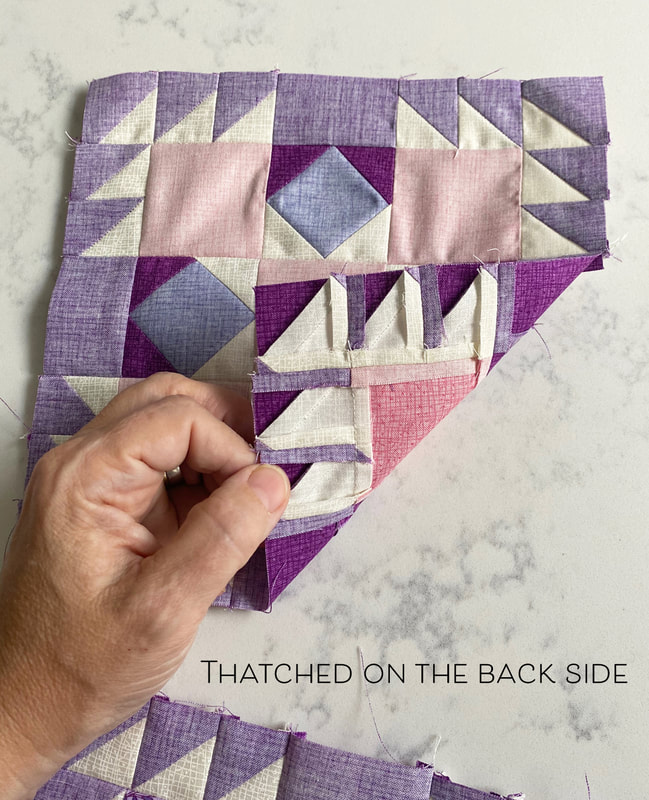
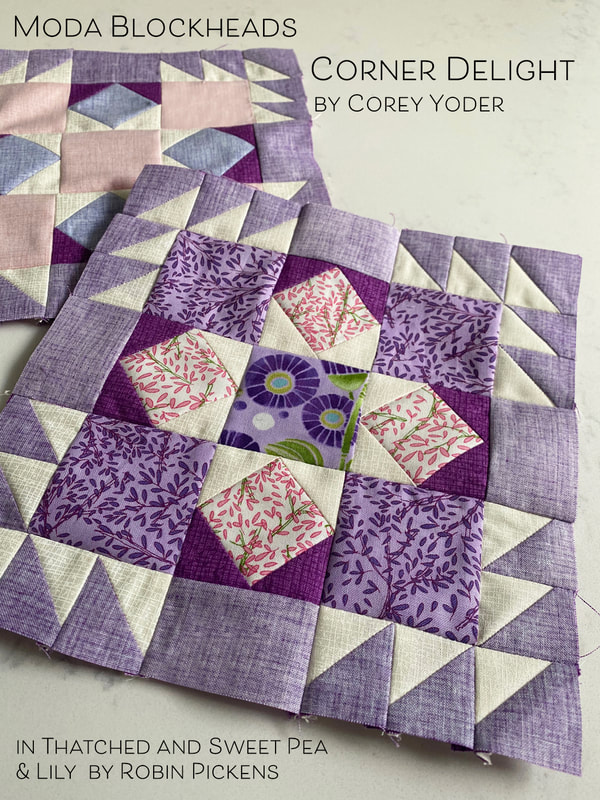
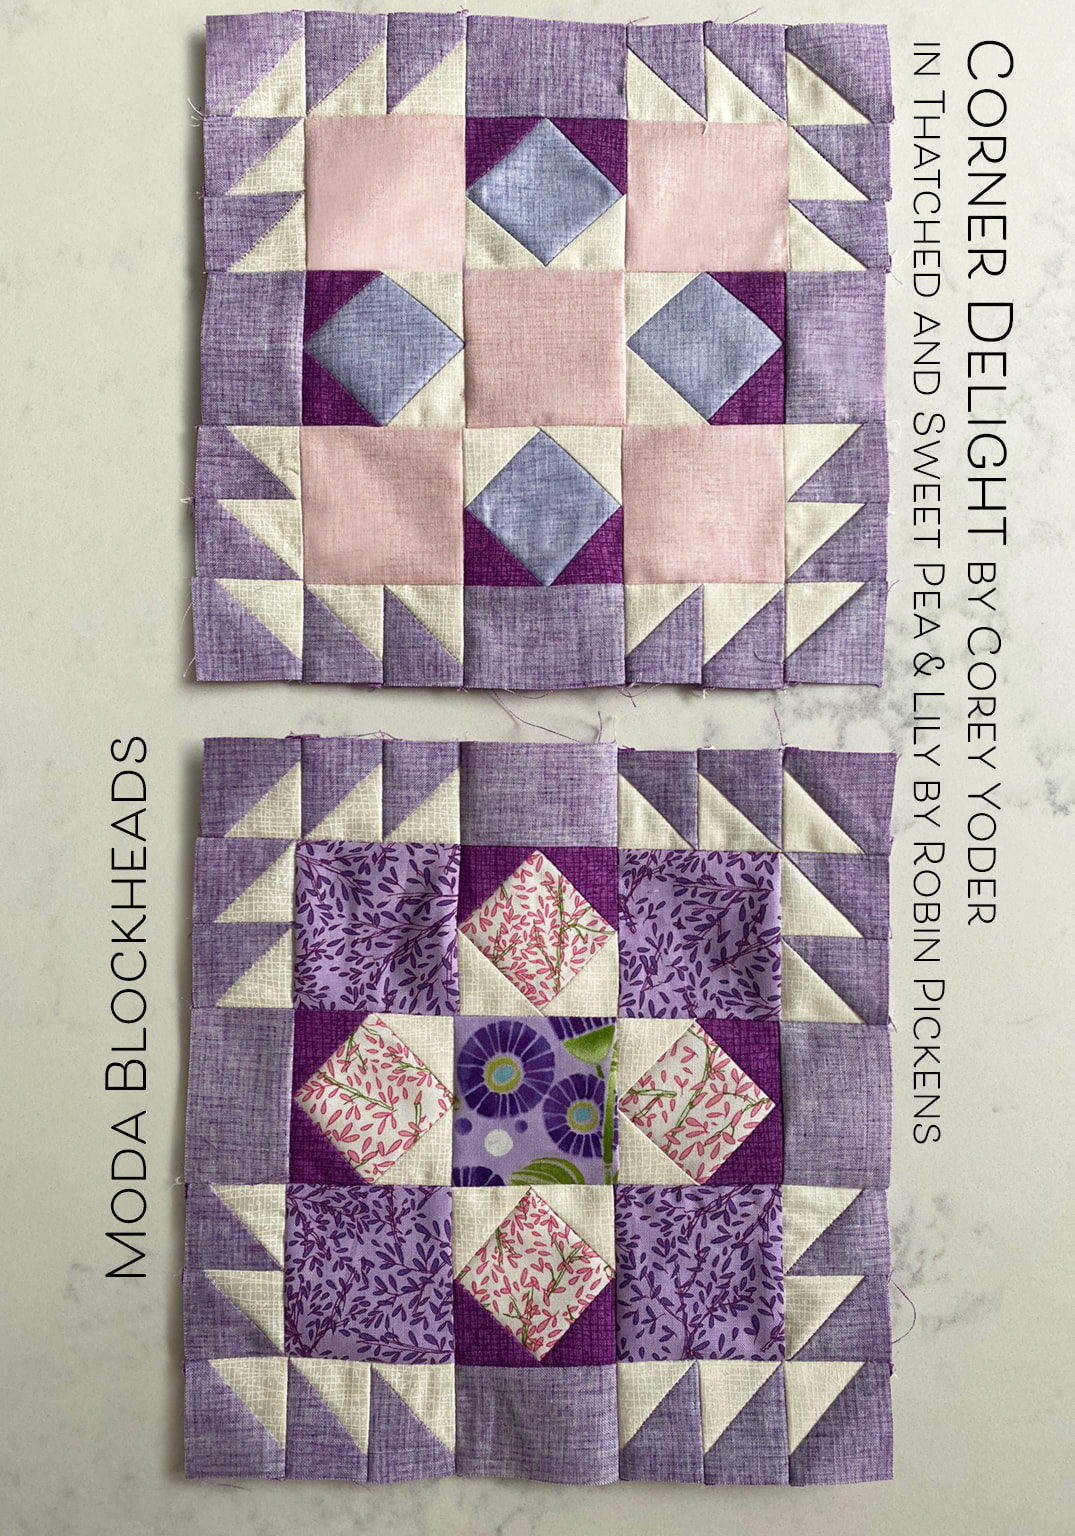
What a fun block this week from Corey Yoder! I love the possibilities in this with the diamond shapes and squares. I didn't even realize it was Wednesday till I started to see blocks being posted so I didn't get a color study done this week. I'll be back to playing with colors on the computer for next week's block though. On my all-Thatched version I wanted the lighter end of the spectrum for my layout. My quilt will be in rainbow bands of color and going from dark on the left to lighter on the right. One of the ways I get those lighter shades is by using Thatched on the back side. I love the soft look it has when I use it that way! My print version uses Thatched with Sweet Pea & Lily for lacy branches and a graphic floral center. For both blocks I made my diamond stitch and flip blocks with half dark purple corners and half cream corners. I wanted to emphasize the star in the middle but I think it made more of a petal shape on this print version and I like it. The all -Thatched with the dark purple emphasizes a bigger diamond square in the center. Visit Corey's blog for this week's Moda Blockheads pattern. Can you believe this is our fourth and final cycle of designer blocks in this sampler project? Woooo hooooo! Keep sewing!
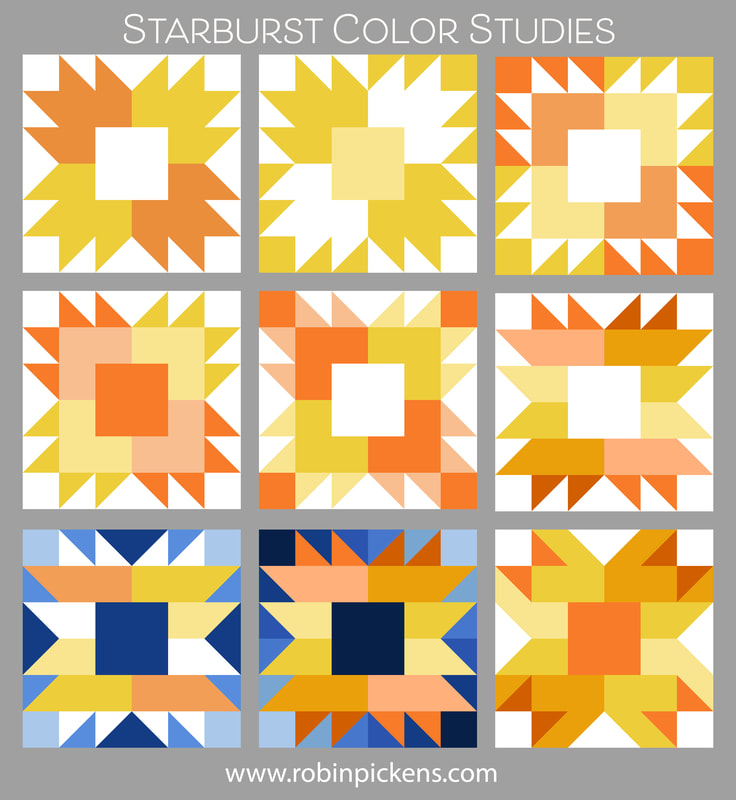
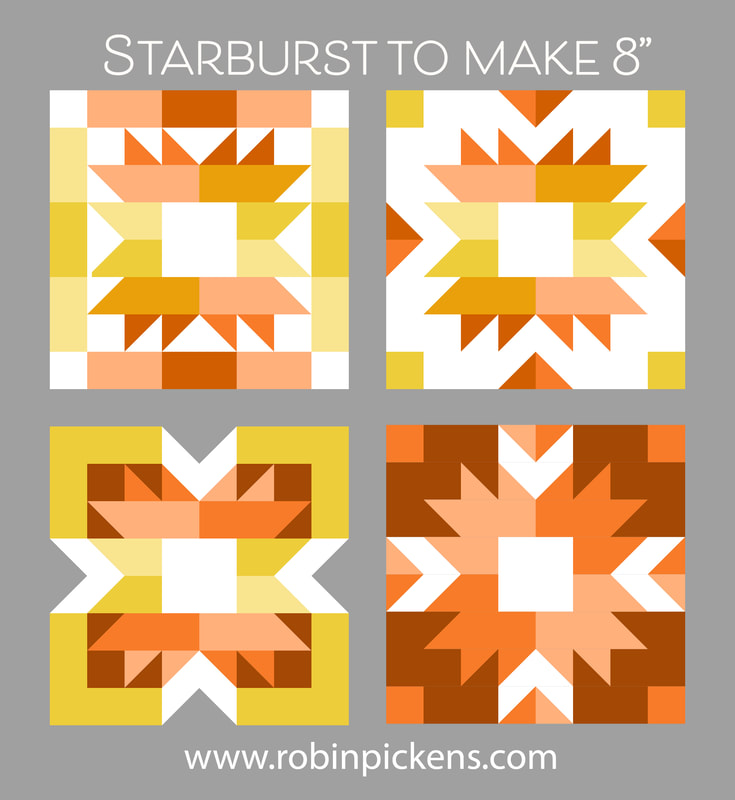
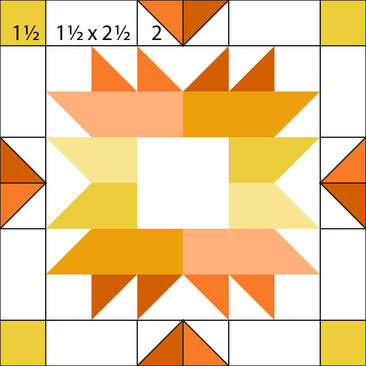
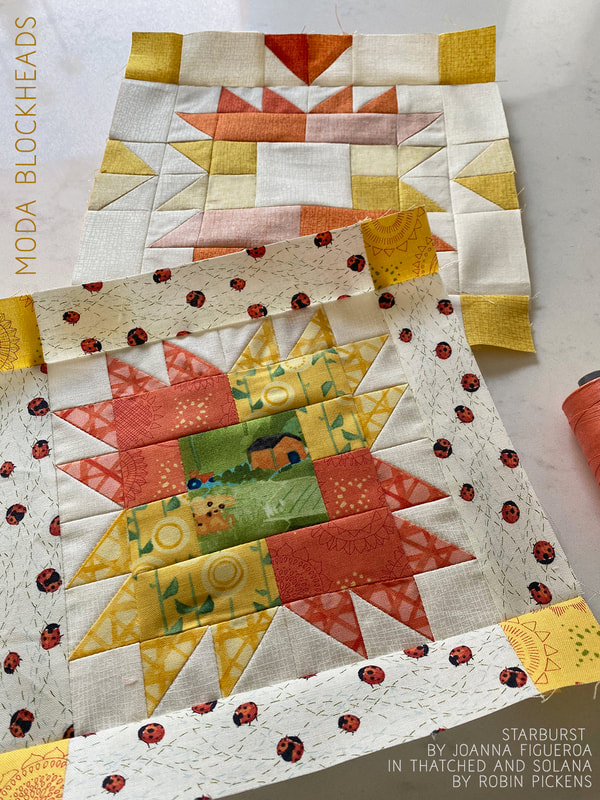
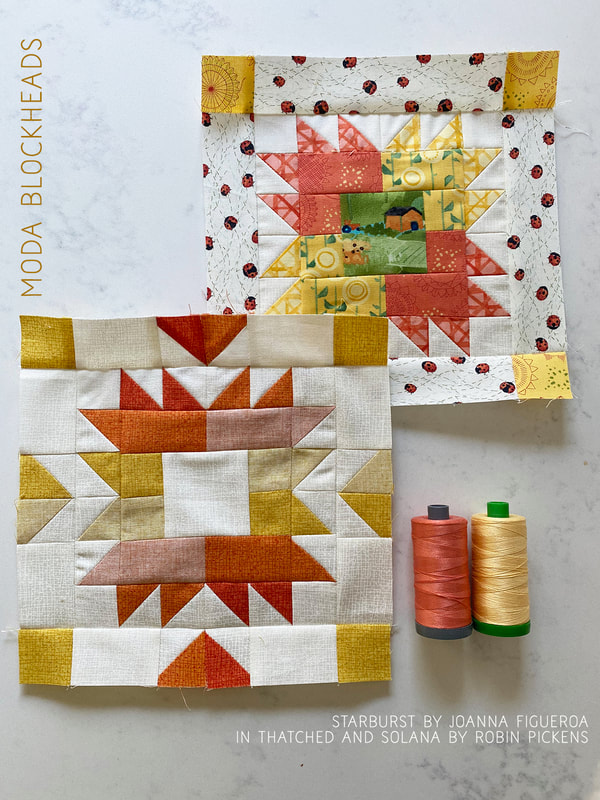
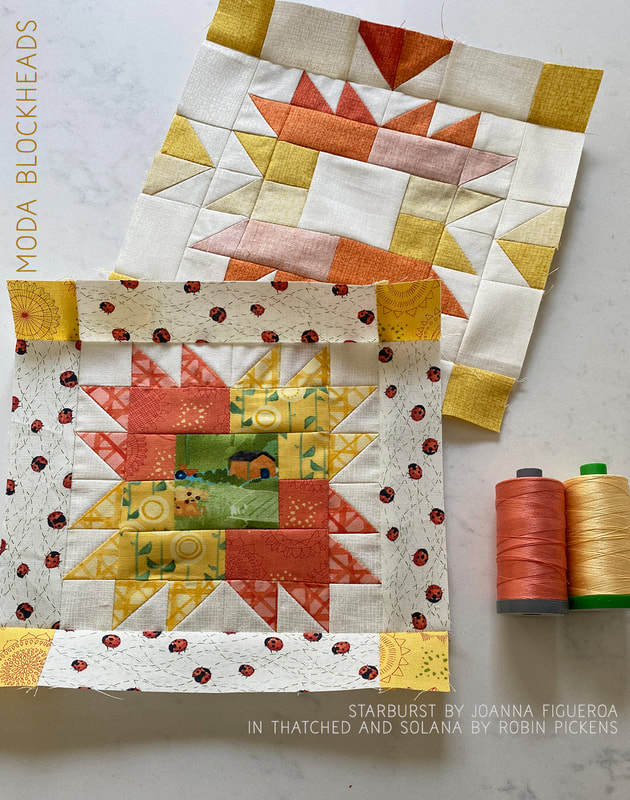
This is block 42 and we are 3/4 of the way through with this sewalong! Next week begins our last cycle of blocks from designers. This week it is Joanna Figueroa of Fig Tree and Company with her Starburst block. You can treat the quadrants in this block as one piece/color or make the half square triangles a different color. I have also played around with making my pieces that make up the big square pieces as rows of colors vs a single color. I like how it can look striped by trying doing that. The last one makes little bows in the corners! I am making all my blocks in the 8" size so I tried out some border options. Making a 1" border (finished) around the whole block makes it 8" and I also envisioned adding some of the same squares and half square triangles to bring those same elements out into the borders and creating additional shapes. If you want to make the version with the HST in the center of the strip and squares in the corner, follow the same directions for making the half square triangles using the 2" squares. The other pieces are 1 1/2" square and 1 1/2 x 2 1/2" rectangles. This week I decided to make my print block in SOLANA since it is shipping to shops now! I've used the little tractor and barn in the scenic print for my center with coordinate prints from this sunflower line. My outer border is using my happy, busy ladybugs and gold varietals corner squares. My all-Thatched uses yellow and orange on the front and flip sides to get those lighter shades. For being such happy summery colors, this still feels calming with those paler shades of the colors. Enjoy this happy, bursting Starburst block and visit Joanna's blog for the pattern! Get ready for round 4, our final round of patterns, starting next week. I think this week I am going to try to catch up on any blocks I've missed so far. Happy sewing!
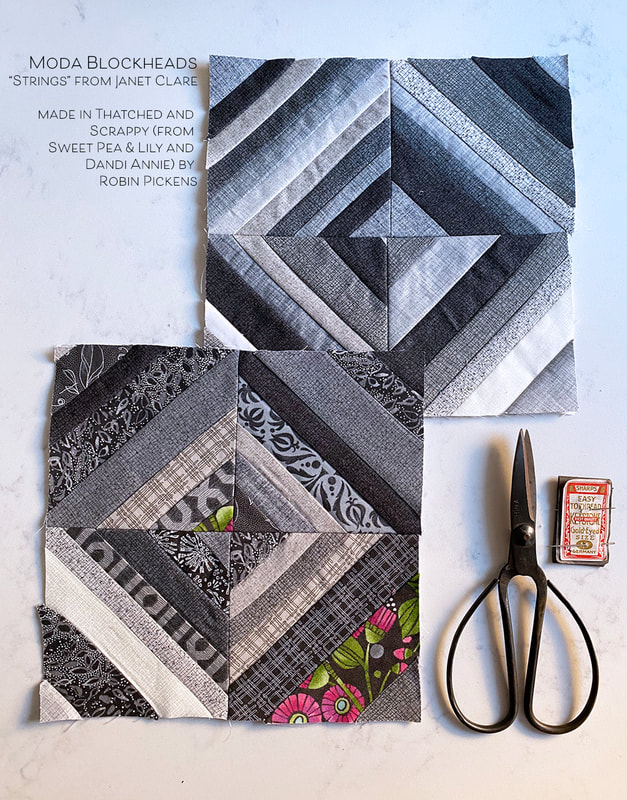
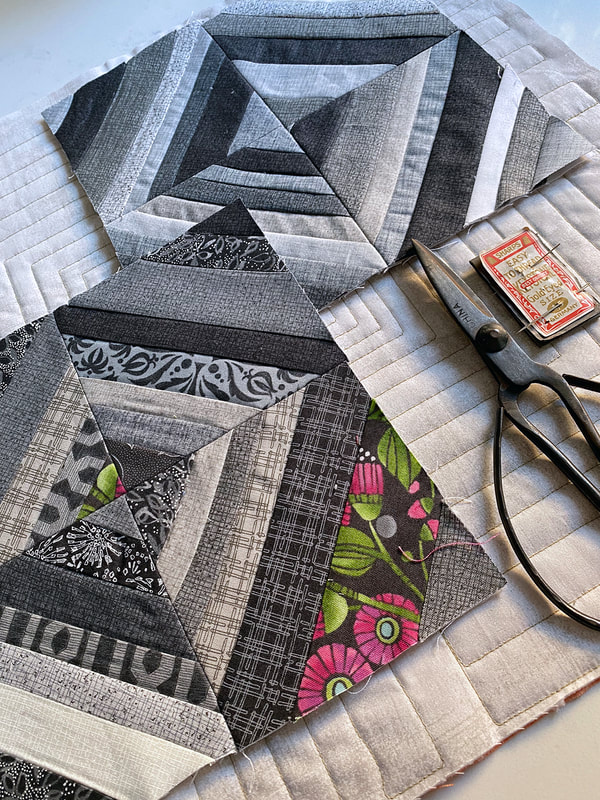
Robin String quilts are such a great way to use up long pieces of fabric that wouldn't be wide enough for a lot of other quilt blocks. For those of us who just can't bear to throw out fabric, using up these strips in blocks is very satisfying. This type of block feels improvisational and intuitive. And multiple ones can form wonderful blocks in new rows and star shapes, etc, by keeping the darks and lights on one side and arranging strategically. Get the pattern for the framework of the 4 quadrants and have fun with some strips of color, pattern goodness!
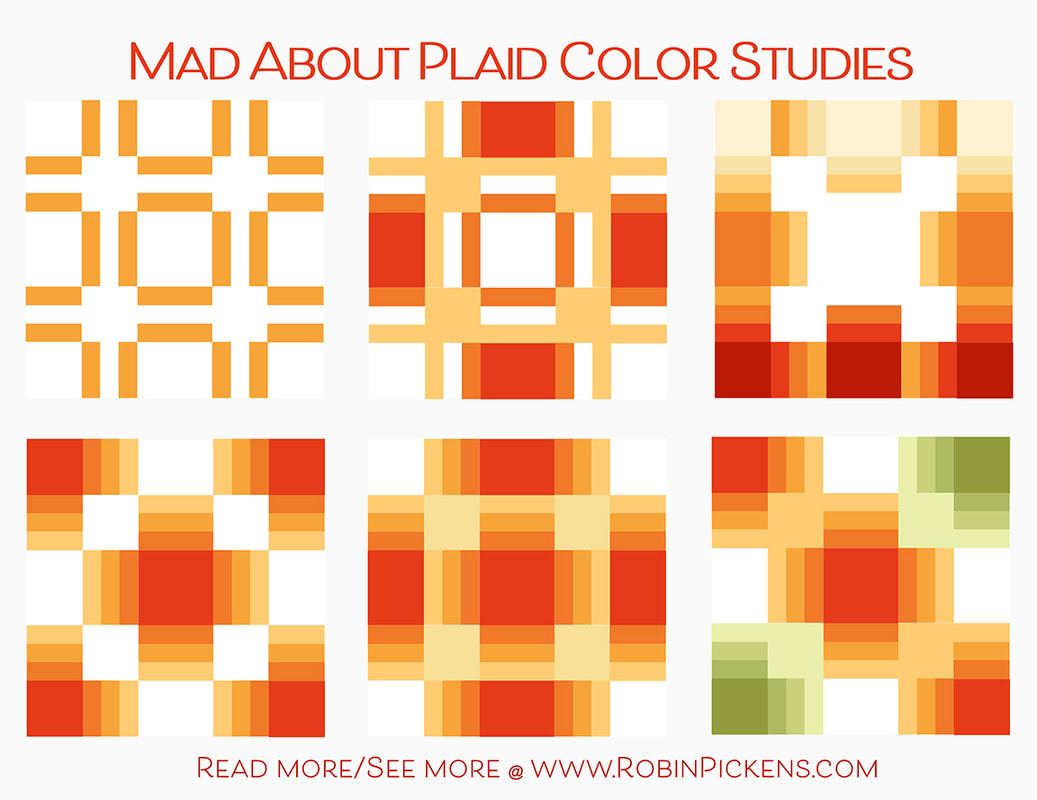
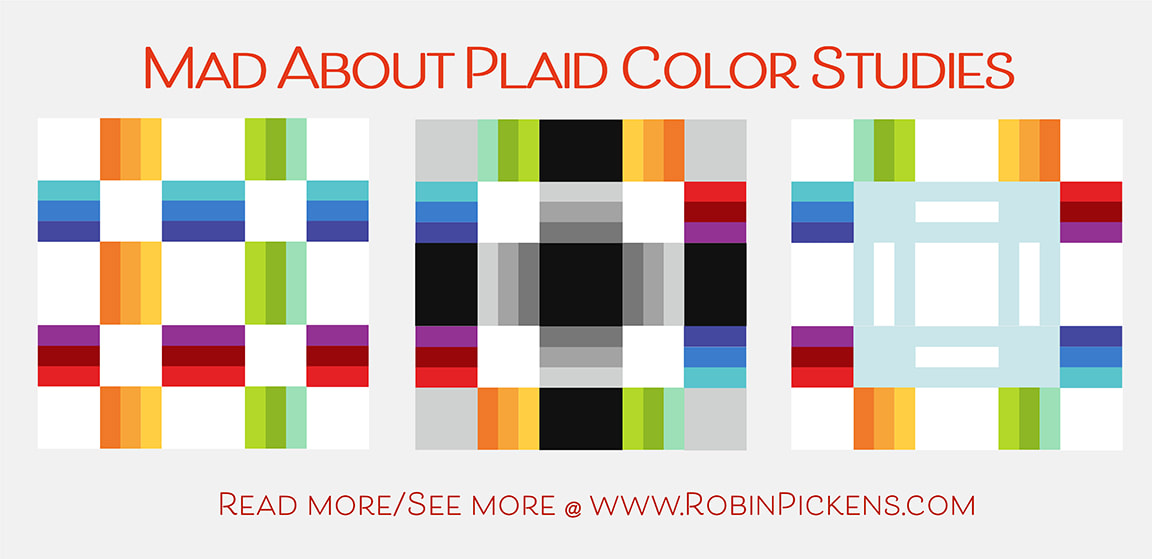
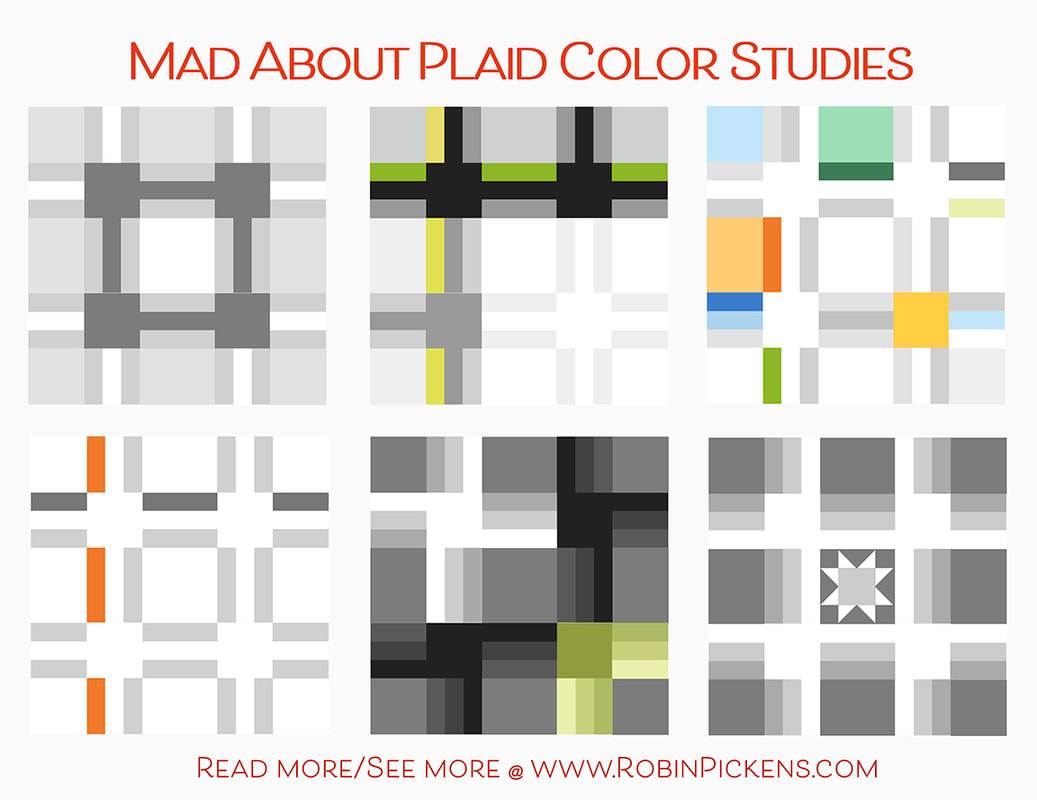
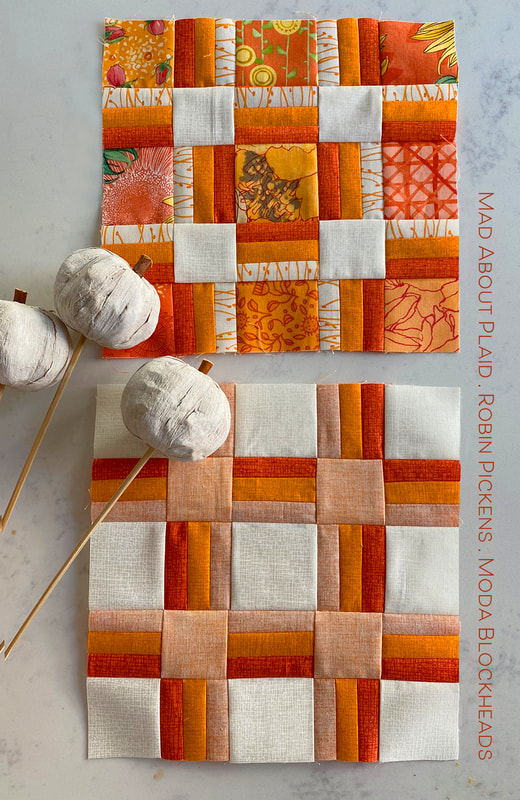
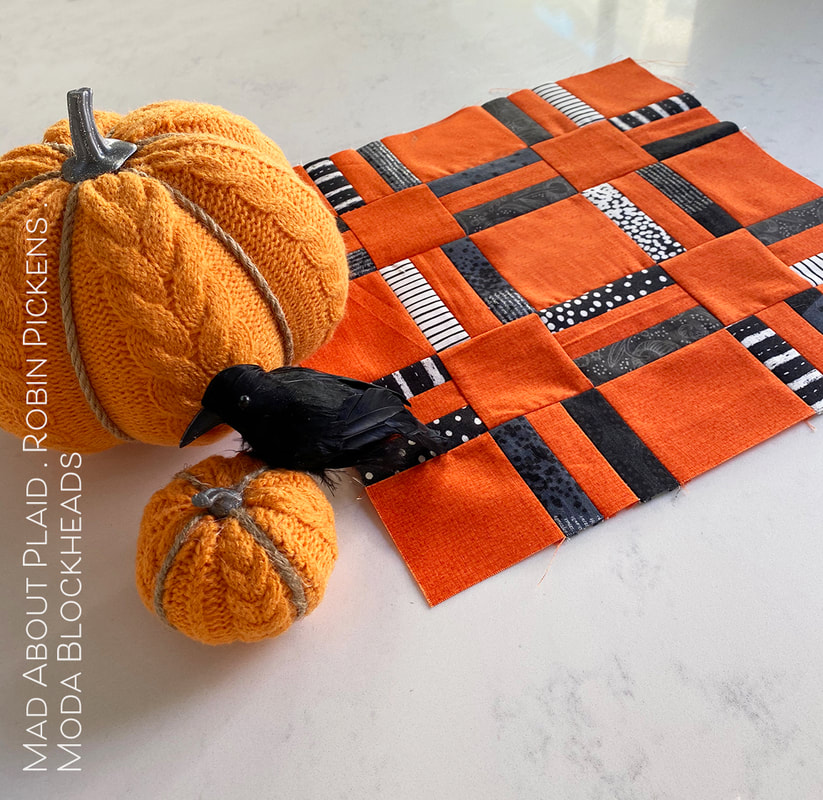
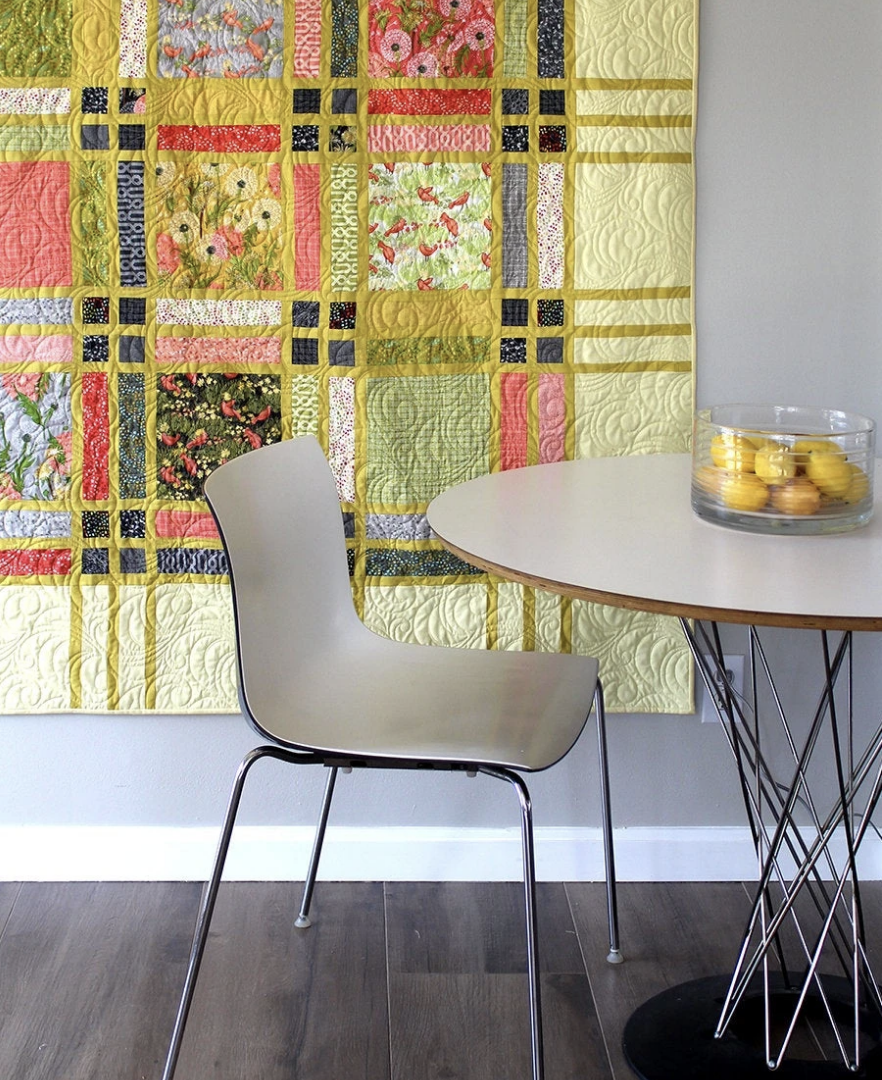
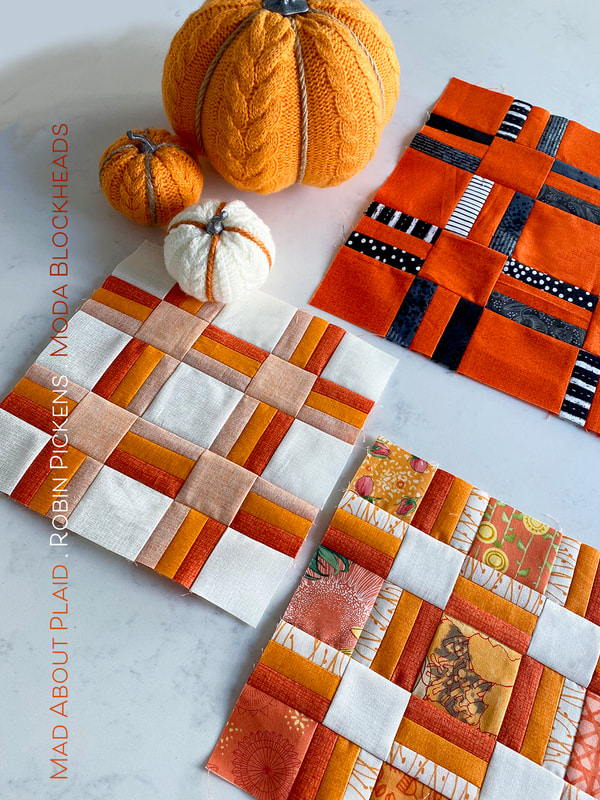
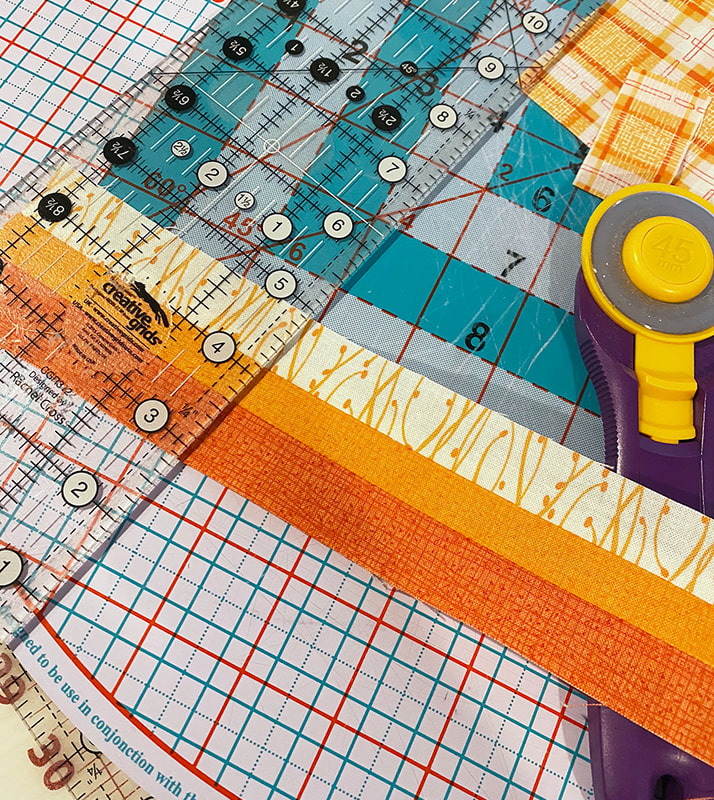
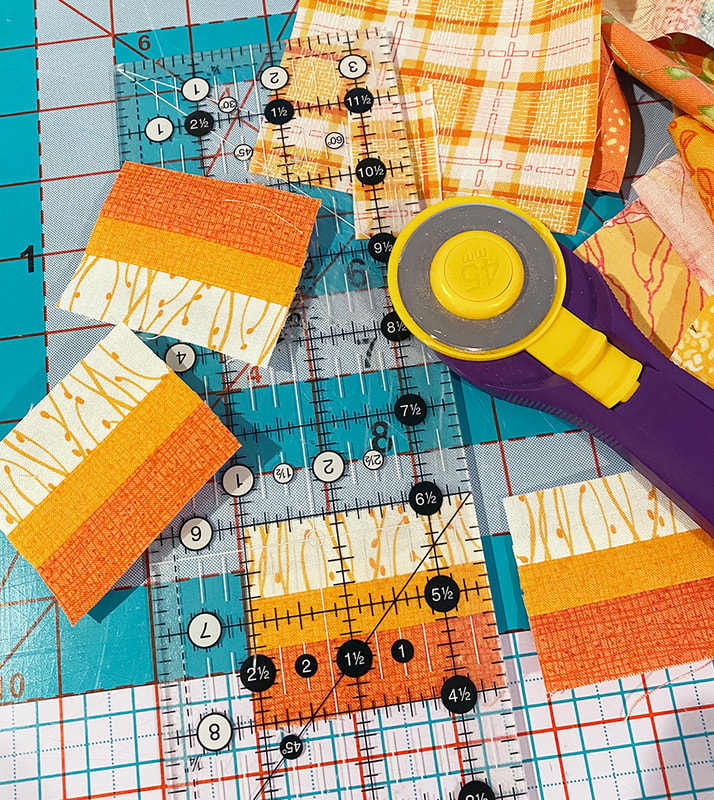
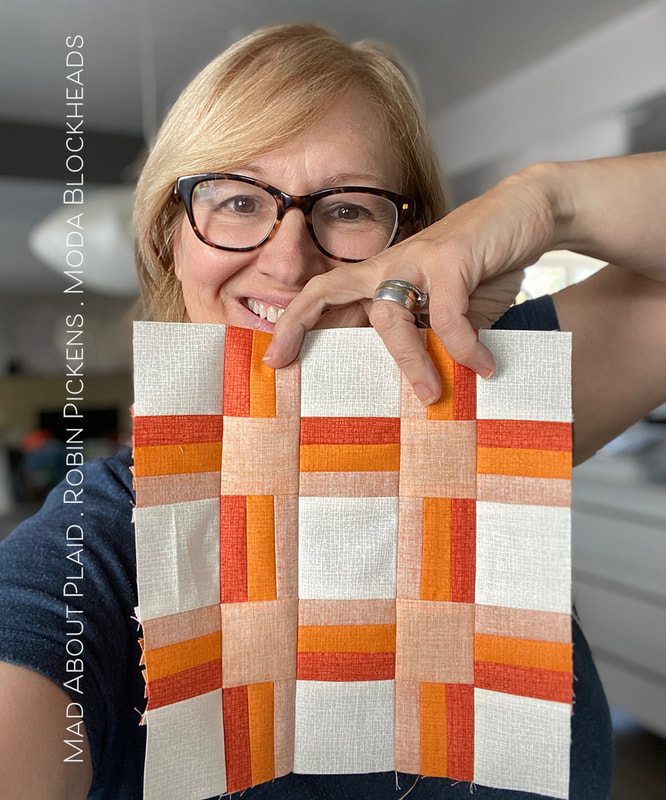
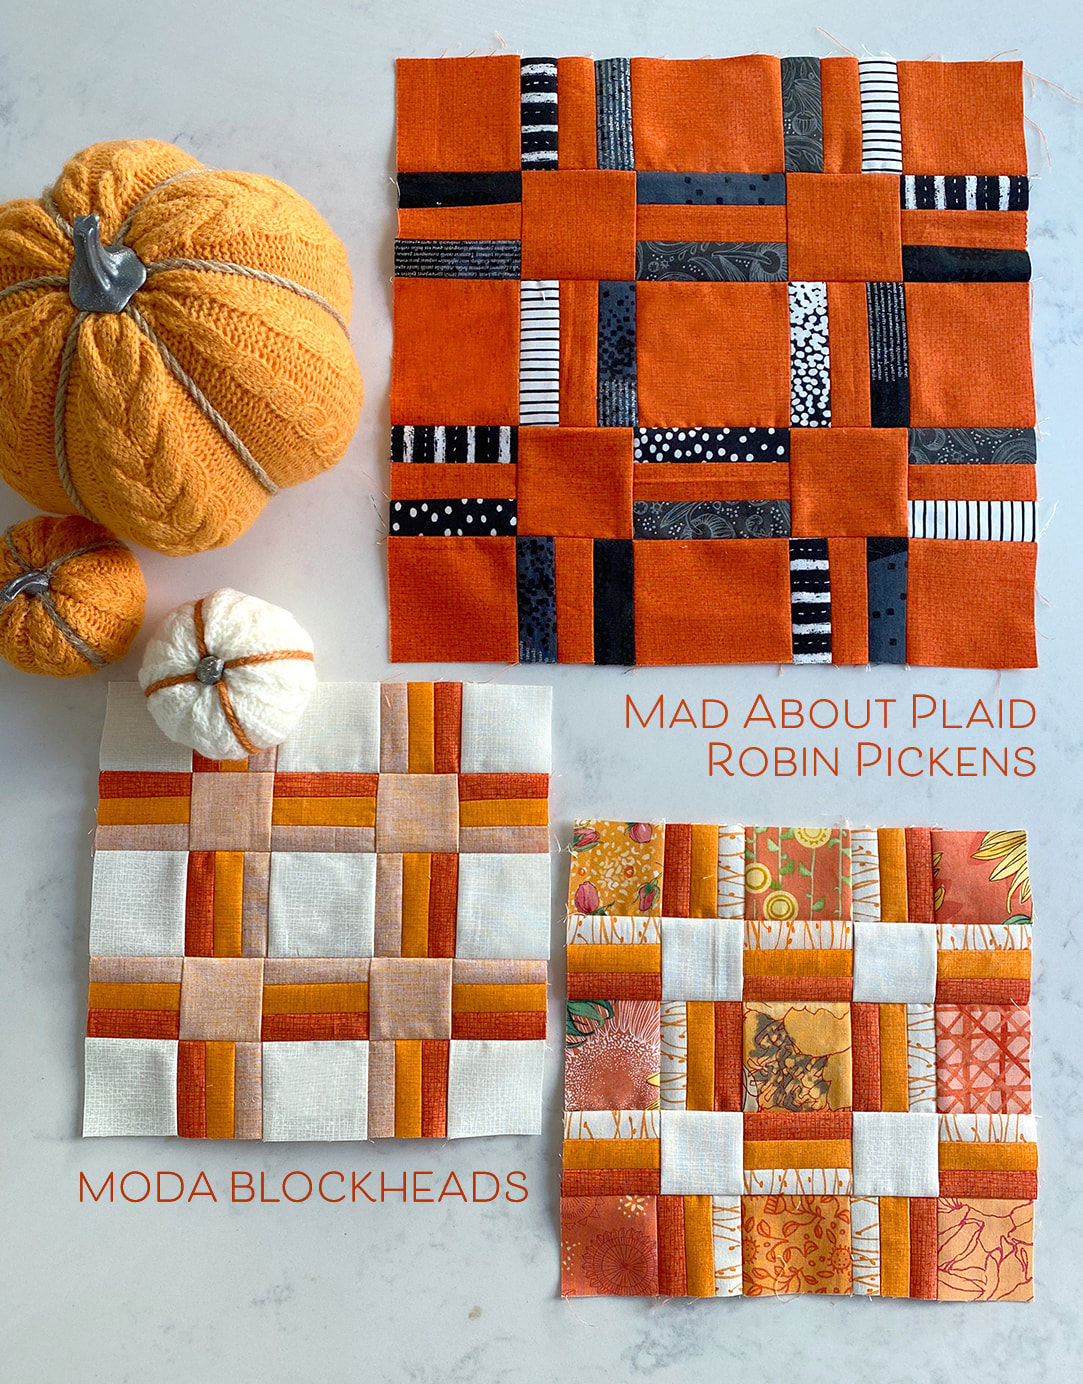
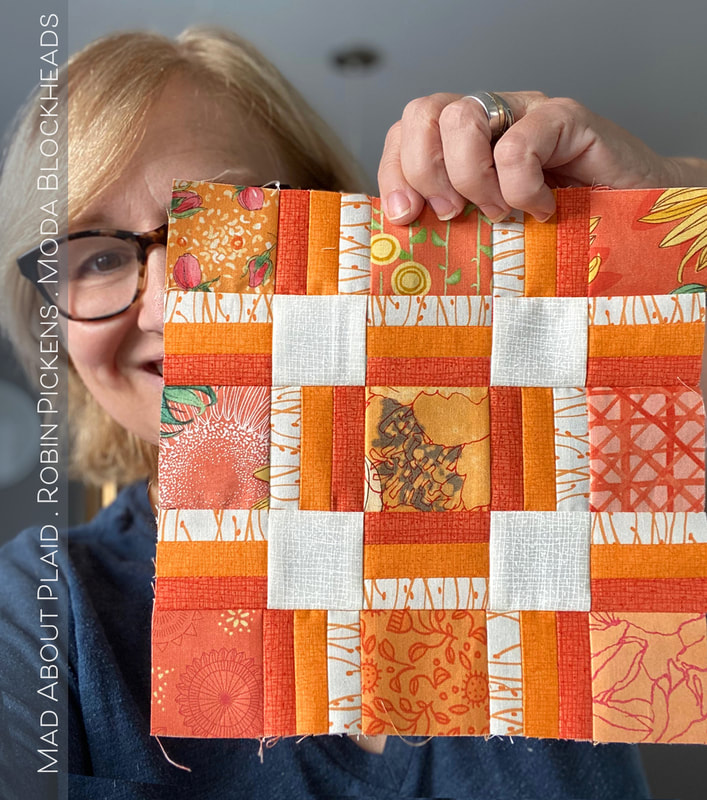
Happy Moda Blockheads Wednesday! Well, its actually Tuesday night but I am going to post this early so I can go to bed!! On blockheads days, when it is my pattern, I stay up till crazy late night/morning hours to make sure my post goes up, etc. Tonight I'm trading that for sleep and you all can get this pattern a little early! Win-win! Read a little further down to get your link to the pattern (link in the gray bar). AND for sharing this week, it would make us all happy to see YOU with your block so snap a selfie for your posting! This block is called MAD ABOUT PLAID and explores some lines that intersect in solid squares, both horizontally and vertically, to make a plaid-like block. You can take it very straight forward and do simple rectangles and two color combo, or play with those stripes more for gradations and accents. I wanted to have a block with lines and some simplicity to balance out the more complex and intricate blocks in the sampler. When I design a collection of fabric, I have the focal print with big florals, but the line also needs small prints or some kind of stripe or plaid to balance out the group. You can see that simplicity doesn't mean boring since there are still plenty of options for interpretation. (Also can you believe you have two weeks in a row with NO half square triangles or flying geese??) My first block is clean and simple and just as much about the negative space as the colored bars. As soon as you enter color within the big rectangles it starts to change and have more depth. Play with gradation and lightness? Background color within the squares where the lines intersect can make that recede or come forward. The last one plays a little with different colors on the corners. What if you wanted the colors of the rainbow? Carry a color all the way through the lines, horizontally and vertically to make it feel like continual stripes. Or, the middle and last one show the rainbow moving around the shape and being specific to the corners. I love how the colors look as accent to the black and gray version. Focus on the center by just emphasizing the squares and one row of rectangles, making a central square. Or take a completely different and asymmetrical approach with more random placement or focus on a side or corner. I like how this can be a framework for more improv work. The last one shows that even if plaid is not your thing, you can still use this as a framework around a baby fancy block. If you make the 12" block, you would need to make a small 3" finished (3 1/2" unfinished block) for the center. That little 3" size is cute in the center! Okay, you made it this far so you can get the pattern!! I hope you will keep reading (and see me in my work-from-home no-makeup glory), but in the meantime, your pattern is here. Click this bar for the link to the pattern info: Want to know what I made this week for my actual blocks? It's October so I'm in that Halloween ORANGE mood. I made two 8" blocks- one all Thatched, one with a mix of prints- in the orange family. For my prints I used a mixture from Blushing Peonies, Solana (which should be shipping later this month!!) and Abby Rose. On the all -Thatched, I used Tangerine, Apricot and the backside of the orange from Solana. I love how soft an orange that is on the backside! And of course Thatched Cream. But it is Halloween this month and I've just been getting the fall decorations out with my daughter. So I also made a 12" in Tangerine and a fun scrappy mix of black and white fabrics for the bars. If I make this into a pillow cover I will either make more to make a set of 4 or add a border around it in another shade of orange. I could extend those lines out into the borders like I did on my FRINGE quilt, pictured below. That quilt was actually the inspiration and starting point for this block design. Are you feeling MAD ABOUT PLAID yet? I hope so and I can't wait to see what you come up with for this block. Oh, one more thing...those squares could be really fun for some cute novelty fabrics and fussy cutting! Think of little lines connecting intersections of cute prints or some little treasure in each square. When I'm making a block with the lines/rows in the same fabric in multiple sections, I sew long rows of my strips then subcut them down to size for the smaller sections. This makes the construction go much faster! This week we thought it would be fun to see a little more of each other so it would be lovely if you felt like taking a picture with your block. We love to see a face with the maker and get to know you a little more. So snap a selfie or see if your cat or dog is talented enough to take a photo of you (they are probably thinking 'leave me alone but scratch my belly first'). Let's see your smiling faces! All this orange is putting me in a fall mood and I'm ready for a pumpkin latte! Happy sewing everyone! Visit my fellow Moda designers for more Blockheads fun:
Corey Yoder - https://corianderquilts.com/ Sherri McConnell - https://www.aquiltinglife.com/ Betsy Chutchian - http://betsysbestquiltsandmore.blogspot.com/ Jan Patek - http://janpatek.blogspot.com/ Brigitte Heitland - https://www.brigitteheitland.de/blog Lisa Bongean - https://lisabongean.com/ Lissa Alexander - http://modalissa.com/ Laurie Simpson - http://minickandsimpson.blogspot.com/ Vanessa Goertzen - https://lellaboutique.blogspot.com/ Stacy Iest Hsu - https://www.stacyiesthsu.com/blog/ (next week is Janet Clare!) Janet Clare - http://janetclare.co.uk/blog/ Jen Kingwell - www.jenkingwelldesigns.com/blog Joanna Figueroa - https://blog.figtreeandcompany.com/ Stacy Iest Hsu said this block was inspired by her love for the log cabin block and that the first quilt she made was a log cabin quilt. This makes me smile since my mother loves log cabin blocks and she too made her first quilt using a log cabin design. It was a quilt that was in yellow and green and was for me! I still have it. Who knew that years later, she would still be loving the process of making quilts and that I would be immersed in this world as well. Thank you log cabin blocks!
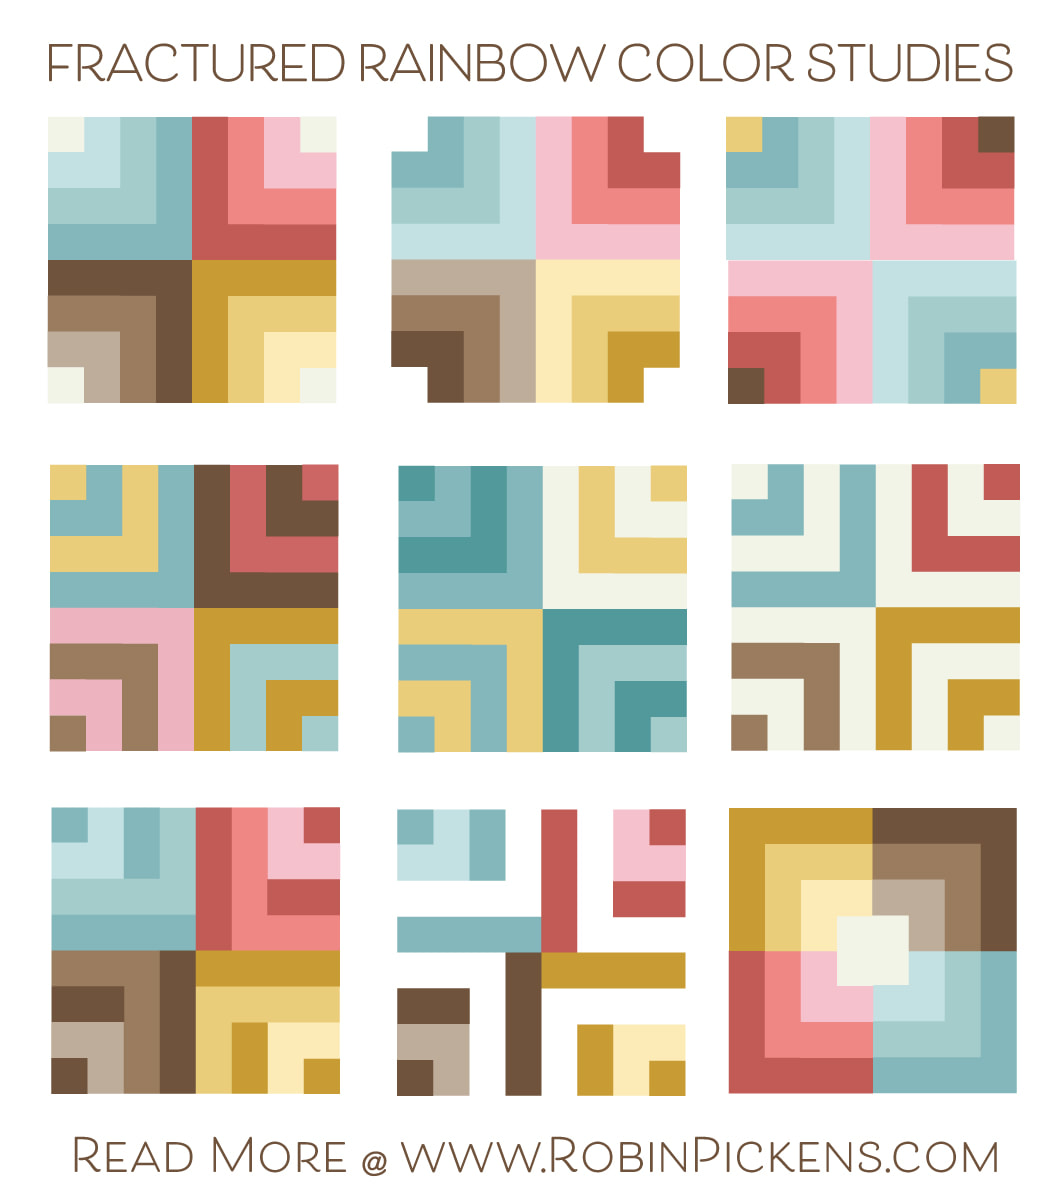
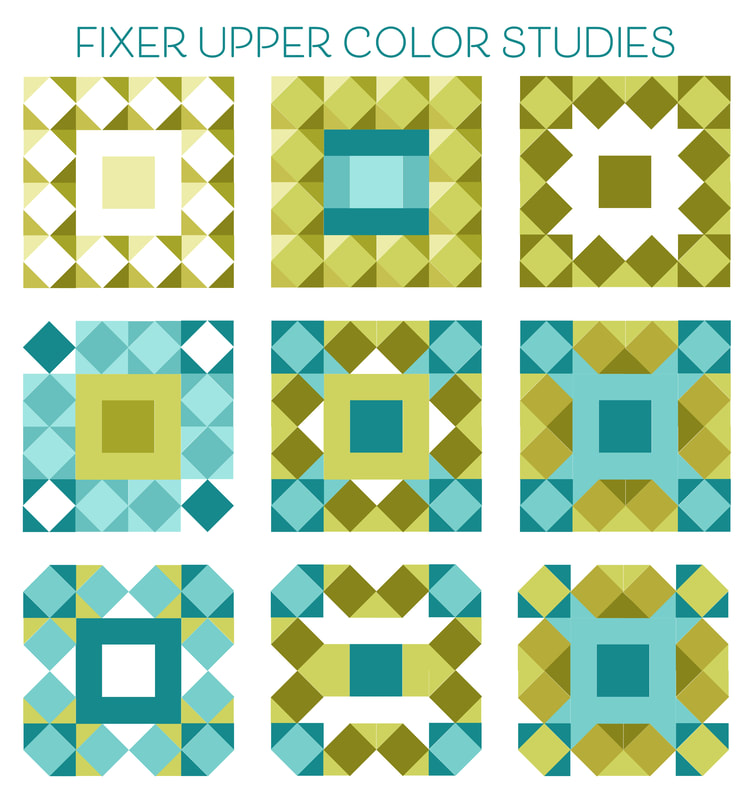
I've started this week's color study with Stacy's version and in the colors she showed on her instructions. I thought it was a lovely palette! If her block radiated darker colors from the center going outwards, what if I flipped that to light on the inside? And maybe light little corners to make those edges fall away? Or just two color families with a little extra color pop in 2 corners? On the next row it is all about stripes and color on color or color stripes with cream. The bottom looks at changing up the color darkness with a dark single piece offsetting the "L" shape, almost creating more of a pinwheel center. For the very last image I switched up the placement of the blocks. Each week I stay within the exact placement of the pieces with this exception...I just could not resist how rotating the corners of the block quadrants made it looked like shades of boxes within boxes (so a little cheat!). Have fun sewing and if you need the pattern, hop on over to Stacy's blog for the download. I'm busy sewing with a new fabric collection that I'll be showing very soon! Hopefully I'll catch up on Blockheads soon but for now I am excitedly sewing away at a rather frantic pace to make some videos for Fabric Forecast. Oh, and stay tuned because next week is one of my blocks for Moda Blockheads! We are three weeks into September and fall has officially begun. I feel like this year has no regular markings of time and this month has been speeding by!! This was such an interesting block to play with. That first image reminds me of the lights around a big celebrity makeup mirror. And the next one emphasizes the center just by nature of the different color. Number three uses negative space to make the center feel like cut ends of a bow in the center. The center shape really gets called to attention in that one.
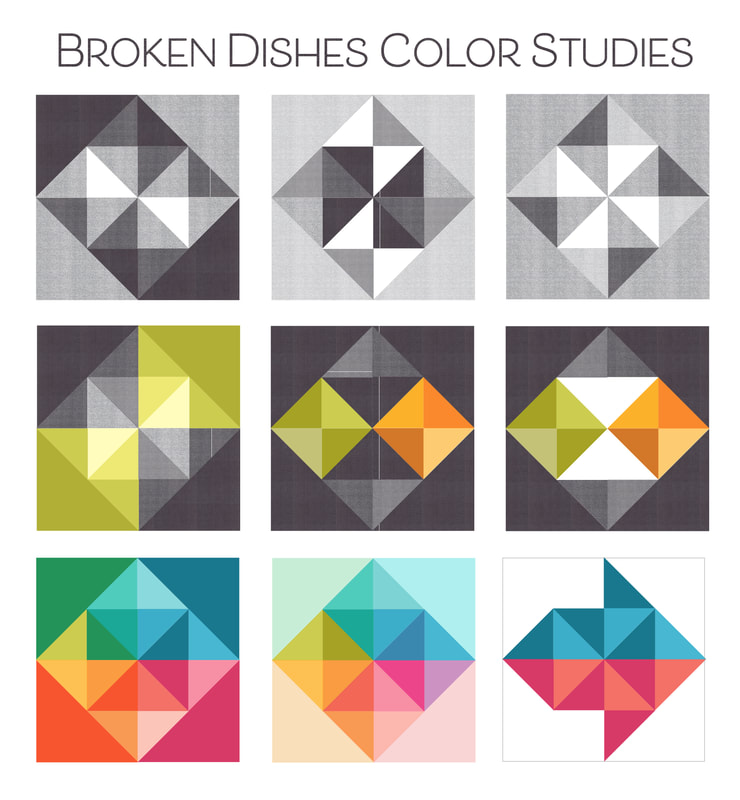
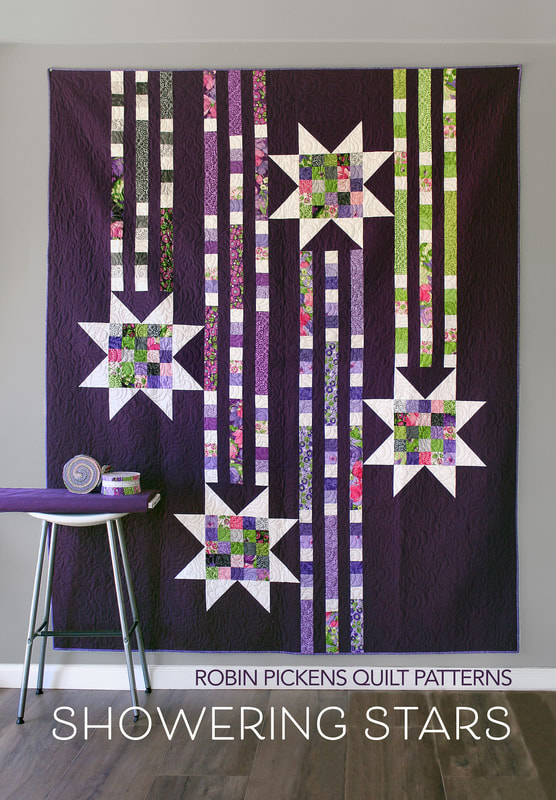
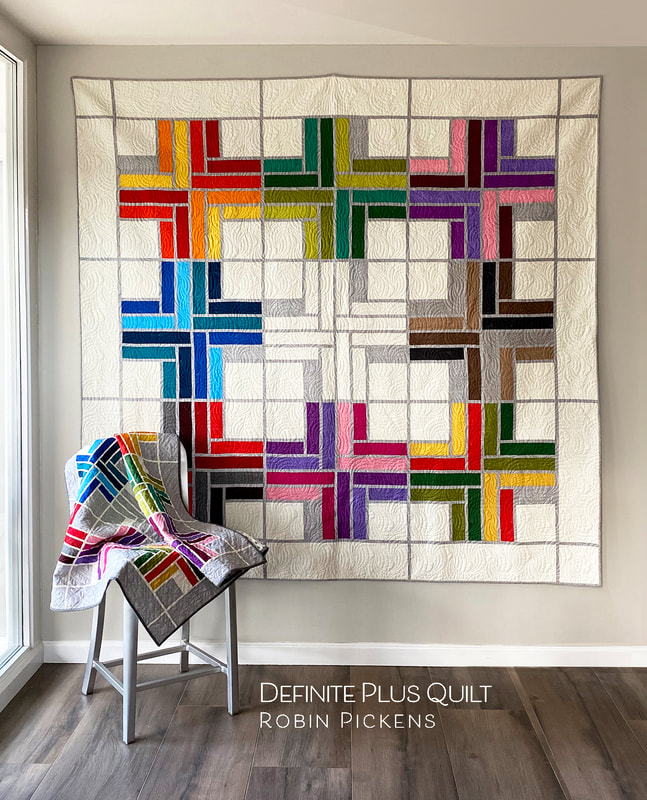
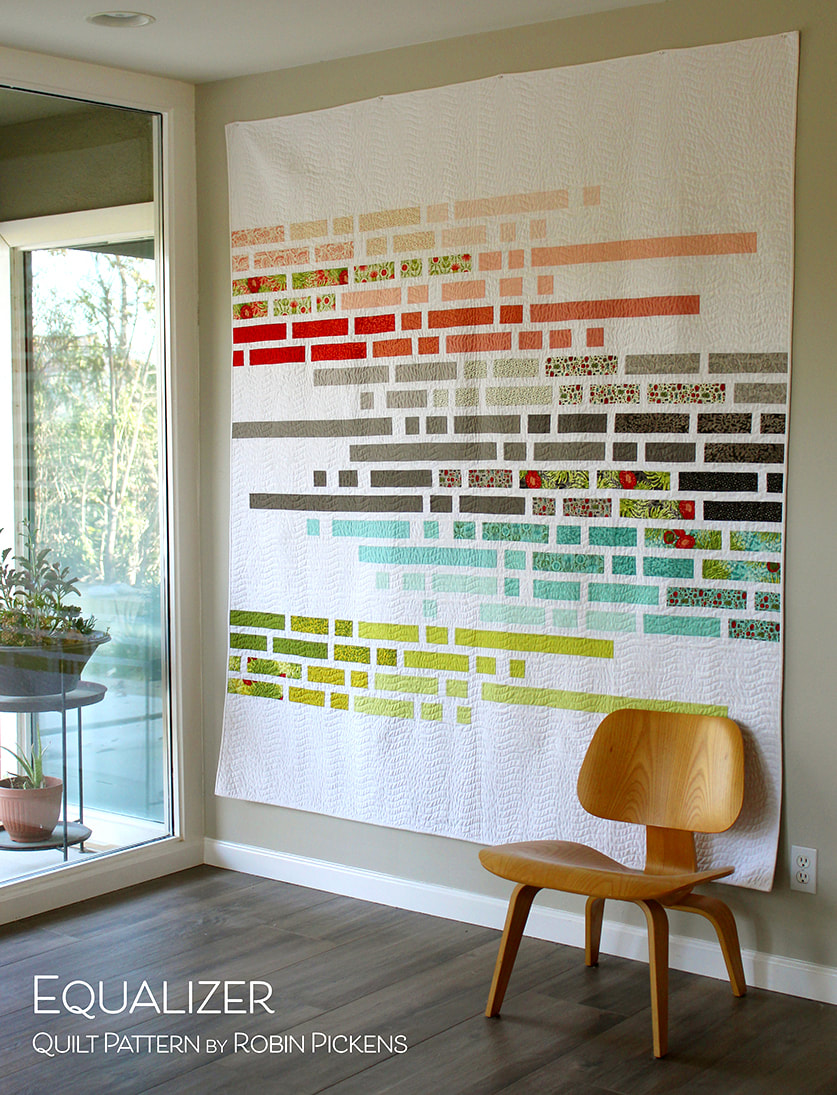
In the middle row, the turquoise color starts to become more mixed into the outer border and the dark olive tones make diagonal shapes and transparencies. In the bottom row, the outer corners becoming the background color gives the shape a more rounded feel and more of grouped corner units. I'm not sure what I am sewing this week although I am rather drawn to #7. This is a busy week. I just got my calendar tea towel uploaded for the spoonflower challenge that opens up for voting next week. And this week Friday the sewalong "Sewcialites" starts! And I just might be imagining some Halloween project in my mind...I'm thinking about my "Cardinal's Christmas Wreath" pattern but done in more fall colors with a black crow. Can't wait to get that mocked up. Happy sewing!! Happy fall! Happy Moda Blockheads day!! Time for a few color studies of Laurie Simpson's Broken Dishes block. Started out with simple black and white and shades of gray with dark corners to make an diagonal direction. Then pinwheels and more playing with introducing color to give the feeling of color transparency (can you imagine a transparent film of color over the corners on number 4?). You can play up the diamonds within a bigger diamond or emphasize the middle band as a horizontal pointed shape. In the last row I tried more of a spectrum of colors and love how the very last one becomes an arrow by using the background color to make a couple triangles disappear! I've been working on 8" blocks for this project and this week I was busy on another project with smaller blocks. I forgot I was doing the 8" for this and ended up making a 4" one! I'm debating adding a border or remaking it and I'll post the blocks after I do my scrappy one too. Did you know it's National Sew A Jelly Roll Day on Saturday?! September 19th get your rolls ready for a day of sewing those long strippy beauties. A couple of my jelly roll patterns that I wanted to share are Definite Plus and Showering Stars. Both quilts can be made large with Jelly Rolls or smaller with Honey Buns. I recently made Definite Plus in Abby Rose and I'm hoping I can get to longarming it on Saturday. That's still working with Jelly Rolls, right? Equalizer is another pattern that works with Layer Cakes or a Jelly Roll and has a clean modern look. Pair your prints with some solids to create that gradated look to lighter color to create the feeling of movement. Whatever you pick for your project for the day, I hope you have fun sewing!
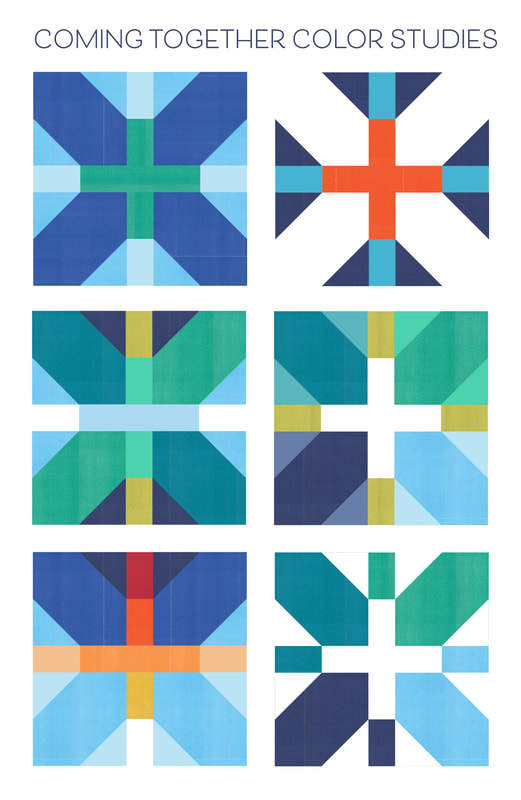
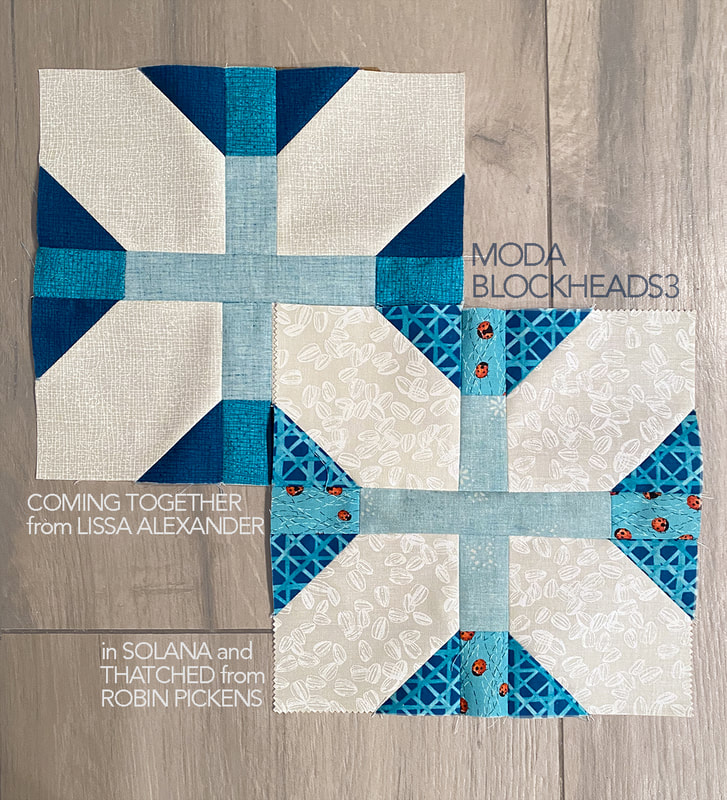
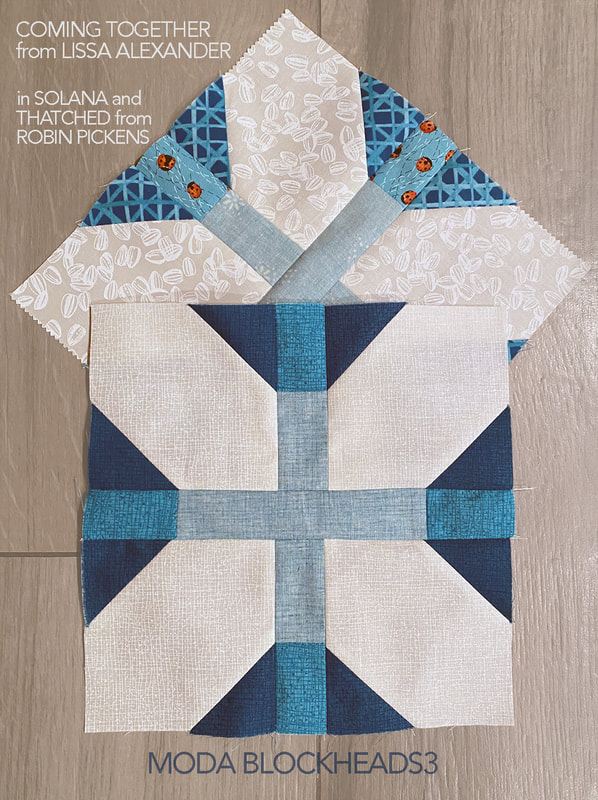
Coming Together by Lissa Alexander is a lovely play on Xs and pluses. I played a little with color, two tone color or no color in the center and one color or shades of color moving around on the X sides. For my layout, I'll be putting this to the lighter end of my blue row so I did the white X and kept my color in the background and center plus. I used my tonal white on cream sunflower seeds for the white X and some of the blue coordinates for the background and center plus. For the Thatched version I used cream and the blue Horizon and Pond blues from the Solana line too. For the block pattern, visit Lissa's blog and it will be posted in the Moda Blockheads group on Friday and in the Moda archives. Happy sewing!
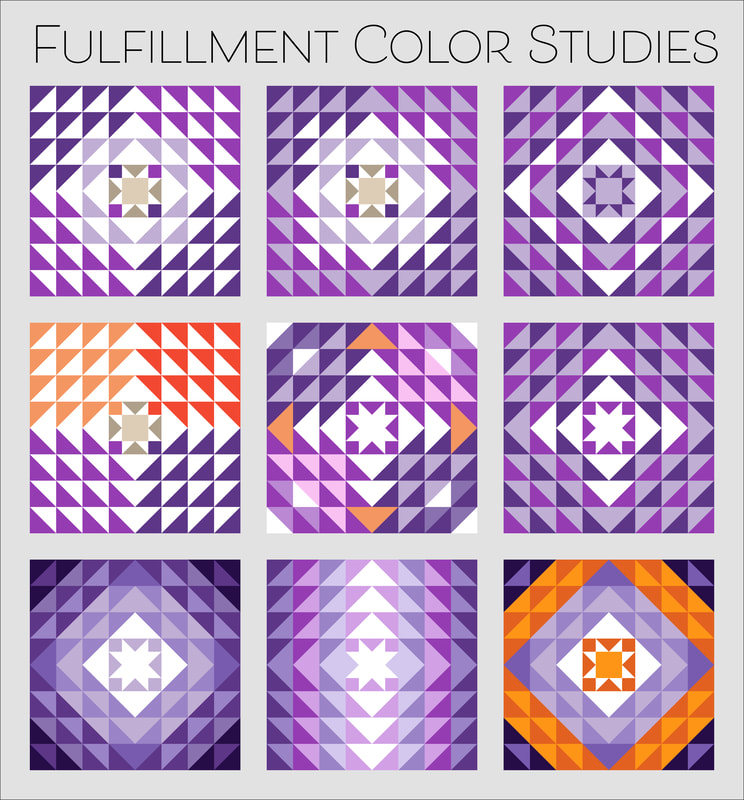
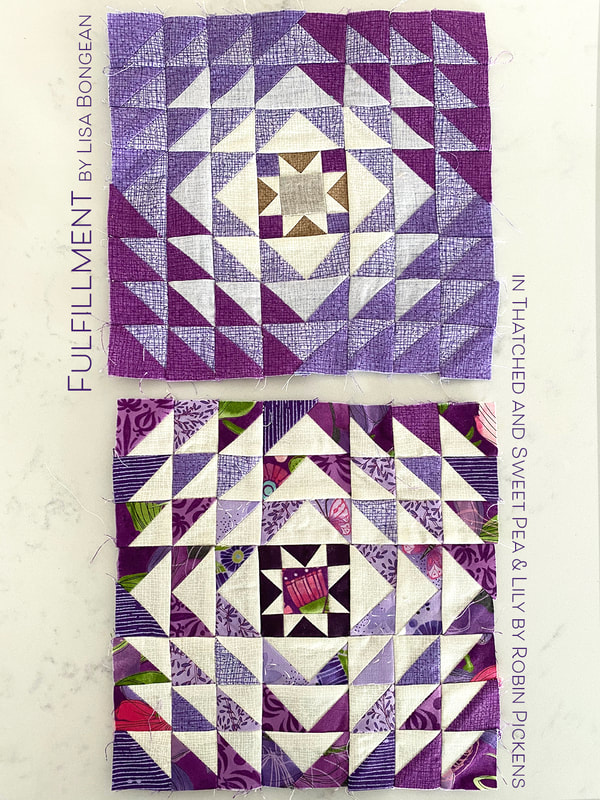
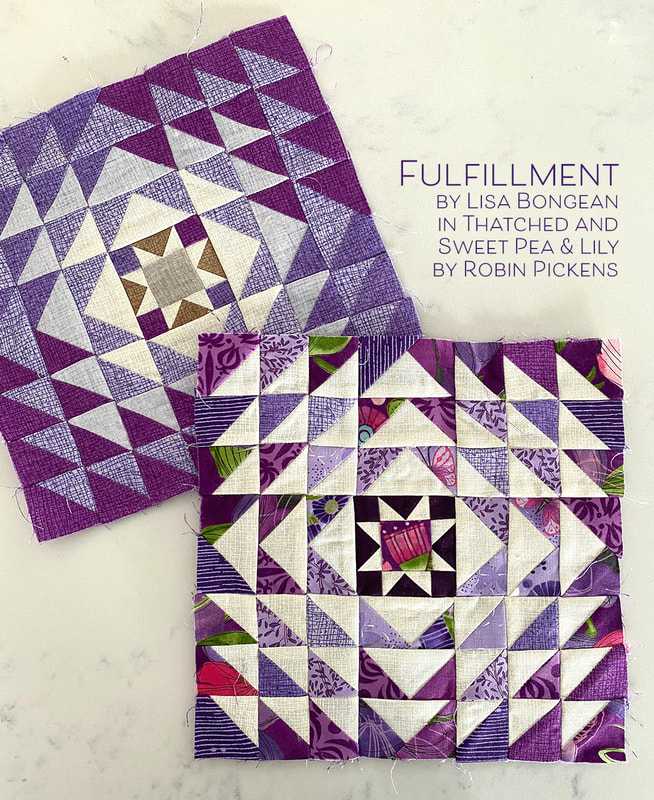
When you have a lot of half square triangles, there is opportunity to play within the angles to show shapes within shapes. I did some background colors that defined the quadrants of the block and also highlighted the white triangles to create diamonds, corners, and compass points. Try squinting to see the shapes more clearly. I also tried making a lighter center with radiating light going out. Also, how about that cute little star in the center? On a few a made them accent colors or warm tan color and others just left them full white. My Thatched block uses a light purple version that is from the Sweet Pea & Lily group. And that is also the group I used for my scrappy block, with a little flower in the middle! I made the 8" size and was really pleased with the little half square triangles. Hope you are finding your own fulfillment from this journey! Thank you Lisa Bongean for this rich and beautiful block design. Be sure to check out her blog at https://lisabongean.com/2020/09/02/moda-block-heads-3-block-34-fulfillment/ Happy sewing everyone!
|
About ROBINDesigner of colorful florals for Moda fabrics. Modern to transitional quilt designer. Illustrator, sewist, crafter. I am proud to be a designer for Moda Fabrics!
Shop Robin's DesignsI am an affiliate for Fat Quarter Shop and may earn a small commission through my links. Thank you for your support!
Categories
All
Archives
November 2023
© Robin Pickens Inc. All rights reserved. No images may be reproduced without permission.
|
Proudly powered by Weebly



 RSS Feed
