|
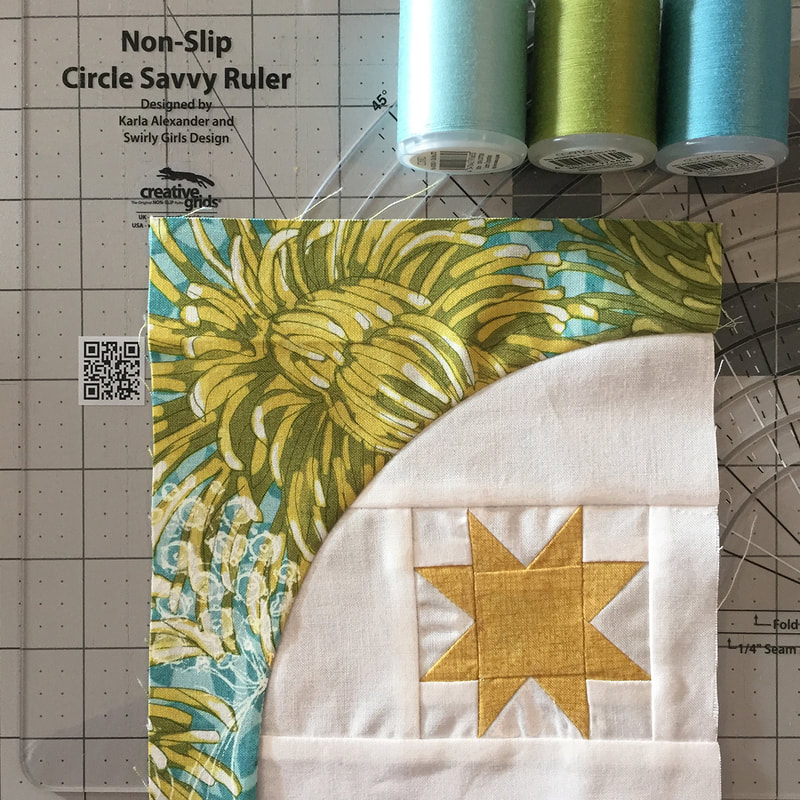
Yet another cute block for this week's Moda Blockheads! This block, Interstellar, was designed by Vanessa Goertzen of Lella Boutique. I was excited when I saw it because I recently became more comfortable with sewing circles AND I decided to use my Circle Savvy Ruler from Creative Grids to make a nice smooth arc.
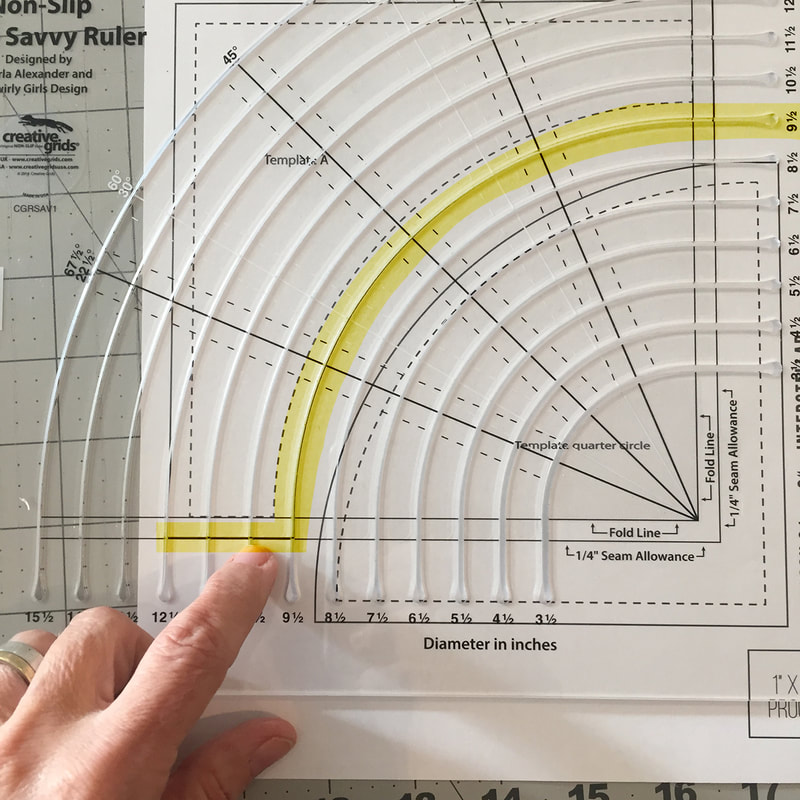
My first step was to print out the paper template that Vanessa included with her pattern. I make sure my printout is the correct size by checking the 1 inch box for reference.
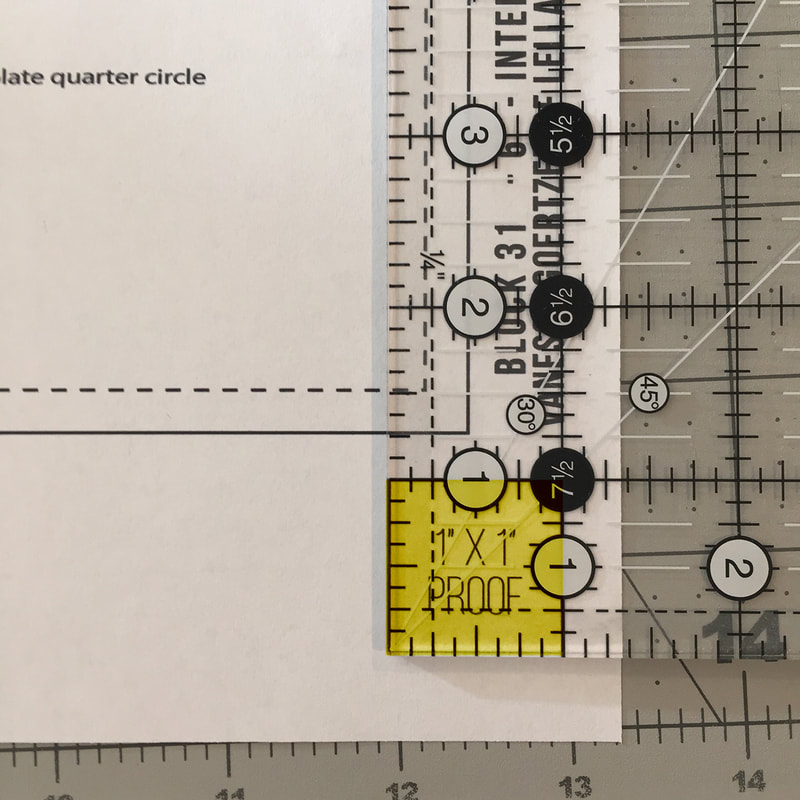
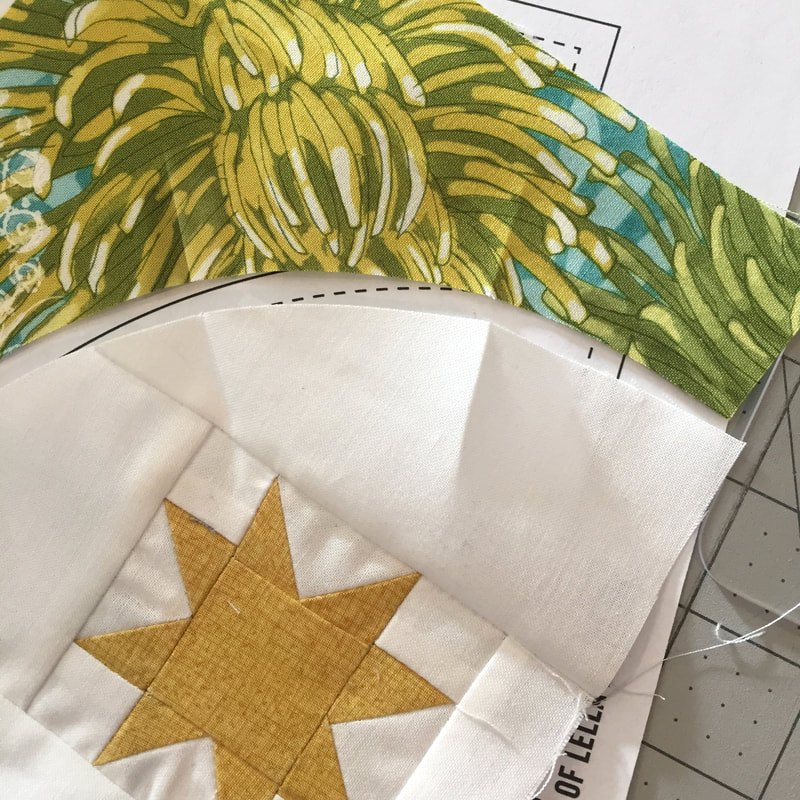
Next I line up the circle template on the lower corner (bottom and right side) of my printout shape to include seam allowance. I can then look at where my circle template cut line for the arc lines up with the printed sheet for the curve. I have highlighted the section in yellow so you can see the parts I've lined up. I can see my inside piece will be cut to the 10 1/2" circle measurement.
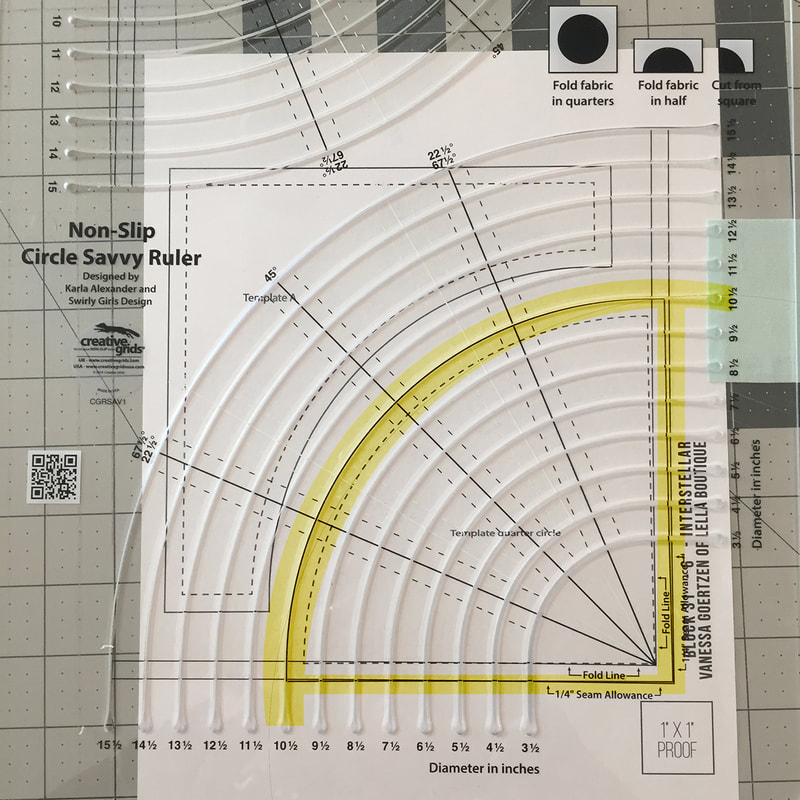
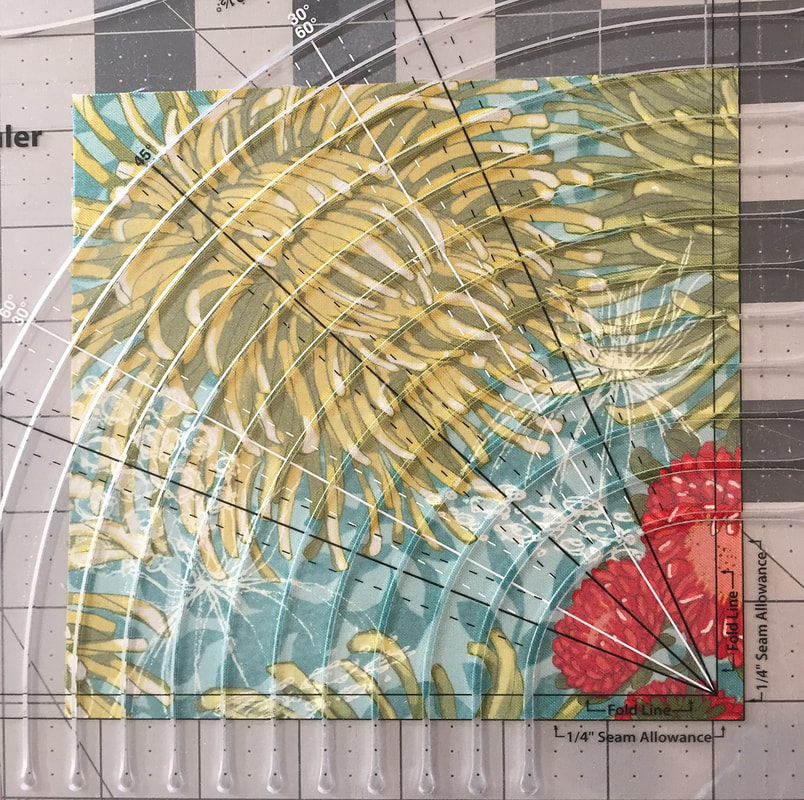
When I put my fabric under the template I again line up my lower right corner to the the lines that will include seam allowance. I cut an arc through the 10 1/2" template. This curve is large enough that I can use a normal rotary cutter but on tighter circles I prefer to use a small blade rotary cutter.
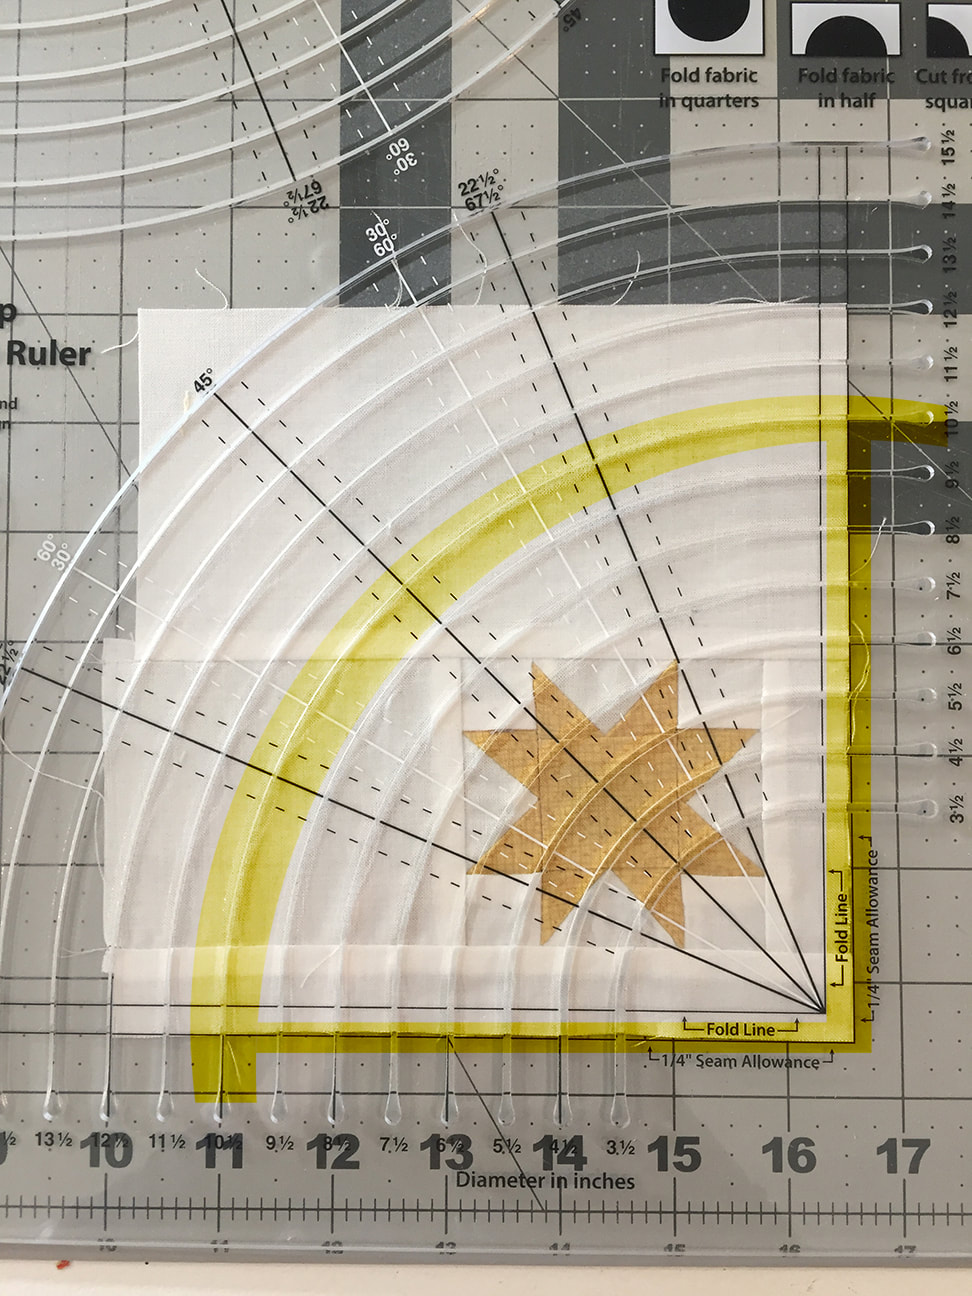
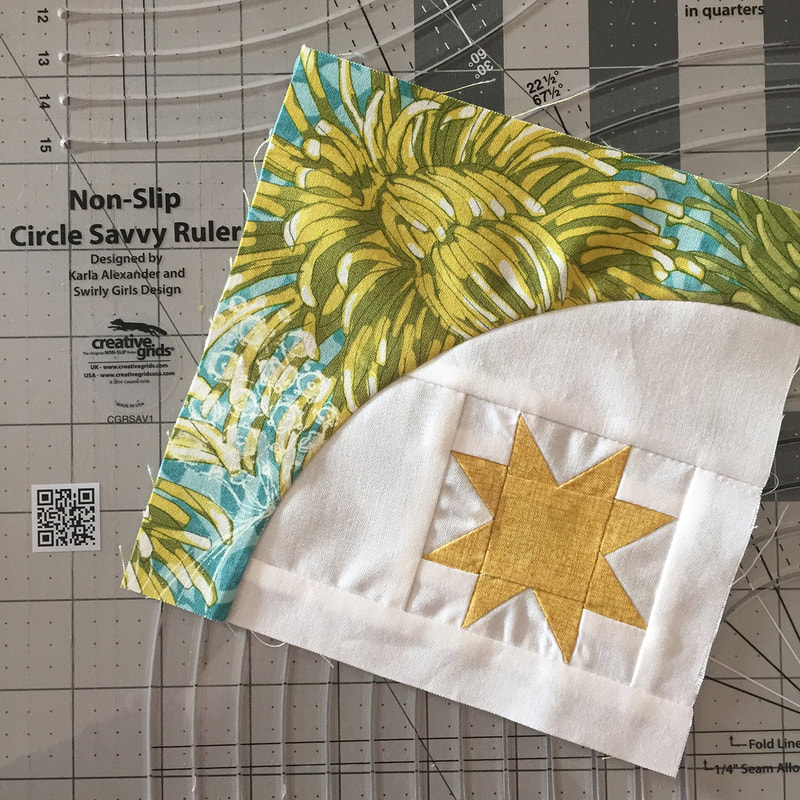
I repeat the same process for the top/outside piece by first lining up the bottom seam allowance line from my printout with the template and looking for the arc that fits. For the outside piece the 9 1/2" circle is the one I want to use.
Line up to seam allowance at the lower right corner and cut the outside piece using the 9 1/2" circle template line.
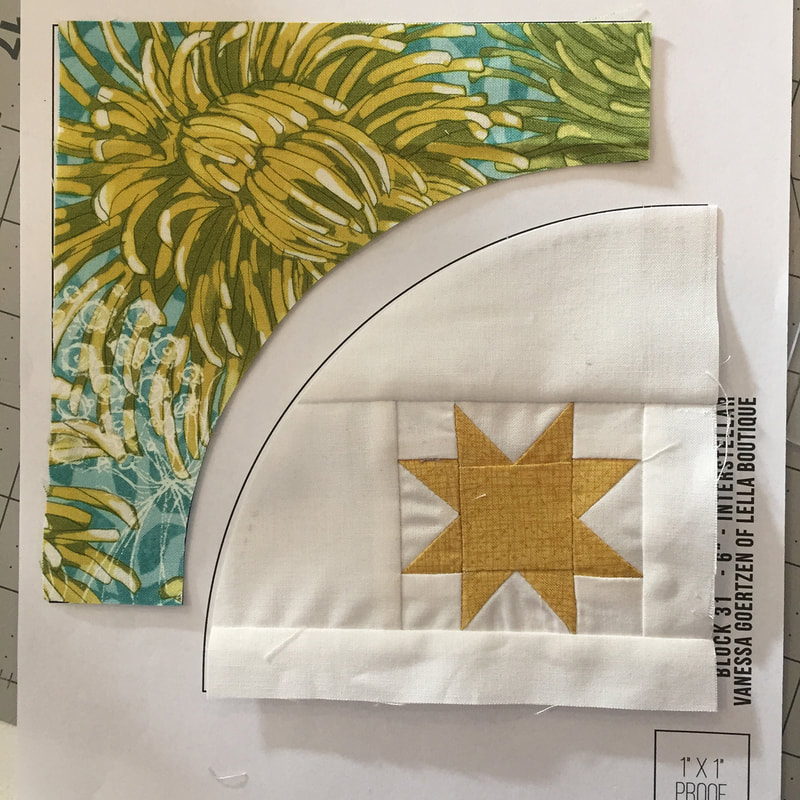
After cutting my pieces I lay them on the paper template to check them. I MAY have flipped my measurements at some point in the past and learned to double check my pieces! (that's why we buy a little extra fabric, isn't it??)
In order to help me line up the inside and outside parts of the curve for pinning and sewing, I next fold my pieces in half, matching bottom side to right side and make a little crease at the fold.
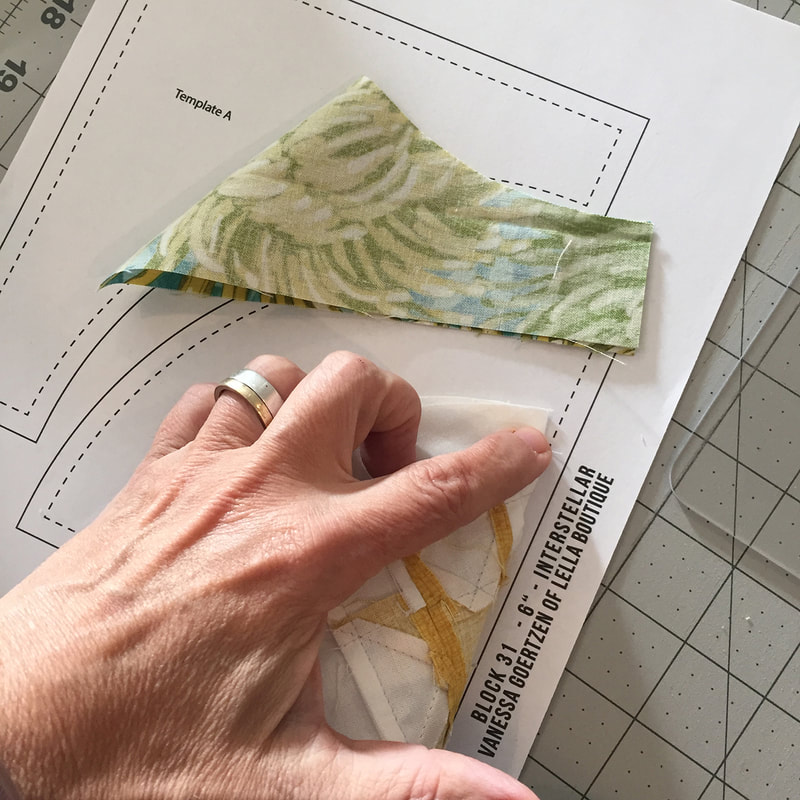
I fold again so there is an additional crease mark between the middle and edges on both the inside and outside pieces. I will line up these creases when pinning my pieces right sides together.
I pin, starting with the two outer edges, then pinning the middle, then the mid points between the middle and sides.
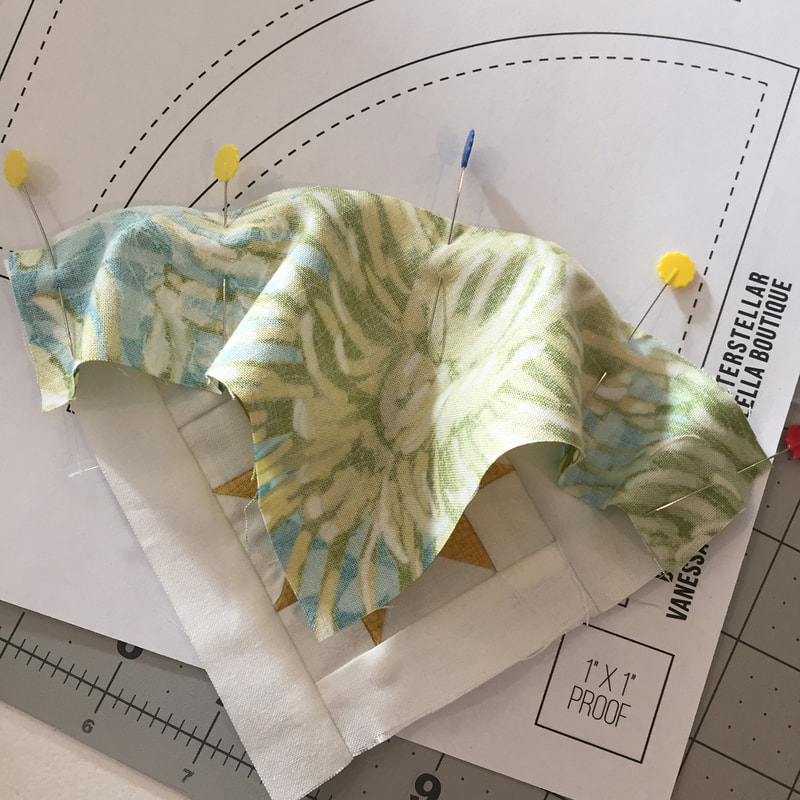
I'm ready to sew! With curves I slow down and take my time. Sometimes it helps to increase your stitch length too. With a curve of this size I didn't need to make that adjustment. I press my seam outwards and there is a nice graceful curve for my star to live in!
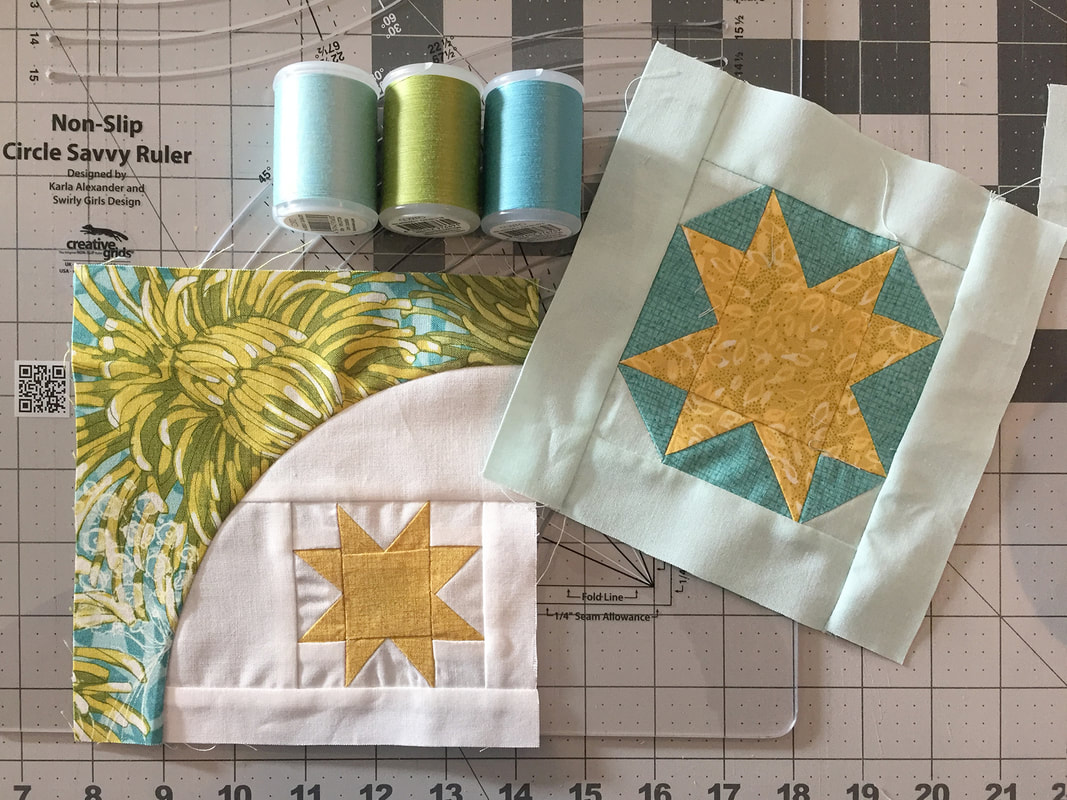
Since I've been doing a little catch-up on my blocks I also did the Corey Yoder version of the star block number 21 (pieced vs applique and you can find it on Corey's blog at corianderquilts.com/blockheads-wednesday/) so I'm feeling the stars today! For both of these blocks I used Dear Mum fabric and yellows from Dandi Annie by Moda.
Hope this helps if you are using the Creative Grids ruler! I love it and used it for my pattern "Towards the Sun." The pattern has a paper template but I like to use a ruler. You can check your local quilt shop for it and if they don't carry it, you can also find it on amazon or other online sellers. Happy curved sewing!
0 Comments
Modern graphic blooms stand tall, reaching for the sun. This is the inspiration for my Towards the Sun quilt pattern. 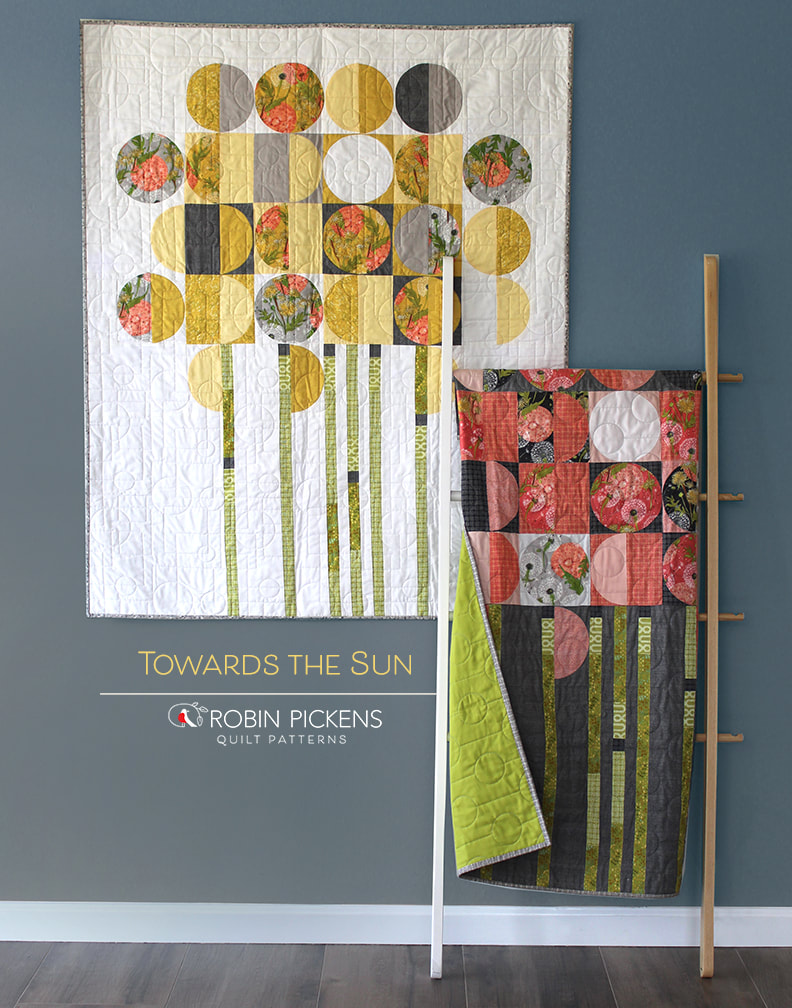 I wanted a quilt to go with my Dandi Annie fabrics that reflected the round spheres of the mature seed puffs of the dandelions. The main prints have a play of large circles behind the plants and I thought they would play nicely within larger circle shapes. This became the overall composition for the blooms within a grid structure for mixing in coordinating prints. With such a graphic and geometric structure, I felt straight sectioned lines as stems would work well to support the blooms and add a new graphic element to contrast with all the circles. 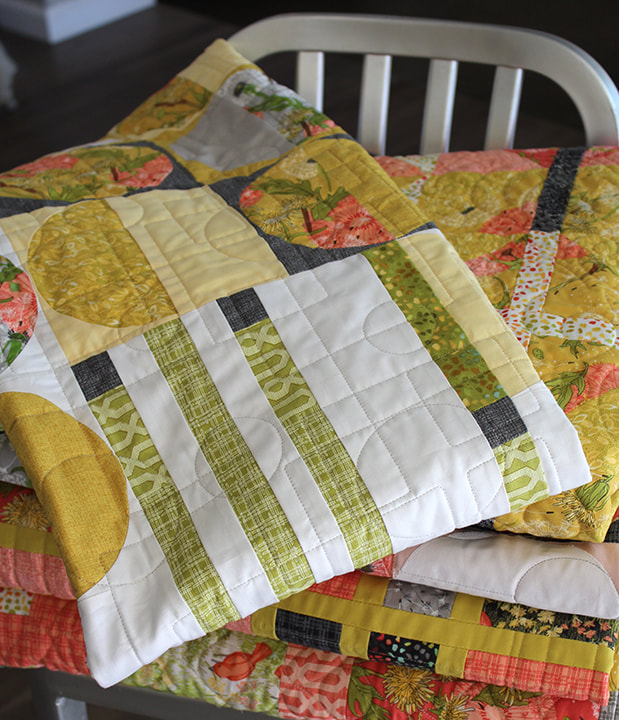 This was my first time making a quilt with half circle and full circle blocks. I created a paper template to go with the pattern that you can use for making the blocks or if you'd prefer to use a specialty ruler template I'd suggest the Creative Grids Circle Savvy Quilt Ruler (CGRSAV1). It has a large range of circular sizes and I used this ruler to make my 6" finished circle blocks. Working with circles was actually quite fun and I found I was most successful with my shapes when I slowed down my sewing a little and lengthened my stitch length to help with the give and stretch going around curves. 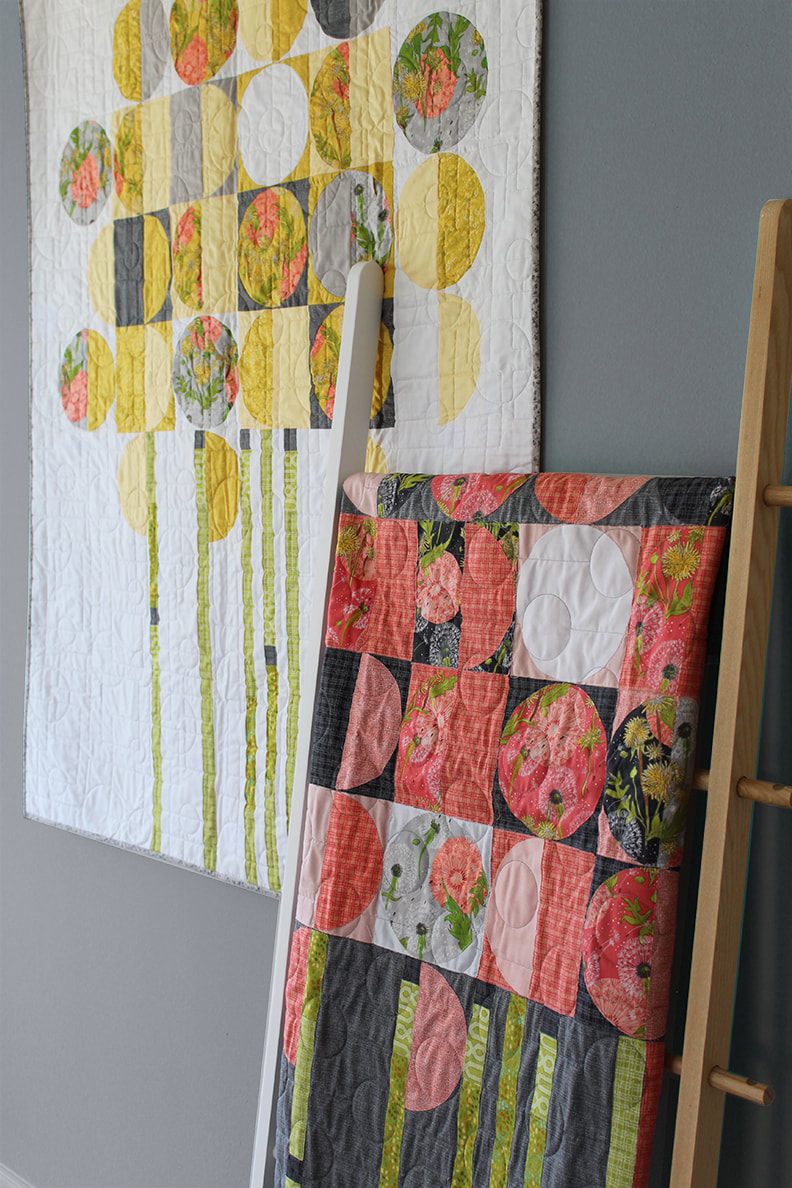 This quilt can be made as pieced blocks or as applique, either fusible raw edge or turned edge. The white and yellow quilt here is pieced using the Creative Grids circular ruler and the pink and gray quilt is made with the fusible raw edge method. I top stitched on my machine close to the edges of the shapes after fusing. The quilts were long arm quilted by Sally at Corona Quiltworks (IG @coronaquiltworks) using pantographs that also use circular shapes and lines, further reinforcing the graphic shapes. Towards the Sun is available at Quilt shops when it ships with Dandi Annie from Moda Fabrics in November. It is also available at my etsy shop www.etsy.com/shop/robinpickensinc. If you get the digital PDF make sure you print out the template at actual size or 100% vs letting a printer resize. You can double check the sizing with the 1" marker on the template. Happy sewing! 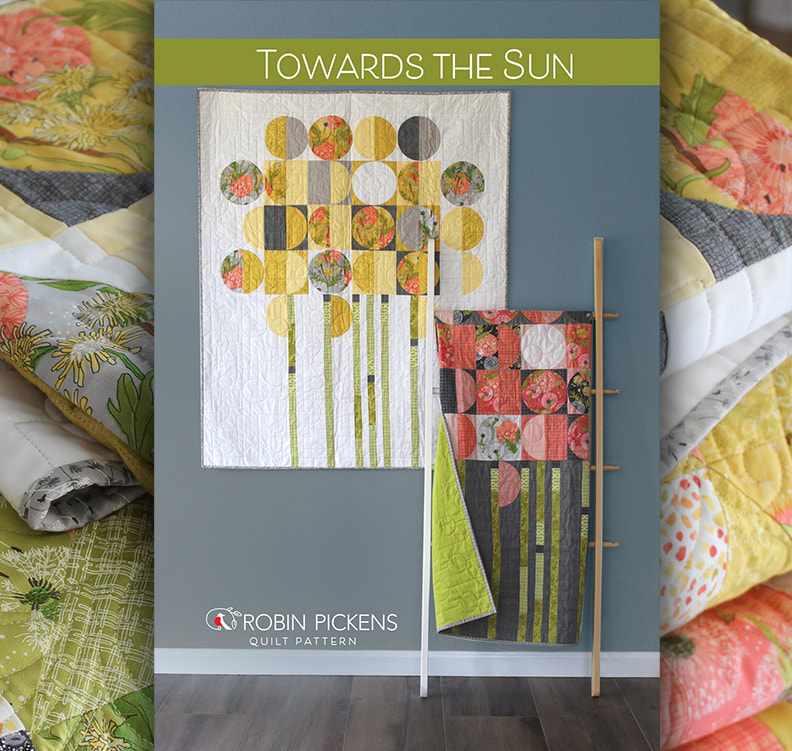 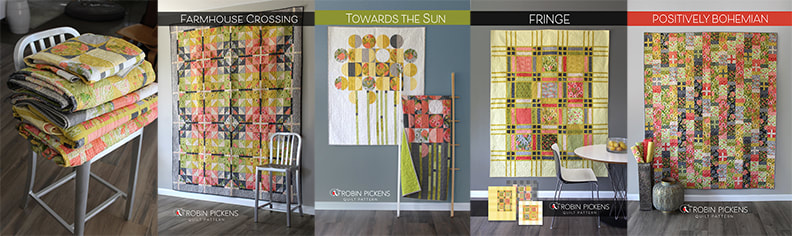  Houses. Neighborhood. Homes. All the differences that make up our communities. This is what I was thinking about when I was pondering the theme "Houses" for the Curated Quilts Mini Quilt Challenge. 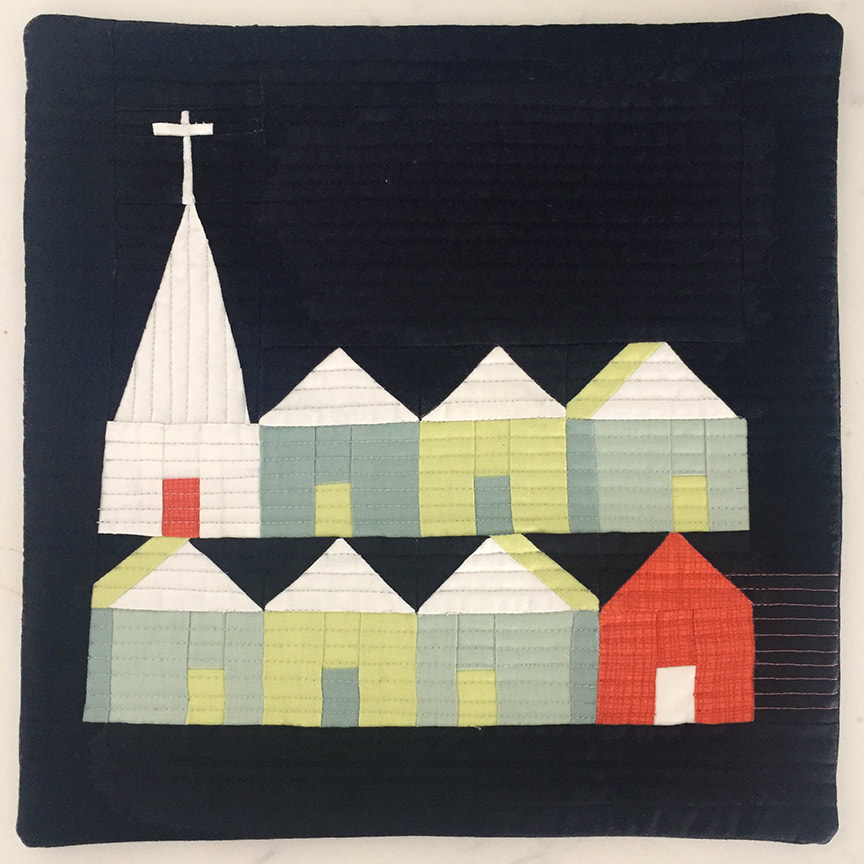 I thought it would be interesting to eventually expand the mini quilts into a series of quilts based on houses. I started with "regular" houses bookended by the wholesome "House of God" and the not-so-wholesome "House of Ill Repute." Then I was thinking of new developments, the following of the rules of sameness in the "Homeowners Association", dense housing neighborhoods to living far away and in more solitude. It was fun to play with the rough ideas on the computer. 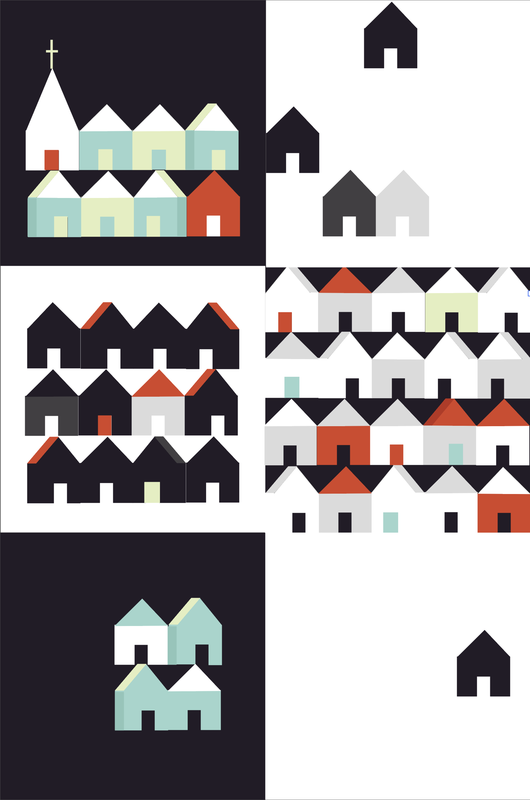 For challenge I thought I'd make my original "house of God and house of ill repute" neighborhood. For the structure of the houses I started with the houses from Miss Rosie's Quilt Company "The Village" quilt and made them mini...scaled down to 2" across. I also added some reference to side view angles for roofs and sides of houses. 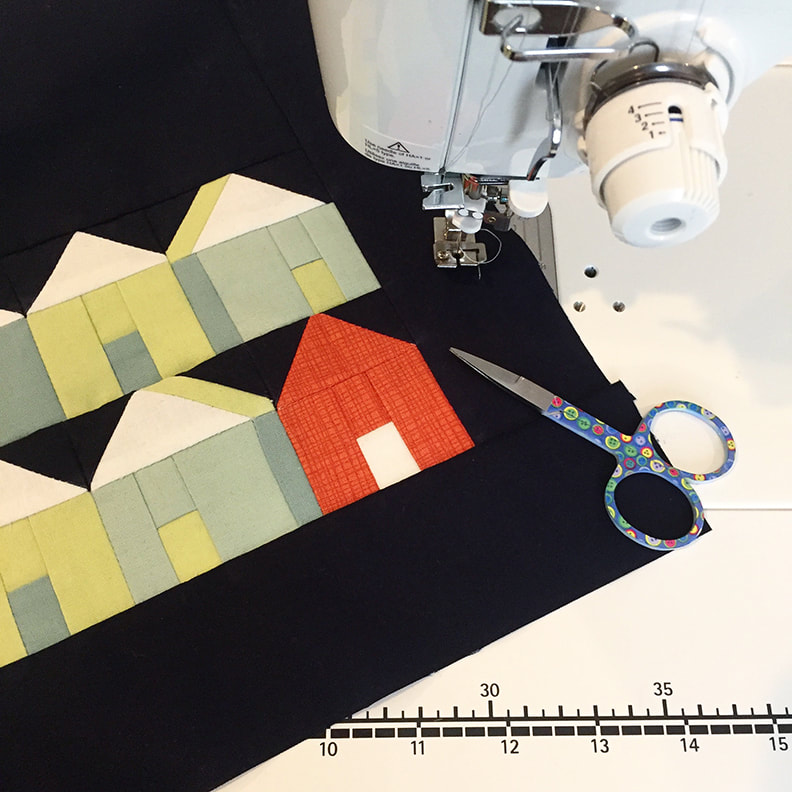 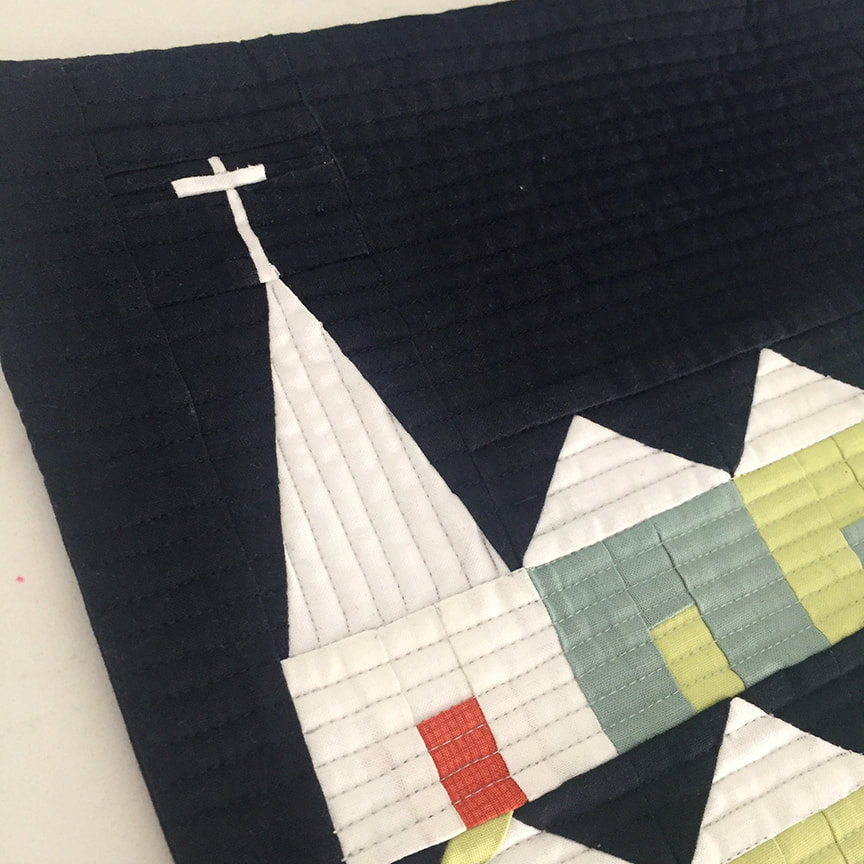 I quilted in straight lines with the steeple of the church going vertically to emphasize the height and direction of the cross. The binding is a faced binding- my first! Hopefully I'll have time to do some more of the house quilts and grow my neighborhood. 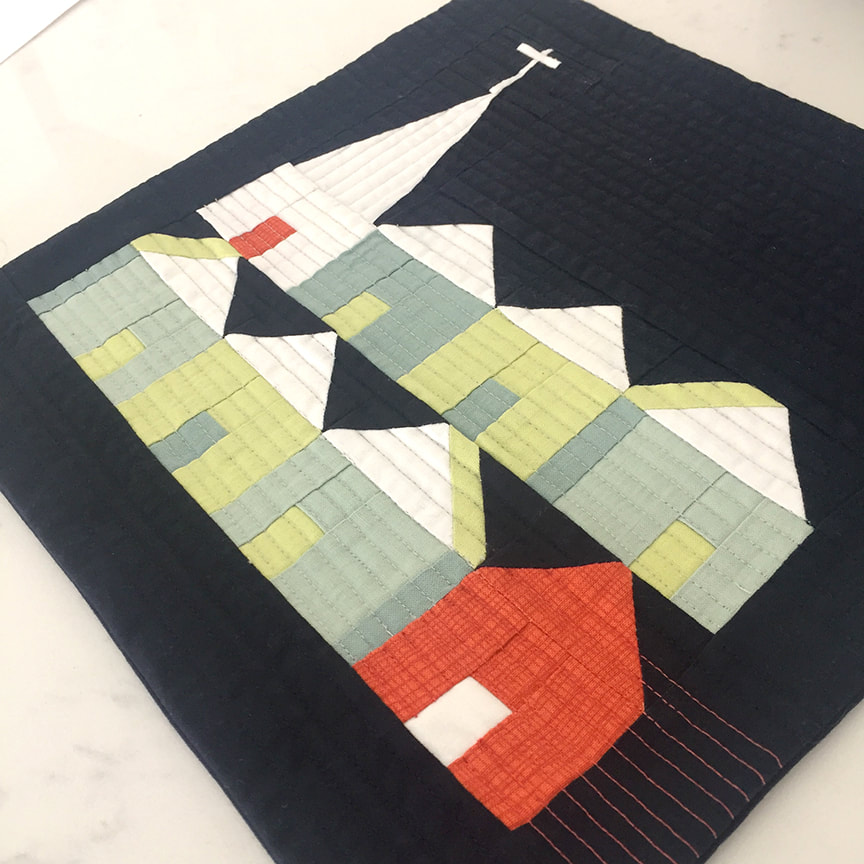 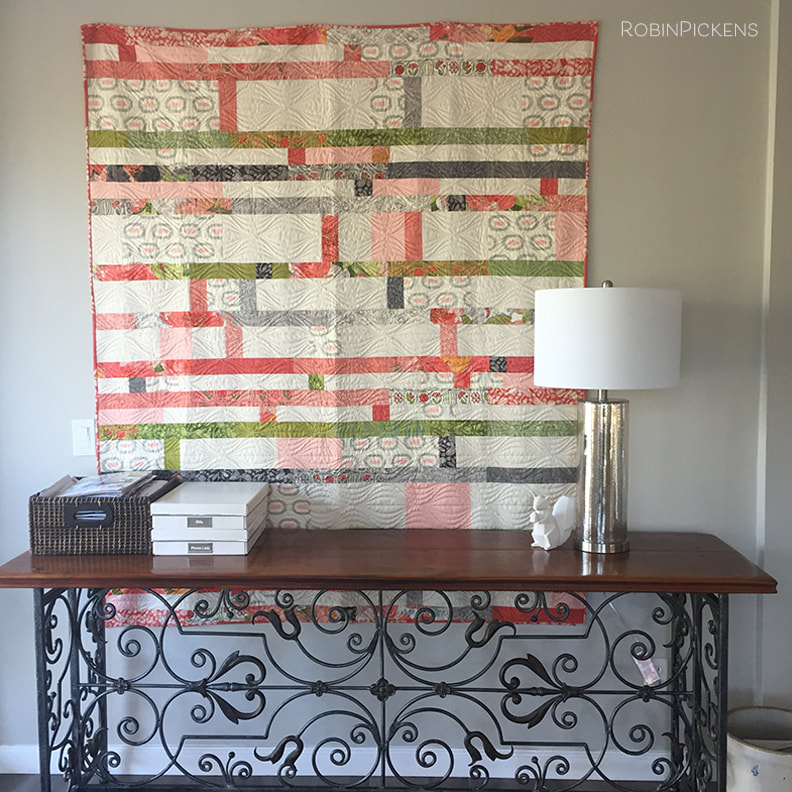 Its coming folks! September 15th, 2018. So get your Jelly Rolls ready! I have been mulling over what I am going to make this year and I think a little computer planning and designing is in order. Last year I used my Sliding Shoji Screen pattern which uses solid Bella Jelly Rolls to divide the blocks but I flipped it so the Jelly Roll of Blushing Peonies became the strips and I used solid pink, eggshell, and the Ikat print from Amy Ellis' Serenity collection as the large panels. I loved the result! In honor of the new National Sew a Jelly Roll day coming up I wanted to share the most recent pictures of last year's project. When I got the quilt back from my longarm quilter, Sally Corona of Corona Quiltworks I loved it even more! The quilting design has a great retro mid century modern feel and lovely flow. When it is on the wall in the foyer it lightens up the space with a calm pretty feel without being overly girly. I recently got this new lamp and I'm liking the feel of these together. Now off to start planning for September 15th... 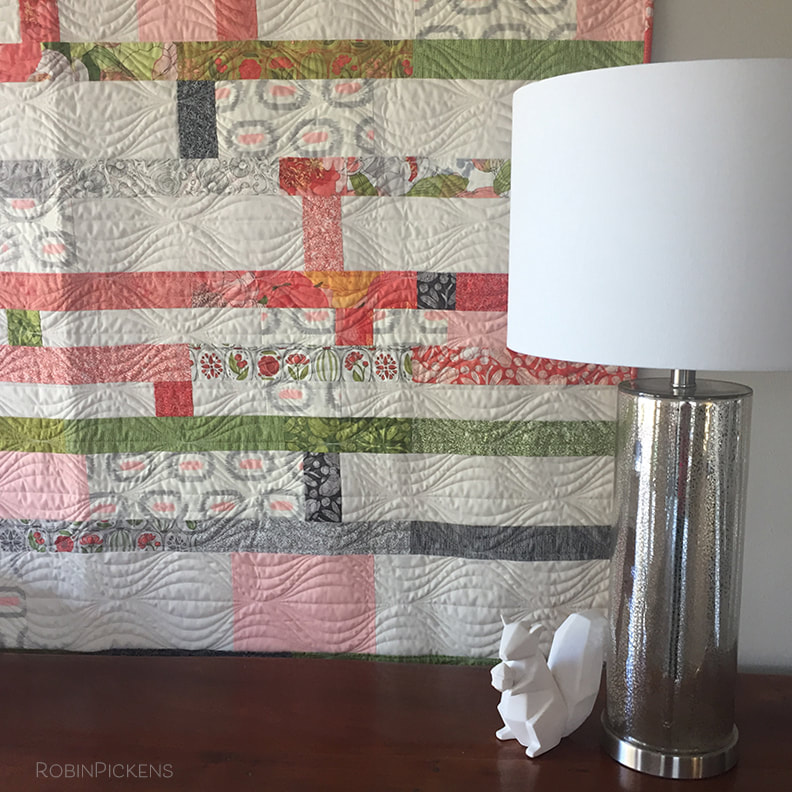 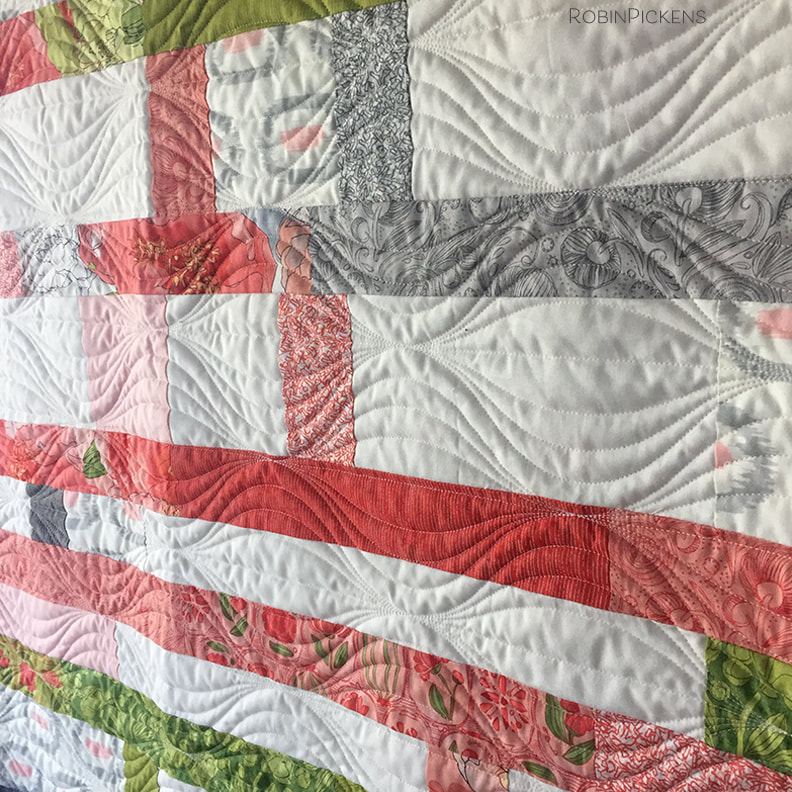 I have a new addiction. Its not buying shoes. Its not chocolate (okay, that one is already established). It's joining in to Sew Alongs. There is a rush of excitement when you finish a block and photograph it and add it up on instagram or facebook or where ever your sew along is happening. Little pockets of motivated time for a do-able thing. Baby steps that add up to a bigger thing. Sharing in the online community and interacting, getting feedback, seeing how people interpret and add their style and taste, encouraging each other...it's about the people as much as the sewing. Sew alongs are like my new crack. And in my need for my next "fix" I jumped into two of them in the last few days: Moda Block Heads 2 and the Splendid Sampler 2. 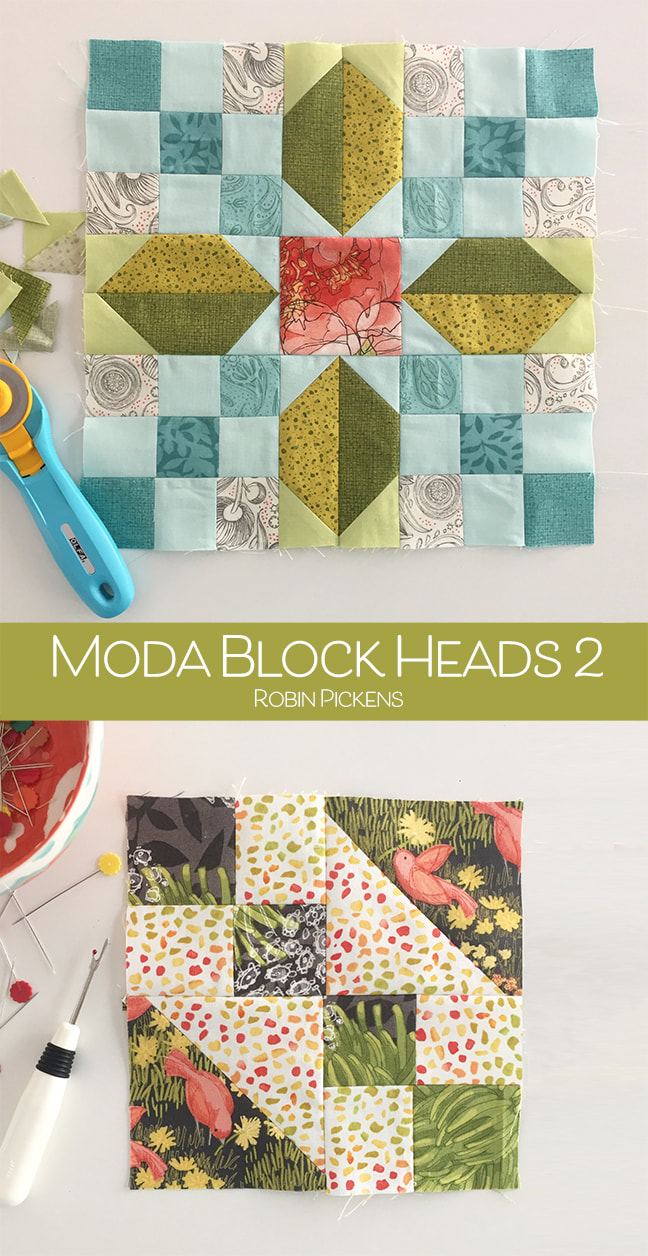 There is a huge group on Facebook https://www.facebook.com/groups/253867175058745/ where you can post your blocks. The first block pattern is Stellar Star from Lynne Hagmeier . The second one is Buckeye Beauty from Me and My Sister Designs. I'm using fabrics from my lines- the top one has fabrics from Blushing Peonies and Dear Mum with Bella Solids Ruby Ice and Light Lime. The bottom one is Dear Mum in the middle with Dandi Annie for the dots and birds. I thought it would be fun to just mix the lines and use them all. The next Sew Along I jumped into is The Splendid Sampler 2 hosted by Pat Sloan and Jane Davidson. I loved seeing what people made from the Splendid Sampler 1 and the first 20 blocks will be released free on a weekly basis, on Thursday mornings. If you want to make more than the first 20, as I'm SURE I will, then the remaining blocks will be in the book The Splendid Sampler 2 which comes out in October. 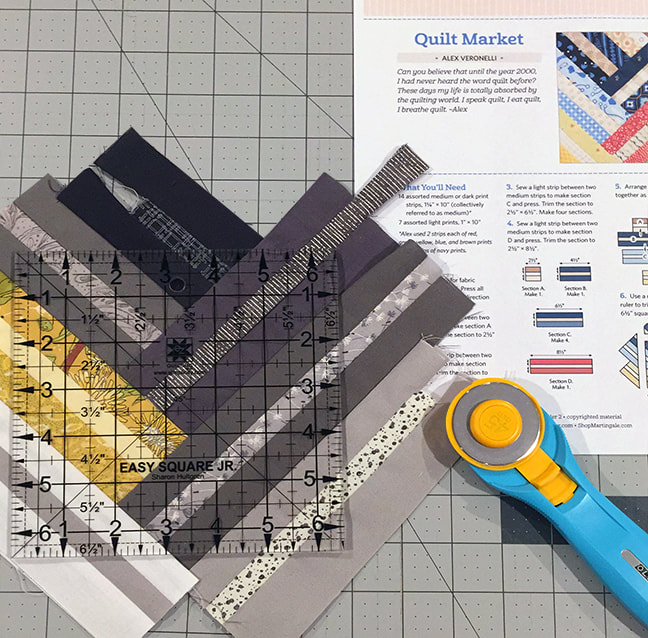 This first block, Quilt Market, is from Alex Veronelli at Auriful thread and I love it! I always take a deep breath before trimming something like this...and double check the placement as its noted in the directions. For this project I think I am going to stay in the gray family and mix in yellows from my new Dandi Annie collection. Maybe I'll add more colors as I go along- we'll see. That is the fun of a sampler. You can experiment as you go along and see what fits the blocks and the group. 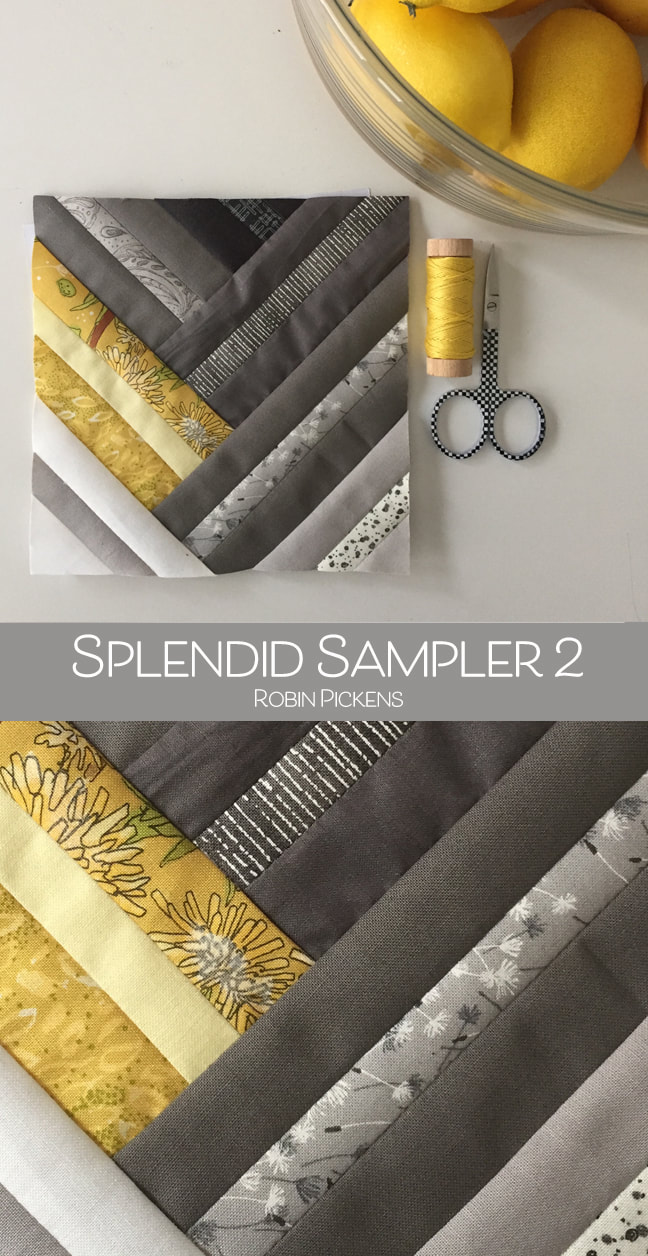 Want to join along? Come on, its a GOOD addiction! I'll try to post here each weekend to show my progress. Or check out my feed at Instagram @robinpickens.
Happy sewing!  Now that Quilt Market has passed, I'm thrilled that I can finally share my Dandi-Annie line for Moda Fabrics! The glowing golds and yellows have been warming up my office and brightening my days. This was a special collection to design because it reminds me of growing up and seeing the cheery yellow blooms pop up in our yard. As kids, we loved the simple happy flowers that could be twisted into necklaces and rubbed into our skin to make a lovely golden color. But even better than the yellow blooms were the mature puff balls of seeds. We knew our dreams would come true if we could blow the seeds off the stem in one breath. 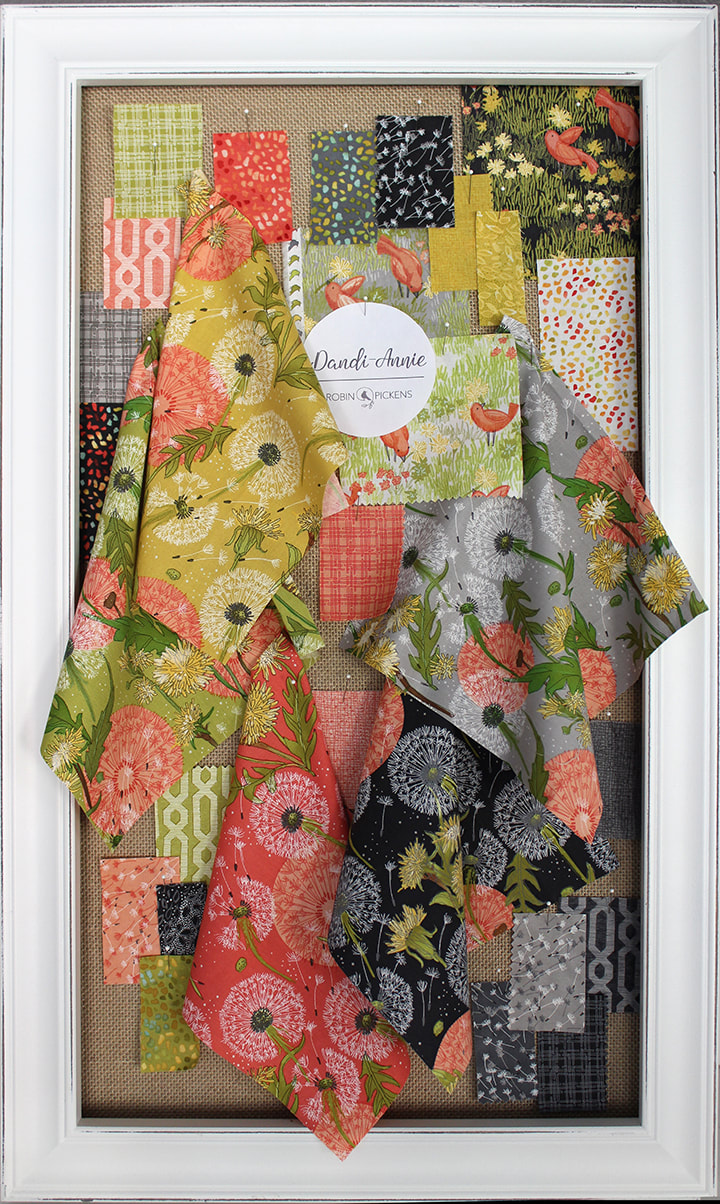 After blowing the seeds off the dandelion stem, we would watch our seeds travel off in the breeze in a graceful dance. Hopefullness. Sunny days. Being a kid and finding the beauty in a what others considered a weed. Those are the memories and wishes wrapped up in the threads of Dandi-Annie. Little birds also pay a visit in this group, jauntily picking their own bouquet of dandelions. Flyaway seeds, some woven textures and plaid, and a lattice repeat that makes me think of cottage gardens...cheery coordinates for a happy group. 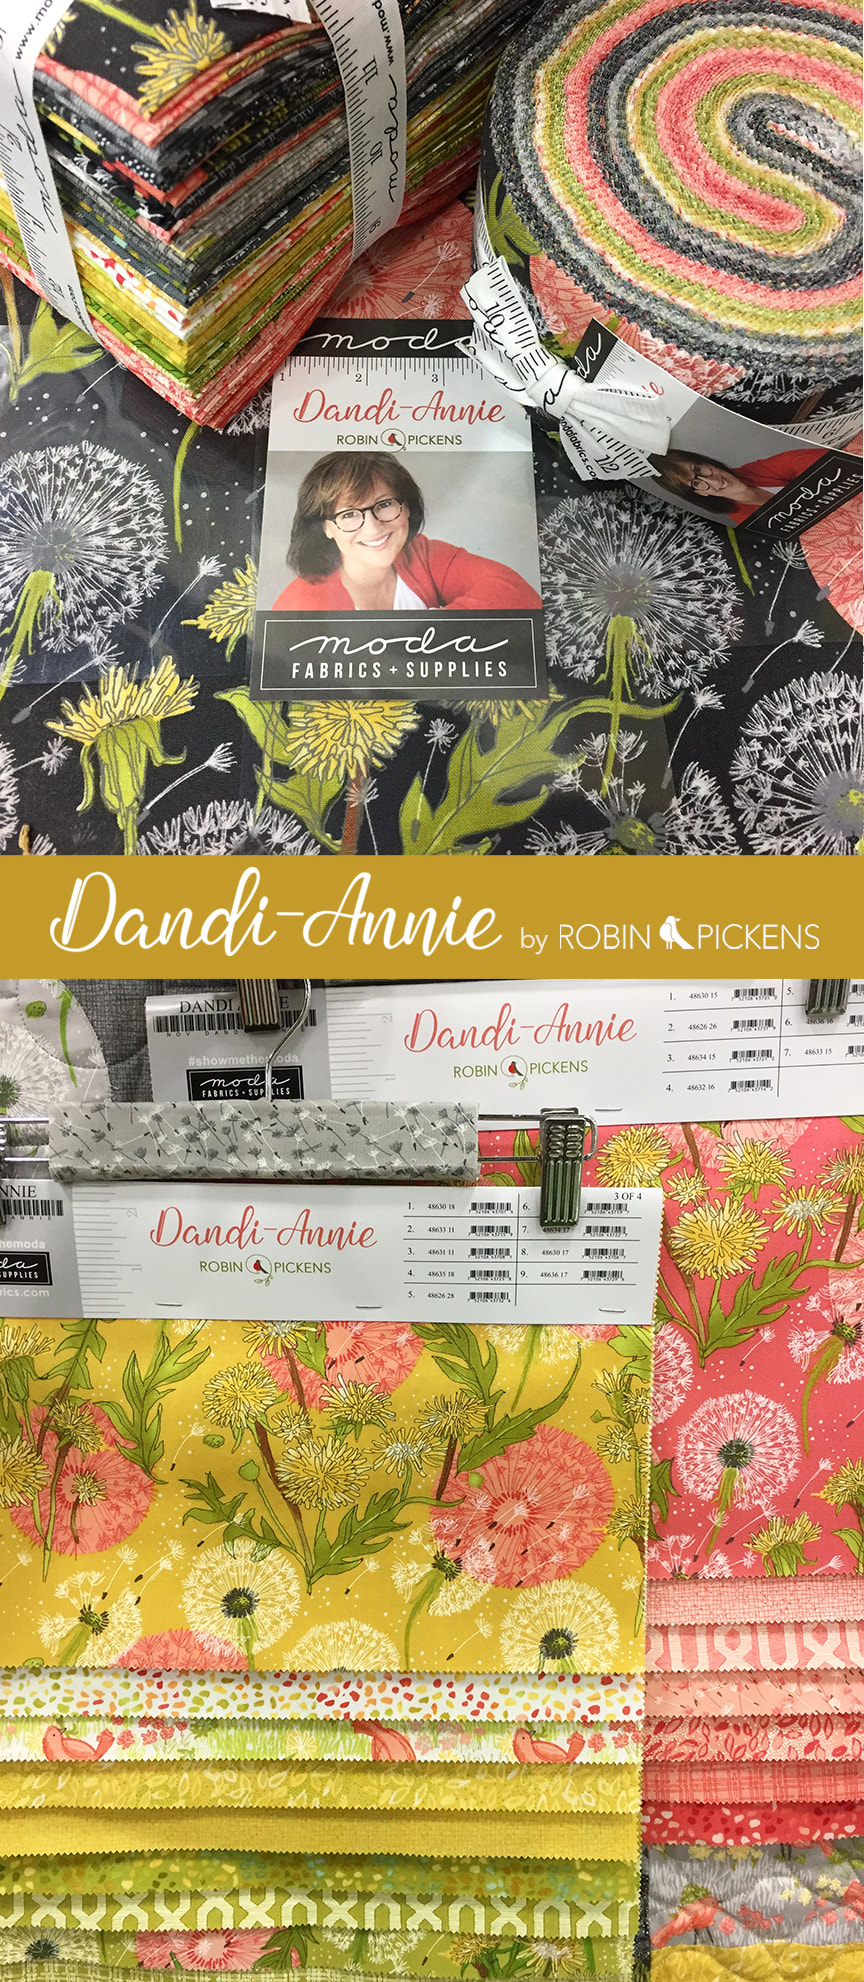 Warm colors fill the group with golds, pinks and greens and they are balanced with the cool of gray. The line still coordinates with the colors from my previous collections so I'm sure to try some mixing in of Blushing Peonies and Dear Mum and Poppy Mae. The more the merrier in the garden!
I hope you like Dandi-Annie as much as I do. I think its my favorite Moda group so far! It will be arriving in quilt shops in November 2018. Stay tuned for QUILTS! A bit of panic started the morning the day my husband and I left for Portland. We were doing great on time- actually got to the airport early. Good, right? Well we didn't realize the long term parking lot was closed down to a fraction of it's former self for construction (what construction, I didn't see any trucks or equipment?) so there was very limited parking. Very. Very. Limited. Other parking lots were full due to the large number of cars that had the same problem we had- finding a parking space. After frantic driving blocks and circling around we finally found a lot (at valet prices, oh well). So even though we were early, technically, WE MISSED OUR FLIGHT TO PORTLAND! Sigh. Tensions were high in the car that morning and I'm happy to say I'm still married. The good news is we got on a flight 3 hours later with minimal extra charges but it was an interesting way to start the trip. We got to Portland safe and on the day we intended, so that is really all that matters. But I learned...take the Flyaway bus to LAX. Don't drive. 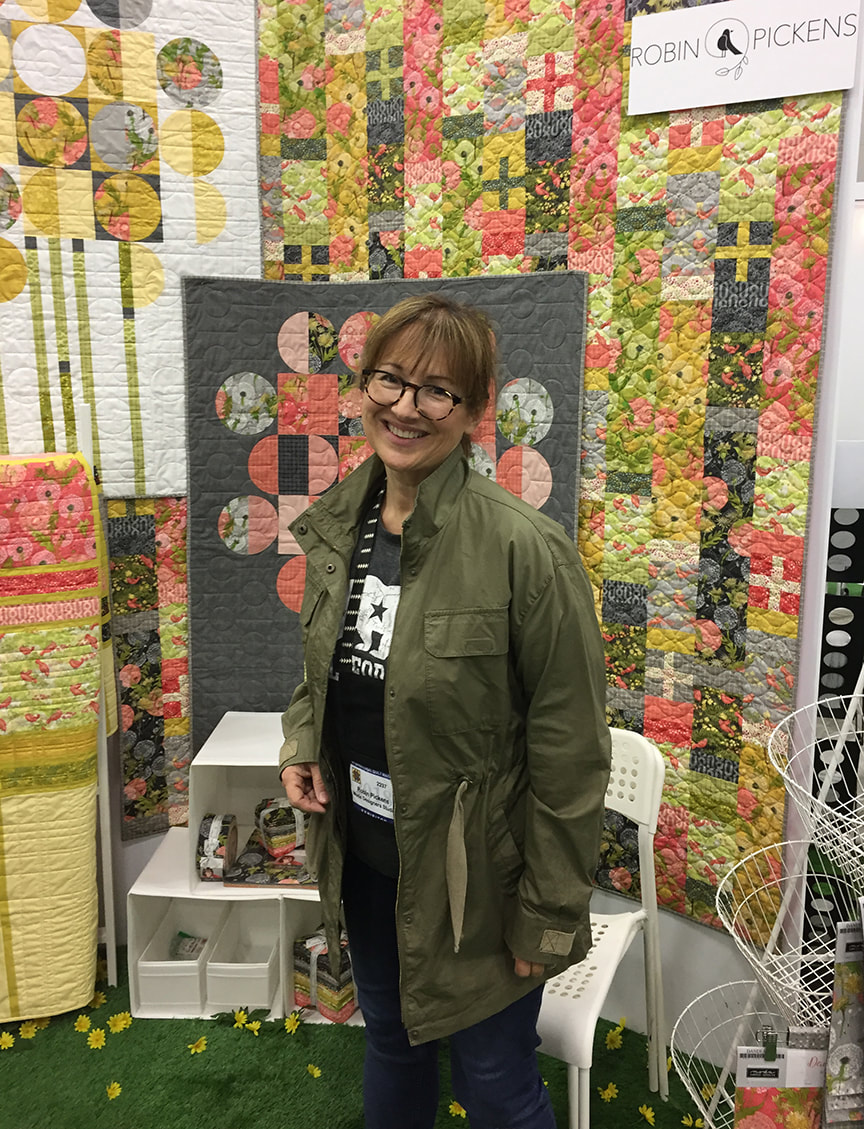 Once we got to Portland and the convention center the setup went quickly due to the fact that I had my husband along for his FIRST EVER time at Quilt Market! It takes me three times longer to hang a quilt by myself on a ladder vs standing back and saying "yeah, a little to the right baby." I'll get into the quilts and fabrics on the next post. But for now, this is me after a 4:30am wake up, missed flight, train ride into city, hardly any food and huge relief to be there and be set up! Yeah, after checking in to the hotel we had a nice dinner and glass of wine so that made up for it. 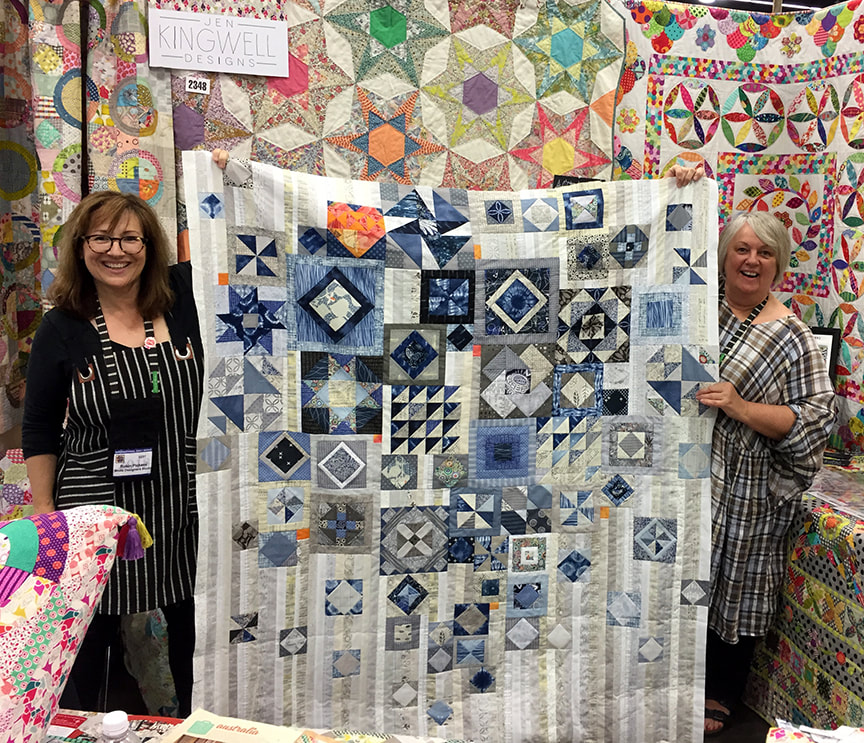 I was super excited to bring along the quilt top for my Gypsy Wife quilt that I did with the GnomeAngel sew-a-long on instagram. I wanted to show it to the amazing Jen Kingwell, whose pattern it is, and who creates the most amazing works of fabric art! 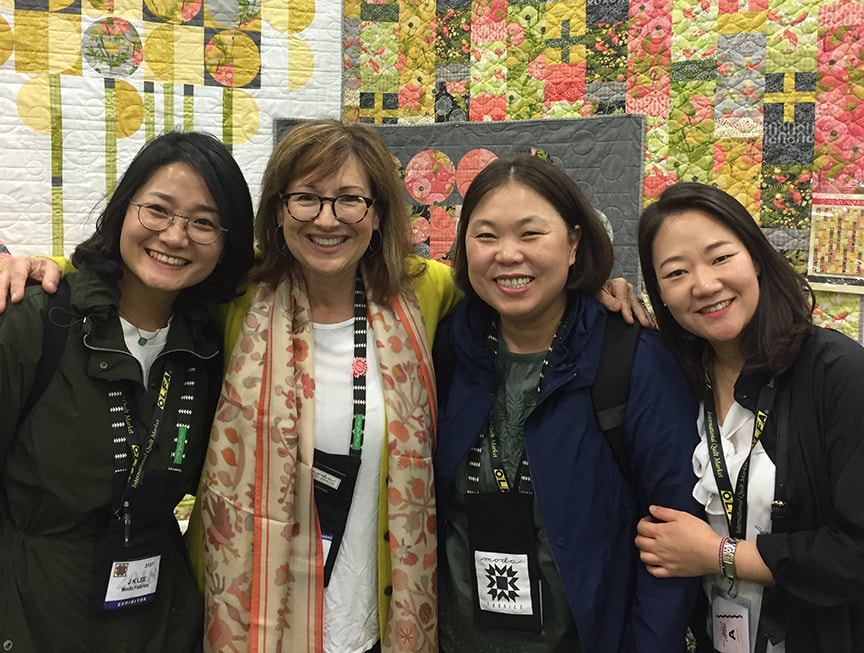 Another highlight of the trip was meeting some of the talented and incredible people from the mill in Korea. They brought me a beautiful gift of the scarf I am wearing and were so LOVELY! They make magic with my designs and I am so grateful for their skill. Of course while at market I must buy some things myself, right? I bought a new Baby Lock Sashiko sewing machine, a Daylight company floor lamp and was exposed to the luscious and lovely threads at Cosmo and Cosmo's Tsu Mu Gi. I really needed to go home before I bought more. The best part of the trip is not only connecting with shop owners and other designers but also having time with the people at Moda. I am so blessed to work with such a fantastic group of people who are great at their jobs, are committed to excellence and their customers, are forward thinkers and truly GOOD people. They are a pleasure to be around and they make market special and fun. Thank you Moda!  I'm deep in designing some new quilt patterns to go with my new line I'll be showing at the spring Quilt Market, but those have to stay secret for now! However, I thought it could be fun to share a little of what goes into the process of making a quilt pattern! I'm really not showing the part of making the actual quilts because you all know what it's like to make a quilt. This is the other part. I work on the computer first for my designing. Yup, nothing gets cut till I've thought it out. I use Electric Quilt 8 and Adobe Illustrator. I have used Illustrator for many years so I have the most comfort with that software. 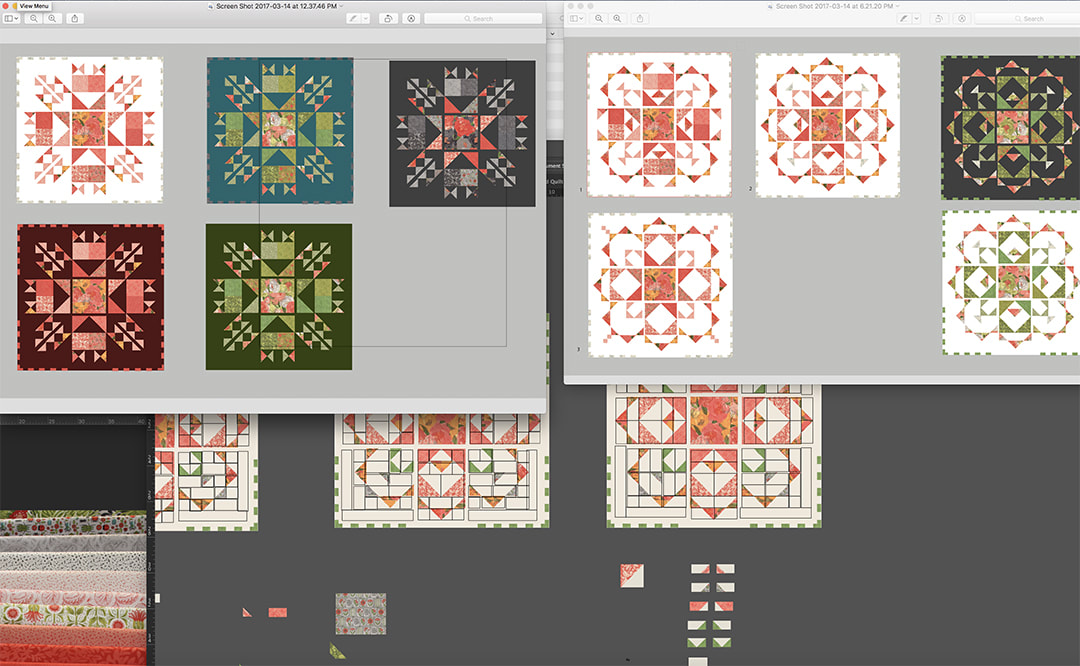 I love creating colorful florals and patterns. Each collection has a personality based on the florals and colors and I try to design quilts that go along with that in some way, either with larger panels to showcase large scale prints, or shapes of blocks that speak to some thing about the main flower. The image above shows part of the process I went through with Town Square Garden for the Blushing Peonies collection. In this case I knew I wanted to do a medallion quilt with a large center panel and started with images on the upper left. Peonies having such a beautiful rounded shape so I ended up using arcs of triangles to the outside to reference the curved softness and blooms (the images on the right). After I have the structure I like, I break it down into what blocks are the most logical to make and describe in instructions. 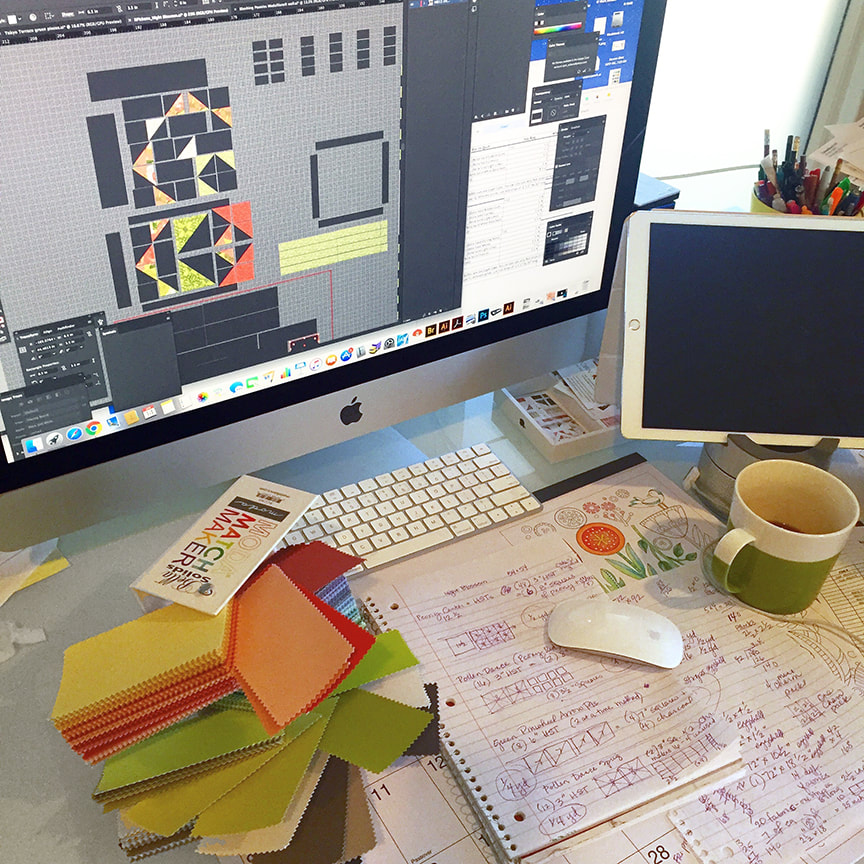 I use Moda Bella Solids with my prints and love the range of colors that coordinate perfectly. I get a lot of use out of my Bella Solids Match Maker and color swatches. The computer allows me to try new color combinations very quickly and easily. In figuring out blocks I also do a lot of drawing and scribbling in my notebooks. Sometimes nothing beats paper to jot stuff down on! 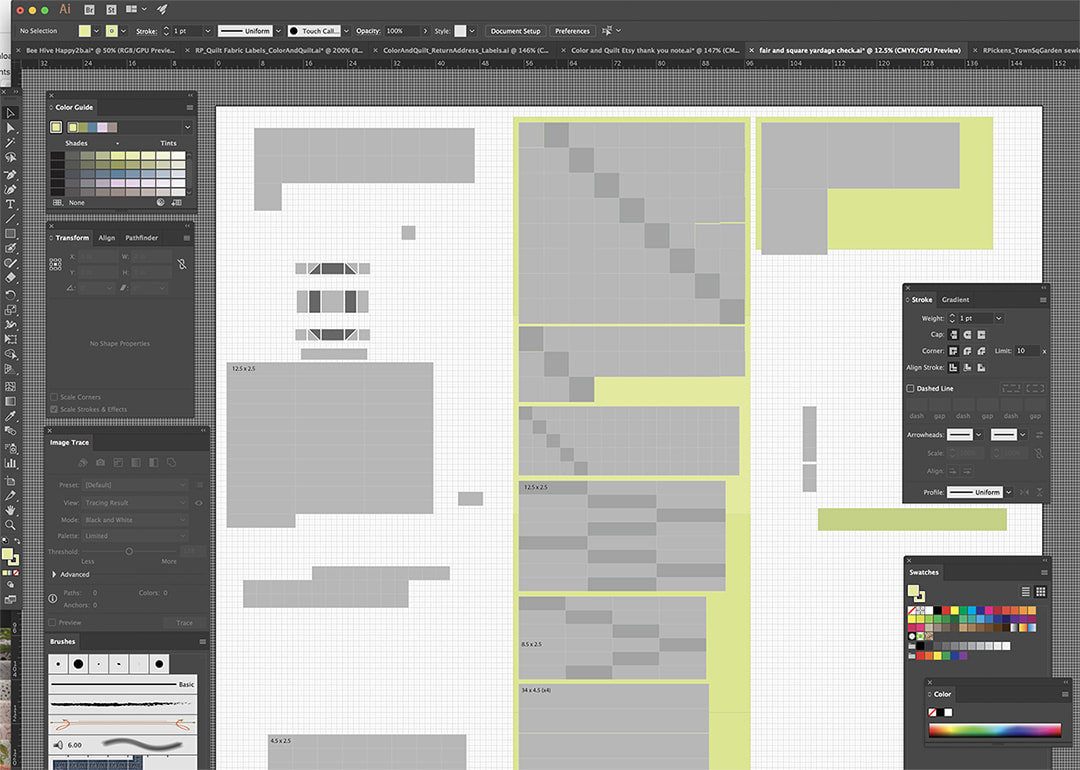 An important part of figuring out a quilt is the size, the scale, and the math of the yardage needed. I try to design some of my patterns to utilize precuts because they are such a handy way to get a whole coordinating collection with a lot of variety without having to buy tons of yardage for that much variety. If I'm using precuts, there are some parameters I stay within for piece sizes for my blocks. To figure out my yardage, I take all the little pieces I made in Illustrator and lay them out the way I would cut them on yards of fabric, as is shown on the image above. I'm sure there are faster ways to figure this out but I'm very visual in my thinking so this way works for me. Then there are the steps of making the actual quilts and finding out what doesn't happen the way I thought it would on the computer. I make revisions on instructions, finish quilts and photograph them (and that could be a whole different blog post). 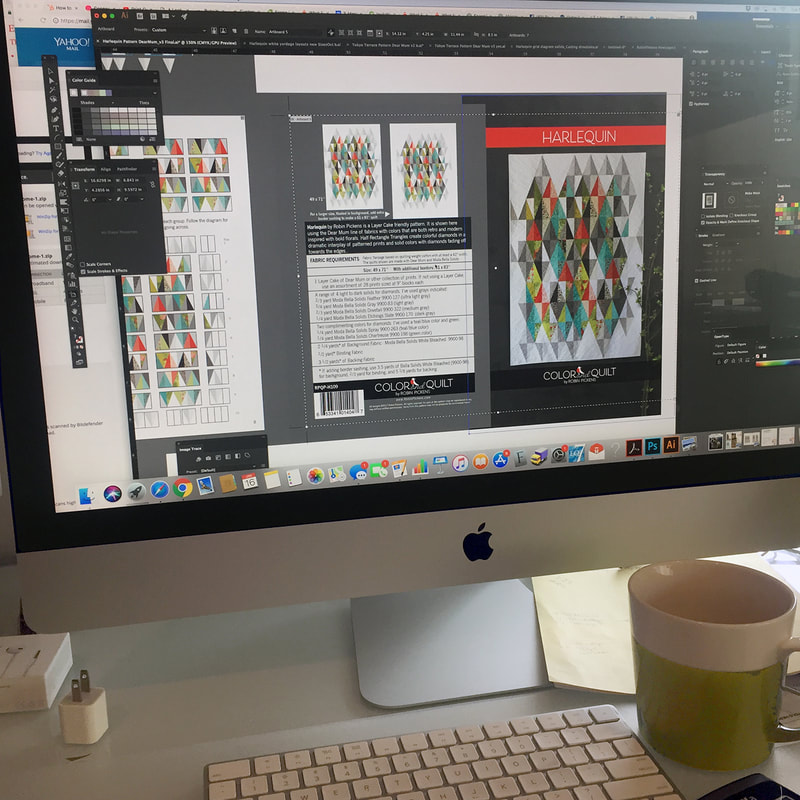 I've got a graphic design background so I handle all the diagrams and layouts myself. The writing of the instructions is often the most challenging part for me and I try to assume people have limited knowledge of piecing. Because I am newer to this, that's the way my brain thinks- simple steps please! I use a technical editor who goes over my patterns before printing and checks my instructions, terminology, yardage and math and any mistakes in my layouts. I get the layouts revised and it's off to press!  When the patterns come back from the printer my handy helper (my dear sweet husband) and I have marathon sessions bagging patterns. The dining room table, the kitchen counters, everything gets used fill the initial larger orders. And then woosh! off they go to shops and sewing rooms! 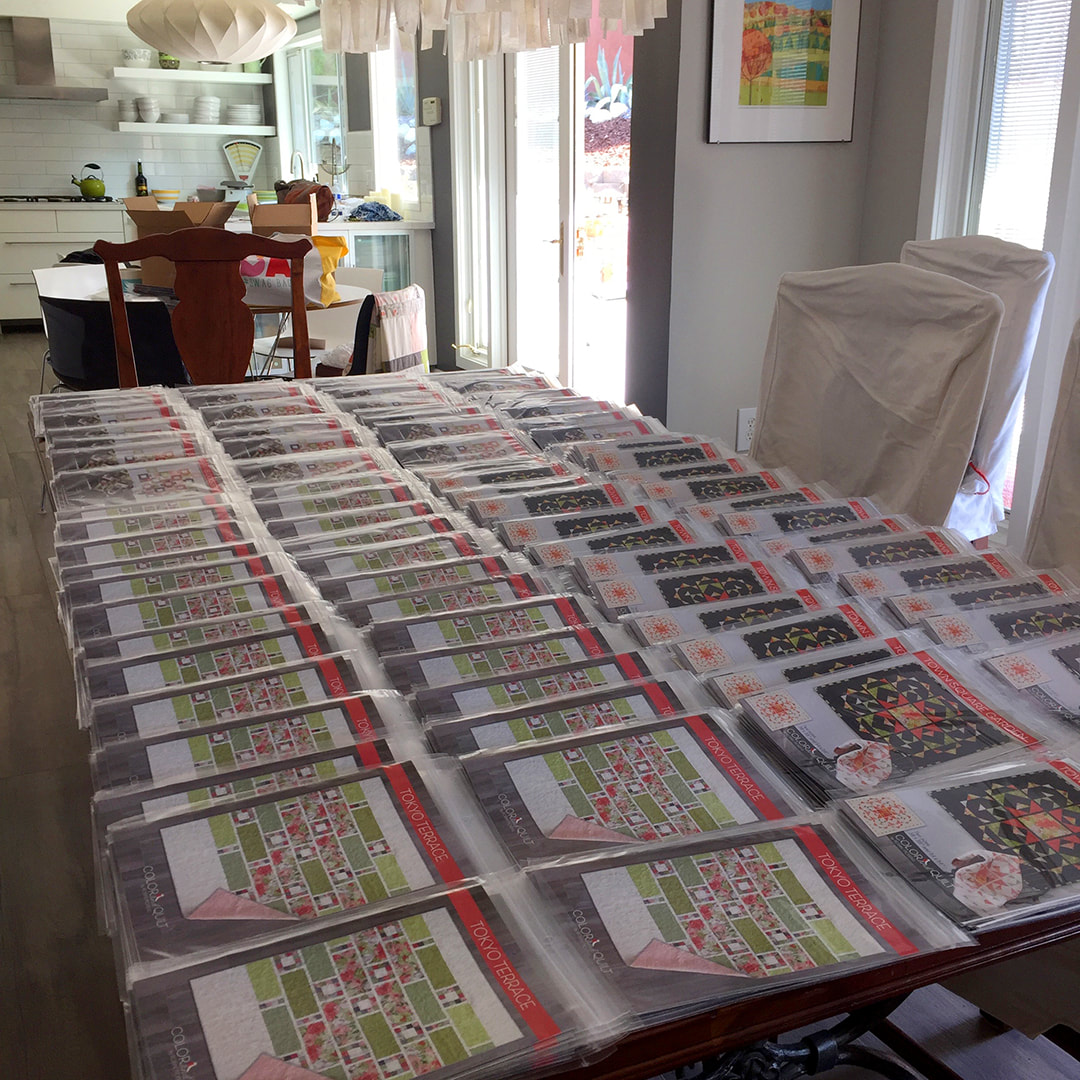  You may have noticed coffee cups in some of the shots...yes, lots of coffee when I'm deep in pattern-land! Hope you have enjoyed this little view into my process! If you'd like to check out some of these patterns they are carried in local quilt shops and on my shop. Happy sewing!! 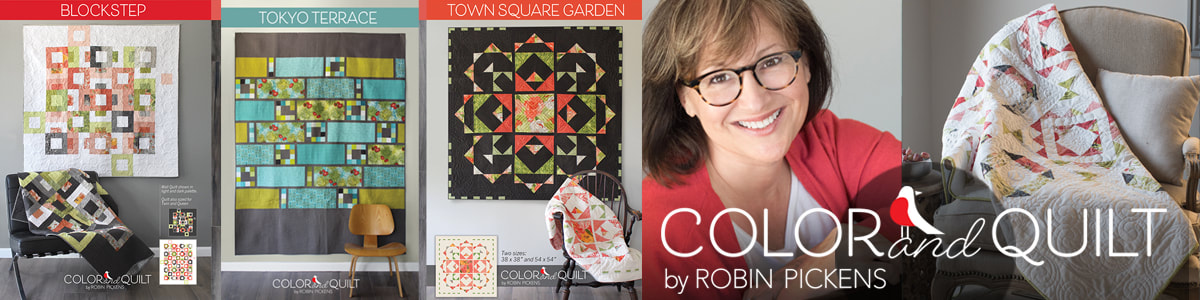 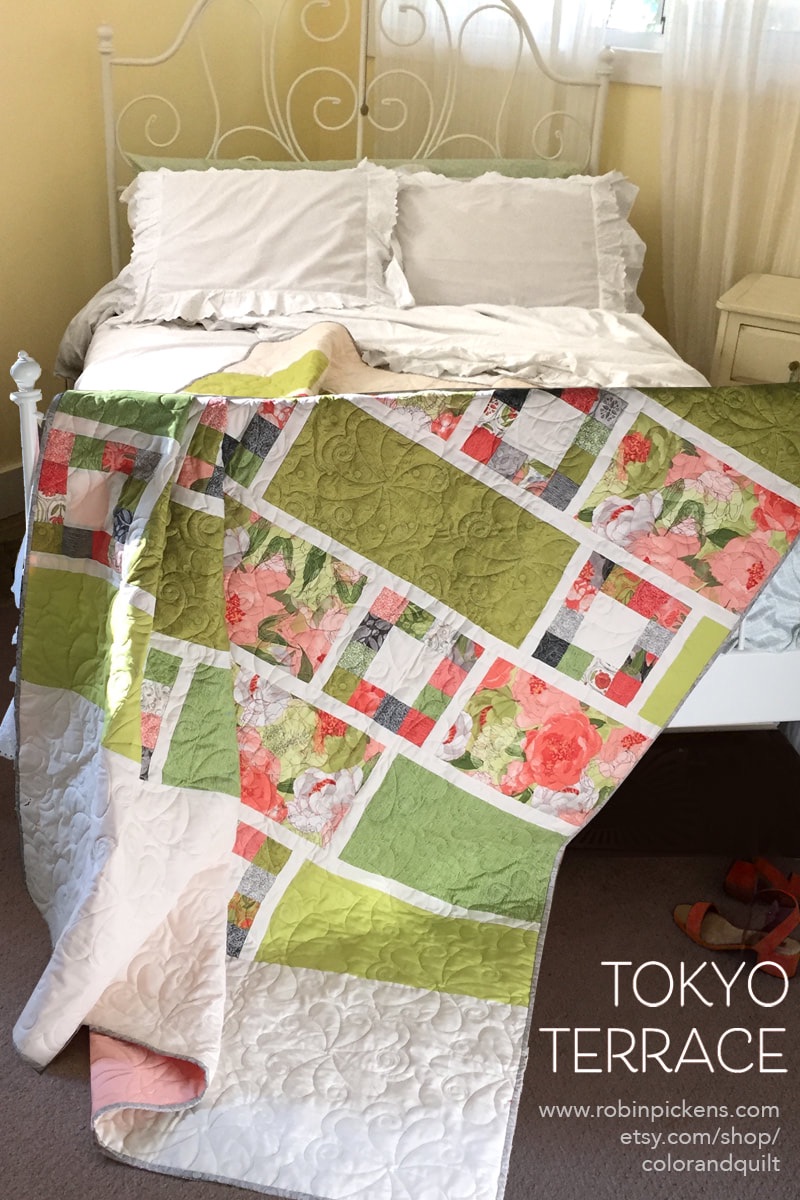 If you could see my fabric stash, you’d notice I fall in love with big dramatic patterns. I love a big statement. I like big flowers. Sometimes I really want to SEE more of that big design. That is why I also like to make some quilts that give space for a powerful print to have it’s spotlight. Think of it as a gallery wall or panel of windows. I knew I wanted to show off the large scale peonies in my "Blushing Peonies" line for Moda Fabrics. That idea inspired “Tokyo Terrace”…pockets of space to display the splendor, balconies of gardens and sunlit architectural structure. This pattern plays with the contrast between large panels to showcase a bold botanical print and small 2” squares in blocks that balance the large flower blocks. 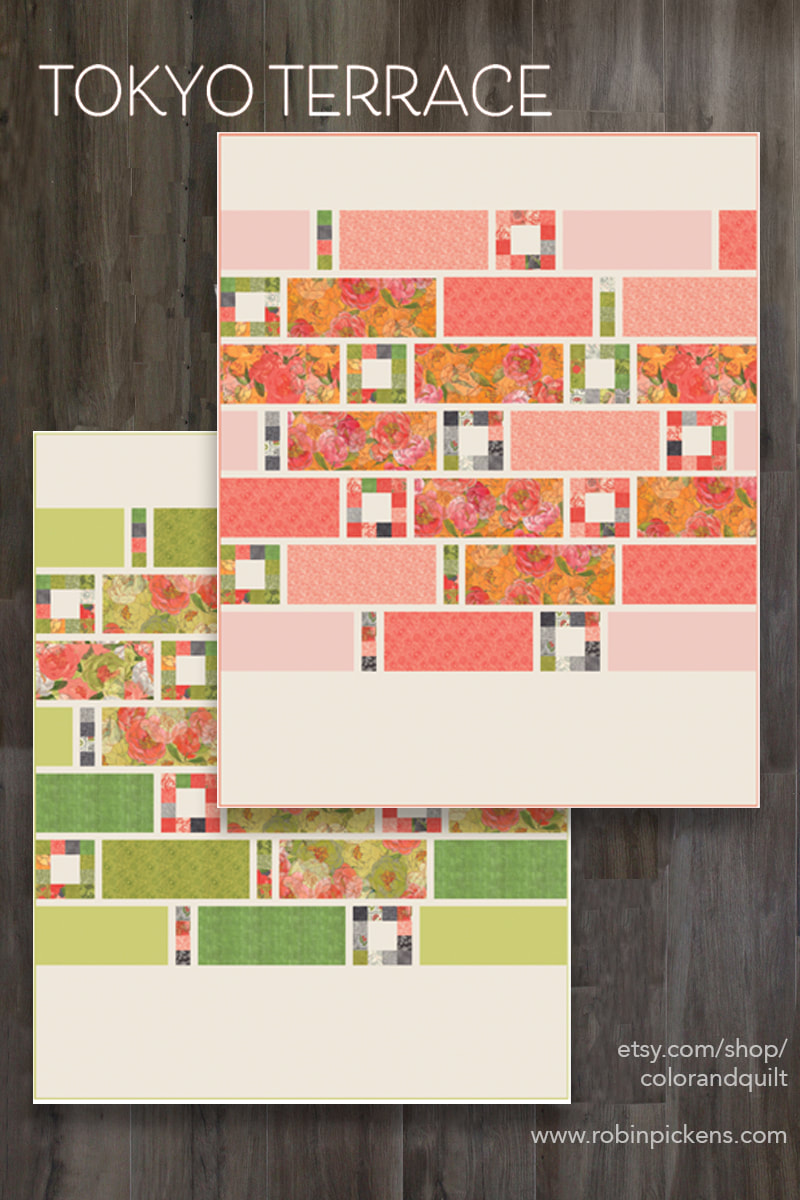 When working on this quilt, I enjoyed making the blocks of small squares and playing with my placement and balance of patterns and color. Then I love the great feeling when row after row comes together quickly with larger blocks. I pieced this in a weekend and I’ve already done another color version since it comes together so easily. Here is a computer-generated version of this quilt in a pink colorway as well as the green one I made. The above quilt was pieced by me but long-arm quilted by Tanya Heldman of Free Range Quilter. She used a lovely curved floral design that compliments the soft lines of the peonies and contrasts well with the geometric structure of the quilt. Blushing Peonies fabric with Moda is in quilt shops now. If your local quilt shop does not carry Tokyo Terrace pattern you can find it in my shop at https://robinpickensinc.com/  I showed three new quilt patterns with my Blushing Peonies fabrics for Moda. They are BLOCKSTEP, TOKYO TERRACE, and TOWN SQUARE GARDEN. 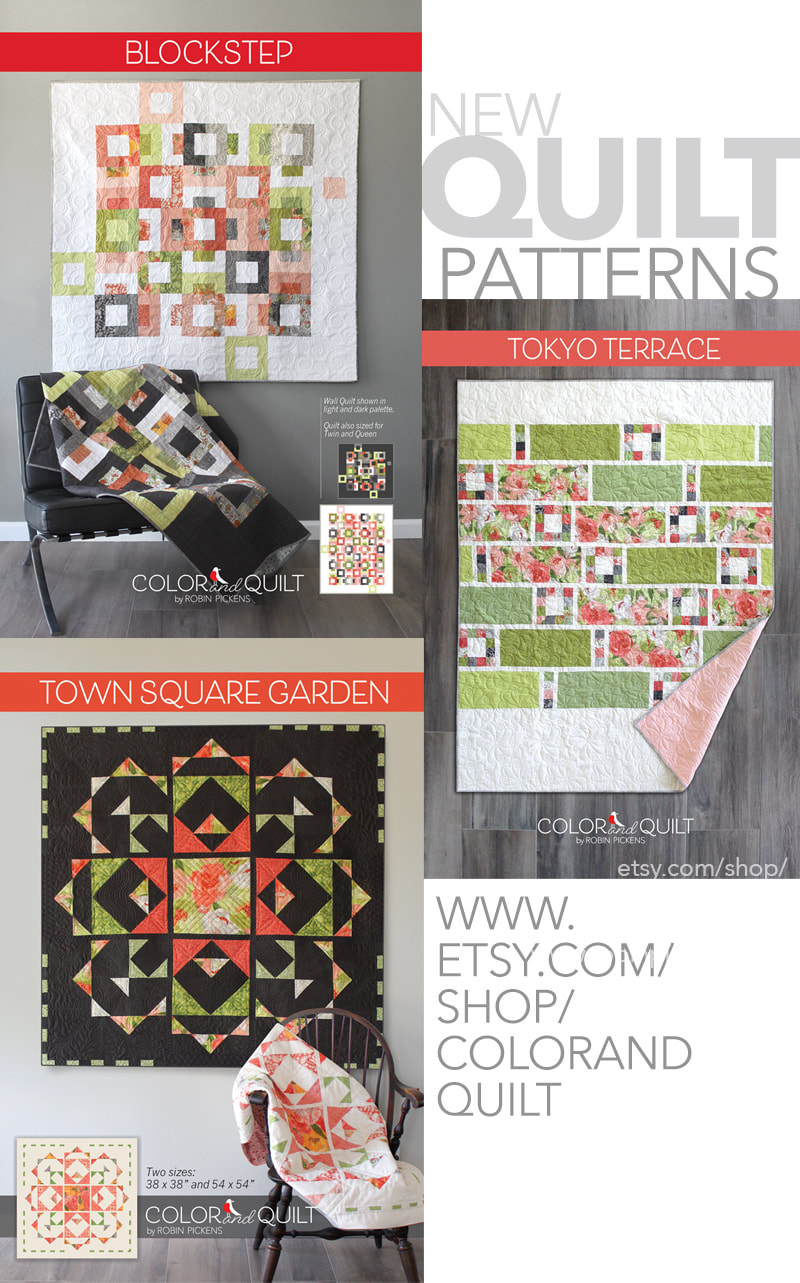 BLOCKSTEP can be made with precuts of a single Layer Cake or a Jelly Roll for ease of coordinating your print fabrics. Precuts can also give you a shortcut on TOKYO TERRACE by using Mini Charms for the small patchwork blocks that are interspersed between the larger rectangular panels. I like doing at least one quilt with a collection of fabrics that has larger panels that make it easy to showcase larger scale motifs. I like to do large-scale florals and show them off! TOWN SQUARE GARDEN is my first medallion quilt and it was a lot of fun to do. I'm currently doing quilting on my home sewing machine with my walking foot on the smaller light color wall quilt (it's 38" square vs. 54" square) and I'll share some pictures when it's further along! Feel free to visit the shop or look for these at your local quilt shop. The patterns will be shipping with the Blushing Peonies collection in November 2017. Also stay connected for "color play" when I do some computer experiments with other color ways of my quilts. Sew on! 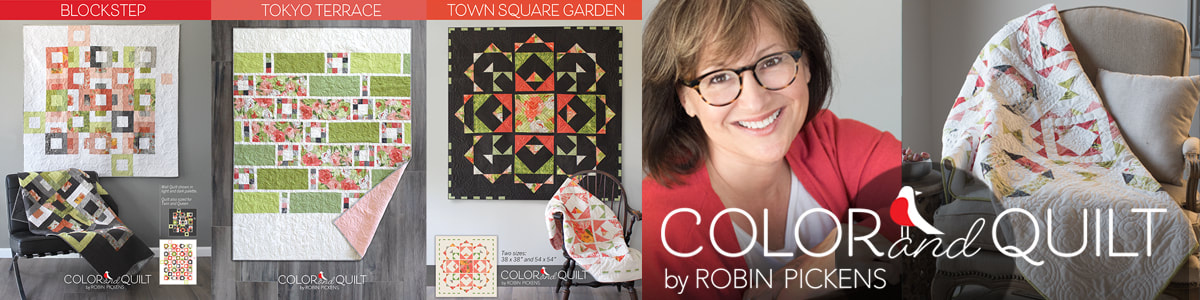 |

About ROBINDesigner of colorful florals for Moda fabrics. Modern to transitional quilt designer. Illustrator, sewist, crafter. I am proud to be a designer for Moda Fabrics!


Shop Robin's Designs
 I am an affiliate for Fat Quarter Shop and may earn a small commission through my links. Thank you for your support!

Check the March 6, 2017 Episode!
Categories
All
Archives
November 2023
© Robin Pickens Inc. All rights reserved. No images may be reproduced without permission.
|
 RSS Feed

