|
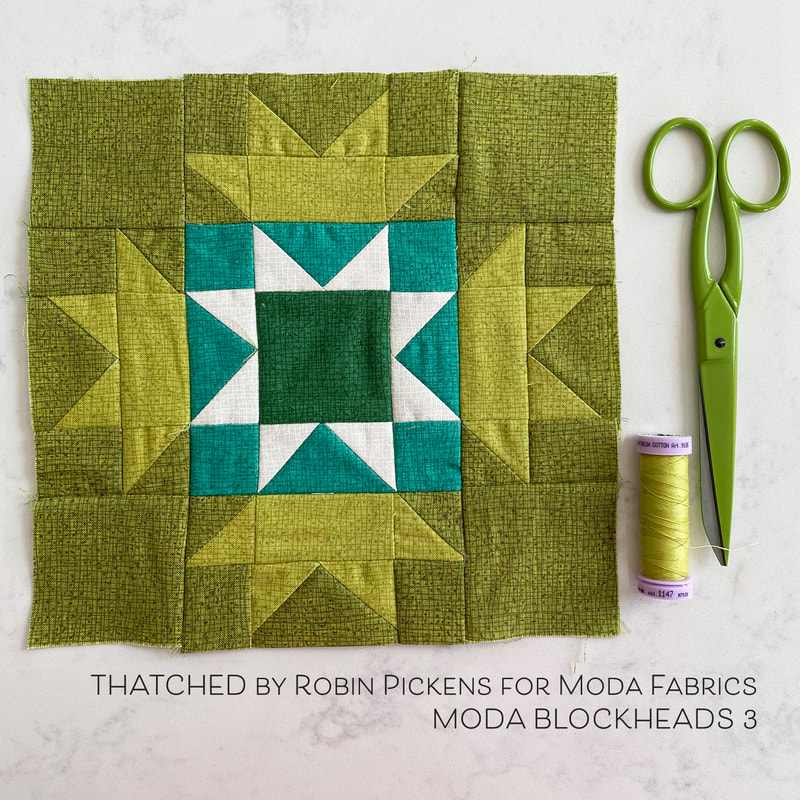
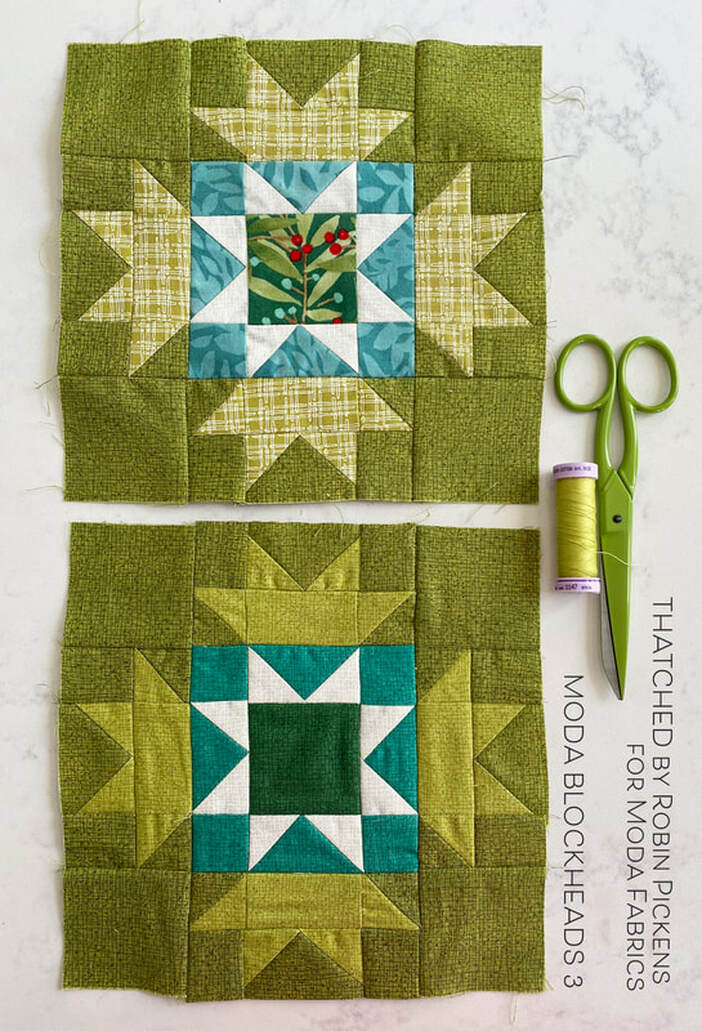
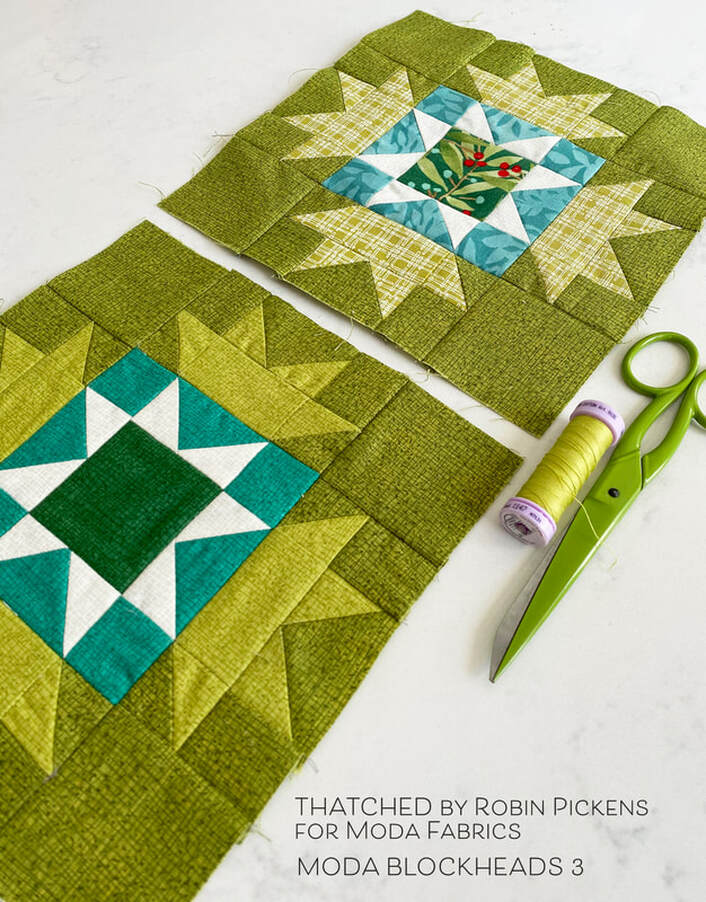
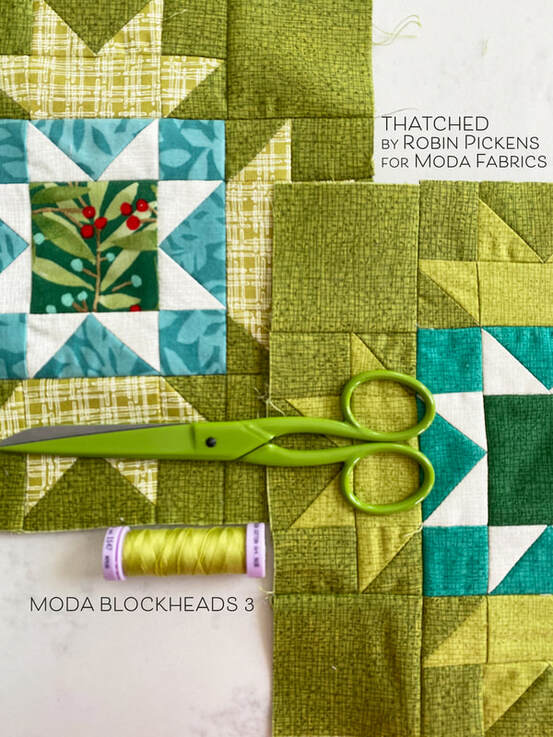
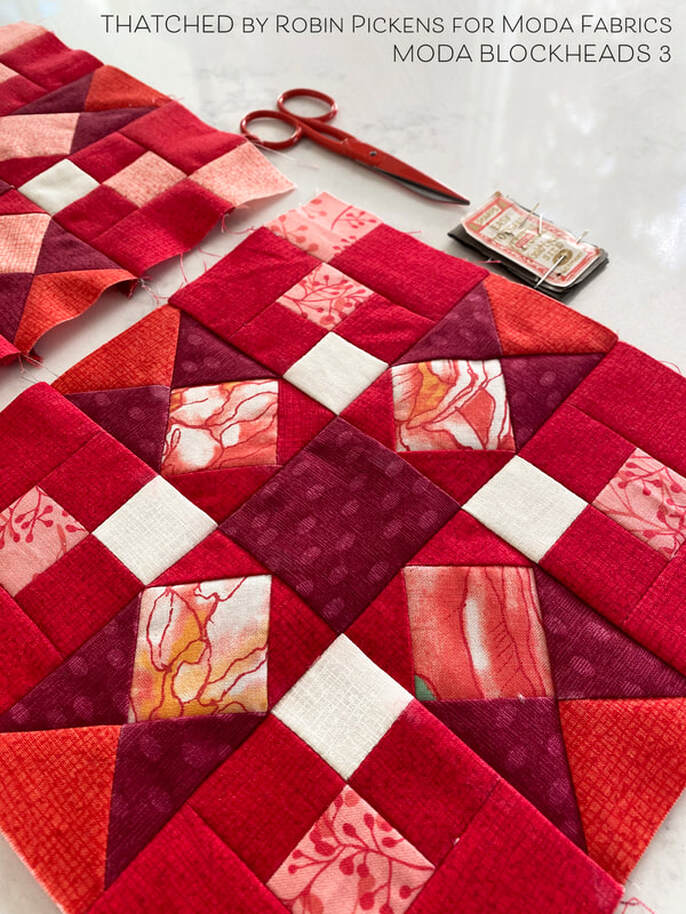
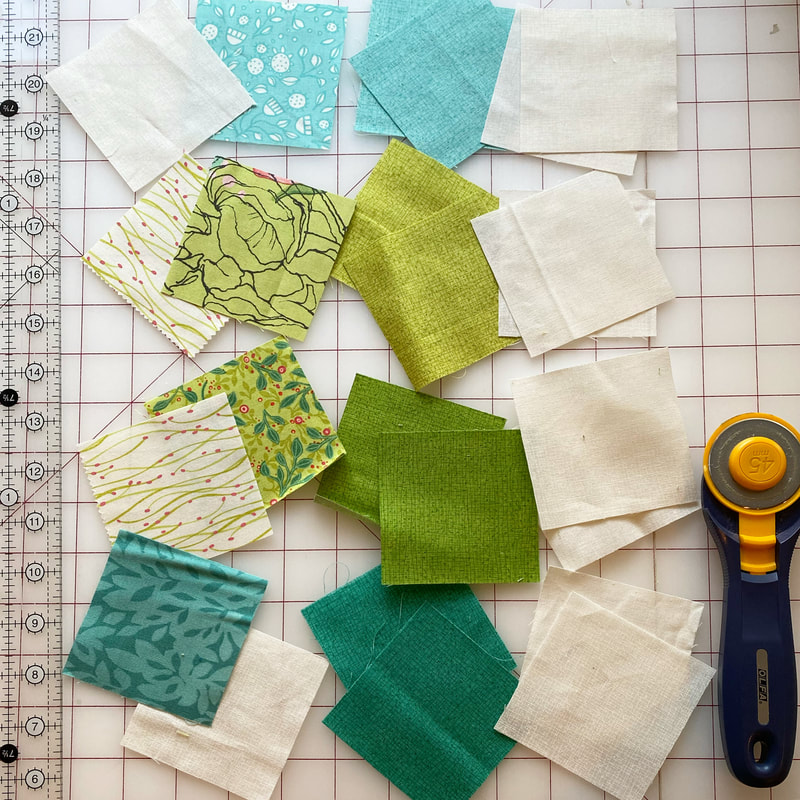
Betsy Chutchian's block this week, Crown and Star, reminds me of arms reaching out with spread hands, bursting with joy. You can get it on her blog at http://betsysbestquiltsandmore.blogspot.com/. I've decided to make my center with a dark pine square, surrounded by white star points on peacock for more contrast. The outer perimeter uses the chartreuse and sprig colors, similar to last week's block HSTs. This is another one for the green row in my quilt top layout plan. This block falls on the darker range and uses more color and less white/cream. From the instructions, I deviated a tiny bit and made my flying geese units using a stitch and flip method, trimming off the corner after sewing, instead of cutting the side squares into triangles first. There is more waste with the fabric this way but the pieces are not that large so I don't feel bad throwing those cut pieces away. I'm making the 8" blocks, so my flying geese are made with 1 1/2" x 2 1/2" rectangles for the base and 1 1/2" squares for the geese triangle sides. My print/scrappier version of the block keeps the Sprig color as my background fabric but I'm using the Stem Plaid from Dandi Annie in green for the outer crowns. The teal color is from Dear Mum and the center is a mistletoe branch from Splendid. I like a little pop of red to tie in with some of the red blocks. In my overall scheme, I have three blocks made that make up two greens and one red in my rainbow grid. I'm looking forward to getting more filled in and working out the progression to more white or cream as the blocks progress to the right. Happy sewing and share your progress on the facebook Moda Blockheads 3 page or tag your blocks on Instagram. Thanks Betsy for a wonderful block! Check out the other designers and their progress too:
Corey Yoder - https://corianderquilts.com/ Sherri McConnell - https://www.aquiltinglife.com/ Betsy Chutchian - http://betsysbestquiltsandmore.blogspot.com/ Jan Patek - http://janpatek.blogspot.com/ Brigitte Heitland - https://www.brigitteheitland.de/blog Lisa Bongean - https://lisabongean.com/ Lissa Alexander - http://modalissa.com/ Laurie Simpson - http://minickandsimpson.blogspot.com/ Vanessa Goertzen - https://lellaboutique.blogspot.com/ Stacy Iest Hsu - https://www.stacyiesthsu.com/blog/ Janet Clare - http://janetclare.co.uk/blog/ Jen Kingwell - www.jenkingwelldesigns.com/blog Joanna Figueroa - https://blog.figtreeandcompany.com/
2 Comments
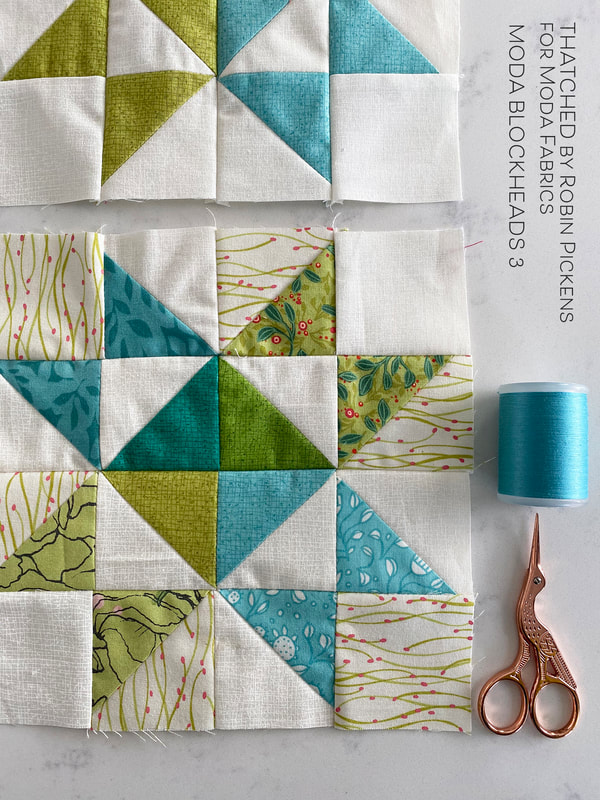
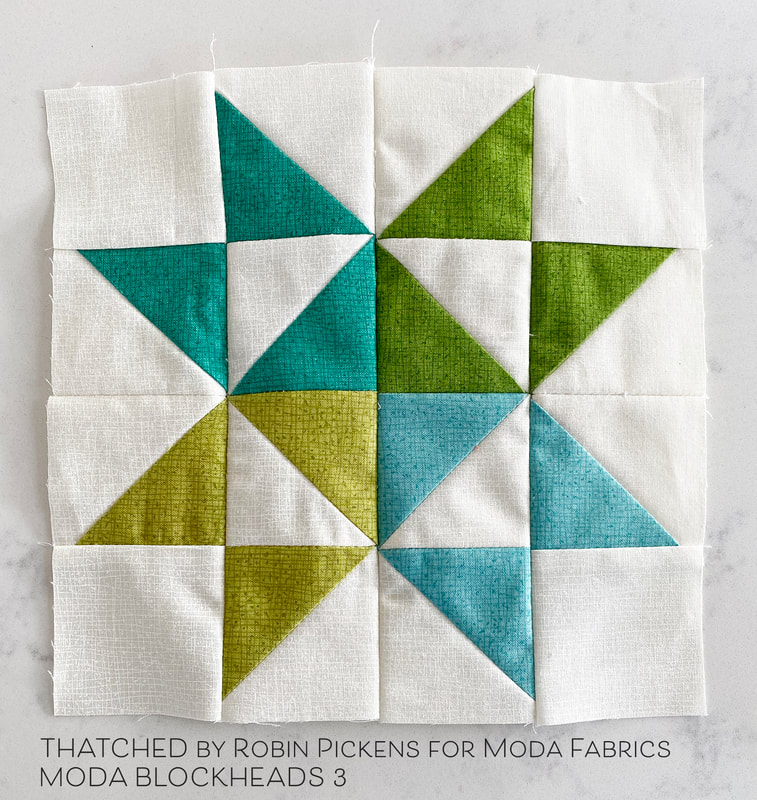
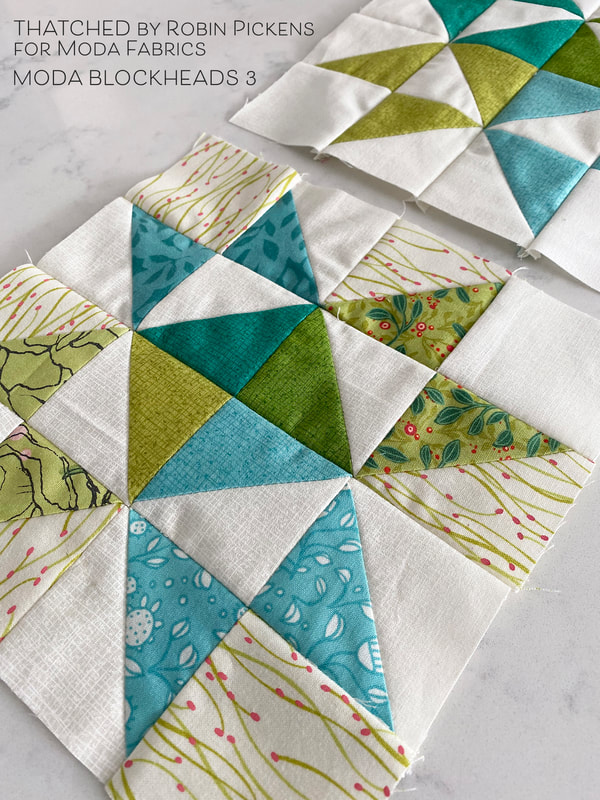
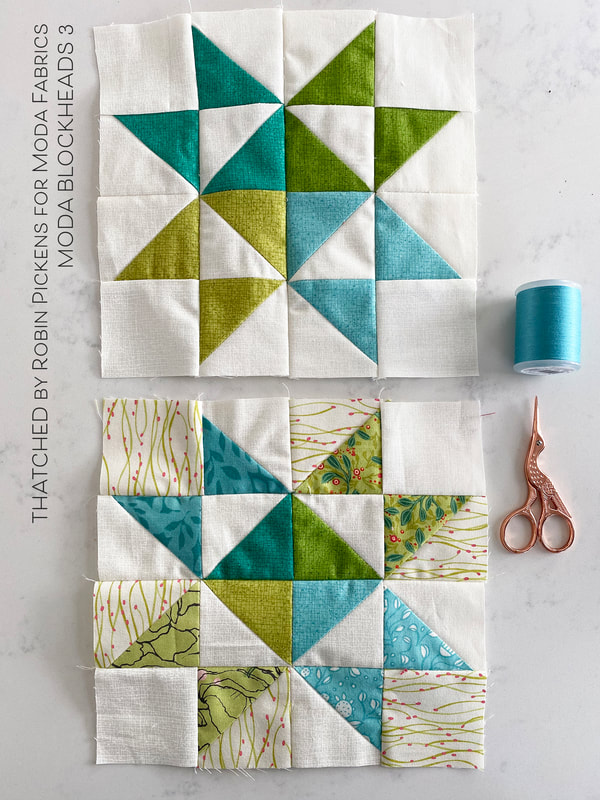
Week 2 with Moda Blockheads 3 and its a fun block from Sherri McConnell! This is SUNSHINE STAR and I'm continuing my all-Thatched and Thatched-scrappy prints blocks. Sherri will have the quilt block instructions at her blog: A Quilting Life - https://www.aquiltinglife.com/ This week I'm working with greens and teals. My Thatched colors are peacock, sprig, chartreuse and seafoam (seafoam is in Abby Rose). The pattern specifies cutting triangles and then joining them (one at a time HST method) but since I was making two blocks and keeping my colors the same through numerous pieces, I decided to use a 4-at-a-time method. I used 3 HST in a color in a quarter of the block then used the extra fourth HST in the second block, making my center a copy of the Thatched grouping from the other block. For my block mixed with prints I've got a few from Abby Rose which ships to shops in March. The flowing lines in the background fabric, the little leaves on green and seafoam and the line drawings from the cabbage roses are all from this new collection. The teal graphic leaves are from Dear Mum and I like how the teal/aqua shades from that group work with Abby Rose. Thanks to Sherri for such a cheery star block! I love star blocks. Next week we will have a block from Betsy Chutchian. Thanks for stopping by! Check in with the other Moda Blockheads designers to see their versions of Sunshine Star:
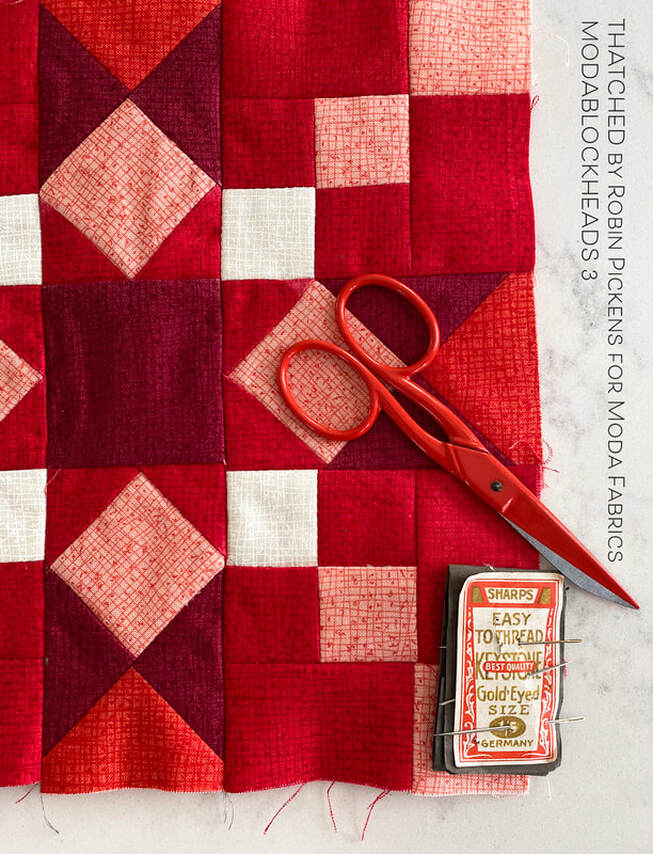
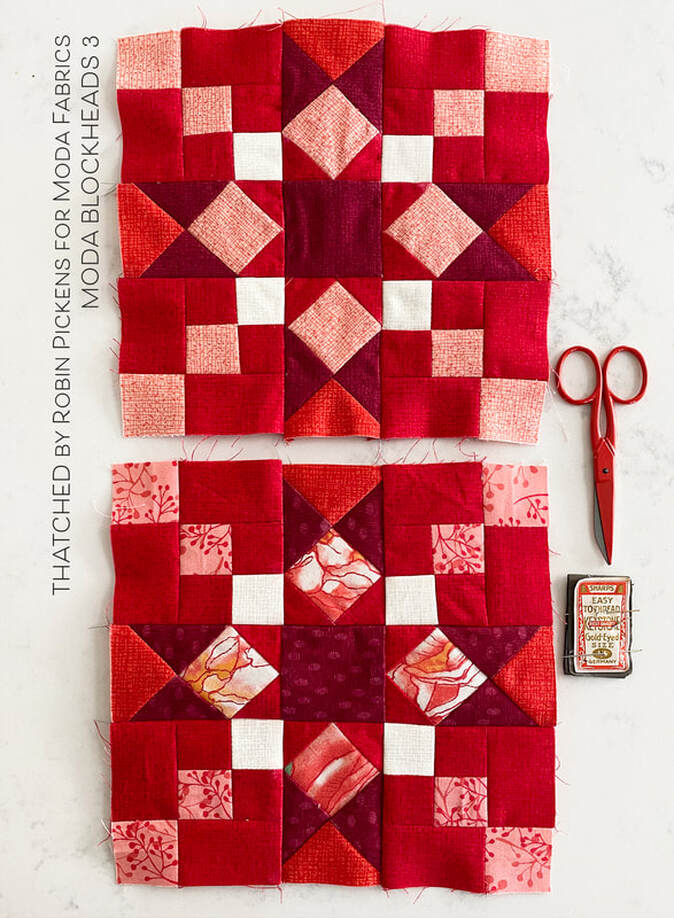
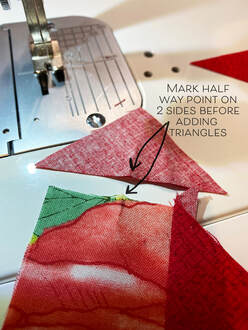
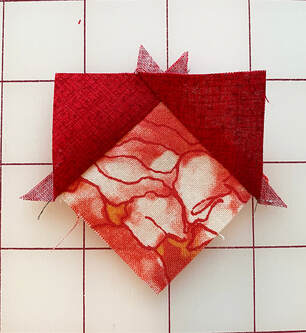
Corey Yoder - https://corianderquilts.com/ Sherri McConnell - https://www.aquiltinglife.com/ Betsy Chutchian - http://betsysbestquiltsandmore.blogspot.com/ Jan Patek - http://janpatek.blogspot.com/ Brigitte Heitland - https://www.brigitteheitland.de/blog Lisa Bongean - https://lisabongean.com/ Lissa Alexander - http://modalissa.com/ Laurie Simpson - http://minickandsimpson.blogspot.com/ Vanessa Goertzen - https://lellaboutique.blogspot.com/ Stacy Iest Hsu - https://www.stacyiesthsu.com/blog/ Janet Clare - http://janetclare.co.uk/blog/ Jen Kingwell - www.jenkingwelldesigns.com/blog Joanna Figueroa - https://blog.figtreeandcompany.com/ Lets get started with Moda Blockheads 3! Our first block is designed by Corey Yoder and is called "Star Chain." I mentioned in my posts before that I was going to use Thatched basics for making my blocks. This first block is using Crimson 43 for the background red. Outer center triangles are Rose 13. Dark pieces are Cranberry 118 and the light pink is the Thatched print that went with Dandi Annie. I'm trying to do my blocks in both Thatched-only and in Thatched mixed with prints from some of my collections. The first block I made was the purely Thatched one and I had a few stumbles along the way. For the second block with the prints I READ THE DIRECTIONS and was able to make a more accurate block. 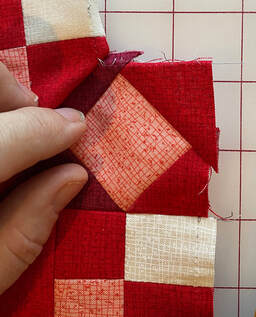 I found it hard to know where to line up my triangles for the center point when adding them onto the diamond square. I have to admit I often like to take the short route and I don't pin much. My "guesses" on mid point when adding the second triangle sometimes left me with uneven pieces and sides for sewing seams. Perhaps I could have found some tips by googling it or something, but I resolved my issue by finger pressing two sides of the square in half, and the long end of the triangle in half, before joining either. That way, once the first triangle was added, I already knew where the triangle and square center point was to line up the next piece accurately. AND since I ended up ironing out the finger presssed crease after attaching the first triangle, I decided making a pencil mark was a better way to mark the square. This gave me a MUCH better result with even edges. With the second block I also followed Corey's arrows to show which direction to press the block pieces. The entire block lined up well when I finally followed those instructions! However, I still added one whole row to the top upside down and had to rip that out and flip it to the correct side. I figure I'll make all my errors on the first blocks, right? Somehow I have a feeling I will be friends with my seam ripper numerous times as I embark on this journey. But that also means I am learning and stretching my skill set to new levels. I think it a universal understanding of quilters that mistakes, um, I mean "opportunities" help to make us better quilters. Check back next Wednesday for my Thatched and Thatched/scrappy blocks for week 2. If you want more info on my colors and my overall plan, check out yesterday's post My Plan for Moda Blockheads 3. And visit the other Blockheads 3 designers to see their blocks and progress too! Corey Yoder - https://corianderquilts.com/
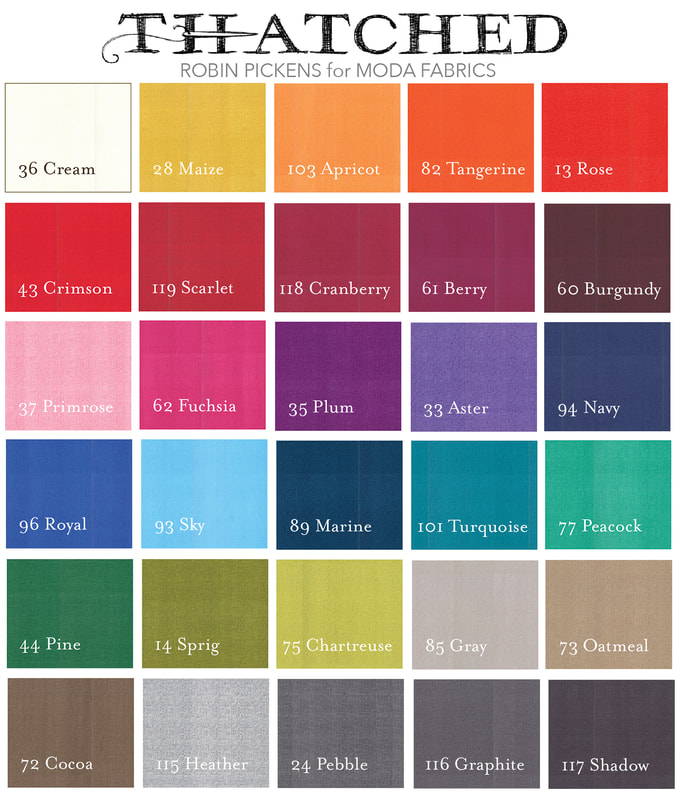
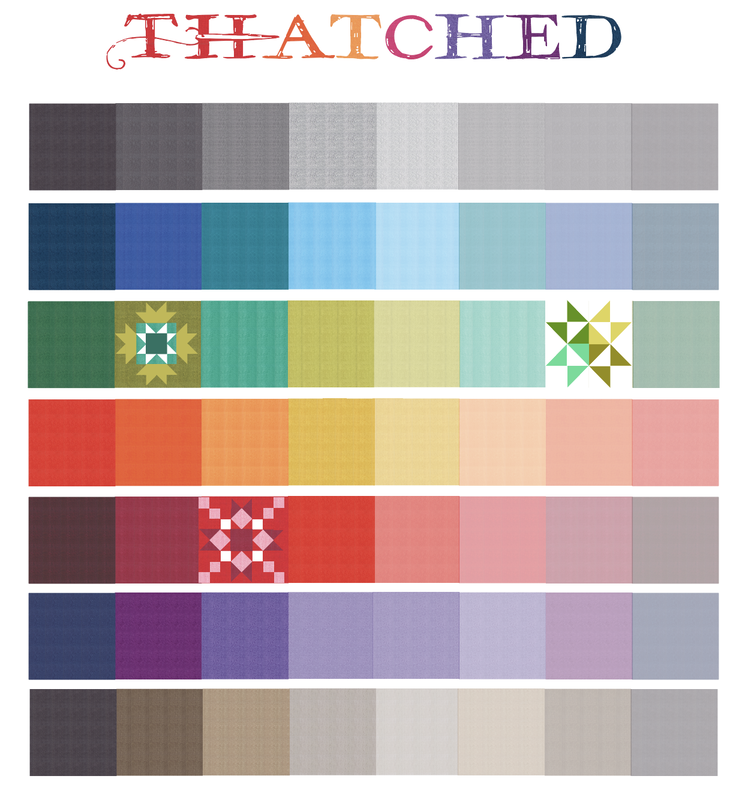
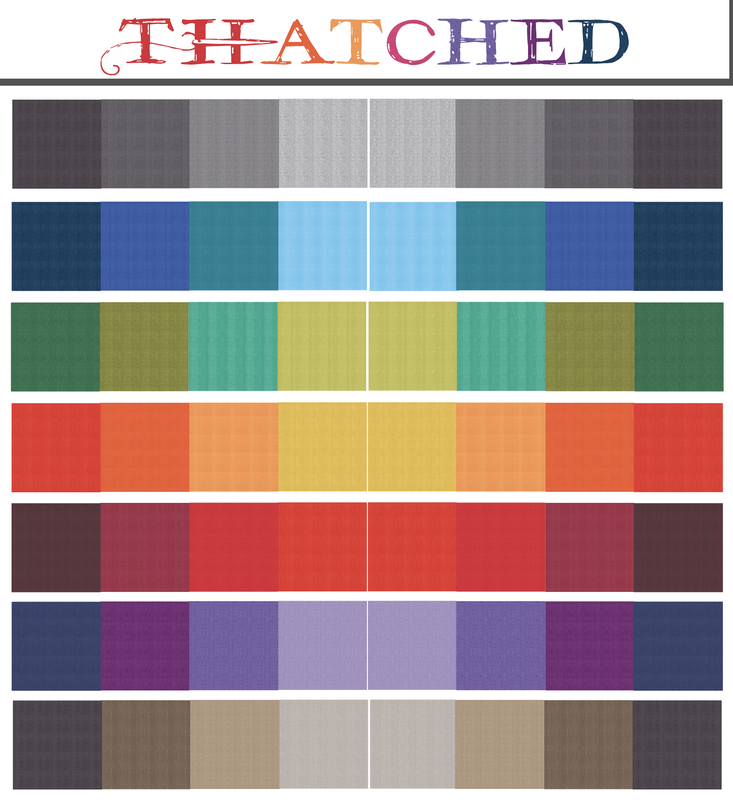
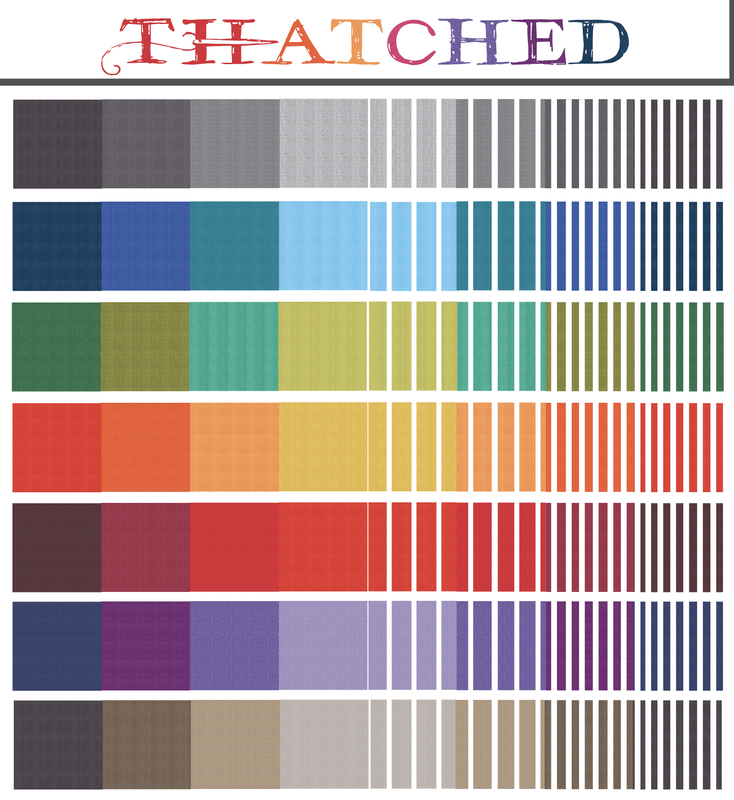
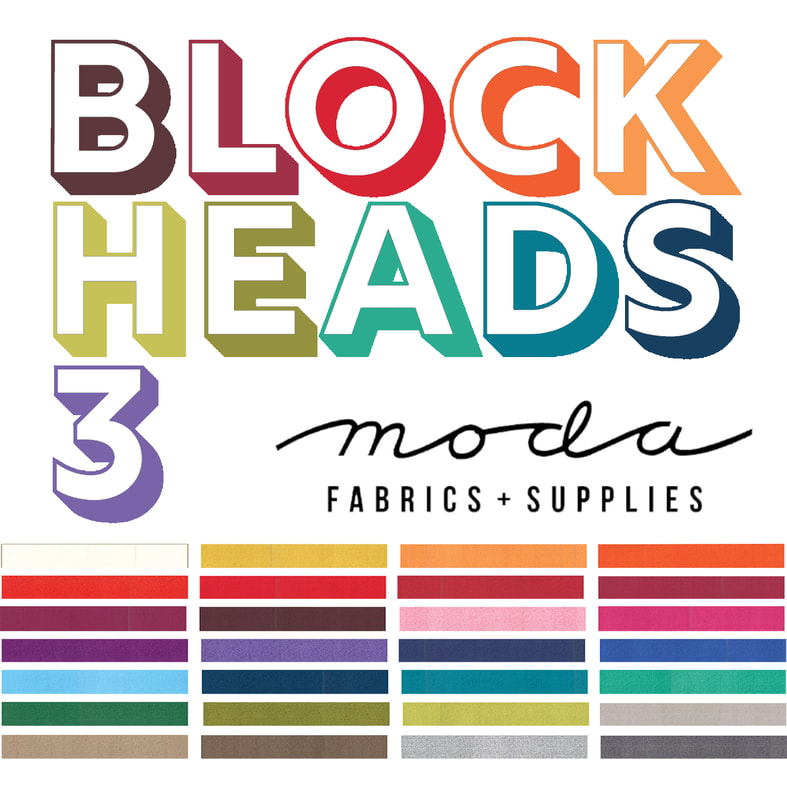
Sherri McConnell - https://www.aquiltinglife.com/ Betsy Chutchian - http://betsysbestquiltsandmore.blogspot.com/ Jan Patek - http://janpatek.blogspot.com/ Brigitte Heitland - https://www.brigitteheitland.de/blog Lisa Bongean - https://lisabongean.com/ Lissa Alexander - http://modalissa.com/ Laurie Simpson - http://minickandsimpson.blogspot.com/ Vanessa Goertzen - https://lellaboutique.blogspot.com/ Stacy Iest Hsu - https://www.stacyiesthsu.com/blog/ Janet Clare - http://janetclare.co.uk/blog/ Jen Kingwell - www.jenkingwelldesigns.com/blog Joanna Figueroa - https://blog.figtreeandcompany.com/ Moda Blockheads 3 has a variety of options for you. Options on the size of blocks you are making. Options on layouts for overall quilt. Of course, options of whatever fabric you decide to use for it. Sometimes I find giving myself boundaries and a plan will make it easier for me to move ahead on a project. With that in mind, I decided to make a plan for how I was going to approach the mystery blocks ahead. Since I am using THATCHED basics for my fabrics, I have a color palette mapped out. I could limit my choices down to a specific color family or a small group of colors, like blues and greens. But I want to have some fun color exploration with this whole rainbow of colors that Thatched provides. I am using 28 colors for my color map and I'll be including some of the colors that are in other collections, like Abby Rose with the seafoam blue and warmer light pink that are in the Thatched texture. I am hoping a few of those make it into the basics group that gets reprinted. If we are doing 56 blocks, that divides nicely into rows of 8 blocks. Seven rows of 8 blocks each. I am making my rows by color families- purples, warm gold and orange, reds, grays, etc. I am planning on separating the rows horizontally with a white sashing strip so it really reads as a row of color. The image below shows a lot of white lines to the right. No, I'm not piecing a bunch of white strips in. But I am showing this to try to illustrate the idea I have in my head. I'd like to make the blocks go from dark to light by using dark to light colors in the block pieces. Once the blocks get halfway over, I plan on incorporating more white/cream background into the blocks to lighten them even more as they progress towards the right end of the row. So the lines below represent blocks that have more white pieces with less color pieces. I don't know if it will work the way I envision it in my mind, but that is the fun of blocks. You can always rearrange it later, as long as you haven't joined them together, block to block, yet. I will be making 8" blocks. I thought it was easiest for me to pick a size and work in just that size. I loved the look of the varied sizes last year, but since my plan is so based on rainbow lines, I thought a consistent size would be easier to organize. If I were to make the 12" blocks I'd have a nice bed sized quilt. With the 8" blocks I'll have a nice wall or lap quilt, approximately 64" wide and 62" tall (depending on how big those sashings are and if I add an outer border). I'm thinking this would be nice on my foyer wall and this seems like a good size. One other thing in my plan...I am going to try to make two quilts as an exercise in the color study of Thatched. One will be completely Thatched. The other will follow the same color scheme but mix the Thatched as background fabric with some of the prints from my collections. That way I can have a better idea of how Thatched plays as a support for prints vs as a "solids" quilt. That's it for the parameters I have given myself and what my method is. I hope this helps you to plan your own course of attack.
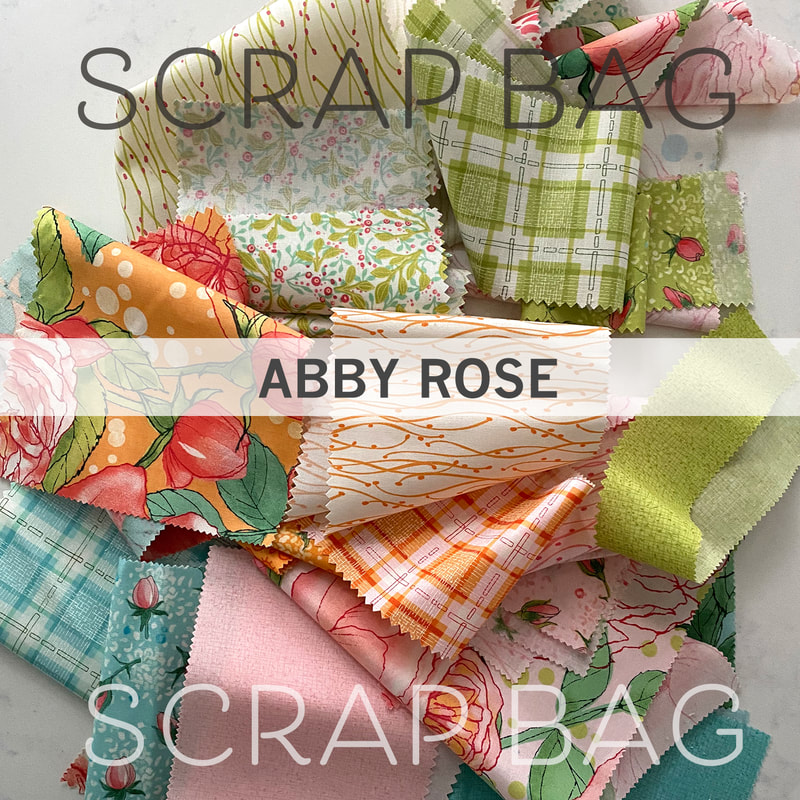
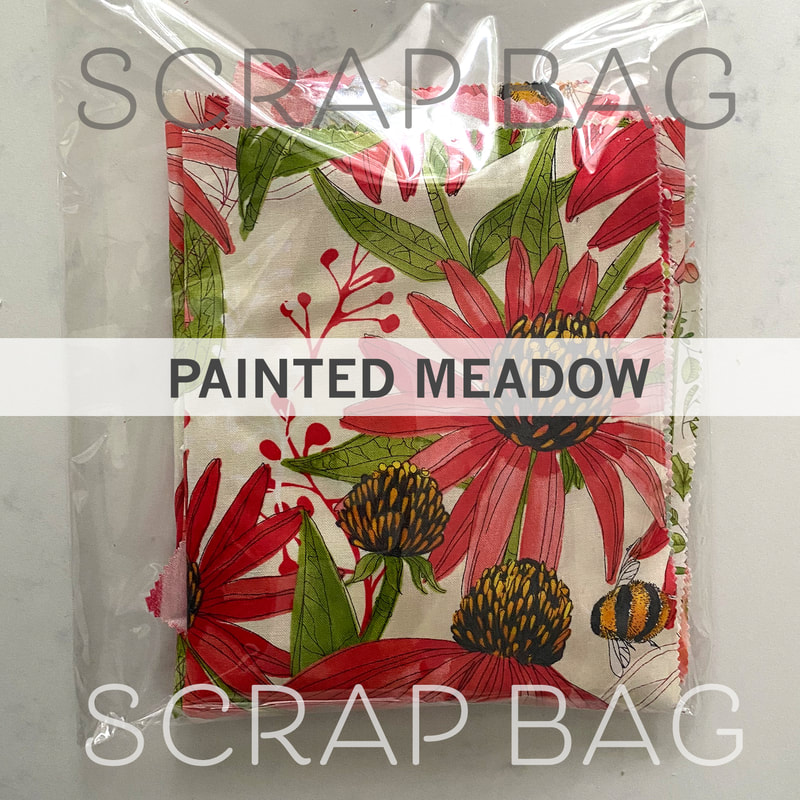
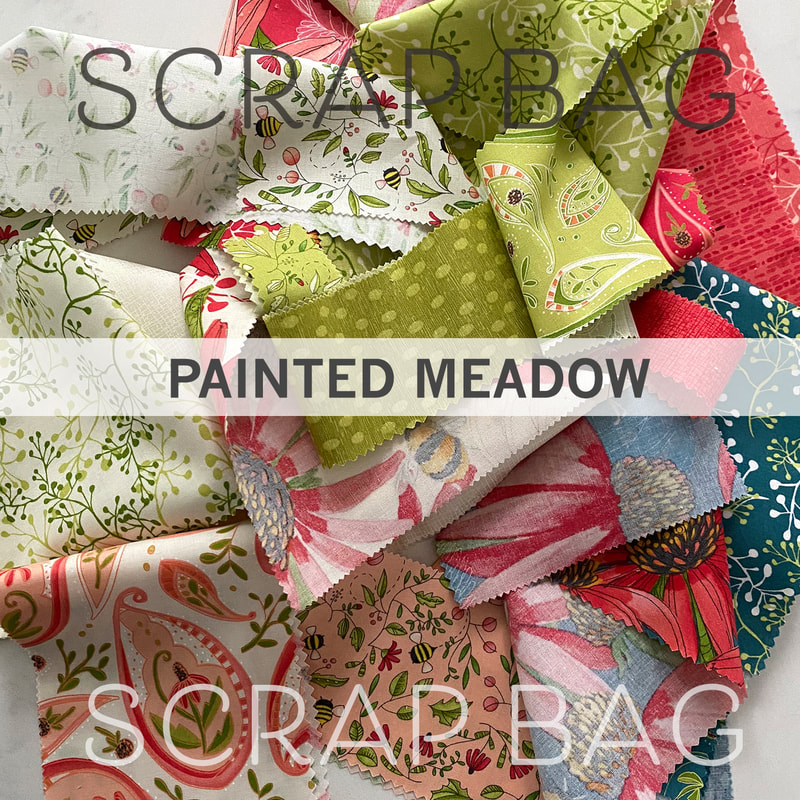
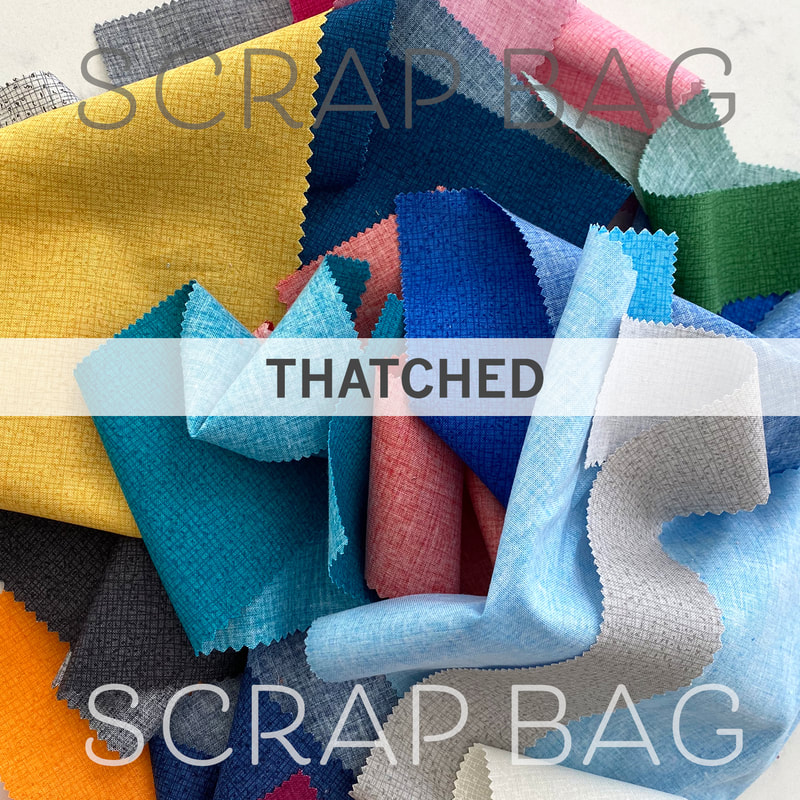
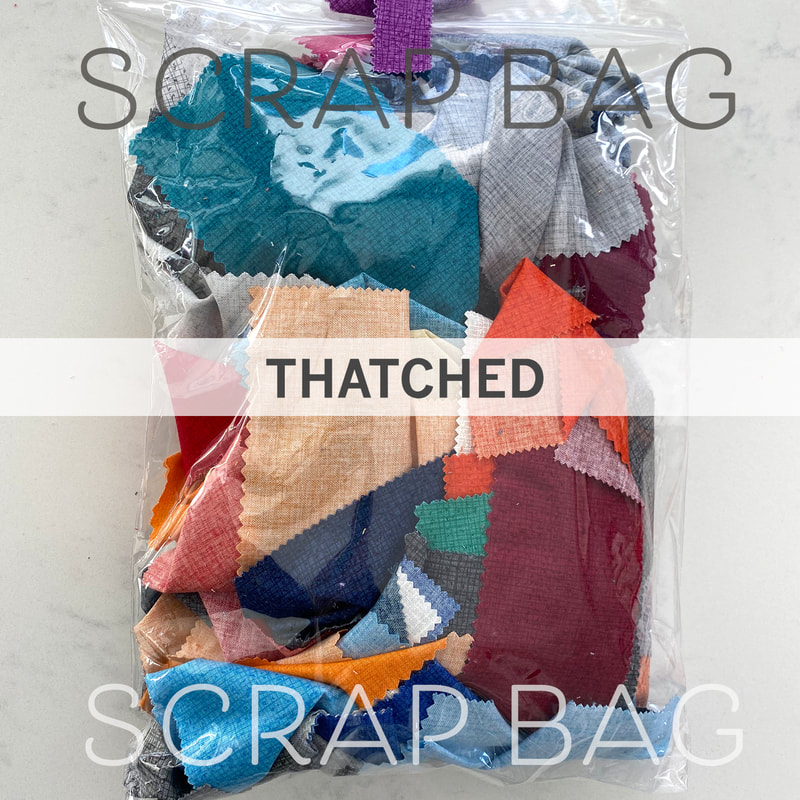
Its starting tomorrow! Are you ready to play with fabric in Moda Blockheads 3?! Scrap bags provide nice fabrics for doing scrappy projects. The sizes range and there are not always all the fabrics in a collection, but there is still a nice cohesiveness to having scraps that coordinate from a collection. I've got a limited number of bags up on my shop. Scrap bags weigh over 1/2 lb. (approximately 10.5 oz!) with scraps of cotton quilting fabrics from the Abby Rose, Painted Meadow, and Thatched collections. Not all the fabrics from a collection are included. Pieces range from 1 1/2" wide to 5" wide and about 12-12.5" long. If you are joining Moda Block Heads 3 and want some filler fabrics to add a scrappier look, think about scrap bags for an easy way to add variety to your stash.
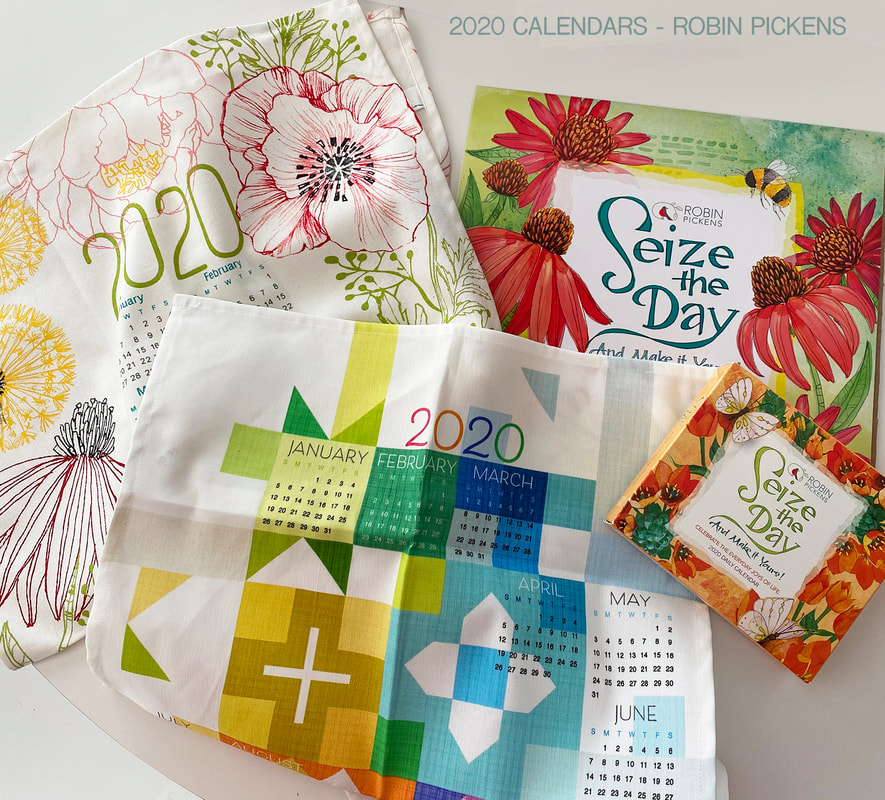
HELLO 2020! I have a couple things I'm putting up in the house that are specifically for this year. Yes, calendars! Both print calendars (wall and daily) and calendar tea towels (at quilt shops or spoonflower).
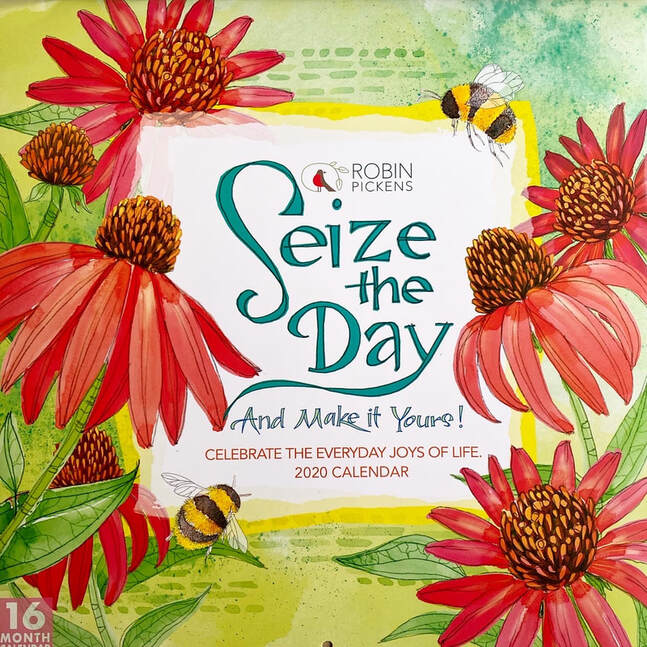
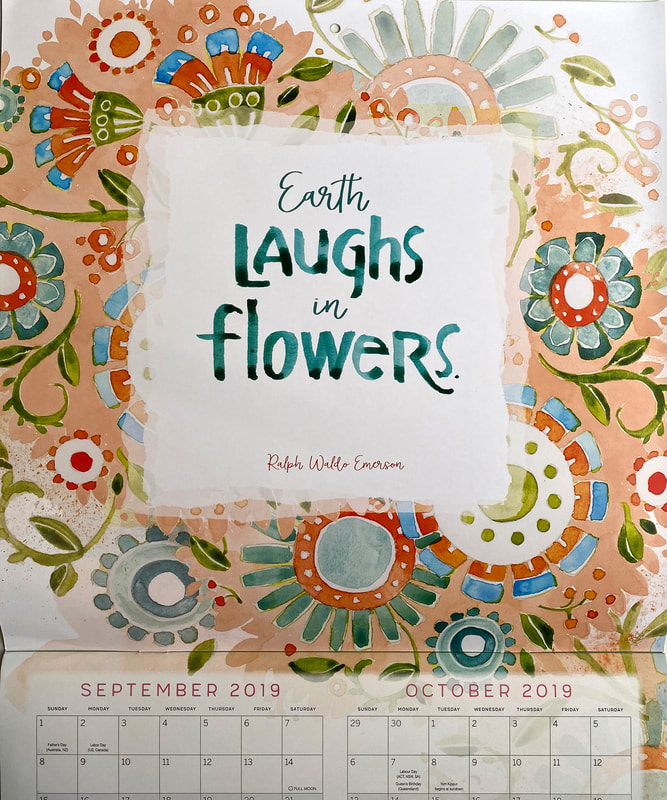
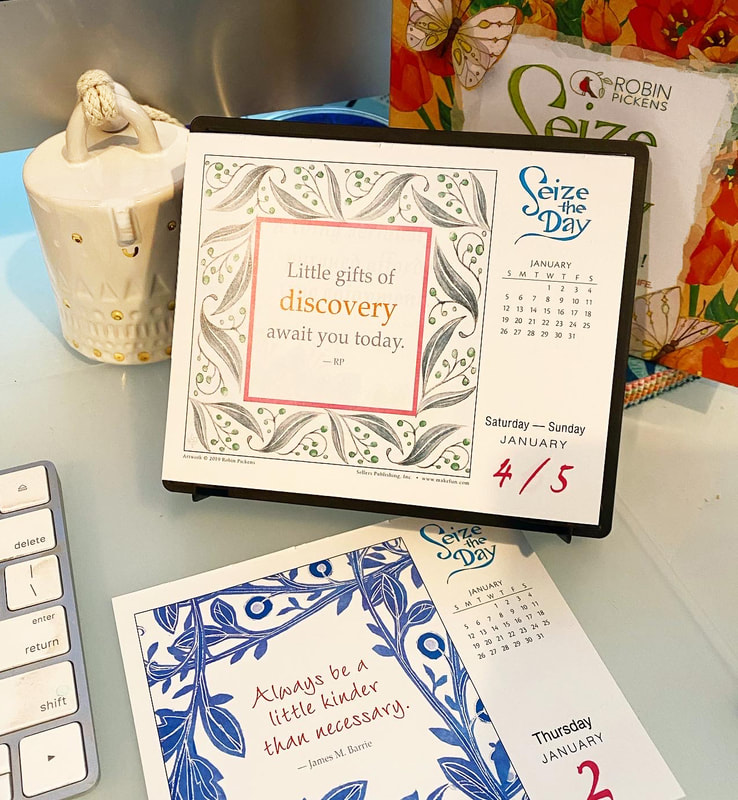
I have been creating artwork for the Seize the Day line of calendars with Sellers Publishing for 10 years! My first ones were for 2011 but that means I was working on artwork in 2009 to get in for printing in 2010 to sell for 2011. I just finished up my artwork for the 2021 calendars and got it all sent in last week. You can probably understand why I sometimes get confused about what day it is or even what year it is!
There has been a lovely correlation for the past few years between my fabric lines and my calendar artwork and covers. It hasn't been intentional to make a cover that is an upcoming or existing fabric line, but the two often overlap and compliment each other. I'm so pleased that Painted Meadow is being used to sew with now and still in shops while those perky coneflowers and big fat bumble bees are buzzing around my calendar for 2020.
The first page of the calendar gives a grid of September-December of the previous year, so you can start using it early to transition into the new year. Since I have my calendar from the year before up till December 31st, I skip over using this and I usually feel that this page is a little forgotten in my studio. So maybe if I share it here it will have more life and space to shine.
The desk calendar has tear off pages for the days of the week (Saturday and Sunday share a page) with a variety of quotes and images. I save my pages to write notes on the back. I'd like to say I find all those quotes myself but I don't. The folks at Sellers Publishing find lots of great sayings and sentiments to fill your days with inspiration. I find ones for the wall calendars and a few daily but they put in a lot of effort to fill those pages with daily optimism. Thank you Sellers Publishing!
Side note: where to buy Seize the Day- Barnes and Noble often carries them, I spot them in places like student bookstores on college campuses and sometimes office supply places. I'm curious...would you buy this at a quilt store if they carried them?
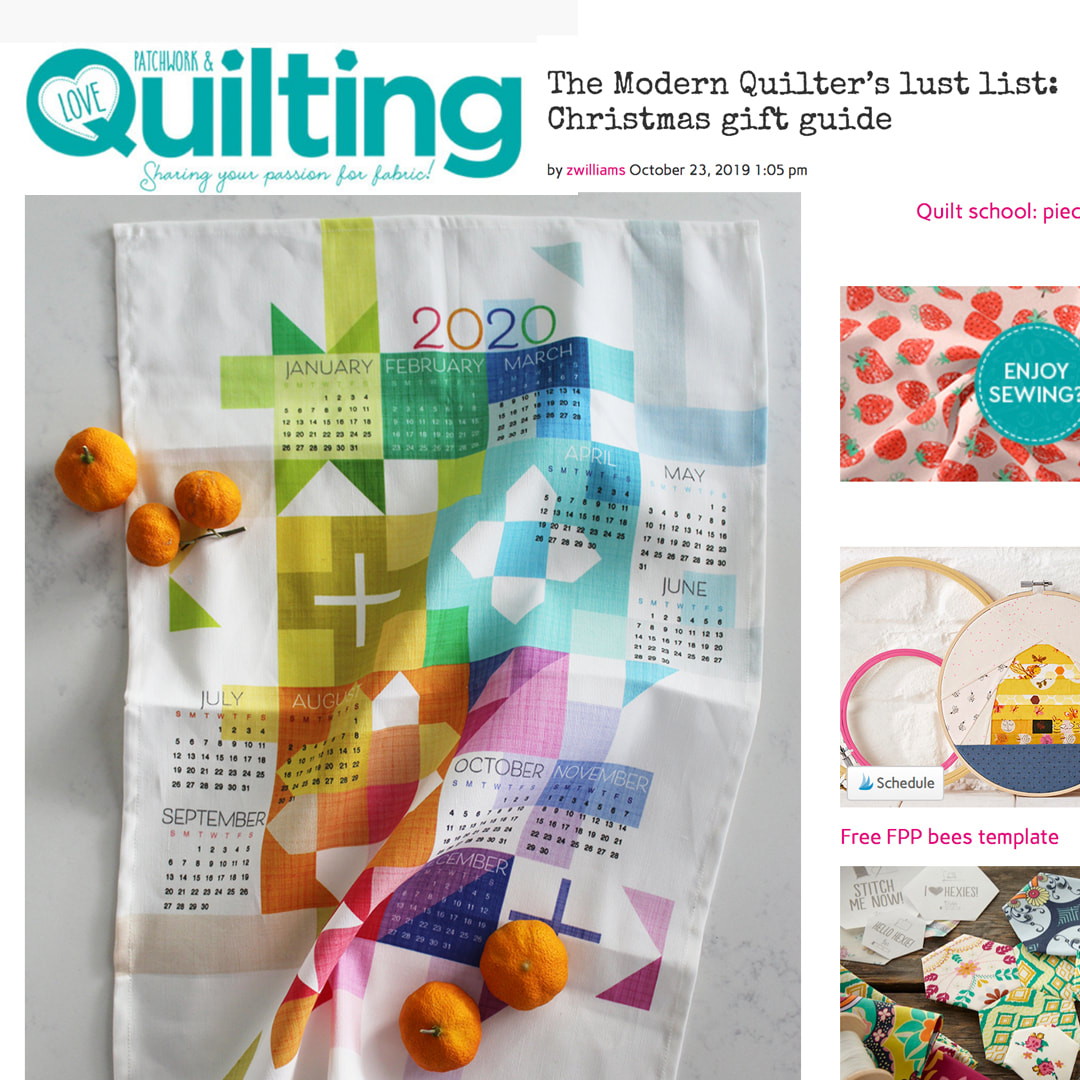
And then there are calendar tea towels! I started doing these through the spoonflower competitions each year. As the competition draws close I update the previous designs to the calendar grid and year of the new year coming and I work on a new idea. This year I decided to work with the quilt theme and I created "Sewing Up the Year" tea towel.
Here it is in the Love Patchwork and Quilting Holiday Gift Guide. It makes a nice gift for the quilters in your life. I will be updating this towel each year to reflect the calendar for the coming year (usually around October or November)
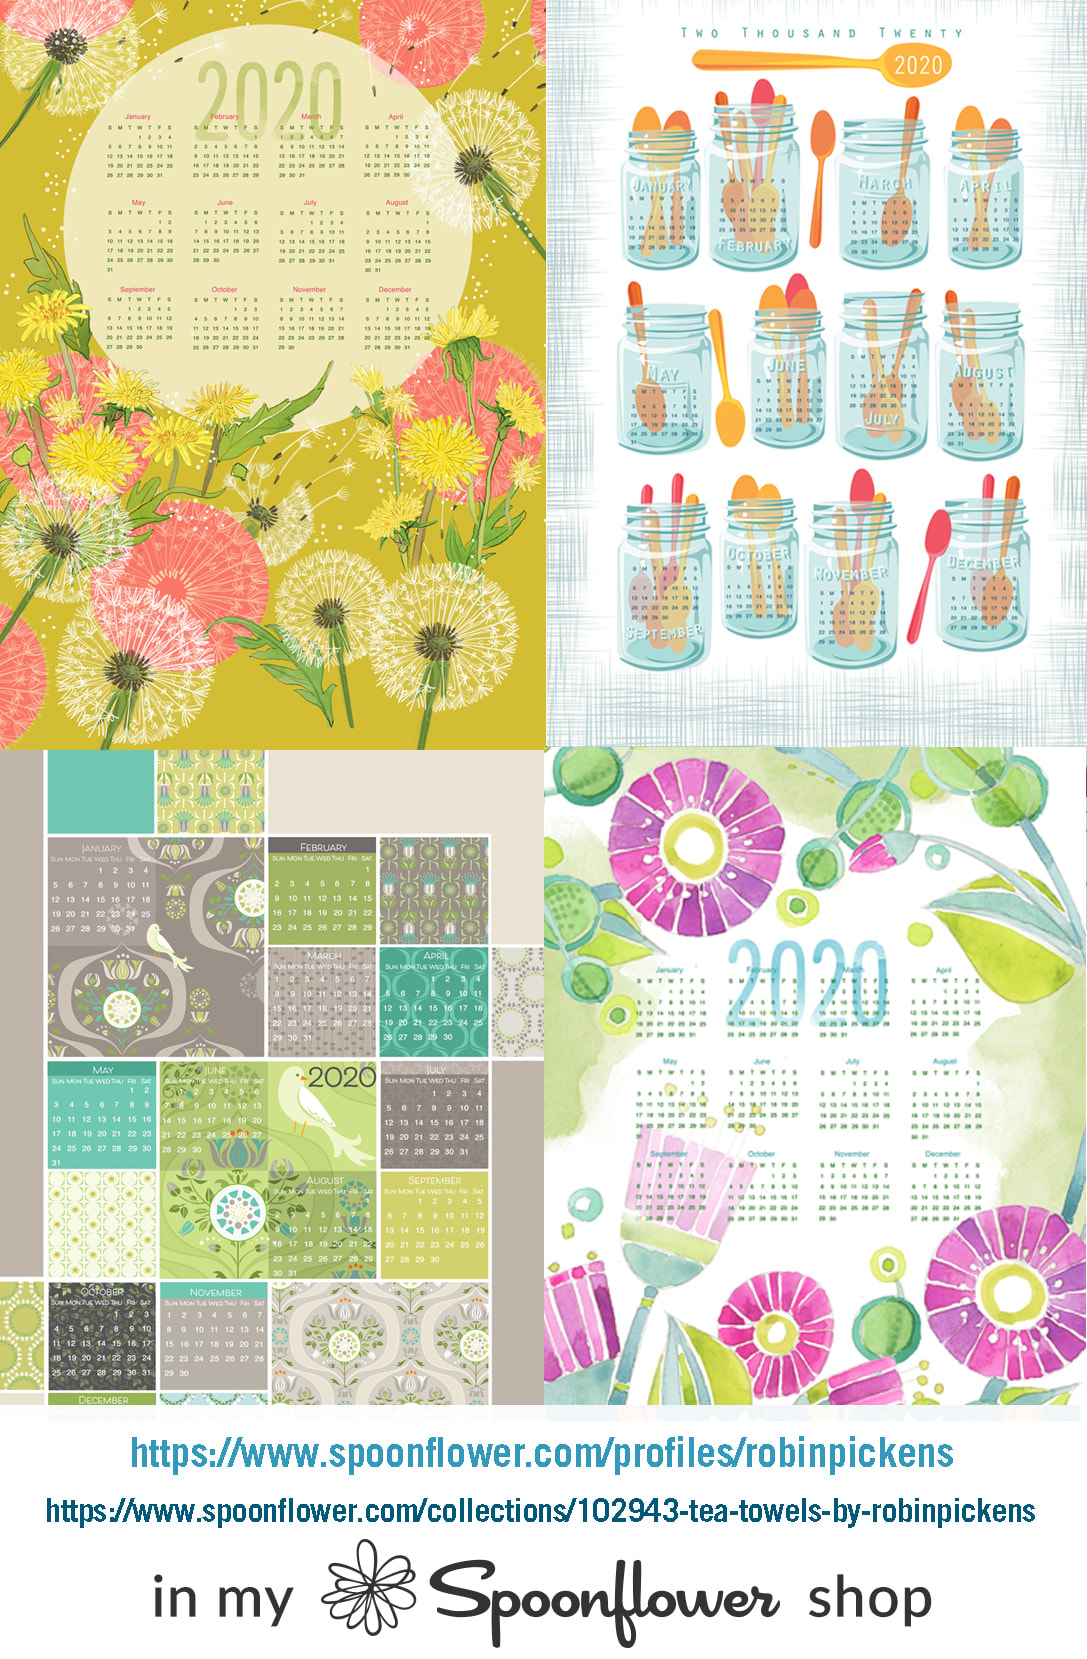
A few more tea towels in my shop- calendar themed. There are non-calendar as well and you can check the tea towel collections on my shop page. All of the spoonflower tea towels fit on a fat quarter of linen cotton canvas. You can also get towels that are finished (hemmed and hang tag on corner in back) from roostery.com
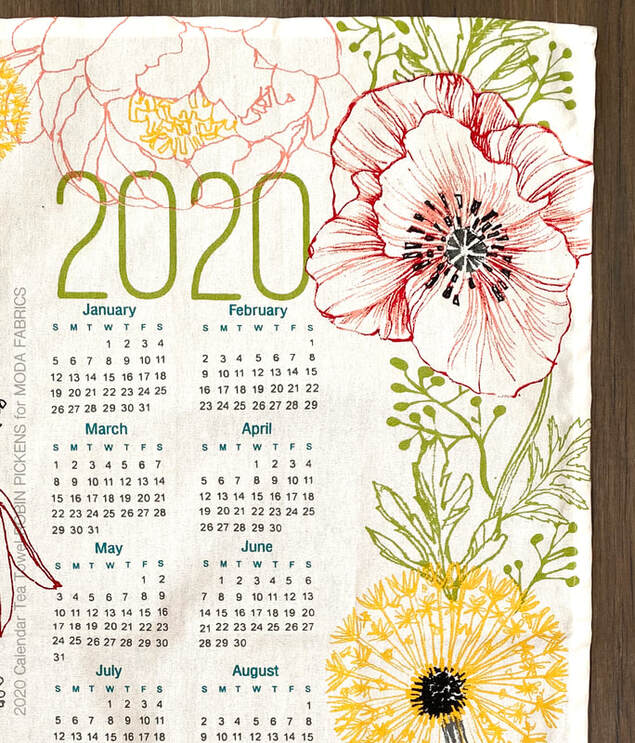
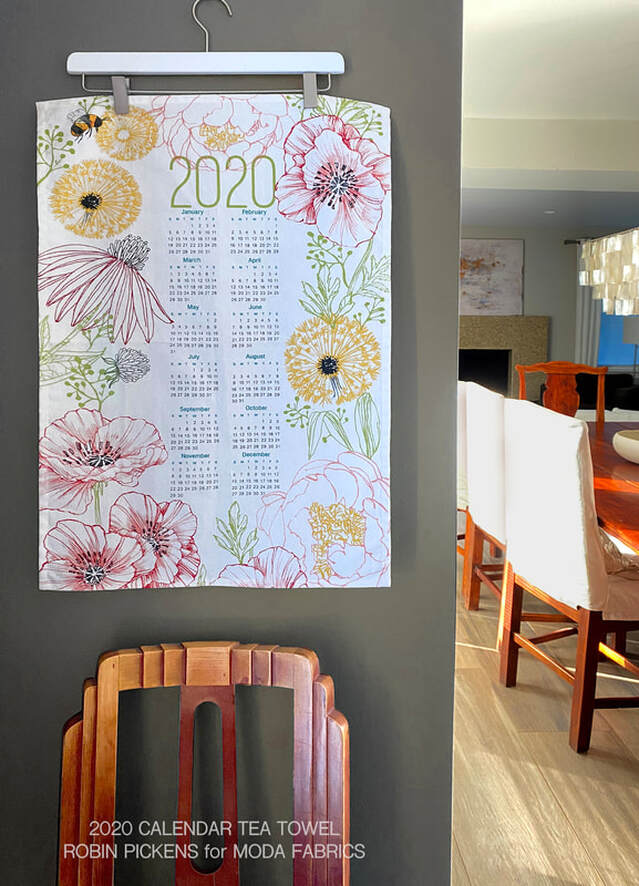
A new item this year has been the calendar tea towel for MODA FABRICS. I designed one for 2020 that used the drawing lines from a few of my collections to make a lacy illustration of florals around the calendar grid.
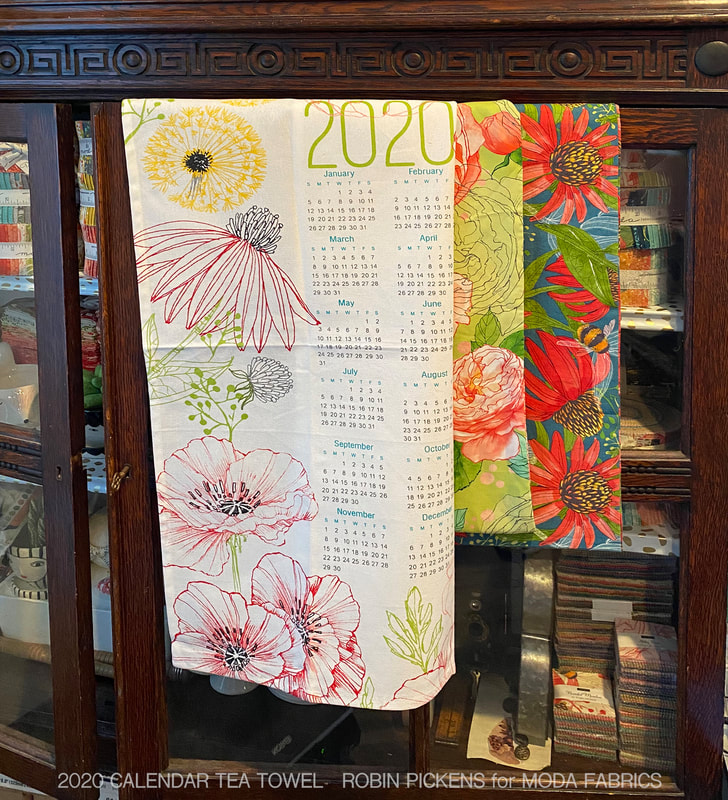
I keep mine folded over a glass door on an antique cupboard in my office. I like to see the contrast of how the linear flowers go with the prints from my collections. Here it is with scarves from Painted Meadow and Abby Rose.
These tea towels with MODA FABRICS are exclusive to MODA and quilt shops. Give some love to your local quilt shop- we need and love them! I know my local shop was carrying them but they have sold out so if you are a shop owner and have these in stock, please comment and let us know so we can send folks your way!
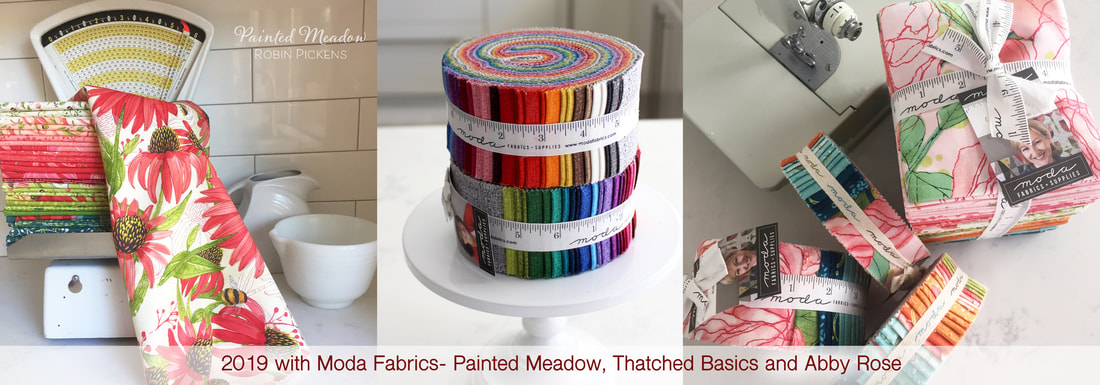
I hope you are as excited for 2020 as I am. It already promises to be filled with lots of activities and shows- which is even more reason why I've got to start getting it entered in my calendar! Well, at least I'm hoping it is! We are a few days into 2020 and I am not a huge one for making resolutions but I am big on setting some goals when New Years time rolls around. It is a logical starting place for reviewing and resetting and planning what I want to accomplish in the coming year. Wait, that sounds kind of like a resolution, doesn't it? Ah, but for the reviewing... When I look back at 2019, I've got to admit it was a good year for me. Perhaps one of the biggest things that happened is I had two surgeries to have hip replacements. One in January and one in June. I had no cartilage left at either hip, being bone-on-bone. I couldn't stand up straight and walking was getting unbearable. It is a gradual change, accompanied by a lot of denial, that happens with arthritis. It is hereditary for me so I was very familiar with seeing my mother and sister go through it. But it is still scary to face surgery and change yourself. See that hip with the bone smashed up against it? (pic on the left) That is the NO cartilage pic. There were lots of bone spurs. Ouch. And lots of arthritis. More ouch. The pic on the right shows my fabulous bionic hips now! It is hard to express exactly how life-altering or "giving my life back to me" this has been. As a quilter, before the replacements, I couldn't stand much to even cut fabric at my cutting table. It was hard to manage a suitcase and getting through an airport to go to Quilt Market. My dear husband came to spring market to manage the bags and put up my quilts in my booth. I would not accept offers to travel to teach- it was just too painful. I didn't even want to walk through a grocery store. I had planned to go to Quiltcon as an attendee in February, thinking I'd be better after the first hip, but I had to cancel when I didn't have travel clearance from my doctor yet. After both surgeries and physical therapy, I was thrilled to go to Quilt Market in the fall and be able to STAND STRAIGHT and walk like a normal person. I even danced at the Moda Fabrics customer appreciation party! I feel so fortunate to live in a time where we have the knowledge, experience and ability to improve our lives through medicine and surgery this way. It is hard to fully express how much this has improved my life. If 2019 was the year of me getting my hips (and life) back, then 2020 needs to be about continued learning about joints and what types of daily behaviors, diets, and practices can help to extend the life of the rest of the cartilage in my body. After eating WHATEVER I wanted, WHENEVER I wanted, over the holidays (which was everything, all the time) I'm back to more structure, eating better and moving/walking more. 2019 was also a fun year for fabric for me, with more blooming color in the house! Painted Meadow debuted at the Spring Market in Kansas City, Thatched was released over the summer, and Abby Rose was my fall Market colletion (for release in early 2020). I haven't shown much of Abby Rose here but will do it in the next couple of posts! I'm very excited for Thatched since I can blend the colors of the basics line into new collections or just go for quilts that are color studies based on the slightly textural solids.
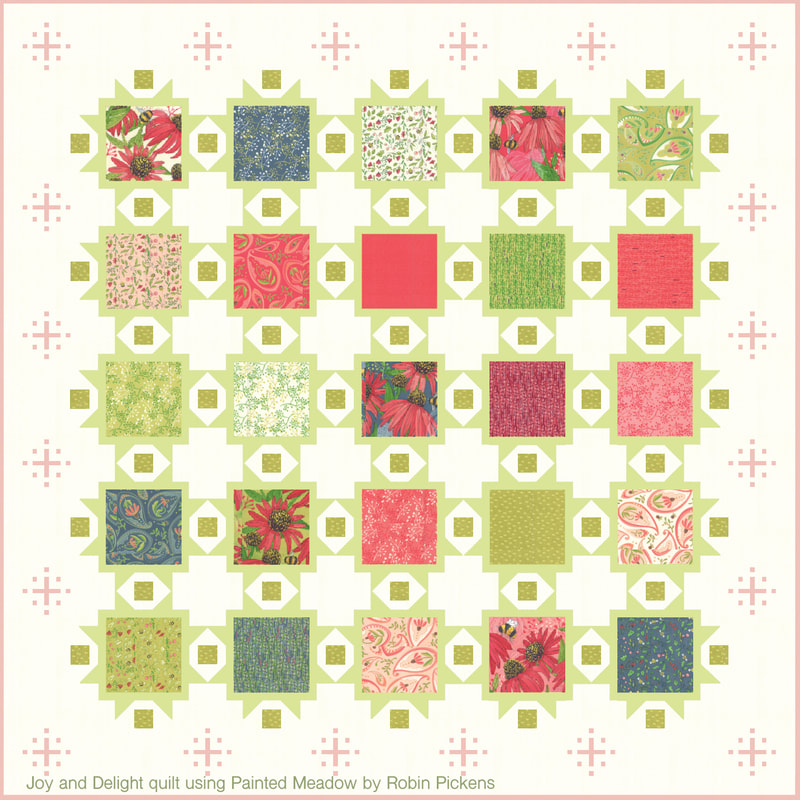
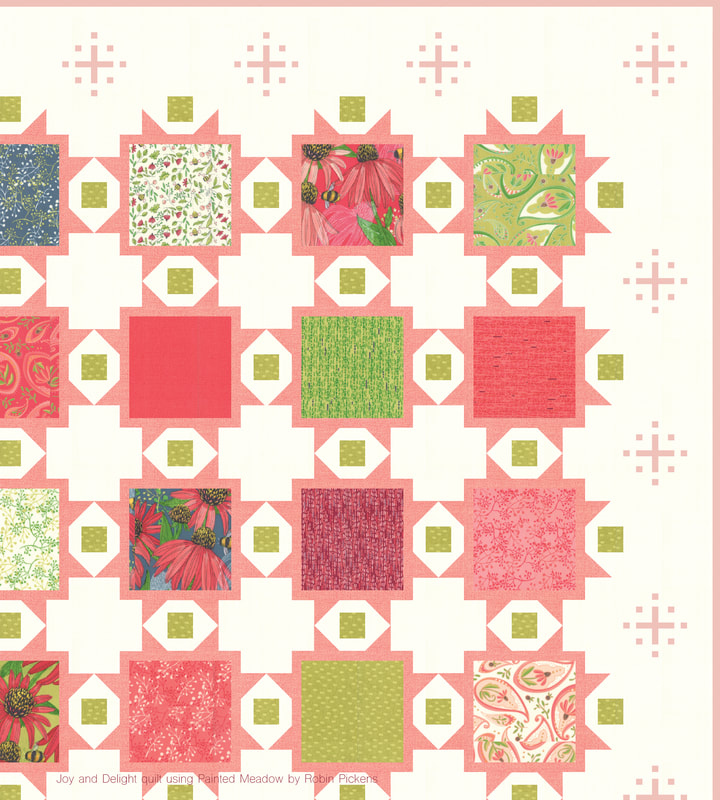
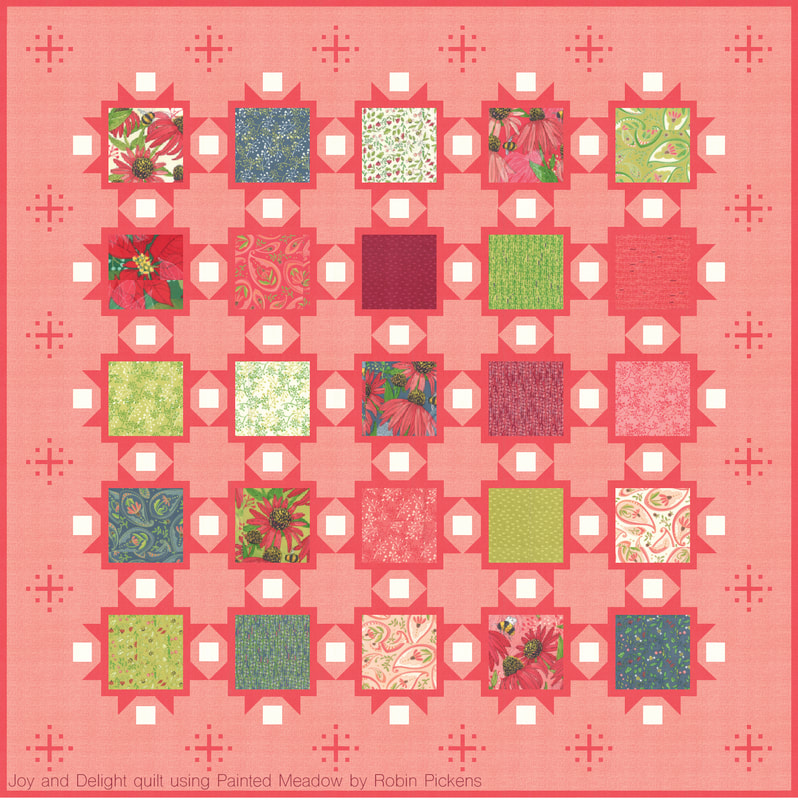
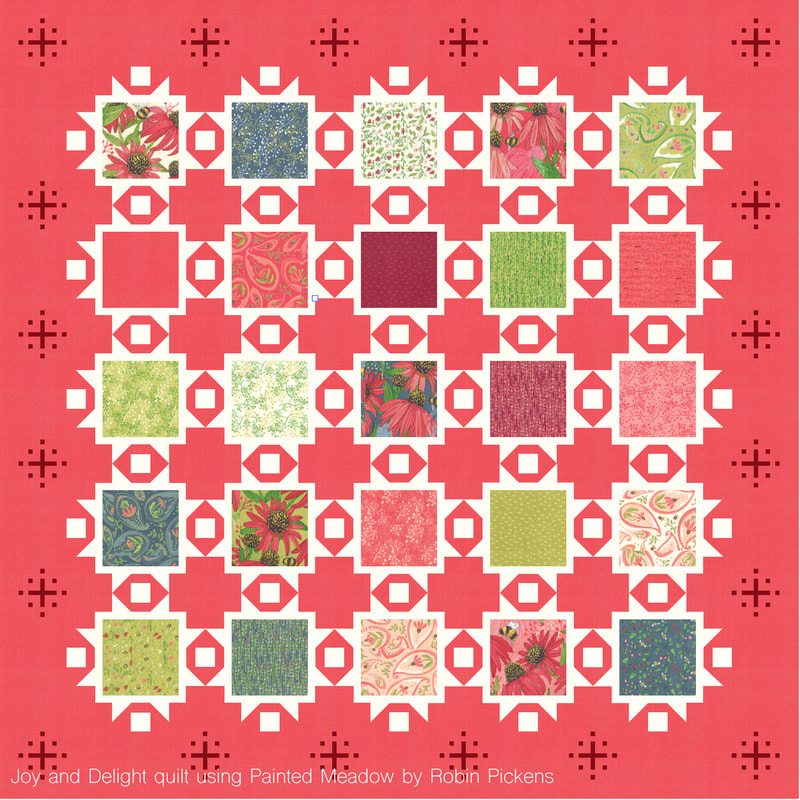
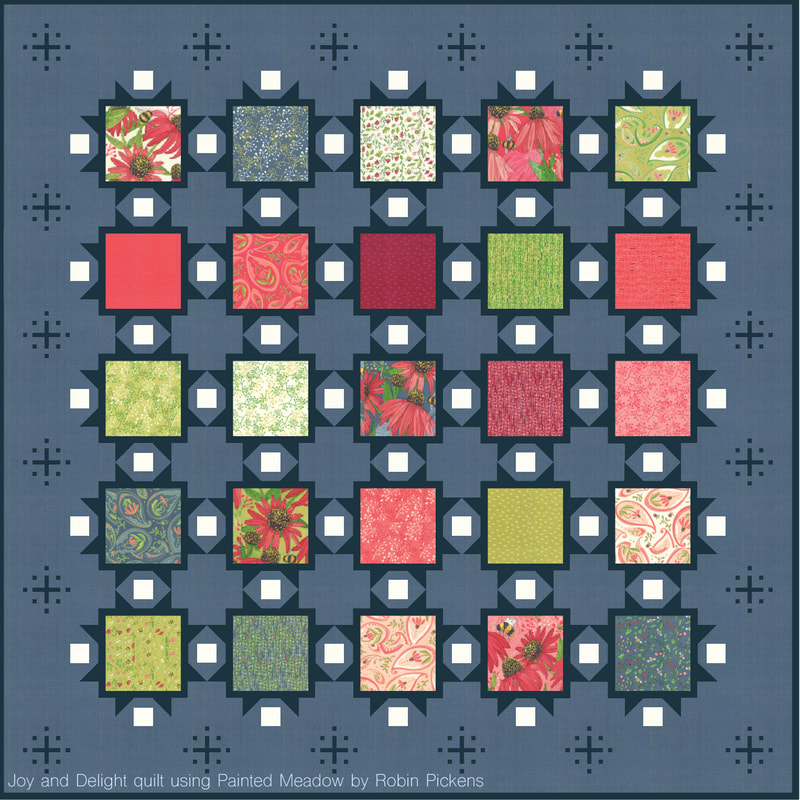
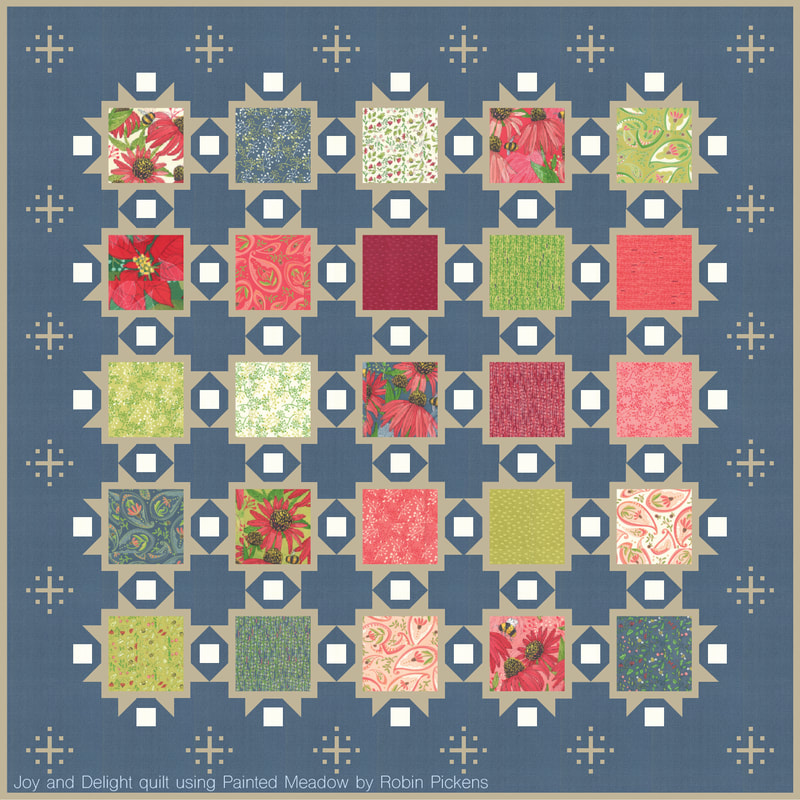
In 2019 I played along/sewed along in three online sew alongs- 100 Blocks 100 Days presented by Gnome Angel and Skyberries, Bowtie Flower Quilt with Quilters Candy, and Moda Blockheads 2. I attempted to do the Meadowland Quilt sew along from Then Came June but I didn't get too far. She's doing it again this year so maybe I can jump in and try to make some progress on that WIP. Speaking of SEW ALONGS... in just 11 days MODA BLOCKHEADS 3 starts! Come join the facebook group and get a link on Wednesdays to the blog of the weekly designer, or check out the Moda Cutting Table blog at https://my.modafabrics.com/tags/blockheads on Fridays. One block a week, lots of community, lots of fun. I'm a designer contributing 3 block designs this year so I'm extra excited! That's all the 2019 big stuff I can think of now. Stay tuned as I'm sure more will pop into my head! Happy 2020 and hoping you have lots of sewing fun in the year ahead. I've had a number of requests for showing Painted Meadow fabric in my Joy and Delight quilt design. I love the ease of the computer to try out a few things so lets have some color and print fun! I designed Joy and Delight with my Christmas collection, Splendid. I showed it with the blocks alternating two prints OR in a version with the large block centers using a Layer Cake for a scrappier look. With this exercise in color play, I'm staying with the scrappy Layer Cake assortment. I'm starting with some of my favorites (I think) because I really enjoy how soft and pretty these can look in this more pastel palette. The above quilt shows the snowflakes in the borders in pink. So now I can feel free to call them sparkle bursts instead of snowflakes. They have a sparkly decorative feeling. Of course you can make this quilt without the border sparkles but I think they do add a layer of twinkle (or pixie dust??) to make those borders feel special. Below is a more close up view to see the softness of the sparkle bursts in a light color. Also the framing around the blocks is shown in pink (below) vs light green (above). A little more exploration of pinks...lighter to the deeper pink. With the lighter pink background I used dark pink framing and border sparkles. When using a darker frame around the blocks, I like to switch the small squares in between to a light color for more contrast and the color sparkle of the white accents (see, more sparkle!). With the dark pink I went back to the pop of the cream frames but made my border sparkles even darker red. I enjoy the more dramatic tealish blues of Painted Meadow and thought it would be fun to see some blue stories. A deep midnight blue frames the squares in this first one. And on this version I wanted to add a soft khaki or light tan for the frames. I think the addition of the neutral natural light tan gives this an entirely different feeling and is a nice compliment to all the color in the blocks. There is something so restful and calm about this color combination. Hope you enjoyed a little color play with Painted Meadow and this helps in visualizing quilt plans! If you are interested in Joy and Delight, it is shown in Splendid in my shop.
Happy sewing! |
About ROBINDesigner of colorful florals for Moda fabrics. Modern to transitional quilt designer. Illustrator, sewist, crafter. I am proud to be a designer for Moda Fabrics!
Shop Robin's DesignsI am an affiliate for Fat Quarter Shop and may earn a small commission through my links. Thank you for your support!
Categories
All
Archives
February 2024
© Robin Pickens Inc. All rights reserved. No images may be reproduced without permission.
|
Proudly powered by Weebly



 RSS Feed
