|
I've got a lot to cover today so keep reading! There is a book giveaway included from Martingale at the end! New block pattern, color studies and book giveaways...sounds like a good Wednesday to me!  I'm very excited to share my block this week "CORNER GARDEN"! This block came out of the leaves in my Bird Talk quilt with a desire to do a simplified floral bloom. I think this block would be adorable in the corners of a pieced border of a quilt, plus it plays off the 4 corners of the block, thus the CORNER part of the garden name. The pattern is here in the gray link box right under this paragraph, but keep reading for color play and a BOOK GIVEAWAY from Martingale Publishers! 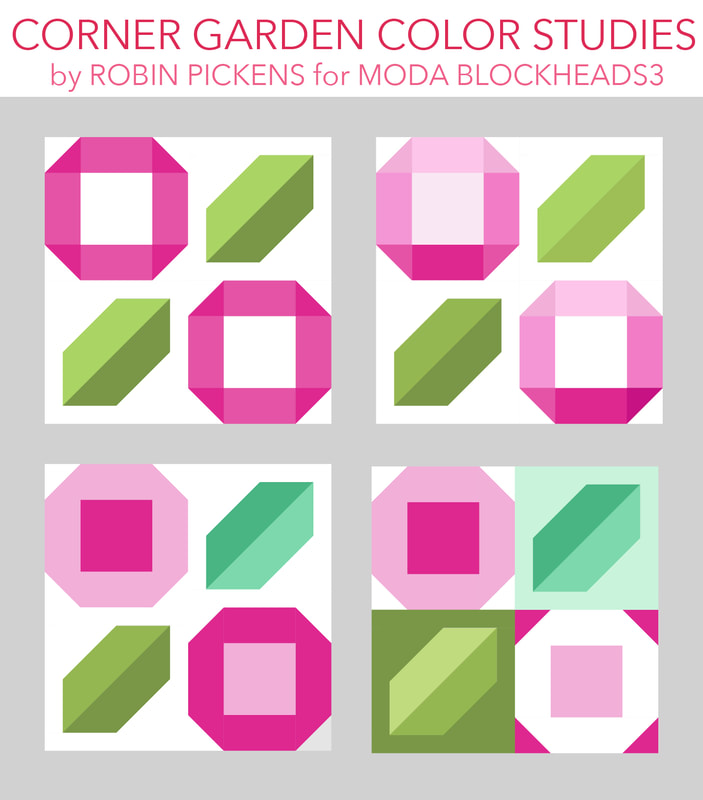 Big square flower blooms and leaves....simple in flat colors or you can try them with a color ramp from light to dark. Change up the colors and contrast from one bloom to the next and switch up the leaf colors. I also played with the negative and positive shapes in the last one, with a change in leaf backgrounds too. 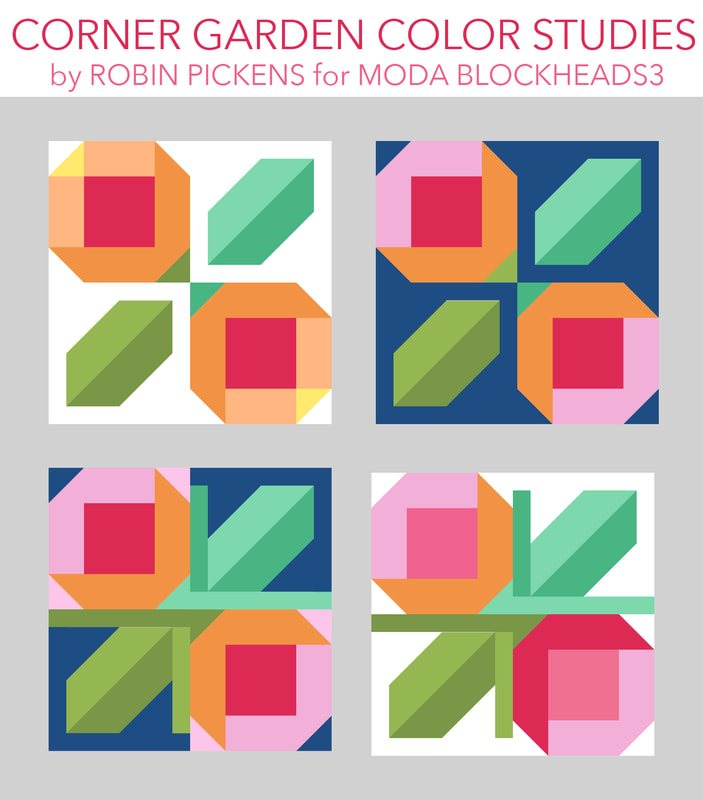 Since the corners of the pattern are made up with stitch and flip squares, why not try greens to the center to make a base for the flower bud with two of the corners? And you can play with varying shades of color to give the illusion of angle and perspective on the flower sides. The bottom images also play with the rectangles that border the leaves. If you make part of those the leaf colors it creates an image of stems weaving together in a flower twist. 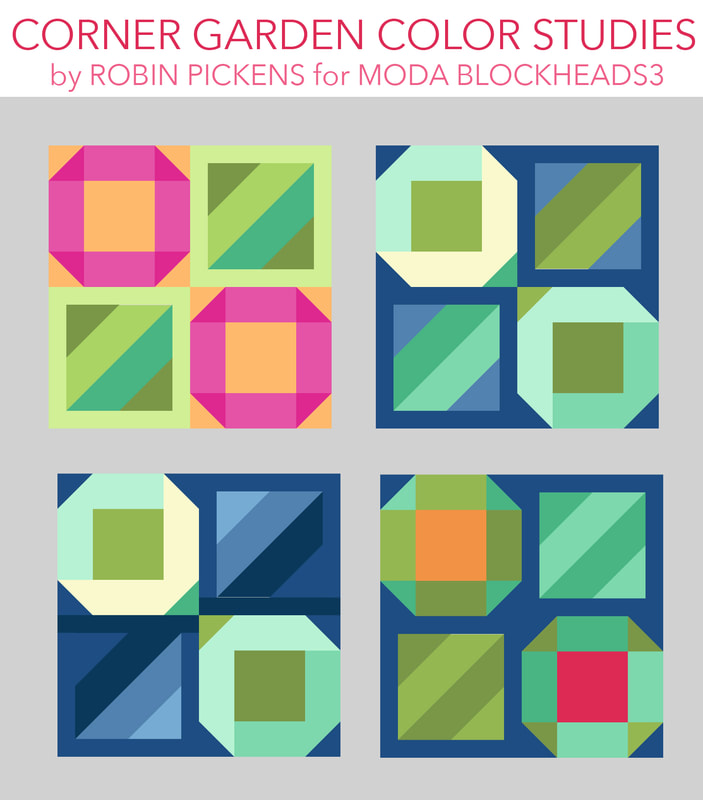 Then I started to break down the shapes to be less literal as flowers, and to emphasize the triangles to the sides of the leaves. They start to look like supergraphic stripes and boxed in angled stripes vs leaves. I also explored a blue/cream/green palette. The last image starts to play off the faceted corners of the octagonal shapes. 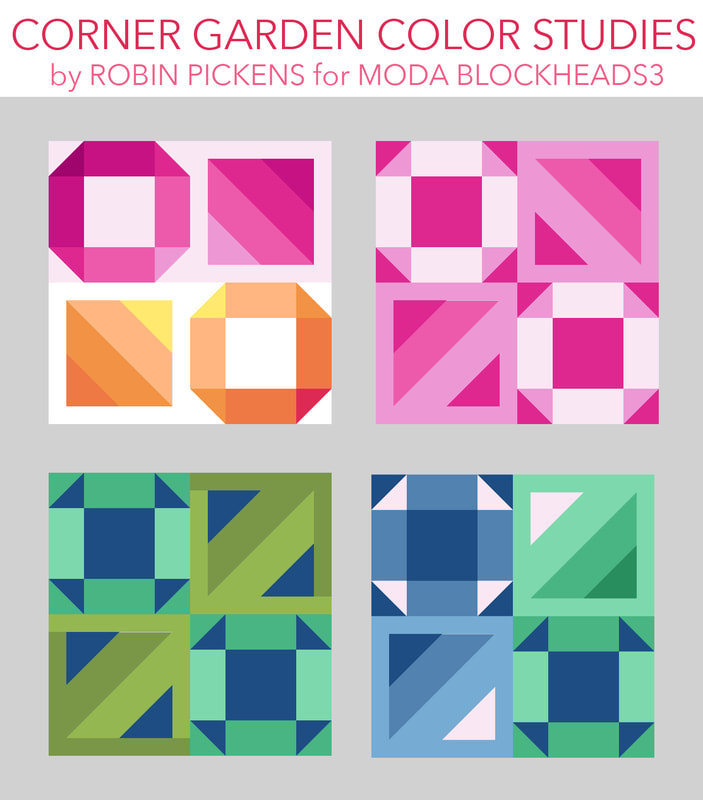 And this last one breaks down the shapes even more to the churn dash idea and graduated stripes. These feel graphic and can work well if you are more focused on shapes and don't want blocks that suggest flowers and literal objects. 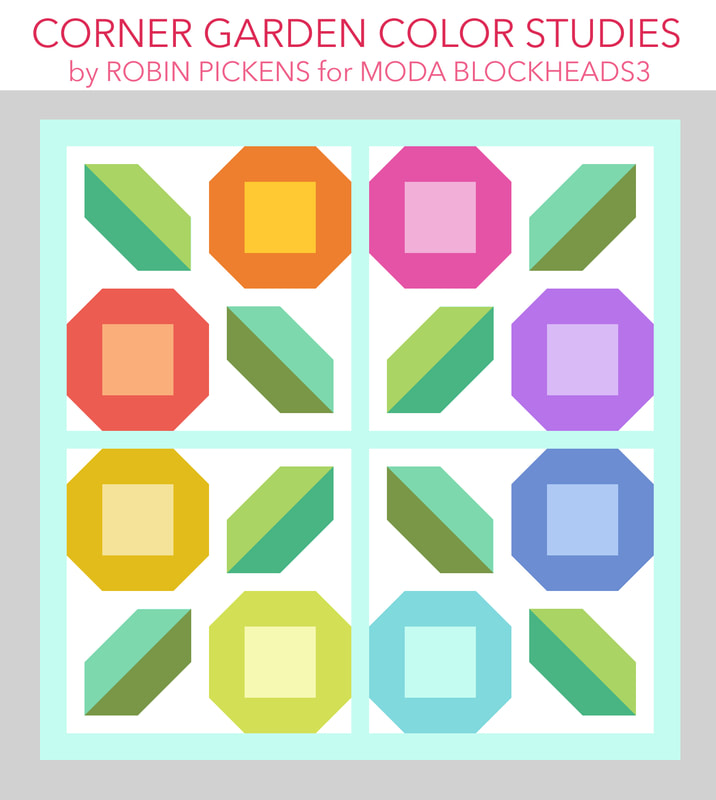 I think this block has lovely possibilities to explore pairs and reflected units, playing off rainbow colors or just simple groupings. 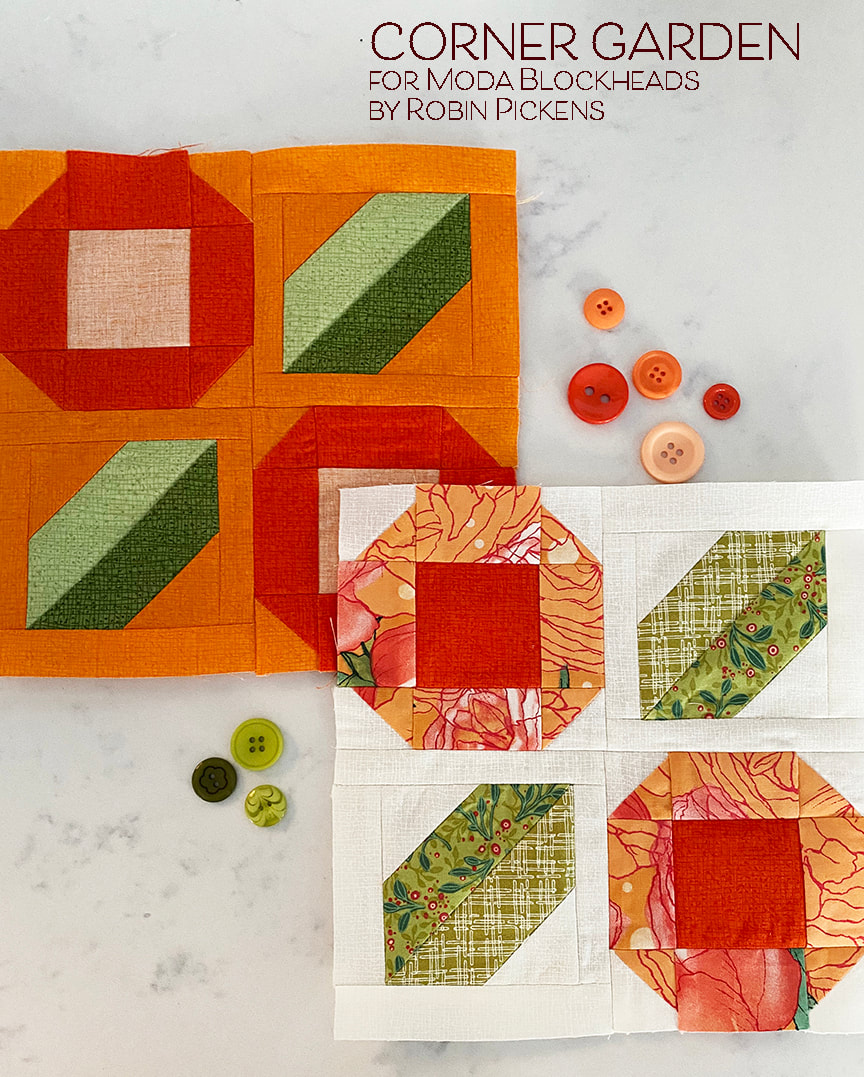 These are my all-Thatched and scrappy versions of Corner Garden. The scrappy one uses Abby Rose and Dandi Annie plaid with Cream and Tangerine Thatched. These are 8" blocks. I tend to make my corner pieces a little larger and trim them down to size. And if all the HST corners are the same, I make my HST with an 8-at-a-time method vs individually. 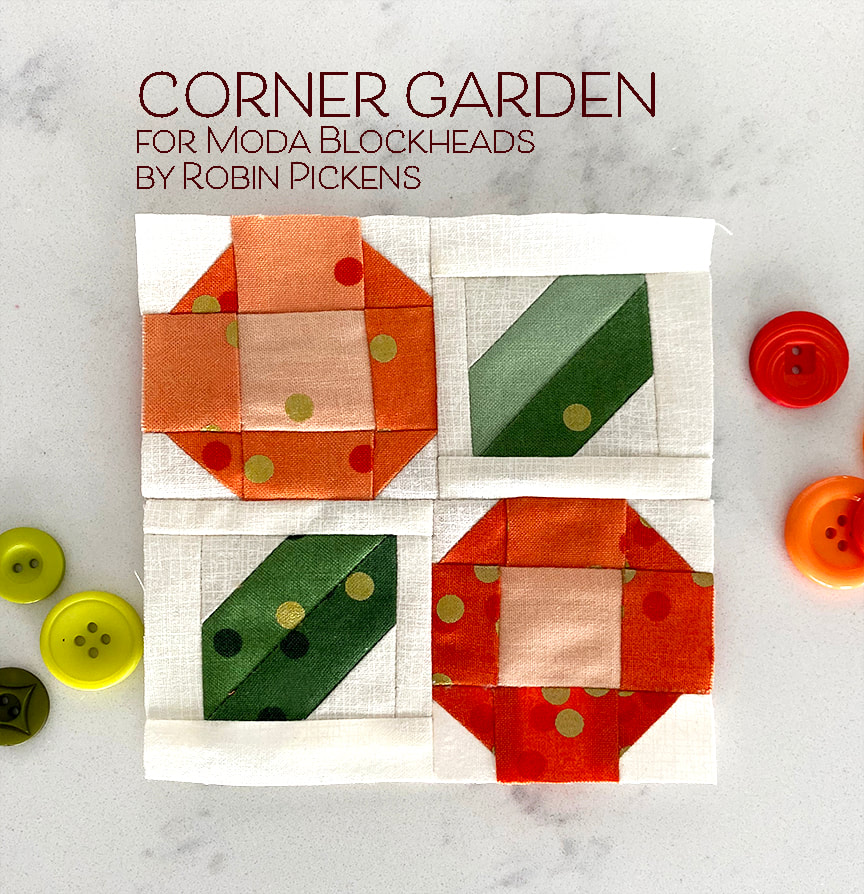 The 4" block I made in V& Co Ombre Confetti. I just love doing these little blocks! 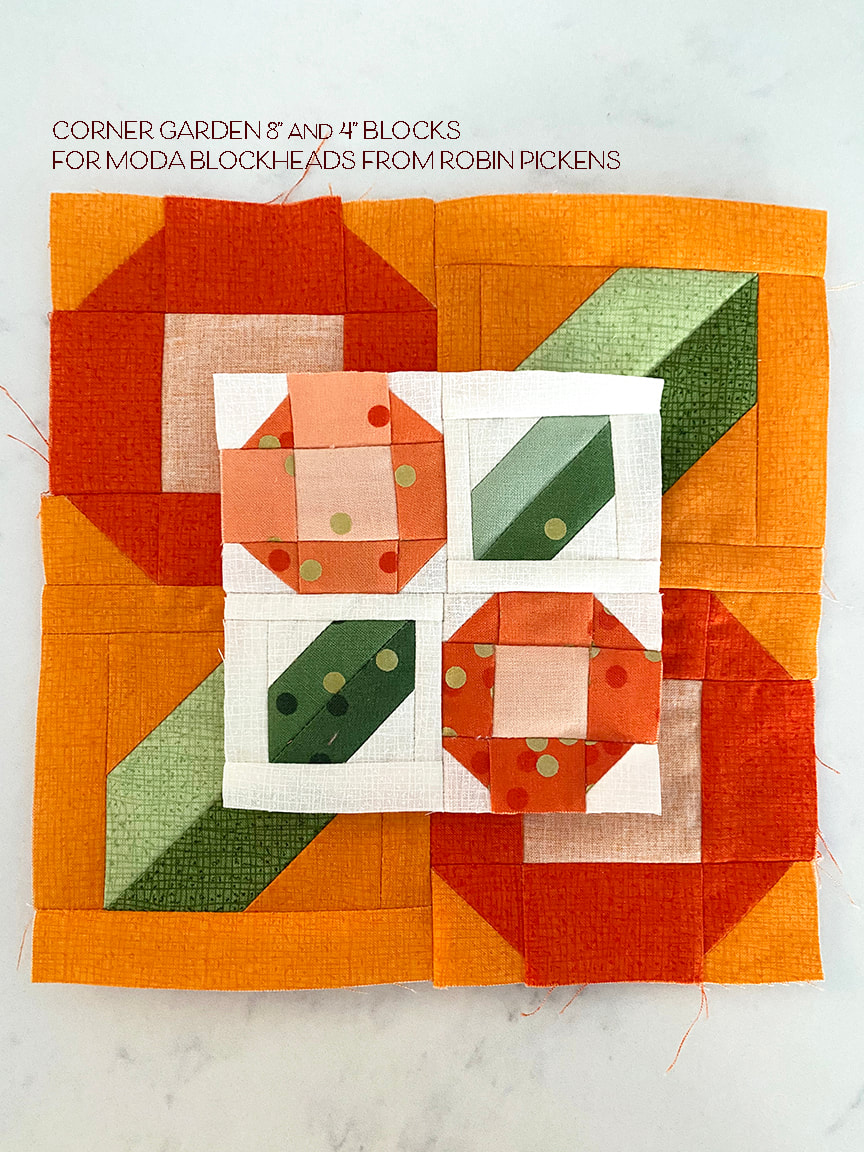 And I thought it would be fun to try making a block from strip/string quilt pieces. The block below is a 12" block using strips from Solana, Dandi Annie, Painted Meadow, Sweet Pea & Lily, Blushing Peonies and Abby Rose. I used the Ombre Confetti for centers since I thought the dots reminded me of big pollen filled flowers. There are lots of ways to have fun with this block! 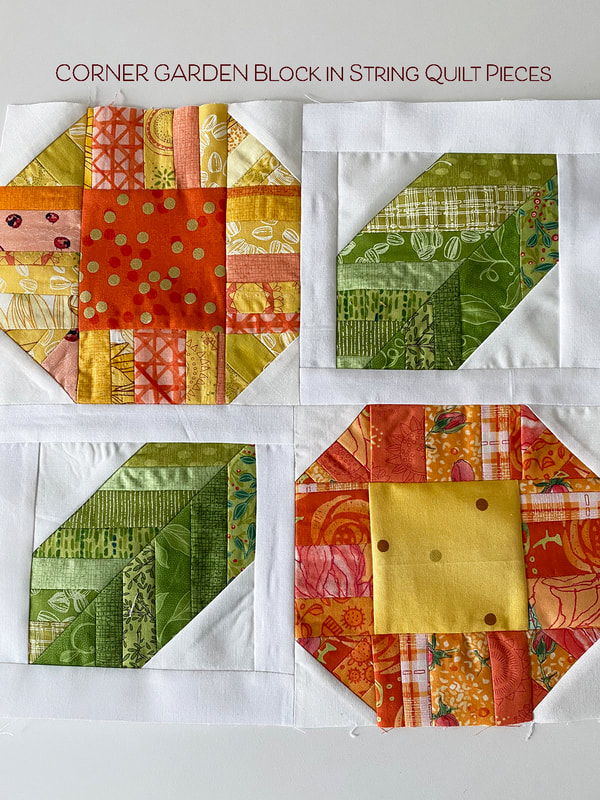 The other exciting piece of news today is the Martingale giveaway of some of the Moda All-Stars books! You can enter to win a digital download version of one of the quilt books. I am taking names here on my blog to be entered into a random sweepstakes for a digital copy of Lucky Charm Quilts. Sales of this Moda All-Stars book benefit Alex's Lemonade Stand, a Foundation for kids with childhood cancer and has funded over 1,ooo research projects. TO ENTER TO WIN A DIGITAL COPY OF THIS BOOK, enter a comment below telling me your favorite color to sew with! I'll be drawing a winner on Friday and will contact the person through their information on the blog comment. Thank you for supporting the All-Stars books that benefit wonderful charities! 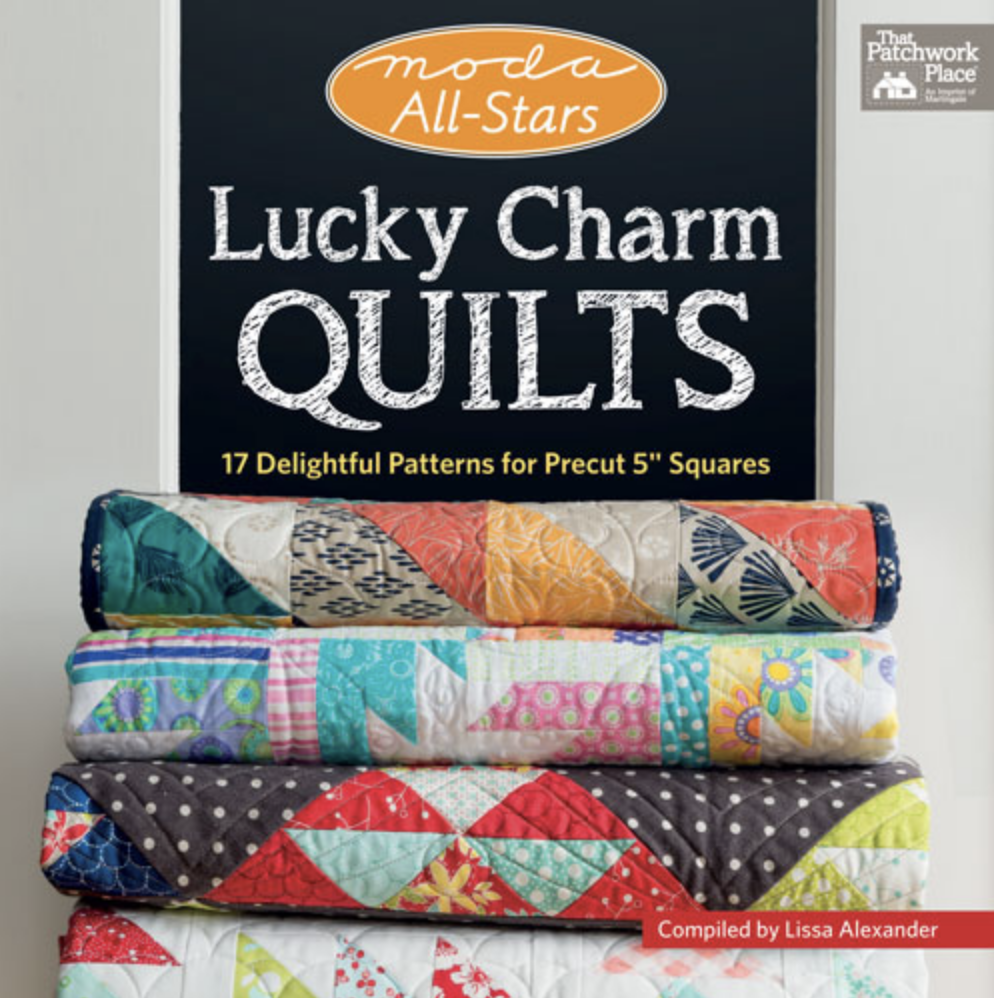  But I'm not the only one doing a giveaway! All the Moda Blockheads designers are giving away one of the All-Stars books this week. Please visit the other designer blogs and enter for more chances to win one of the digital books! Links to their blogs are below: 7.1 – Robin Pickens - we are here! 7.8 – Janet Clare 7.15 – Jen Kingwell 7.22 – Joanna Figueroa 7.29 – Corey Yoder 8.5 – Sherri McConnell 8.12 – Betsy Chutchian 8.19 – Jan Patek 8.26 – Brigitte Heitland 9.2 – Lisa Bongean 9.9 – Lissa Alexander 9.16 – Laurie Simpson 9.23– Vanessa Goertzen 9.30 – Stacy Iest Hsu 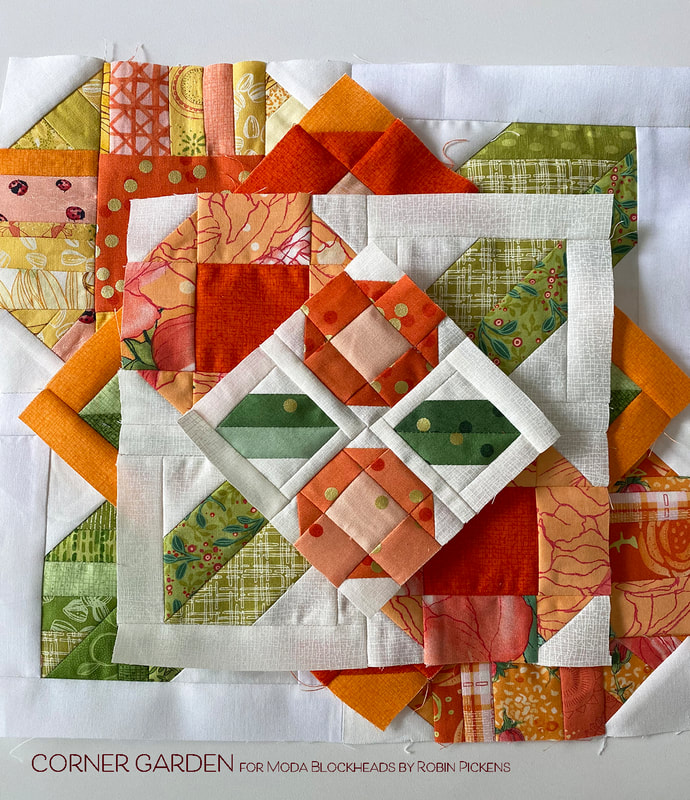 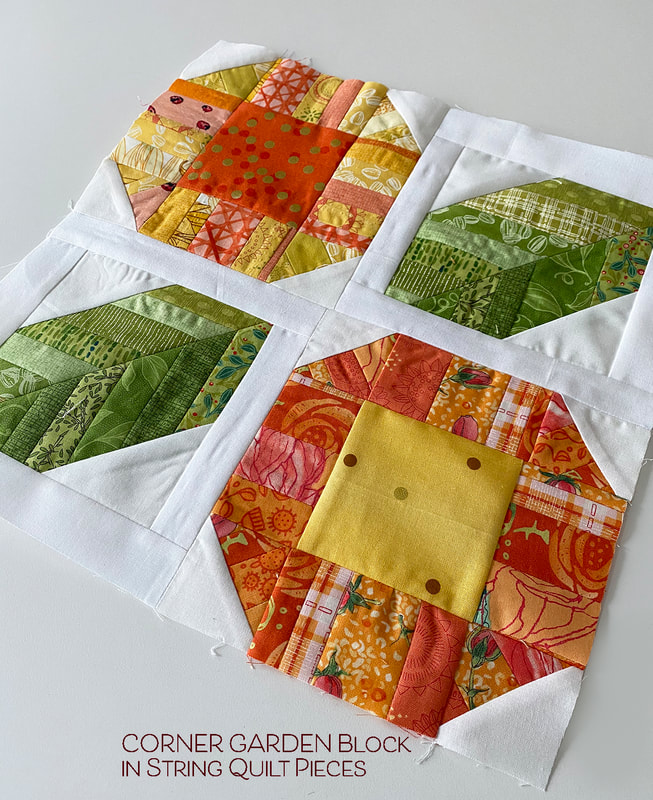
412 Comments
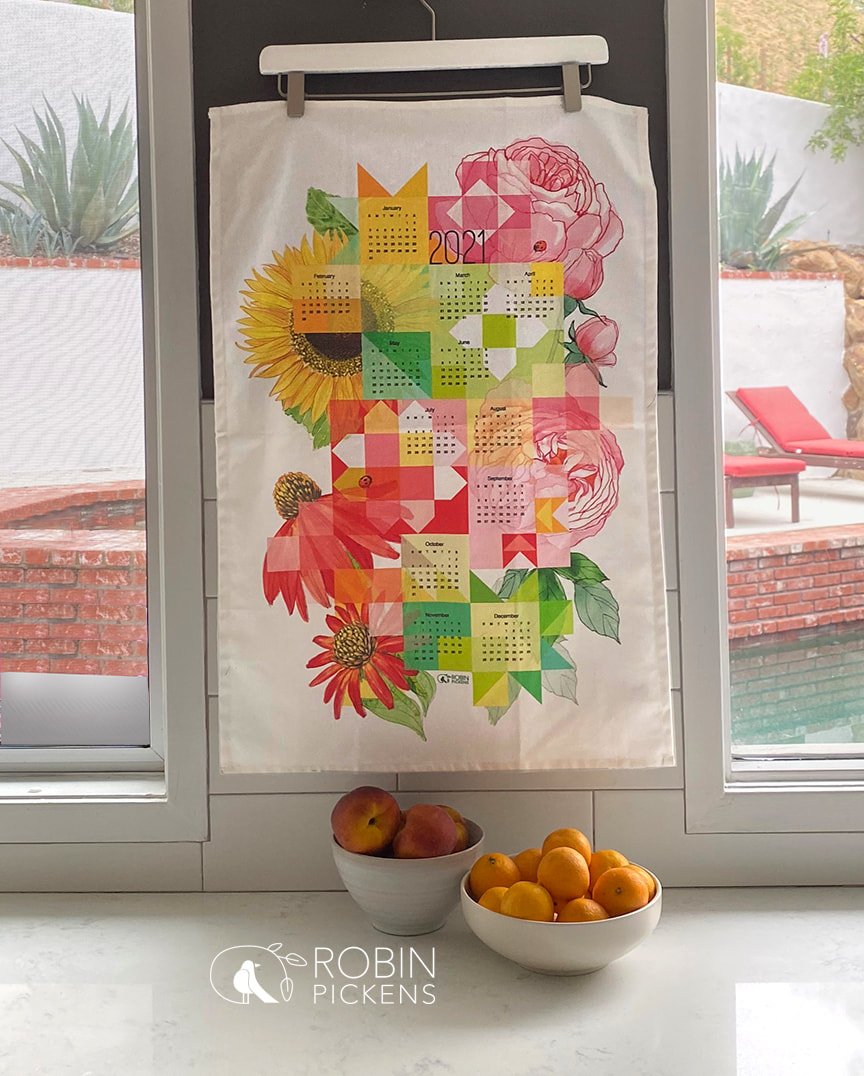 I'm looking forward to 2021 and hanging this colorful calendar tea towel in my kitchen! This design is exclusive to Moda Fabrics and will be sold through quilt shops. I've used colorful quilt block motifs mixed with some of my florals from Abby Rose, Painted Meadow and Solana. A couple of the ladybugs from Solana are bringing some good luck into the day too. 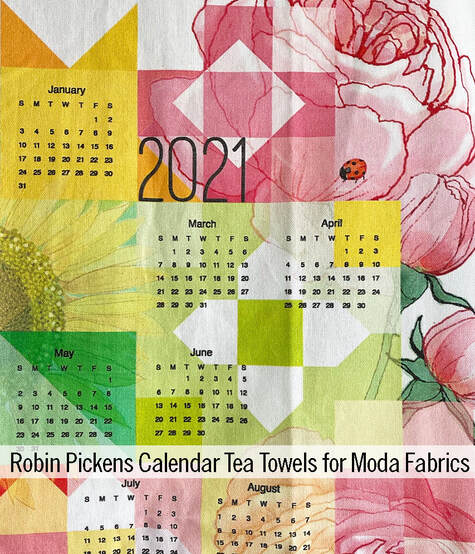 I have heard some people say they will add a calendar tea towel to a back of a quilt to mark the month and year the quilt was made. I think that is such a fun idea! I like to just collect them as a memento from each year and vary the designs. I also hang them for some time in the kitchen from a skirt hanger and I can then switch them out easily. 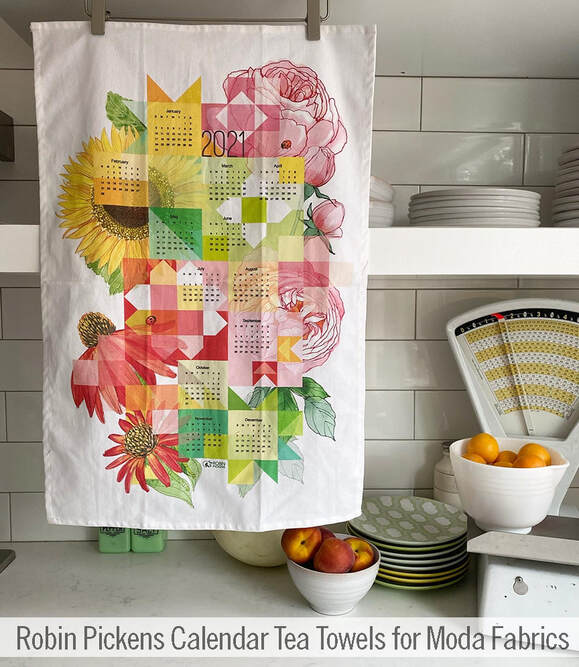 If you are interested in getting one of these, let your local quilt shop know you want them to order some. Along with this tea towel (which will be shipped to shops in November), Moda is also making some tote products! They have the same floral and quilt design but instead of a calendar they say SEW HAPPY. I was so excited to see the samples and did this video that shows them more on my youtube channel. And this fun fast one to get a feel for HOW MUCH fits into this large project tote! The totes have fun red handles and the regular sized tote and large project one have inside zippered pockets to hold those little things that so easily get lost. Or you can pop a zipper pouch inside the tote that holds rotary cutter, scissors, threads, etc. The zipper pouch has a nice strap handle to the side so you can loop it over your wrist. Another lovely feature in the large project tote is a pocket that runs along the width of the tote on the back side. It has a center seam so it doesn't flop open and its a great spot for some of your rulers, books, and patterns. 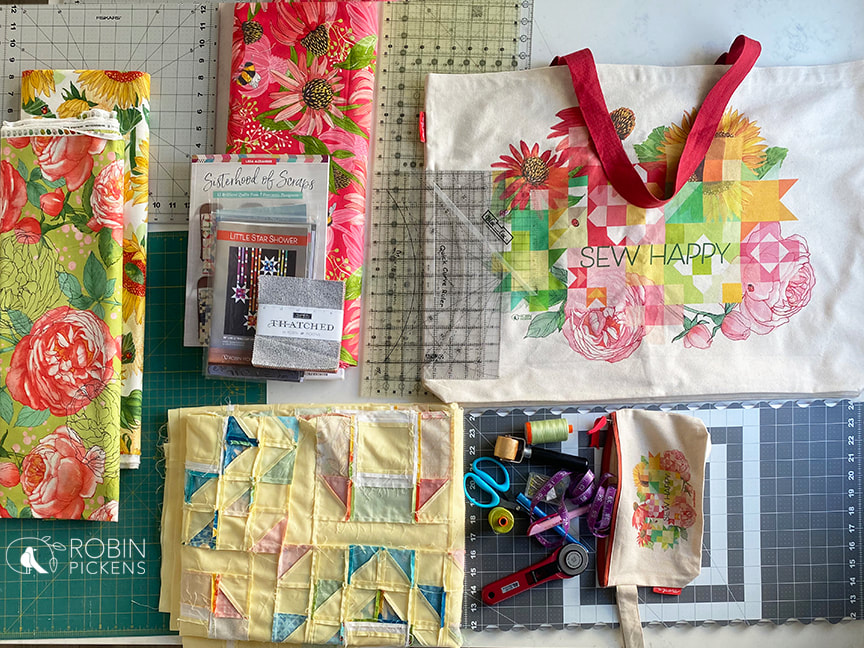 This is an example of the types of things I have if I'm taking a class or workshop for quilting, including fabric (did I mention it fits whole bolts of fabric?), cutting mats, rulers, sewing notions, rotating mats, and patterns and quilt blocks or tops. I am forever fighting the long rulers and mats and trying to keep them from sliding out of my arms and piles of stuff as I travel from car to class. I like to have my 24" long rulers and a mat that is at least that wide as well. All this stuff fits in the tote! Of if I'm going to see a longarm quilter, I have my quilt top, quilt back and possibly batting. Or my big embroidery/quilting hoop. The totes and zipper pouches will be shipping to shops in December. Wouldn't this be a great gift for a sewing friend? I'm making up my list (and sorry Mom, you now know one thing you'll be getting for Christmas!) Want to see more videos with fabrics and quilts and fun stuff for sewing? Pop on over to my youtube channel! https://www.youtube.com/c/robinpickens Who doesn't love adorable house quilt blocks? I love them! And the simplicity of these lovely homes from Stacy makes them a versatile and fun block to do. To get Stacy's block pattern, visit her blog here: 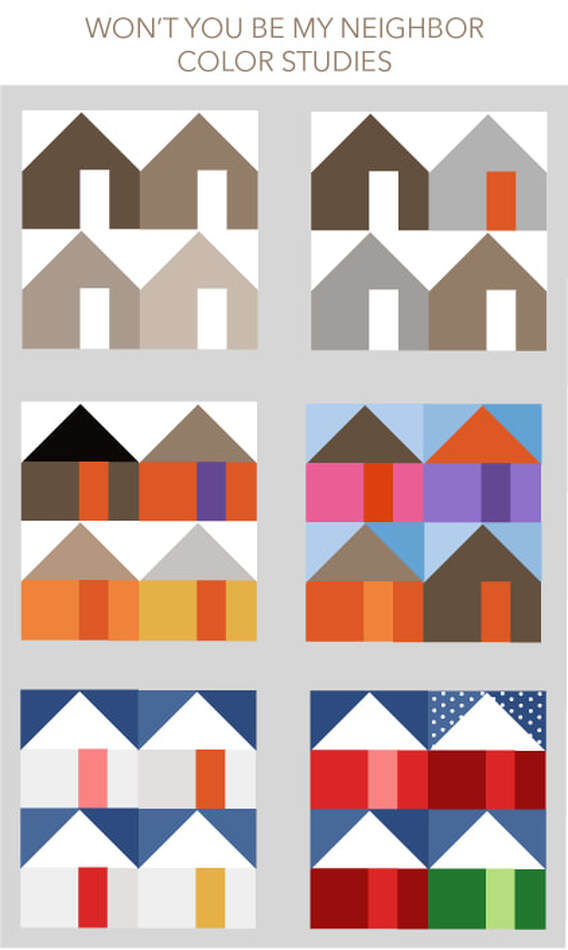 Color studies for this week are pretty straightforward since I think the houses are so cute as houses and I just did some different play with keeping my neighborhood consistent or varied in colors. First off, the houses look modern and minimalist when just done as the shapes in all a single color. Start adding in different colors for doors and roofs and the houses become more dimensional and have more character. I tried Fall colors or a mix of fun pink, purple, orange and brown colors with variety in my sky blues and separate roof browns. What if the houses are all from a snowy village with night blue skies? Or a Christmas street with red and green houses with snow topped roofs and one with the snow falling softly. However you decide to do your houses, I imagine they will reflect some of YOUR neighborhood.  Here is a little fun extra play with the blocks. These are houses rotating around by the roofs or bases. I think of it as traveling around the block. All of a sudden we see arrows and more interesting shapes from the flying geese and those triangles. 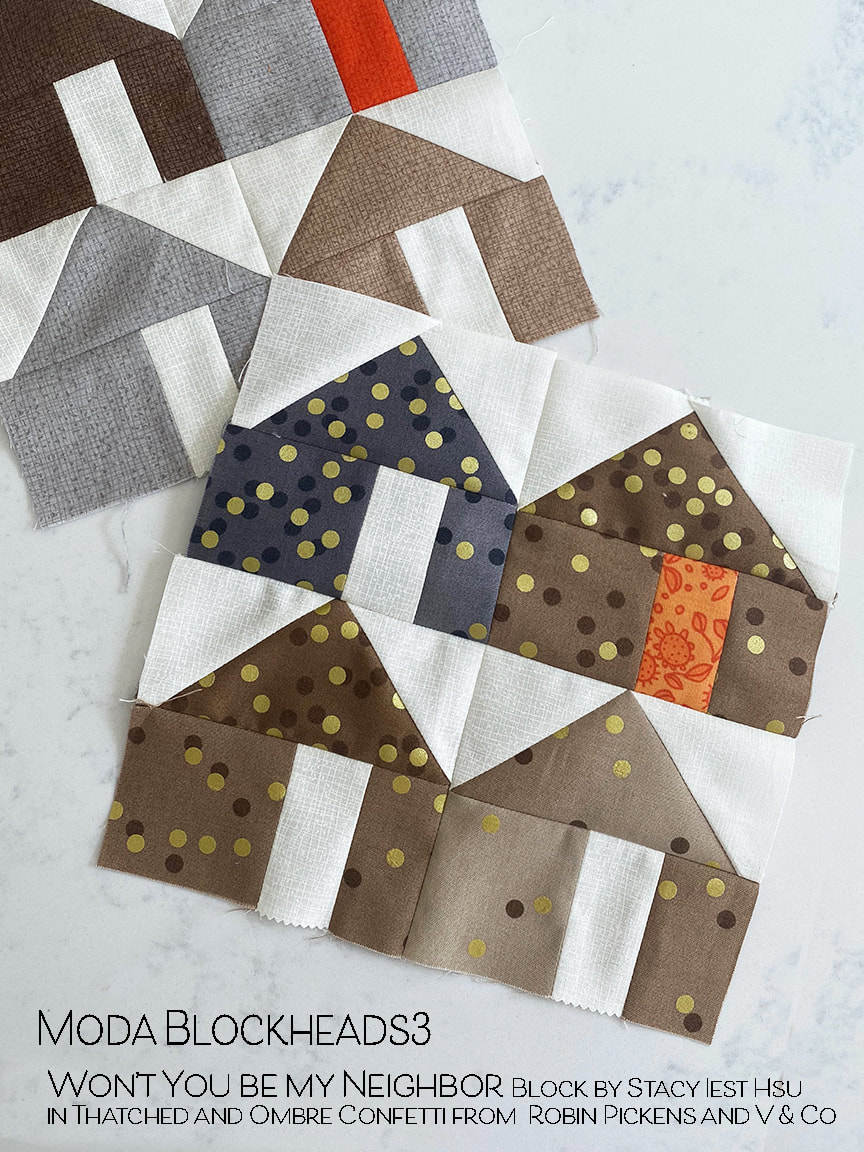 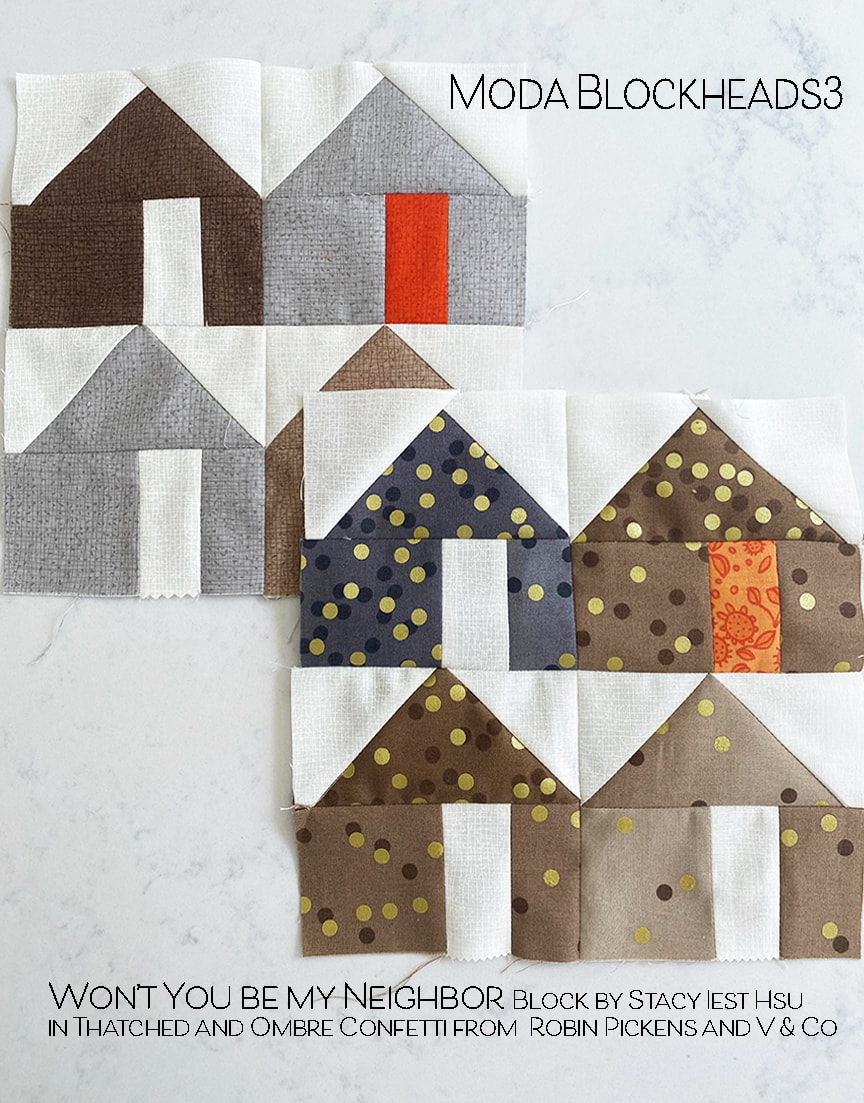 My blocks this week use the brown colorways. Since I don't have many browns in my collections I've used ombre confetti by V & Co for my print blocks with an Abby Rose orange door.
Have fun building your neighborhood this week. And guess what...next week is MY BLOCK again! I'm so excited to share it with you. Be sure to check back next Wednesday! Visit other Blockheads designers: 6.24 – Stacy Iest Hsu<–We are Here 7.1 – Robin Pickens 7.8 – Janet Clare 7.15 – Jen Kingwell 7.22 – Joanna Figueroa 7.29 – Corey Yoder 8.5 – Sherri McConnell 8.12 – Betsy Chutchian 8.19 – Jan Patek 8.26 – Brigitte Heitland 9.2 – Lisa Bongean 9.9 – Lissa Alexander 9.16 – Laurie Simpson 9.23– Vanessa Goertzen Have you been participating in Stacie's Mini Course on being a Creative Powerhouse? It is interesting to me that even after all these years of my own art licensing, I still learn new things or am reminded of the things we need to do on a regular basis to sharpen our skills and become better. I was listening to Stacie talk about setting big goals. I've been so busy working that I haven't taken the time to set some new goals for myself. 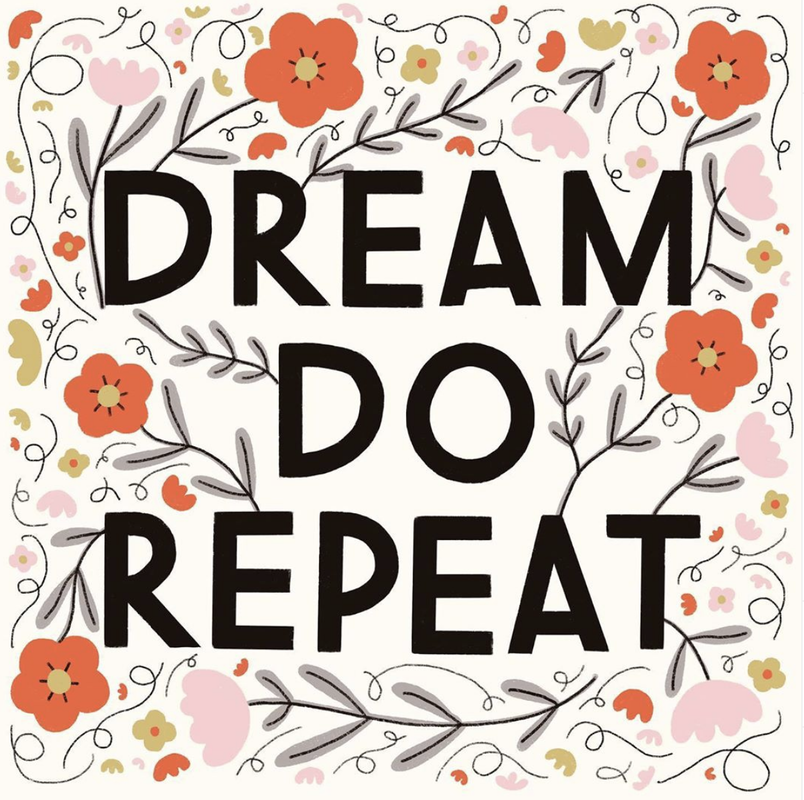 So after listening to Stacie's second lesson in her mini-course, I wrote down new goals. I loved Stacie saying "You've got more power about what happens in your life...The dreaming stage is a part of the process of being a creative powerhouse and remember dreams can grow. They can evolve and they can change. The most important thing to know is that you can hold your dreams loosely in your hands and leave room for inspiration and opportunity." We often don't know exactly what it is that we are striving for until we start learning, start envisioning, start opening ourselves up to the ideas of bigger and better than what we have right now, and start setting the big scary goals. The notion that you can hold dreams loosely in your hands and leave room for inspiration and opportunity is an exciting and motivating concept. We need to take time to examine and learn and grow and be open to these opportunities. 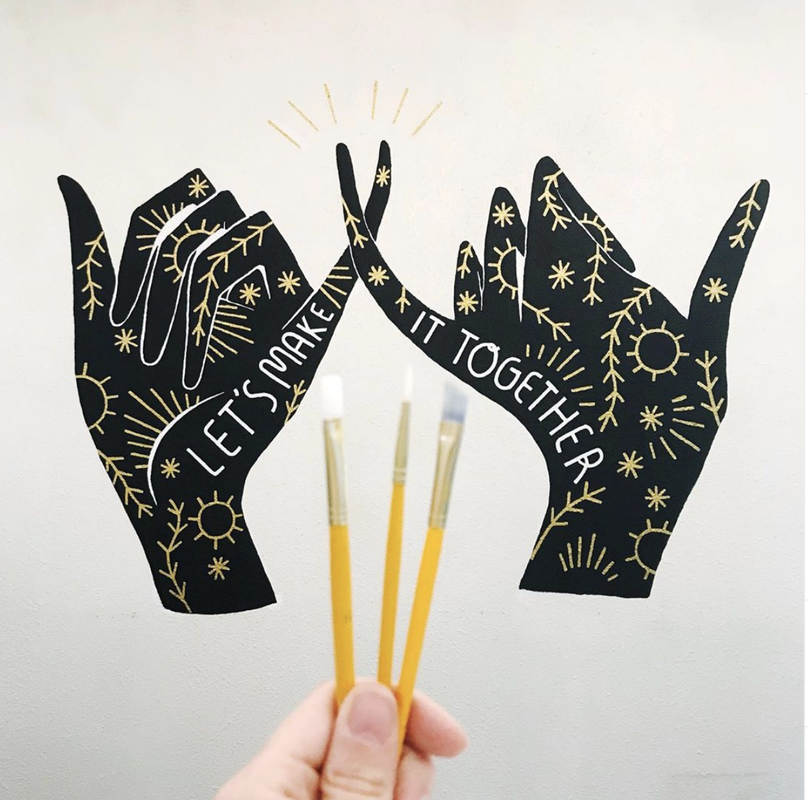 In lesson 4 Stacie talks about making money from your art. Yup, the business stuff. Multiple streams of income. There is a lot of info to take in. Which is why she has a more thorough course. It's a LOT of stuff. I just might be one of those speakers on a bonus segment in her course too! (which, funny thing is...is one of my goals to do MORE teaching and public speaking). 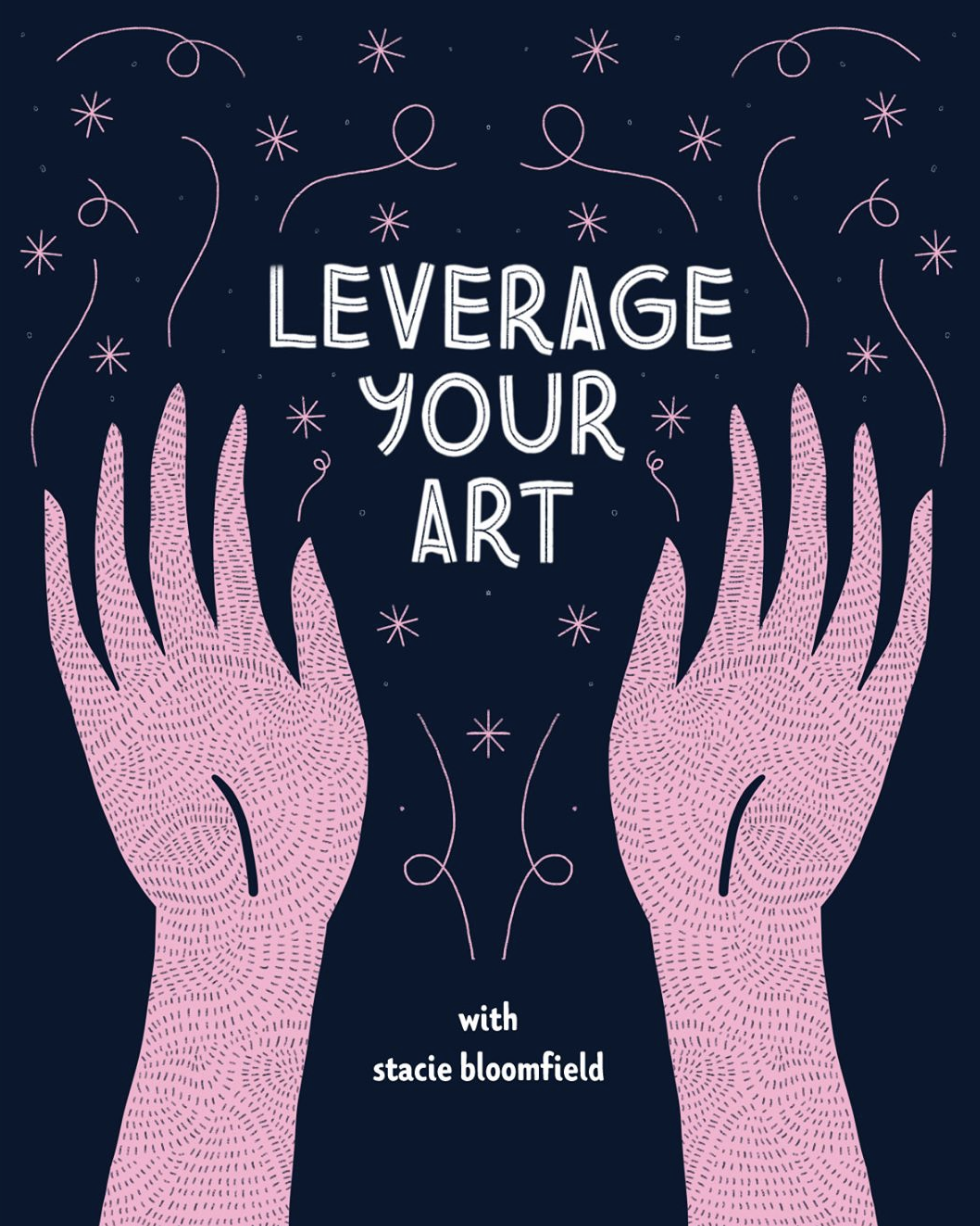 If you want more info on Stacie's course "Leverage Your Art", please check out all her info here: It is an 8 week class, online, and covers lots of information about the many ways to make a living from your art. One thing Stacie mentioned in her mini-course is that she has tried all these methods over the years herself, including licensing, selling direct to consumers, manufacturing and wholesaling, print on demand, commissions, trade shows, illustrating for publishing and more. She's done it and speaks from a place of experience. I'm really glad I've had the chance to get to know her better through Moda as a fellow designer. Her registration is open through Tuesday June 23rd! By the way, ALL the art on this post is by Stacie!  (And can I just tell you how much I love this scene in her house?? ) 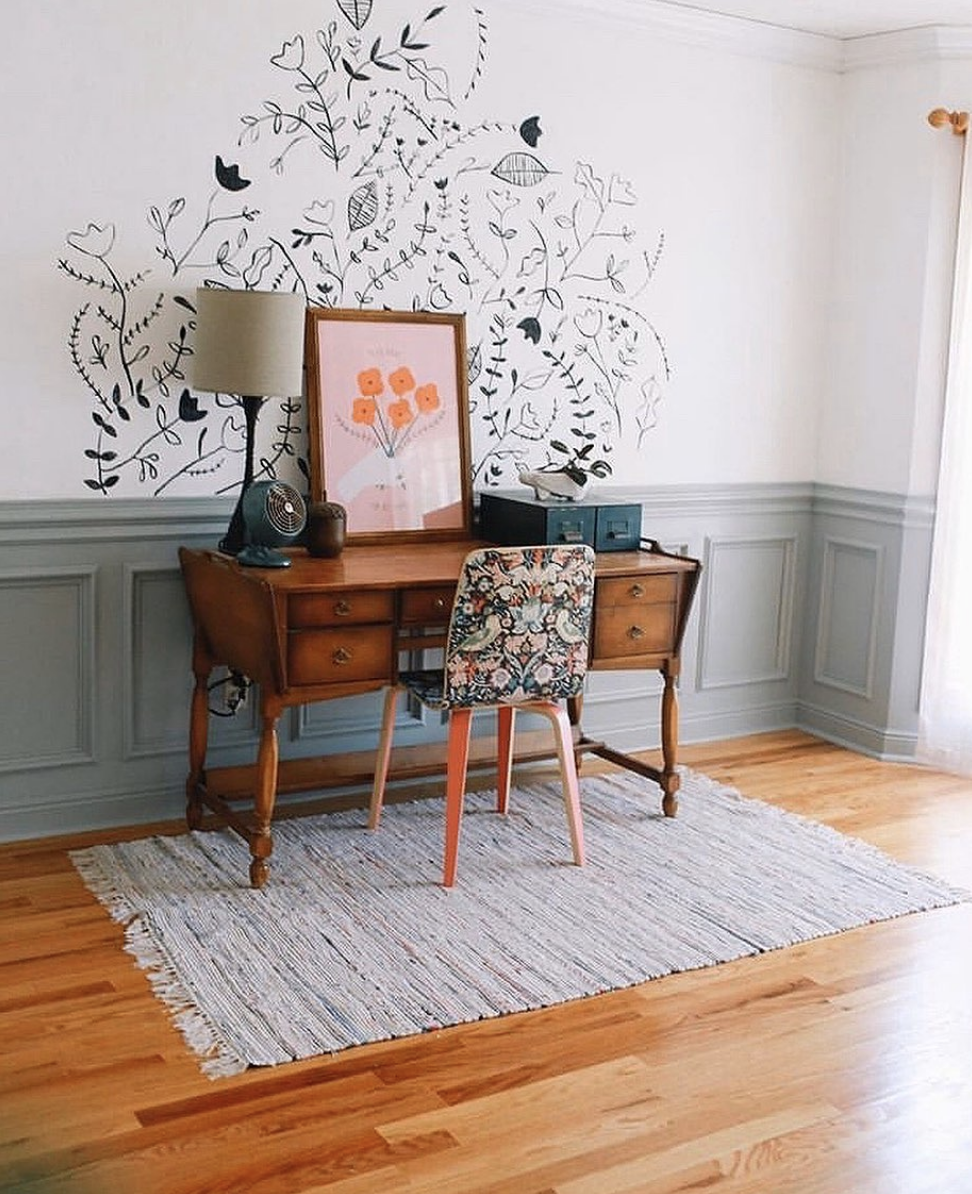 #creativepowerhouse #partnerprogram #gingibercreates #artlicensing 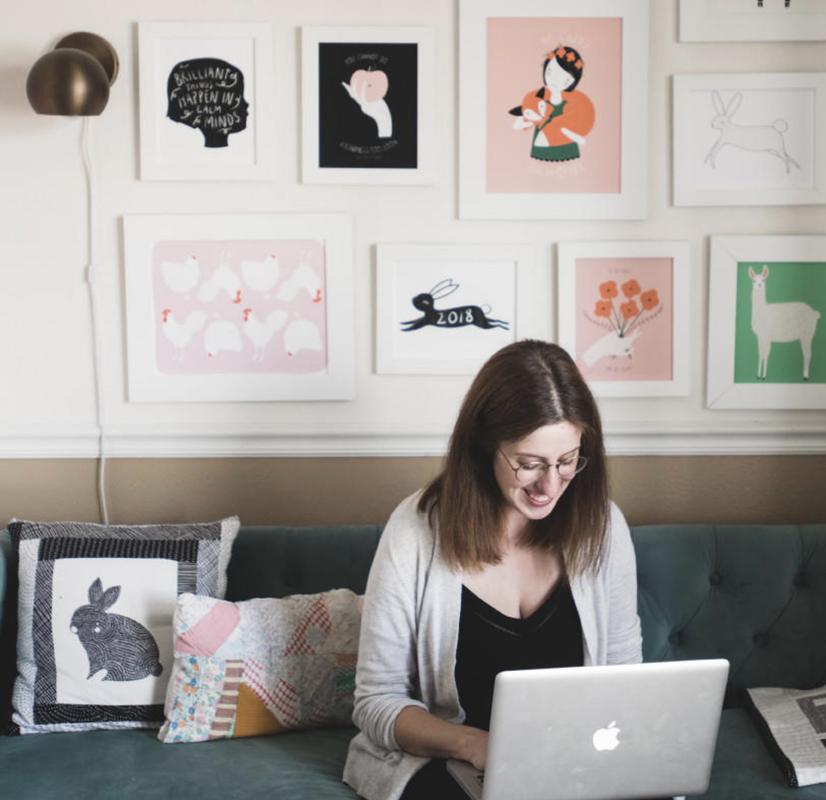 Okay, happy weekend everyone and I hope you are happy and creating something that brings you joy!
-Robin Happy Moda Blockheads day! This weeks cheery block is at Vanessa Goertzen's blog: With a name like Lucky Penny, how could I not think of coppery orange colors? Maybe mixed with grays from other change with it? Silver and copper...gray and orange...time for color play! 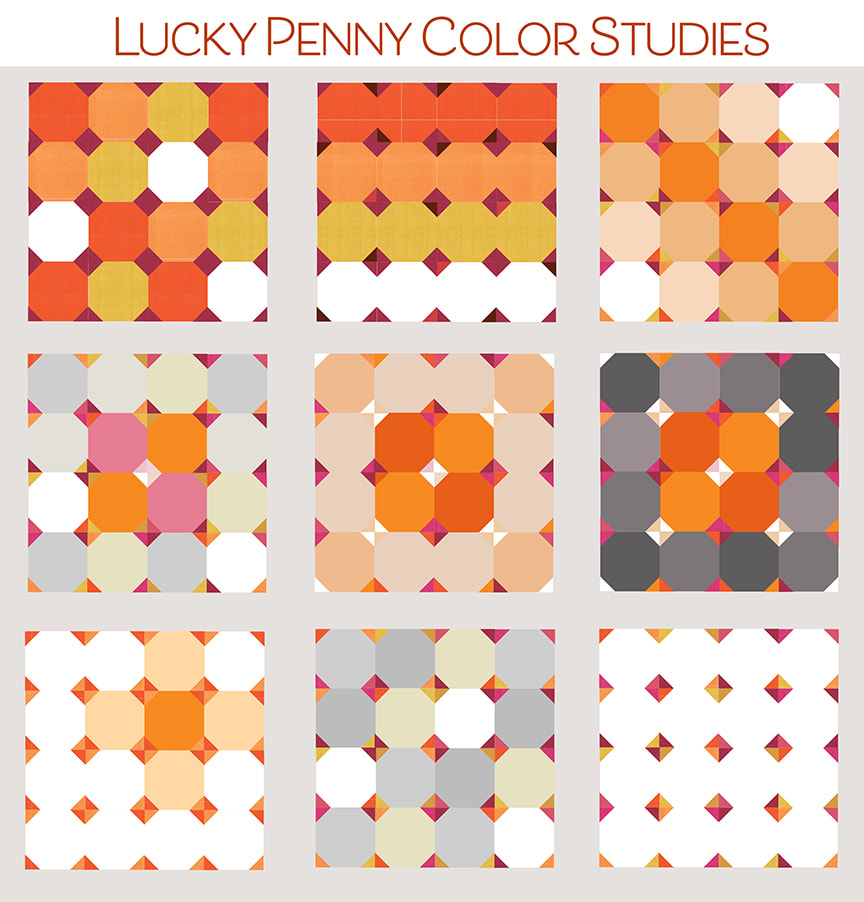 This block is just FUN like gumballs in bright colors! The little stitch and flip corners make friendly curved pieces that can play with random color in spotty placement or lining up the balls in rows or playing with the balls in formation on an angle. I started with all the same color stitch and flip corners and started to introduce other colors to give those corners their own sparkly personality. In the second row I looked at the center stitch and flip unit being light/white while the other corners were darker colors. Combined with the colors of the snowball blocks in the center 4 pieces it really calls attention to that center spot. It is also interesting to carry those light corners out as little bows out to the corners. I kept the middle and right second row images completely symmetrical and tried the outer ring of pieces in light or dark shades. I n the bottom row the image on the left shows using all the same repeating stitch and flip color pairs with mostly white snowball blocks. I've emphasized one block in there with a soft color surrounding it. The other two in the last row could be done in all white or in low volume fabrics with the color coming mostly from the stitch and flip corners. I love how the last one really becomes a composition about the little diamonds and you hardly see the snowballs. 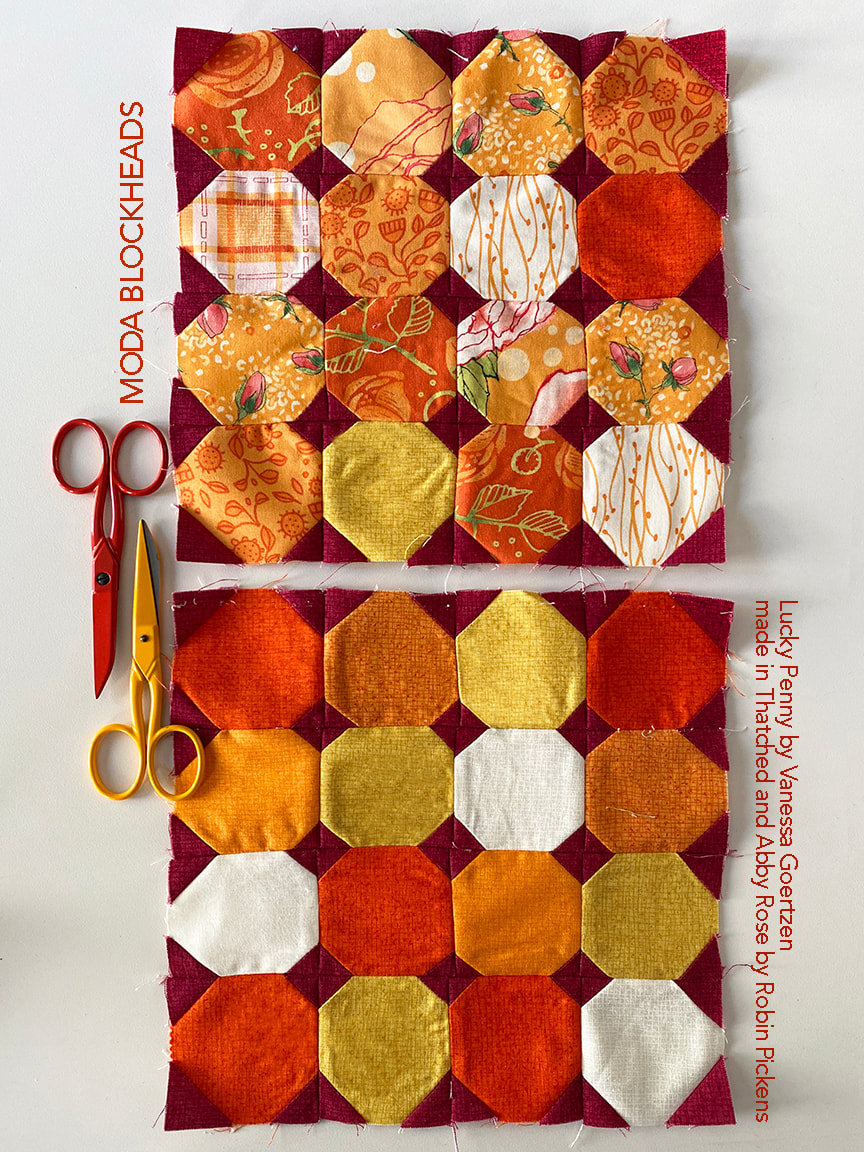 For my own blocks, I liked the colors arranged in a random way and felt that had a playful energy. I used the orange fabrics from Abby Rose to make my scrappy block, using Burgundy from Thatched to make the dark corners that really make the orange prints pop. 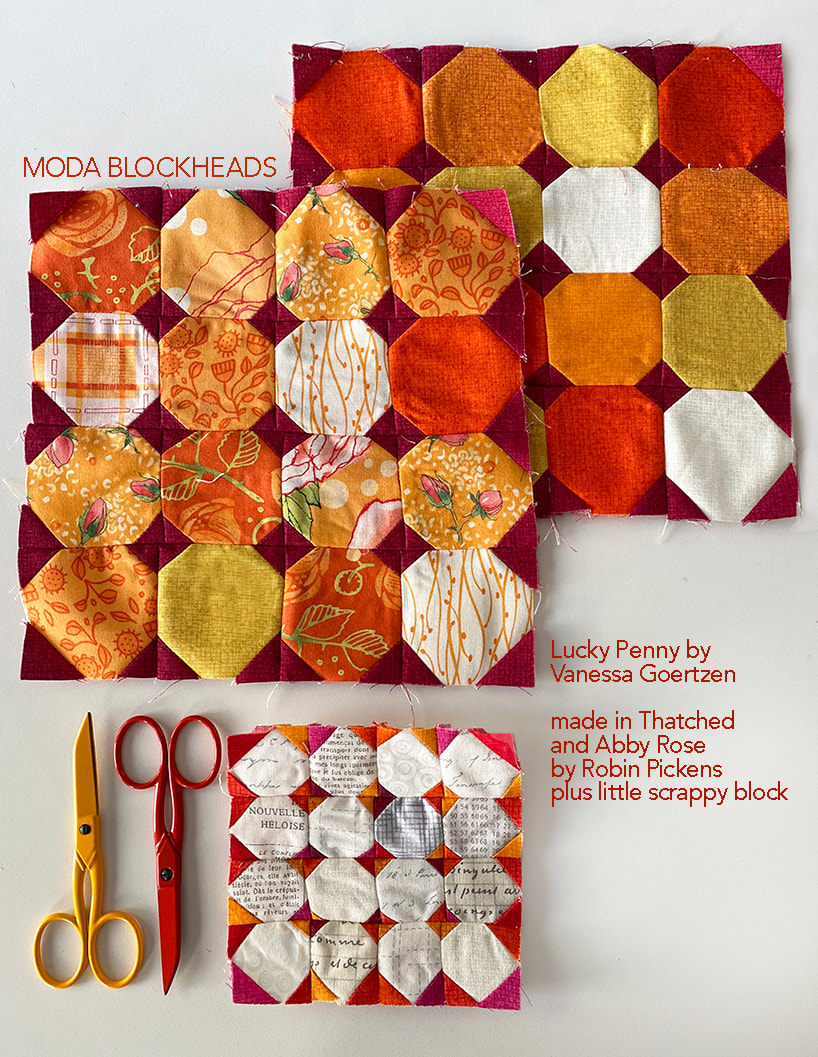 But I was also interested in making the low volume version of the block and decided to make a 4" block with my playful colors in the stitch and flip corners. 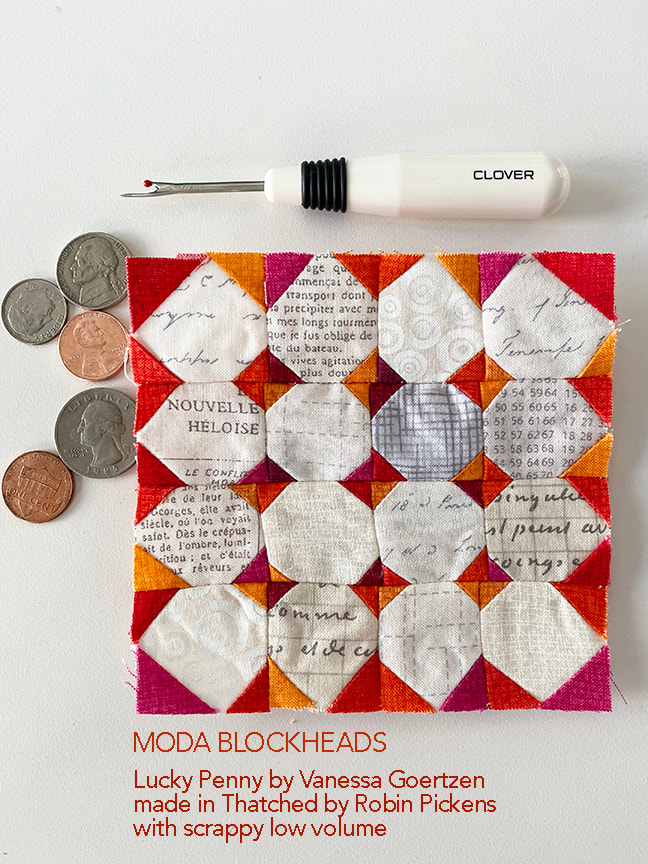 I'm not exactly the most accurate and patient when it comes to making a 4" block with lots of little pieces. I think my block should be renamed "Wonky Penny"! The seam ripper is there because I did rip out my rows and resewed them...believe it or not, this is the improved one! I decided I was just fine with the imperfections on this one and I kind of like the personality it has. Those small blocks sure are cute! 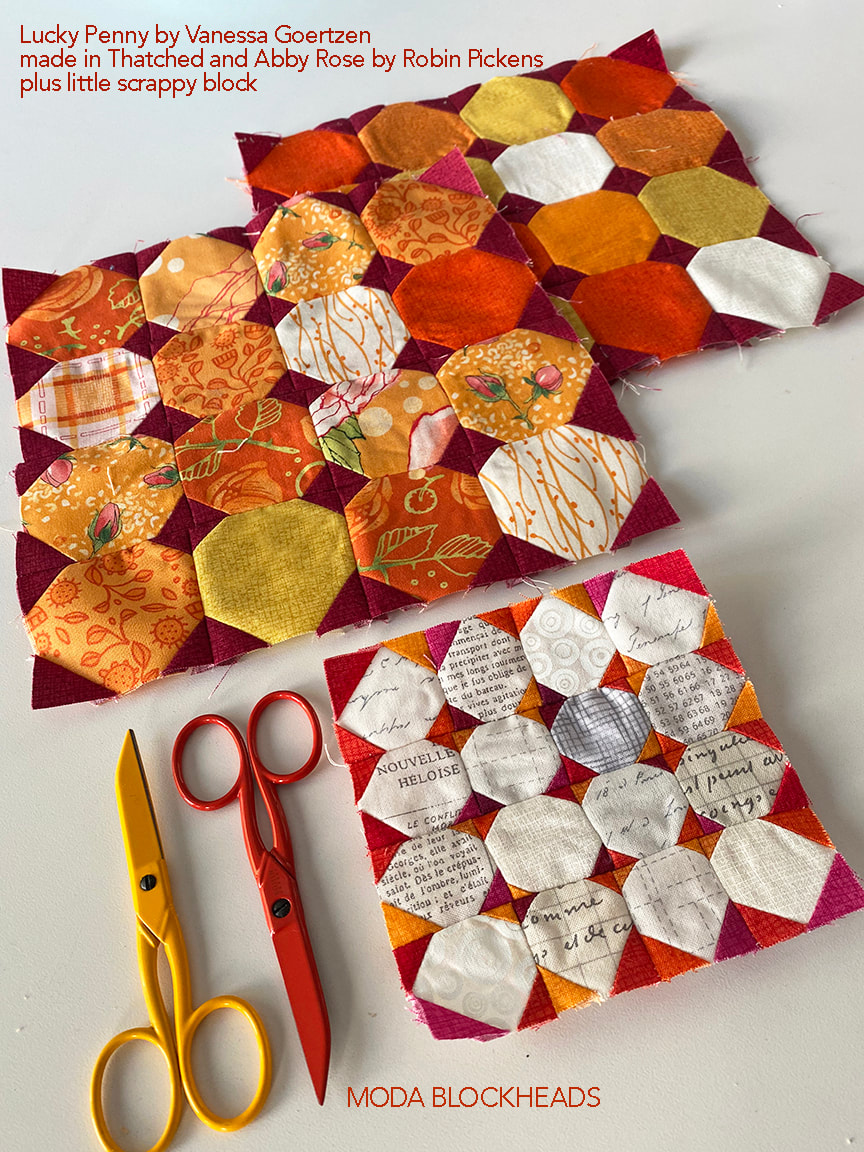 If you want to refer back to other color studies for Moda Blockheads I've made a page that shows an overview of them. The "COLOR STUDIES" is up in the navigation bar at the top. On the page you can click on an image to be taken to that blog post I'll update it and add the new color studies as I do them. 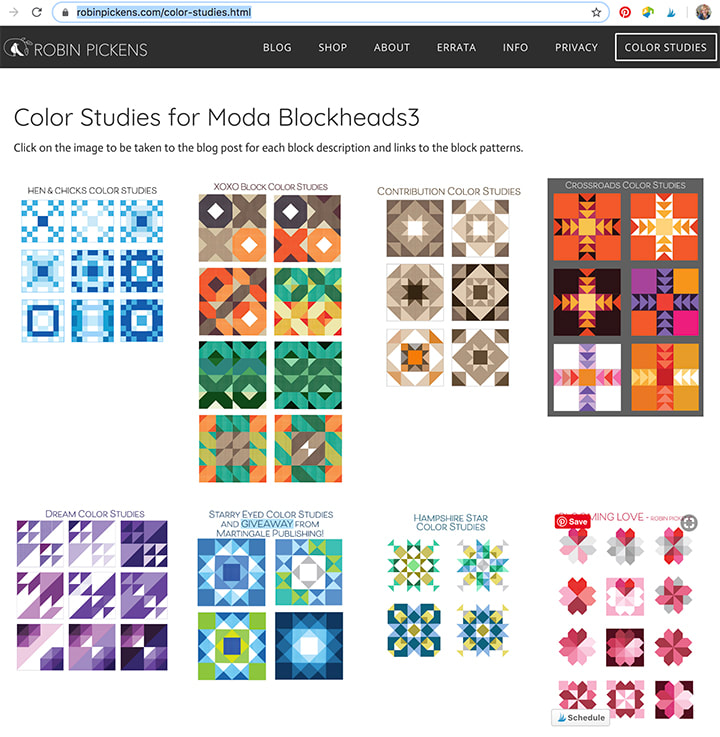 Hope you have lots of fun with your Lucky Penny block! Be sure to check out the other Moda designers!
6.17– Vanessa Goertzen 6.24 – Stacy Iest Hsu 7.1 – Robin Pickens 7.8 – Janet Clare 7.15 – Jen Kingwell 7.22 – Joanna Figueroa 7.29 – Corey Yoder 8.5 – Sherri McConnell 8.12 – Betsy Chutchian 8.19 – Jan Patek 8.26 – Brigitte Heitland 9.2 – Lisa Bongean 9.9 – Lissa Alexander 9.16 – Laurie Simpson I love envisioning past patterns in new fabric lines and since Abby Rose is in shops now, let's play with those cabbage roses! 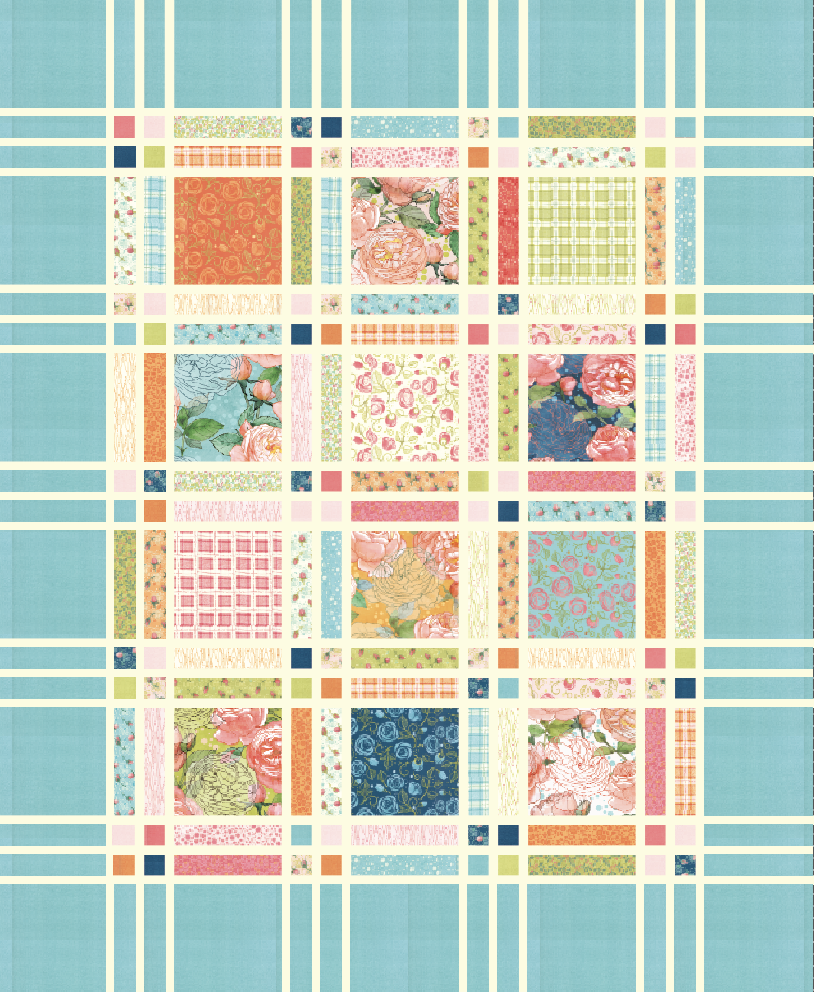 This light blue in Abby Rose is Thatched Seafoam and I just love the softness and warmer tone of that pretty blue! I wanted to see that as the larger side borders with a cream to highlight the fringe thin sashings. A good choice for the cream is Thatched cream 26 or Bella Solids Porcelain. 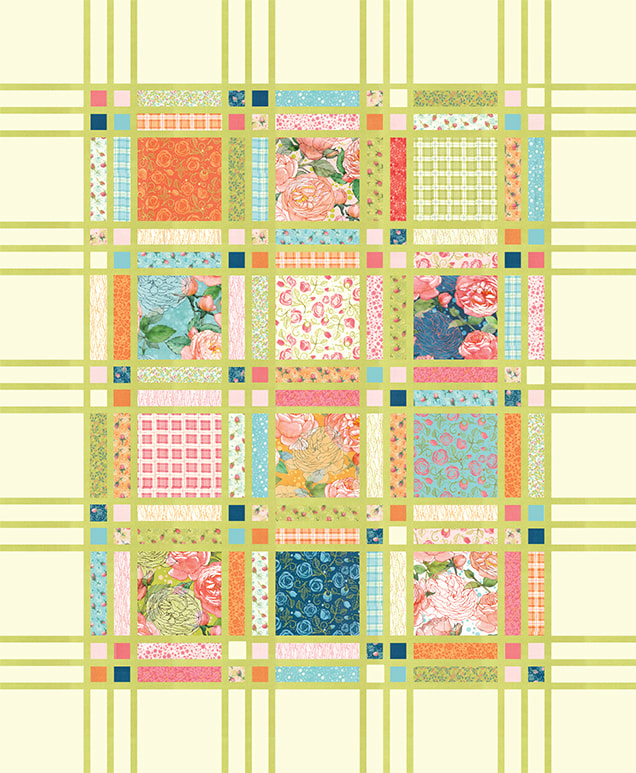 Here is the cream as the main background with the Abby Rose/Thatched Greenery 124 as the sashings. We have blenders in the Thatched texture with new collections and they don't all automatically become new basics in Thatched. But if a color is different enough and popular, it's a good chance that it will. Greenery is not as yellowy as charteuse, although it is close. Its pretty and soft, like the other Abby Rose colors. 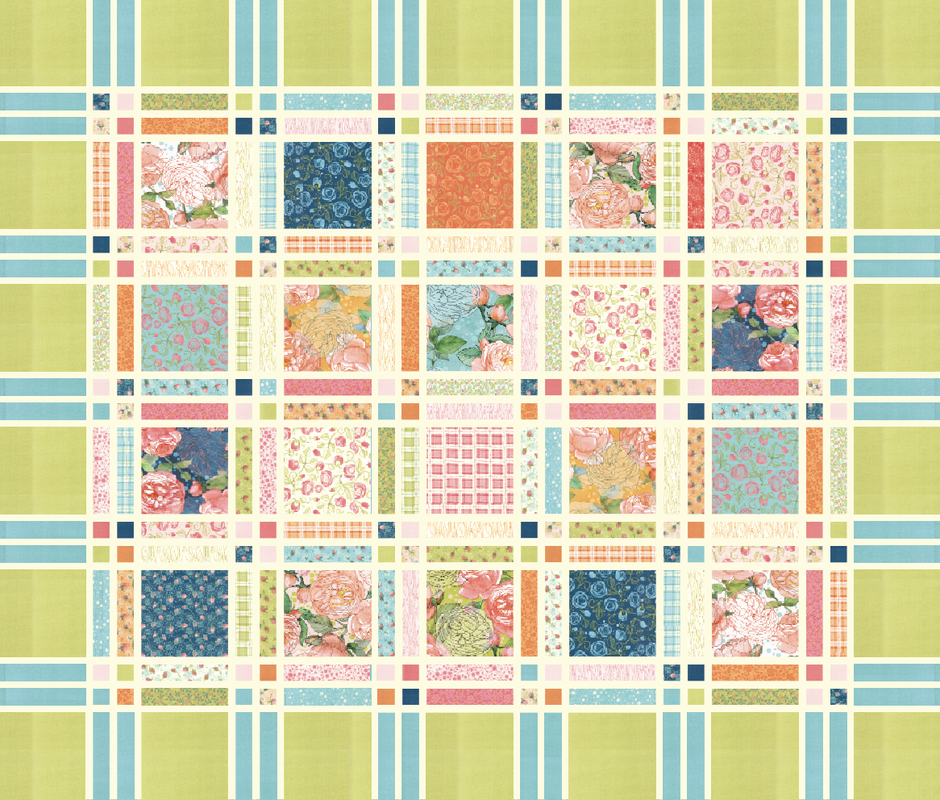 If you were making a king sized quilt, I would assume doubling the twin size. This mockup shows the Greenery as the large border block with the seafoam as the rectangles in the borders. I like the idea of mixing two colors for the borders! You could even go completely scrappy with the borders and have it be an extension of the prints in the body of the quilt. 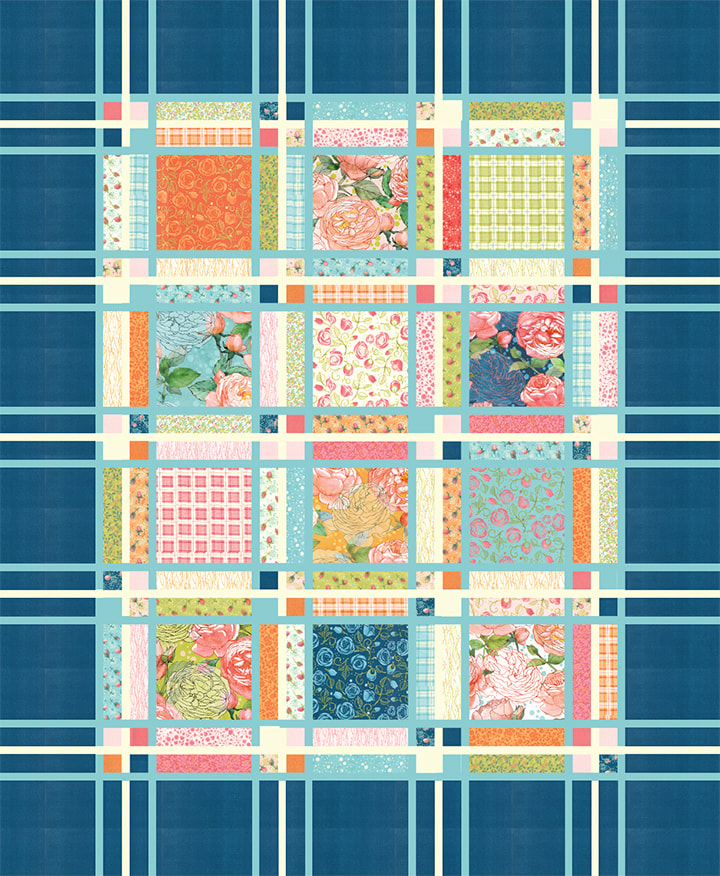 This last image uses the darker, Night 89 Thatched from Abby Rose. It is the same as 89 Marine. I have been so fascinated by Marine, Navy and Burgundy Thatched lately as deep, rich tones. They are so full of depth and personality! Notice on this image that the thin sashings are done in Seafoam Thatched for the two outer pieces, and cream for the inside piece in every group of three. Or you could go from light to dark in three steps to get a more gradated ramp. Lots of possibilities. I just love the drama of the darker border color!
I think Fringe is also a good pattern to play with those large blocks as crazy quilt piecing, string piecing, embroidery panels...lots of options! I hope "seeing" the possibilities with Abby Rose is helpful here! Happy sewing everyone! When it was week 18 for Moda Blockheads, I was deep in sewing for Quilt Market. I knew it would be a week were I put it aside and worked on it later. I'm glad I waited since I decided to tweak the applique block a little and to sew one of the alternate block designs for my second block. 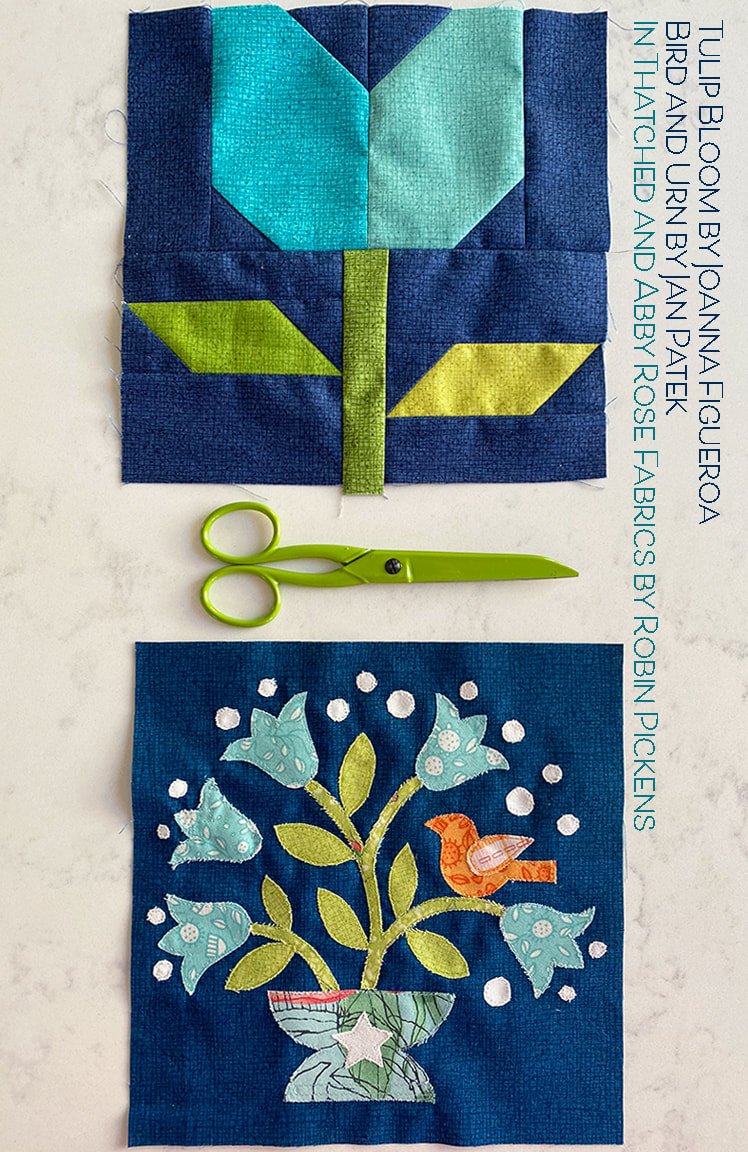 The block for week 18 was designed by Jan Patek and is called Bird and Urn. I showed a bird with three flowers on stems. I decided I wanted to make MORE flowers so I duplicated the blooms and added an additional stem. Another just floats in the open space. I also made the shape of the urn with sharp corners on the bottom. I also rounded out the arc of flowers by adding white circles like pollen dots to give the design a fancy, polka dotted feel. These dots stand out on a deep blue background. My fabrics are all from my Abby Rose line. My applique is done as fusible raw edge applique. 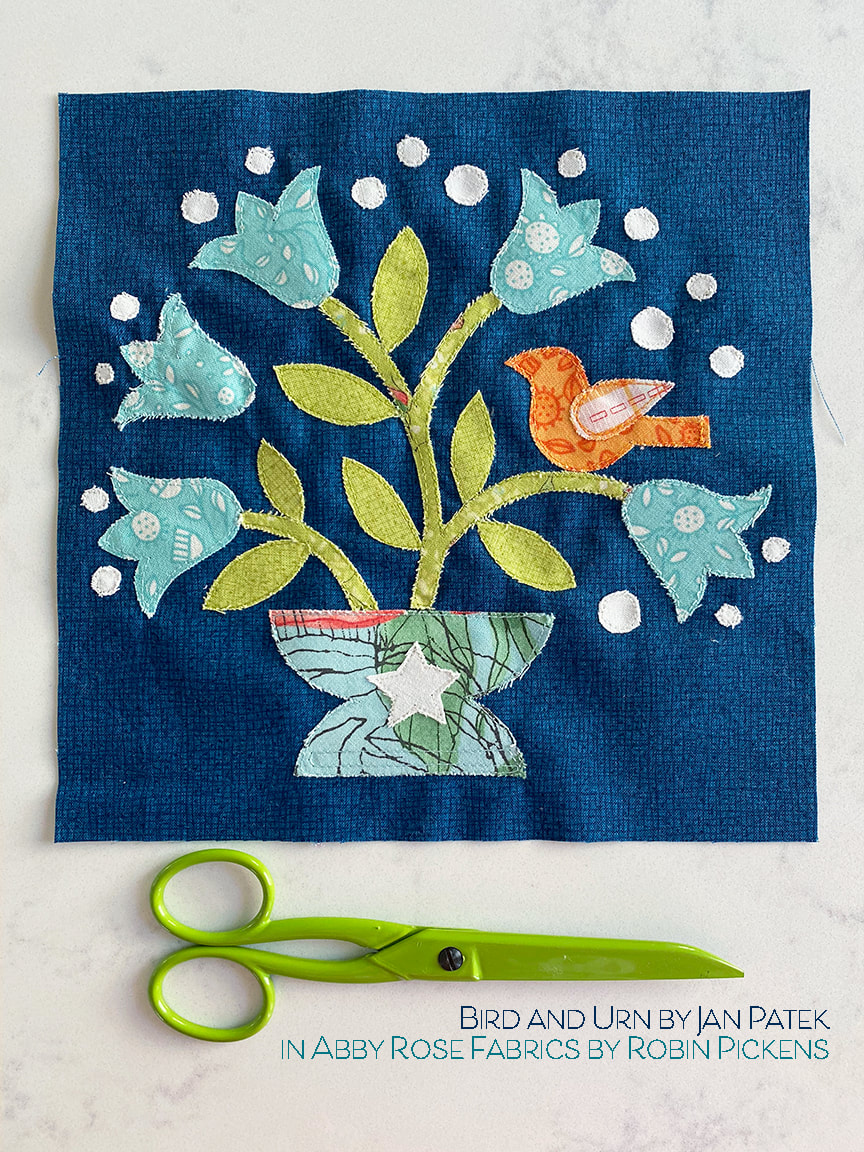 To get Jan's pattern, visit her blog by clicking here: 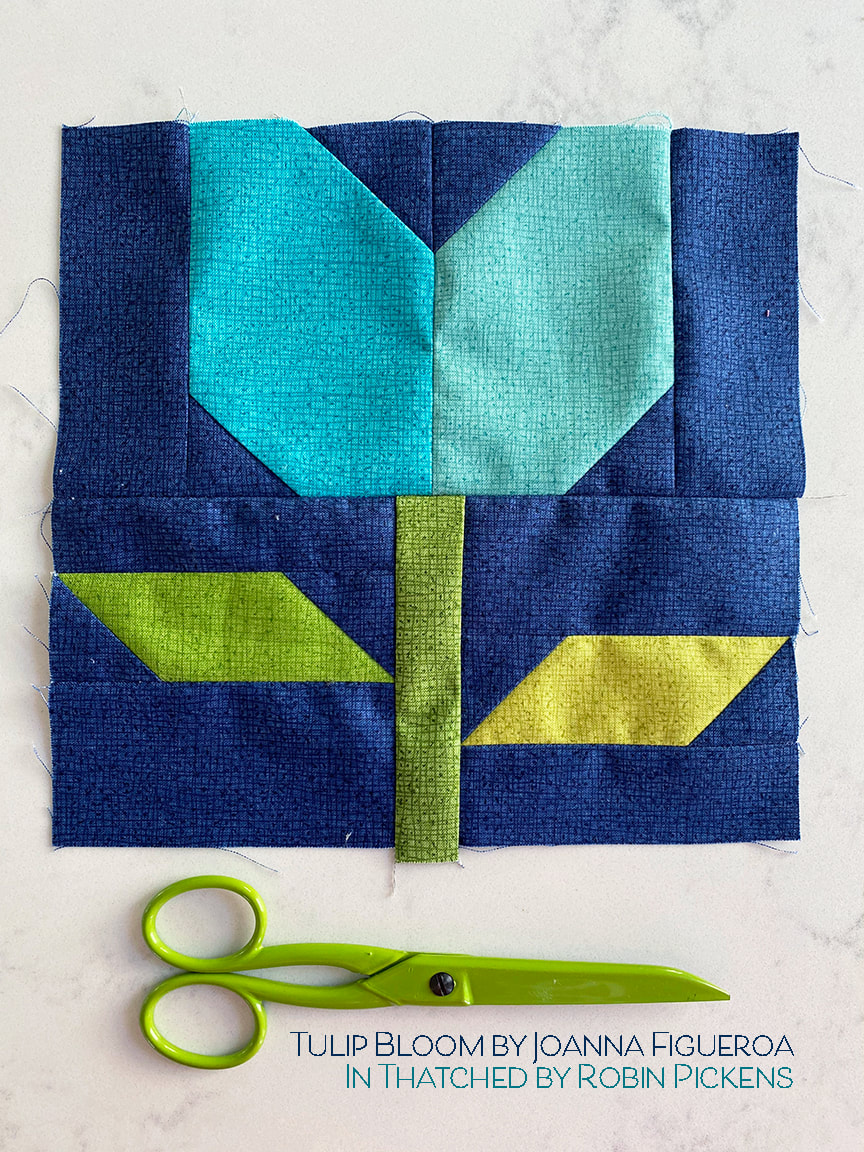 Since I'm making two quilts, one of which is all Thatched fabrics, I decided to switch it up a little and make the alternate block that Joanna Figueroa of Fig Tree Quilts posted. It is called Tulip Bloom and is a lovely pieced flower using stitch and flip pieces. I stayed in my same blue color family with a dark background, but this one is on Navy instead of Marine. I've used an assortment of greens from Thatched and the Thatched coordinating green in Painted Meadow. I am thinking about also going back and making Joanna's house from the birdhouse week for the Thatched quilt as well. 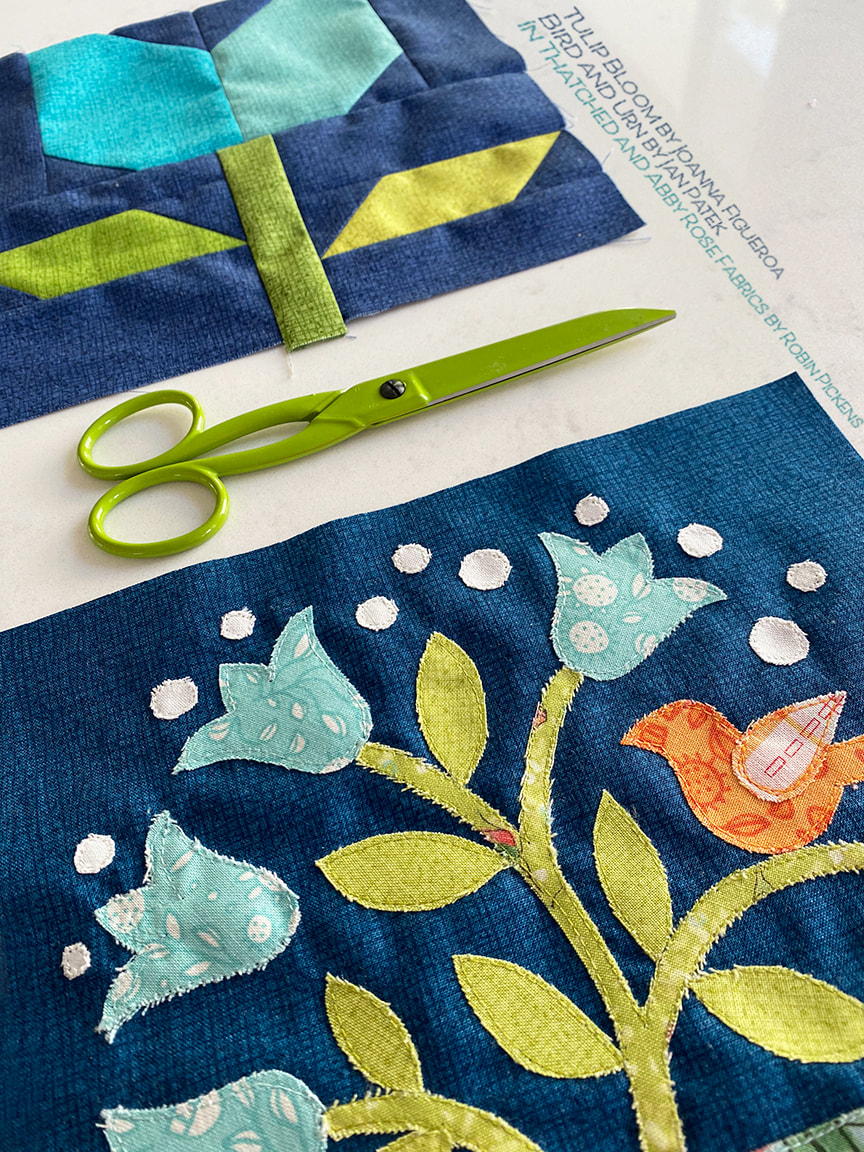 You can visit Joanna's blog to her flower pattern by clicking the gray box: 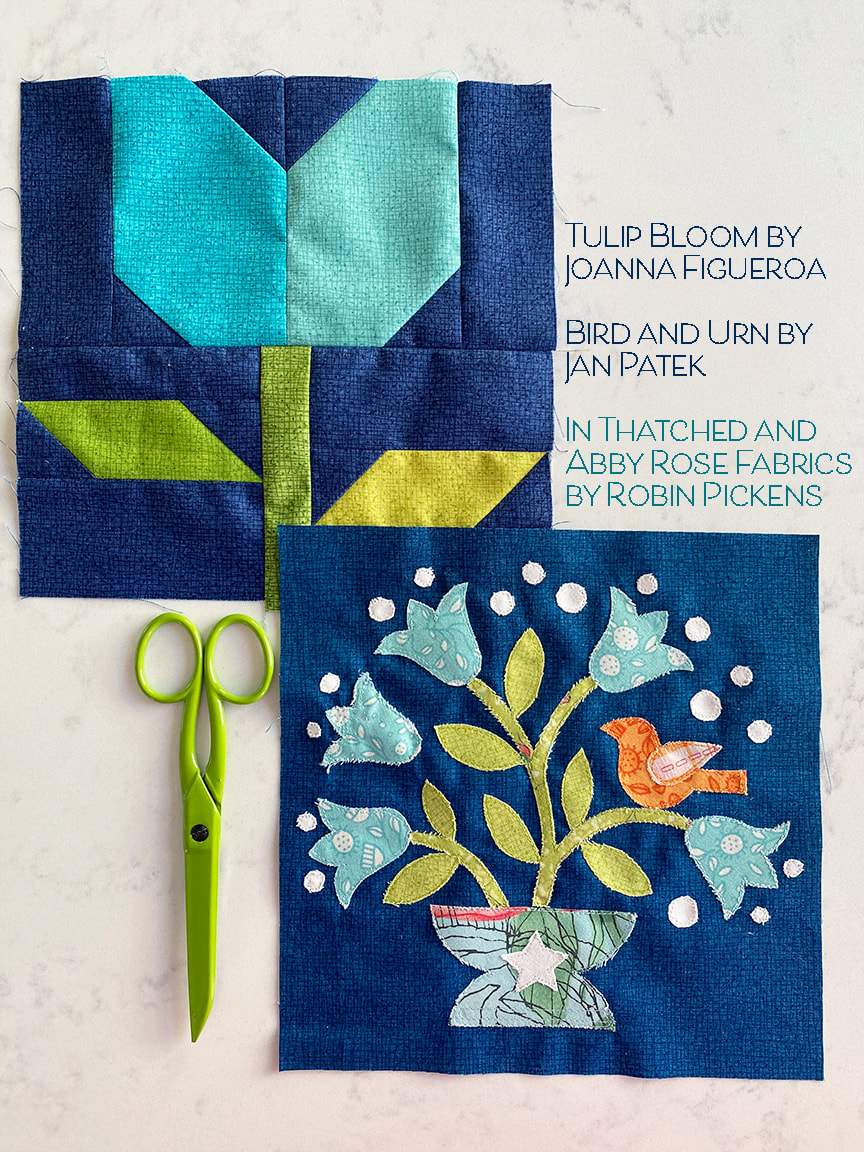 I hope you are all having lots of fun with your blocks and the Blockheads community!
Happy sewing! I love the way this week's block by Laurie Simpson, Hen & Chicks, can be a fun play with a checkerboard feel of an opportunity to emphasize the squares framing the center square. For Laurie's pattern click the link to access her blog with the pattern: And here is my COLOR STUDY with the block! I am adding to my blue row this week. I'll be doing blocks to the lighter end of the spectrum but I like to play with the darker colors too and see how it changes the whole mood of the block. 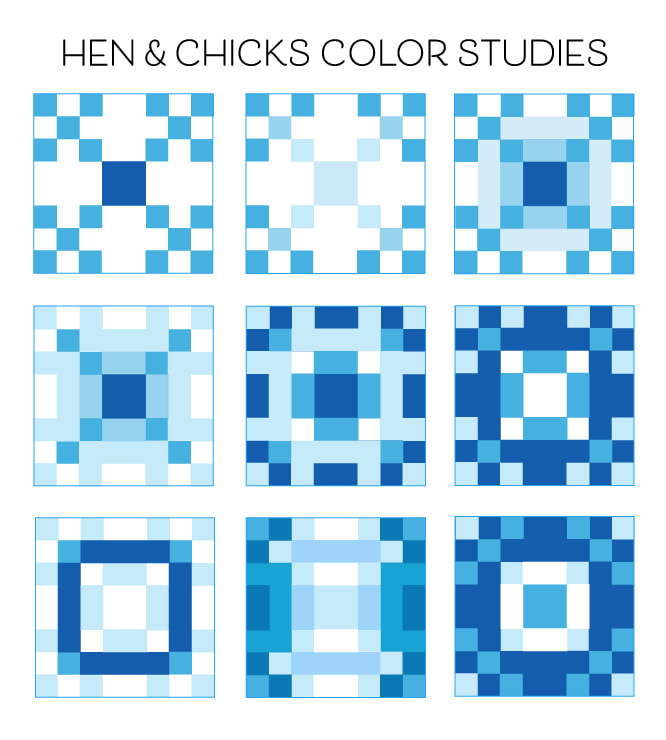 I started with a simple version with a dark center, then tried light radiating out from the center. The longer rectangles can also start to make square shapes within the checkerboard. Keeping the colors the same on some squares next to the long rectangles makes a squared C shape. This one was a little harder to do a color ramp from top to bottom, so I gave up on my tries at that. At the end of my experiments, I sewed mine pretty close to the one on the upper right. 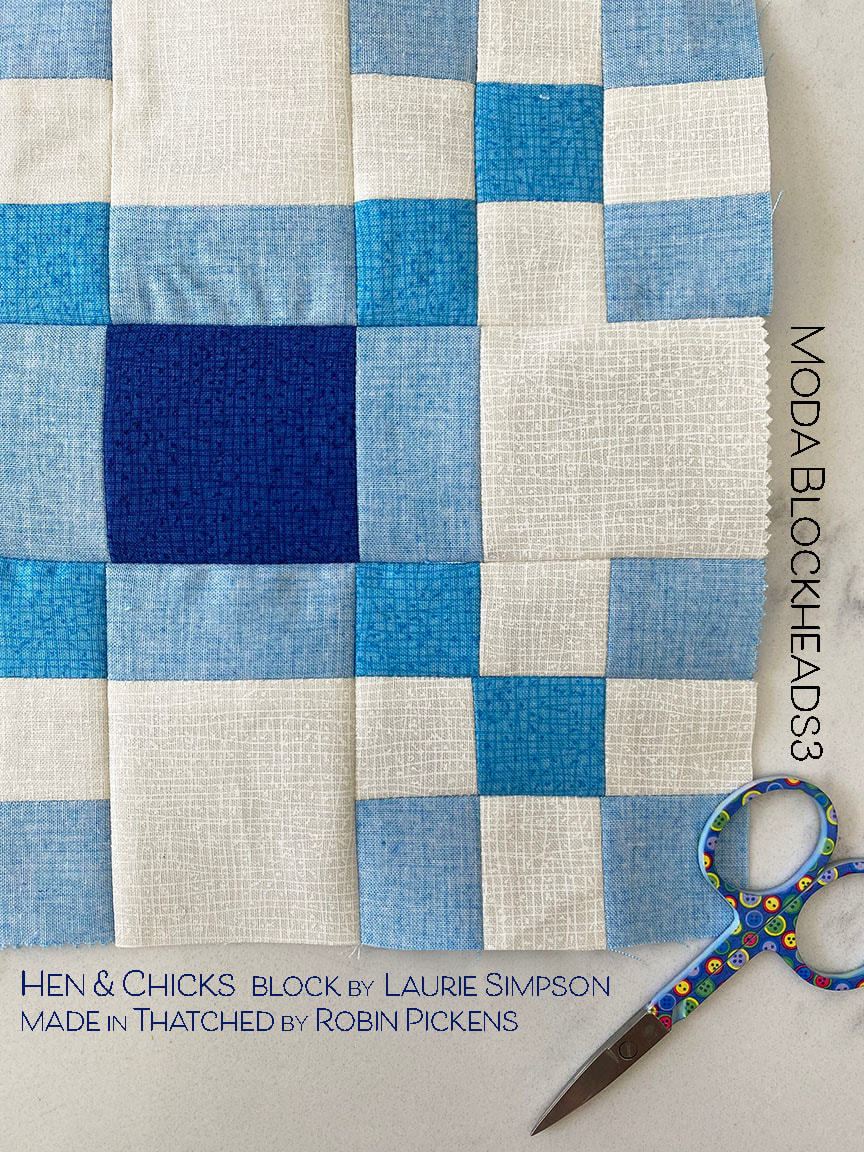 I made the mistake of looking at the overall block and not reading directions before starting so I started making strip sets to subcut for efficiency. About half way through I realized the diagraming had a longer background rectangle joining the middle of the small square rows, so I kept going on the course for this one and made 9-patches with a square between. 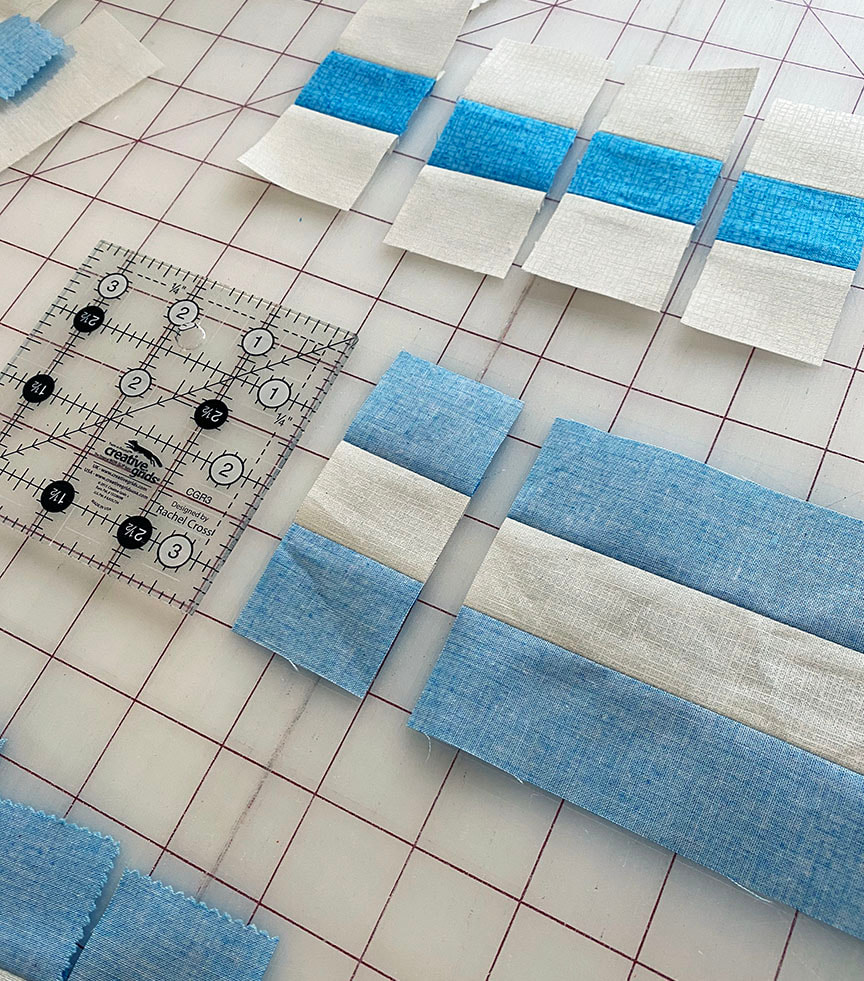 I also wanted a medium blue and a lighter blue so I flipped my Thatched to use the back side for the lighter blue. The dark center of the block is 96 Royal and the medium/light blue is 93 Sky. 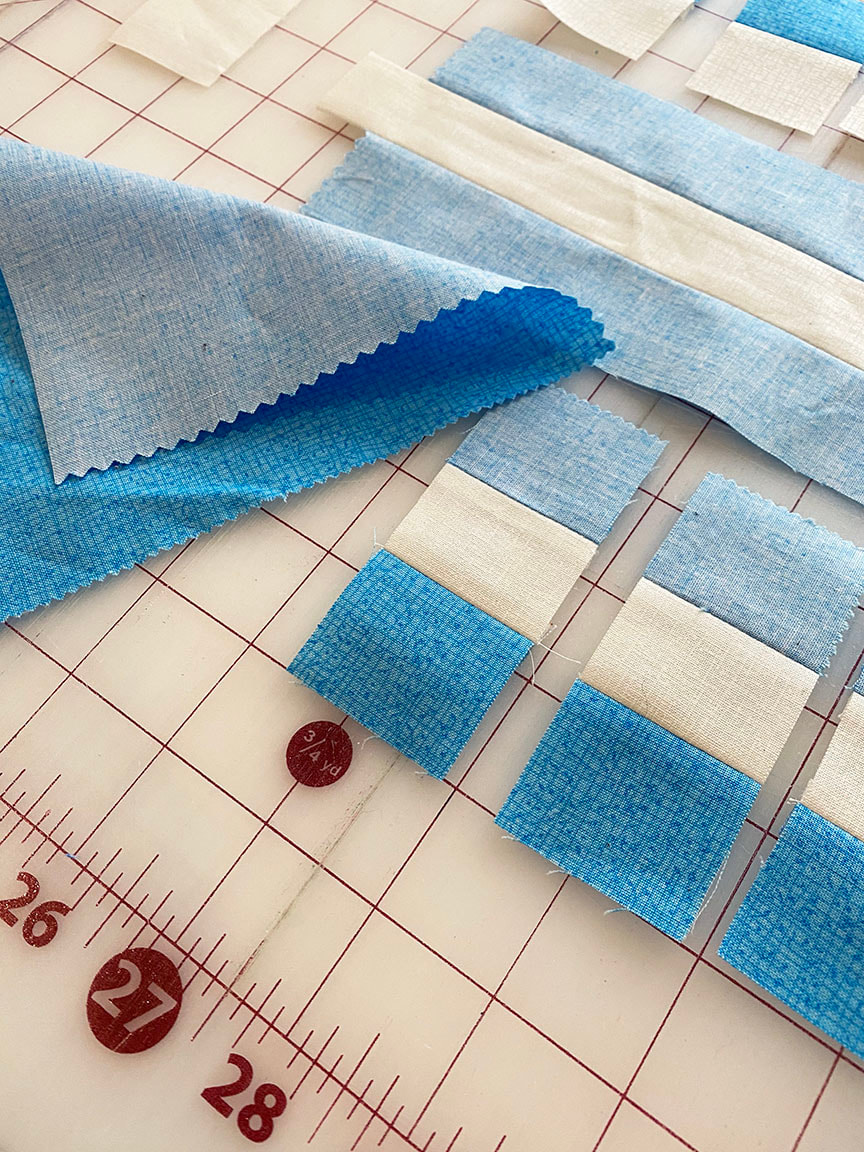 I changed to piecing the way the directions instructed for my second one, made from Abby Rose fabrics. It was fun to put little roses and plaids into the blocks! 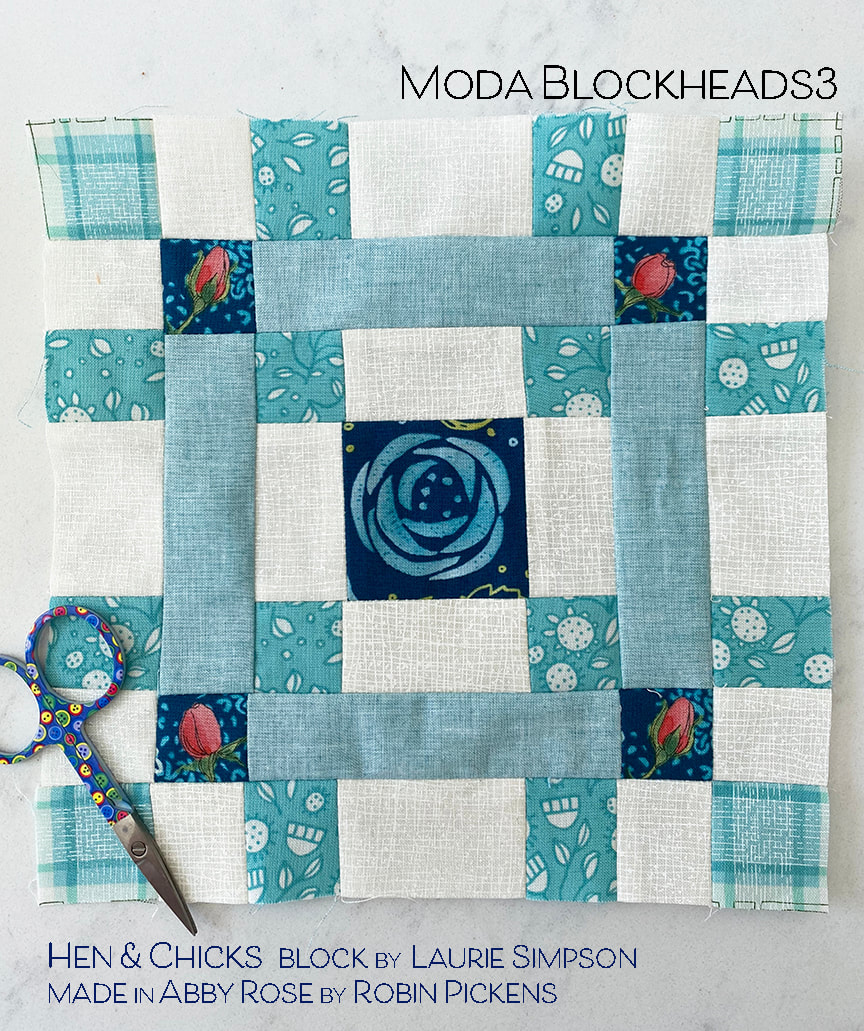 The blues in Abby Rose have more of a turquoise/teal color to them. It's called Seafoam in Abby Rose and I again used the back side on the rectangular strips to make my framing more subtle. 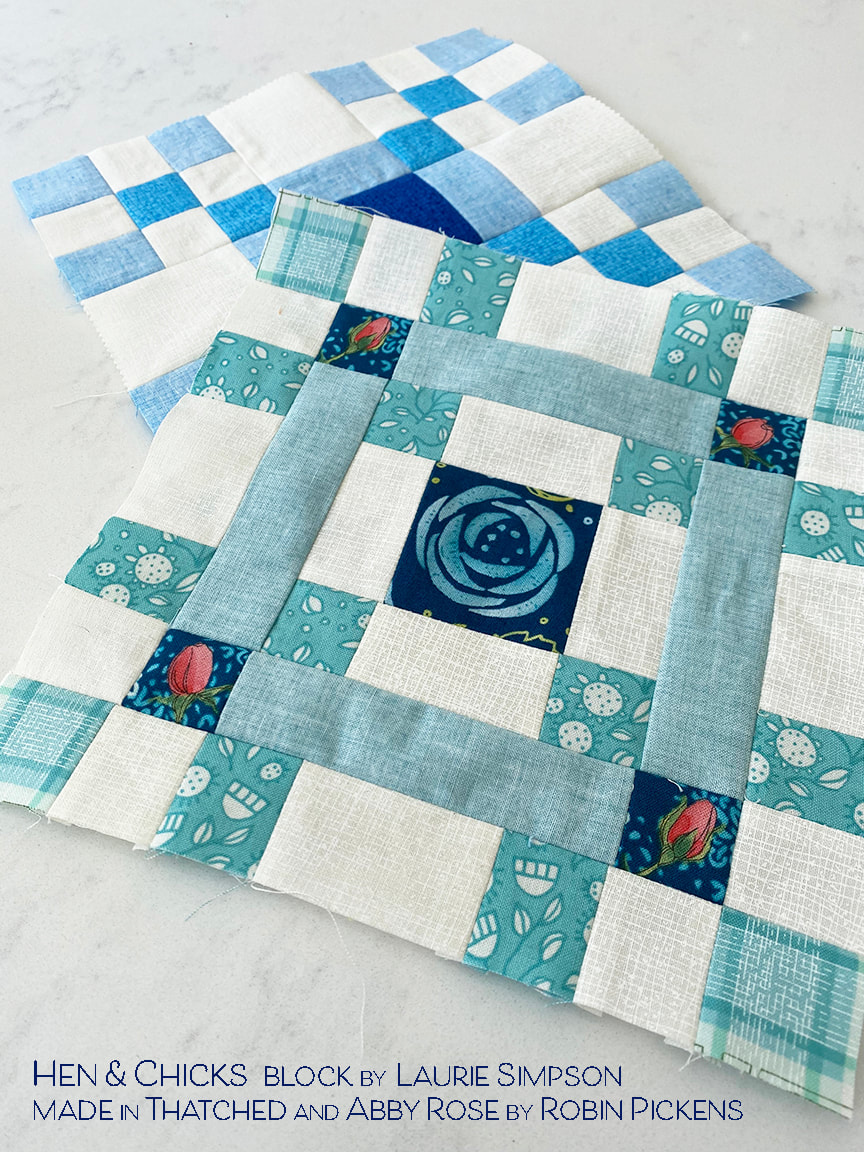 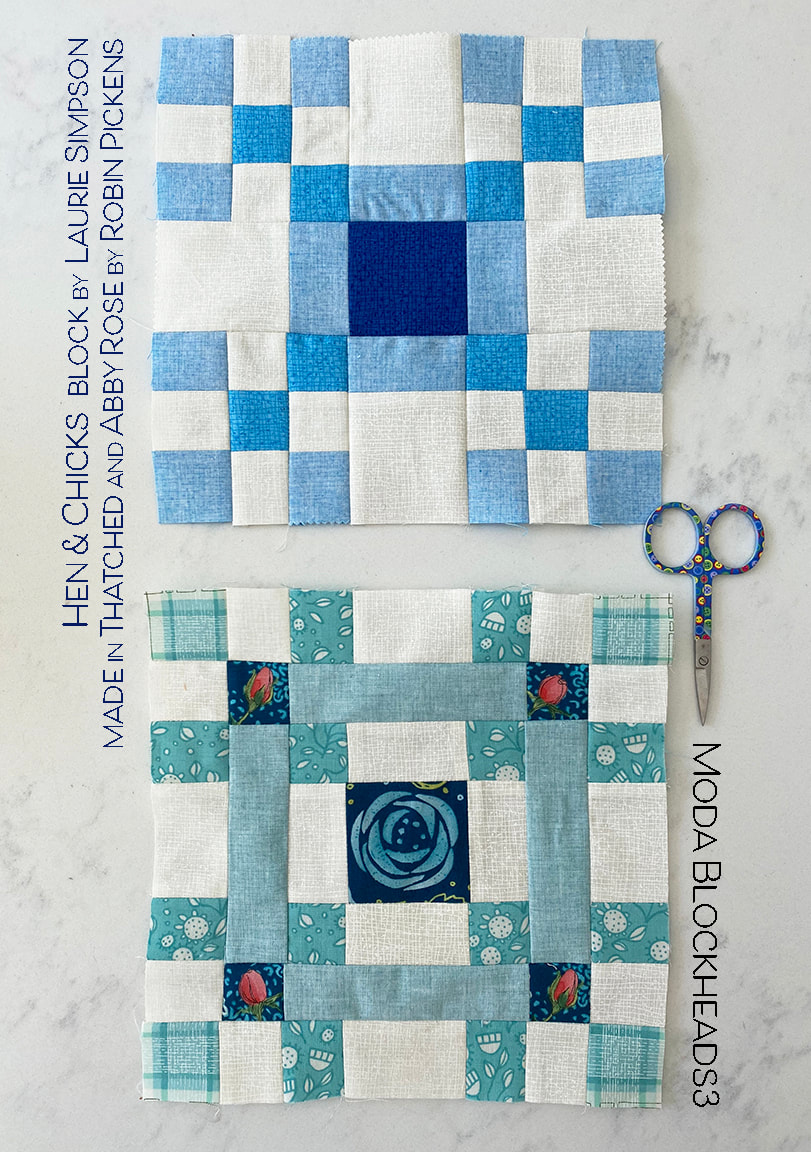 Fellow blockhead designers sewing along: 6.10 – Laurie Simpson <–We are Here 6.17– Vanessa Goertzen 6.24 – Stacy Iest Hsu 7.1 – Robin Pickens 7.8 – Janet Clare 7.15 – Jen Kingwell 7.22 – Joanna Figueroa 7.29 – Corey Yoder 8.5 – Sherri McConnell 8.12 – Betsy Chutchian 8.19 – Jan Patek 8.26 – Brigitte Heitland 9.2 – Lisa Bongean 9.9 – Lissa Alexander If you follow feeds, I am on bloglovin- click here to follow! Thanks and happy sewing!
Often times people have asked me about how I got into this work and what its like to make my living from creating art. There are numerous ways to go about that and I've had years and years of learning and I'm STILL learning. I have a Bachelors of Fine Art from the University of Michigan and I've taken textile and surface design courses at Otis College of Art and Design in Los Angeles. I still take classes to improve and expand my skills and knowledge. I expect I always will since learning is something I love and I strive to continually improve. But It would take a lot of effort to put what I've learned about making a career out of my art into a course for other people- a task that is beyond what I can take on. However, I am happy to share some info with those of you searching for this information...that I know of someone I greatly respect who IS now doing just that! Stacie Bloomfield of Gingiber is sharing her creative energy to help you grow! 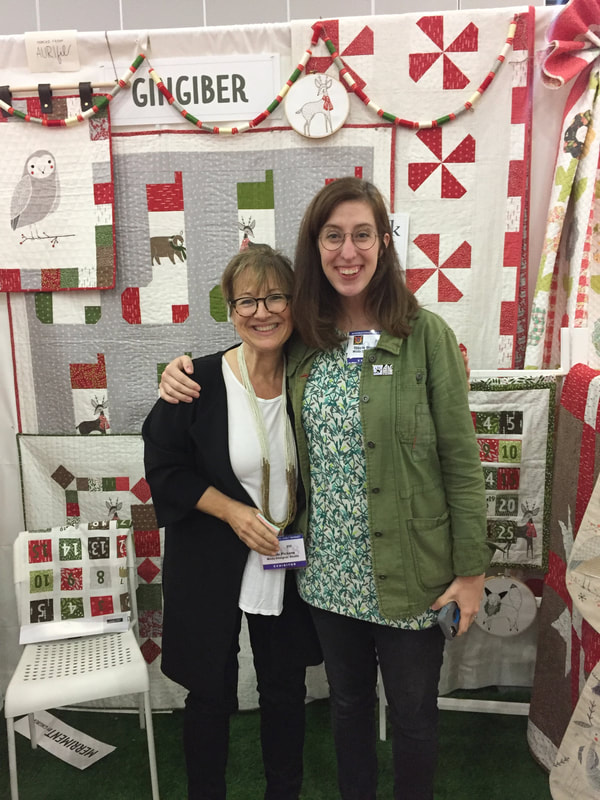 This is Stacie Bloomfield and I at Quilt Market a few years ago. Stacie also designs textile collections for Moda Fabrics and she is one of the wonderful designers I've gotten to know through exhibiting at Quilt Market. Sometimes at market we have some time to discuss and share and get to know each other more. Its one of the special treats of market- time to share with other designers. After getting to know Stacie more, I was blown away by her creative energy, sensitivity, enthusiasm, knowledge and drive. This picture at her booth shows some of her many adorable designs. ALL the wonderful images in the post are from Stacie at Gingiber. 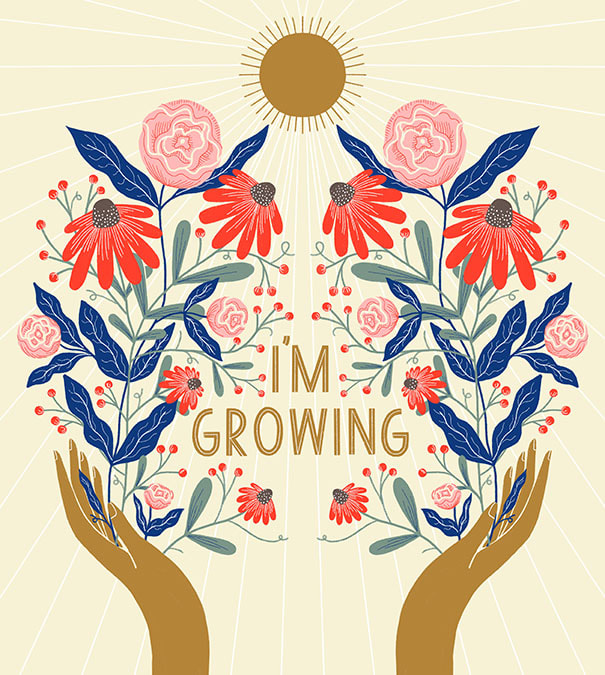 Stacie is a creative powerhouse. She runs a successful business based on her art and designs. She has a brick and mortar store and creative workshop space. She licenses her designs to numerous companies as well as manufacturing products herself. She knows how to approach companies, make the pitch, develop her portfolio and adapt to market trends. She boldly shares the ups and downs, the disappointments and the victories, the motivation and structure needed to make this world of creative work be something that DOES WORK. I have tremendous respect for her and I'm in awe of what she has created as her business. 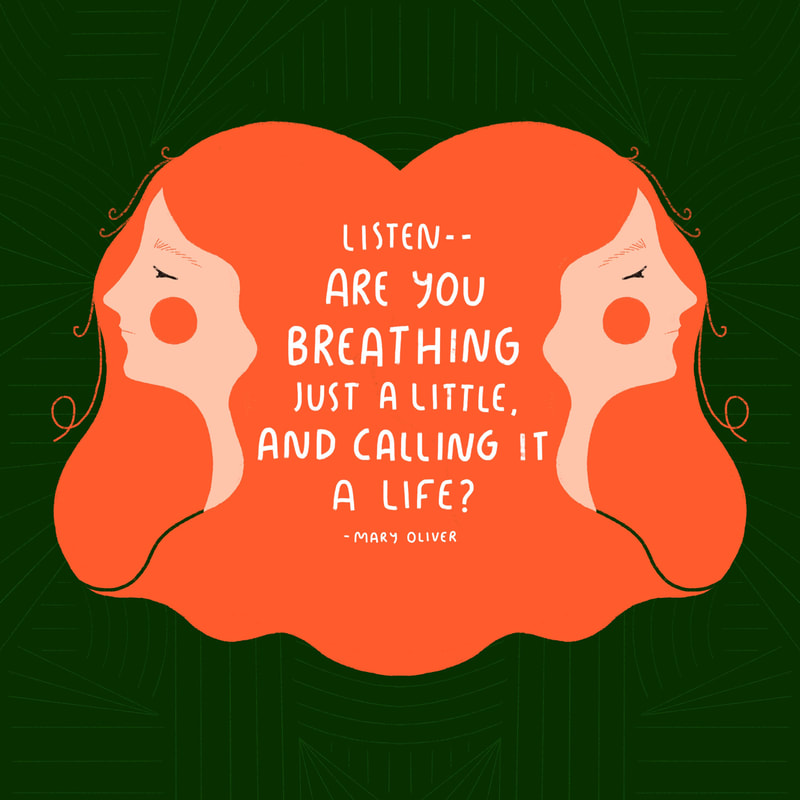 Stacie has a free class you can take that actually starts today- a mini course called "Creative Powerhouse- How to leverage your creativity into a career". This is what she does. I believe the class is open this whole week and its delivered to your email inbox. This is a link to get to her free class or click the box below: 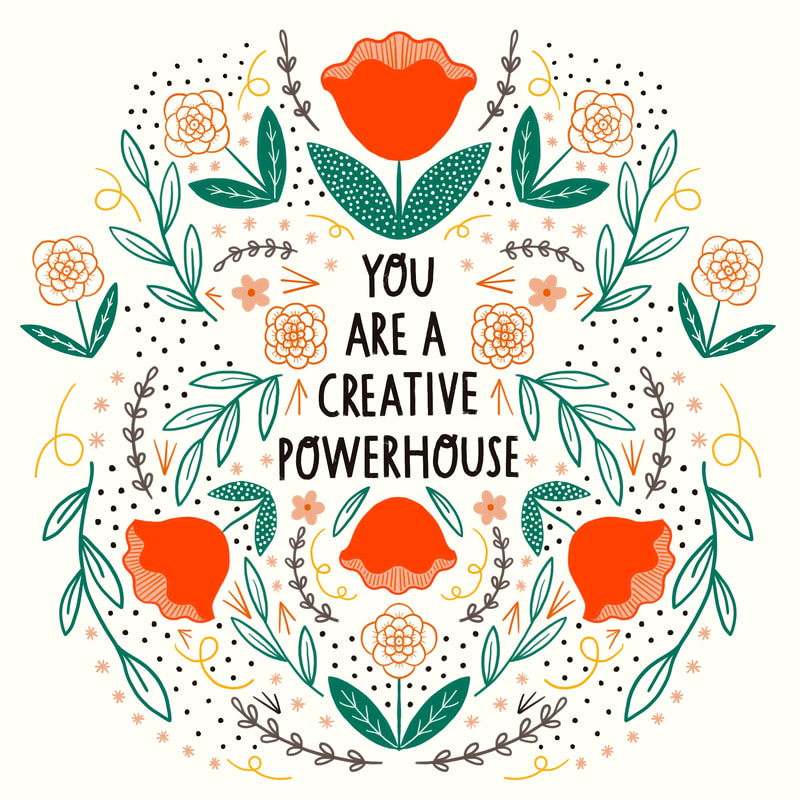 I'm going to be putting this Creative Powerhouse painter image up on my wall at my desk to remind myself of the business that Stacie has created and to reinforce my own commitment to what I am working at creating. By the way, its one of the things that I love about Stacie- she creates great images to empower and encourage and to shine! 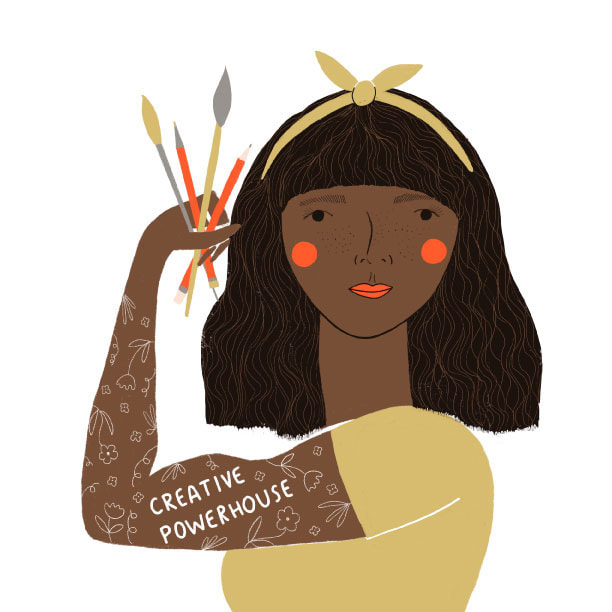 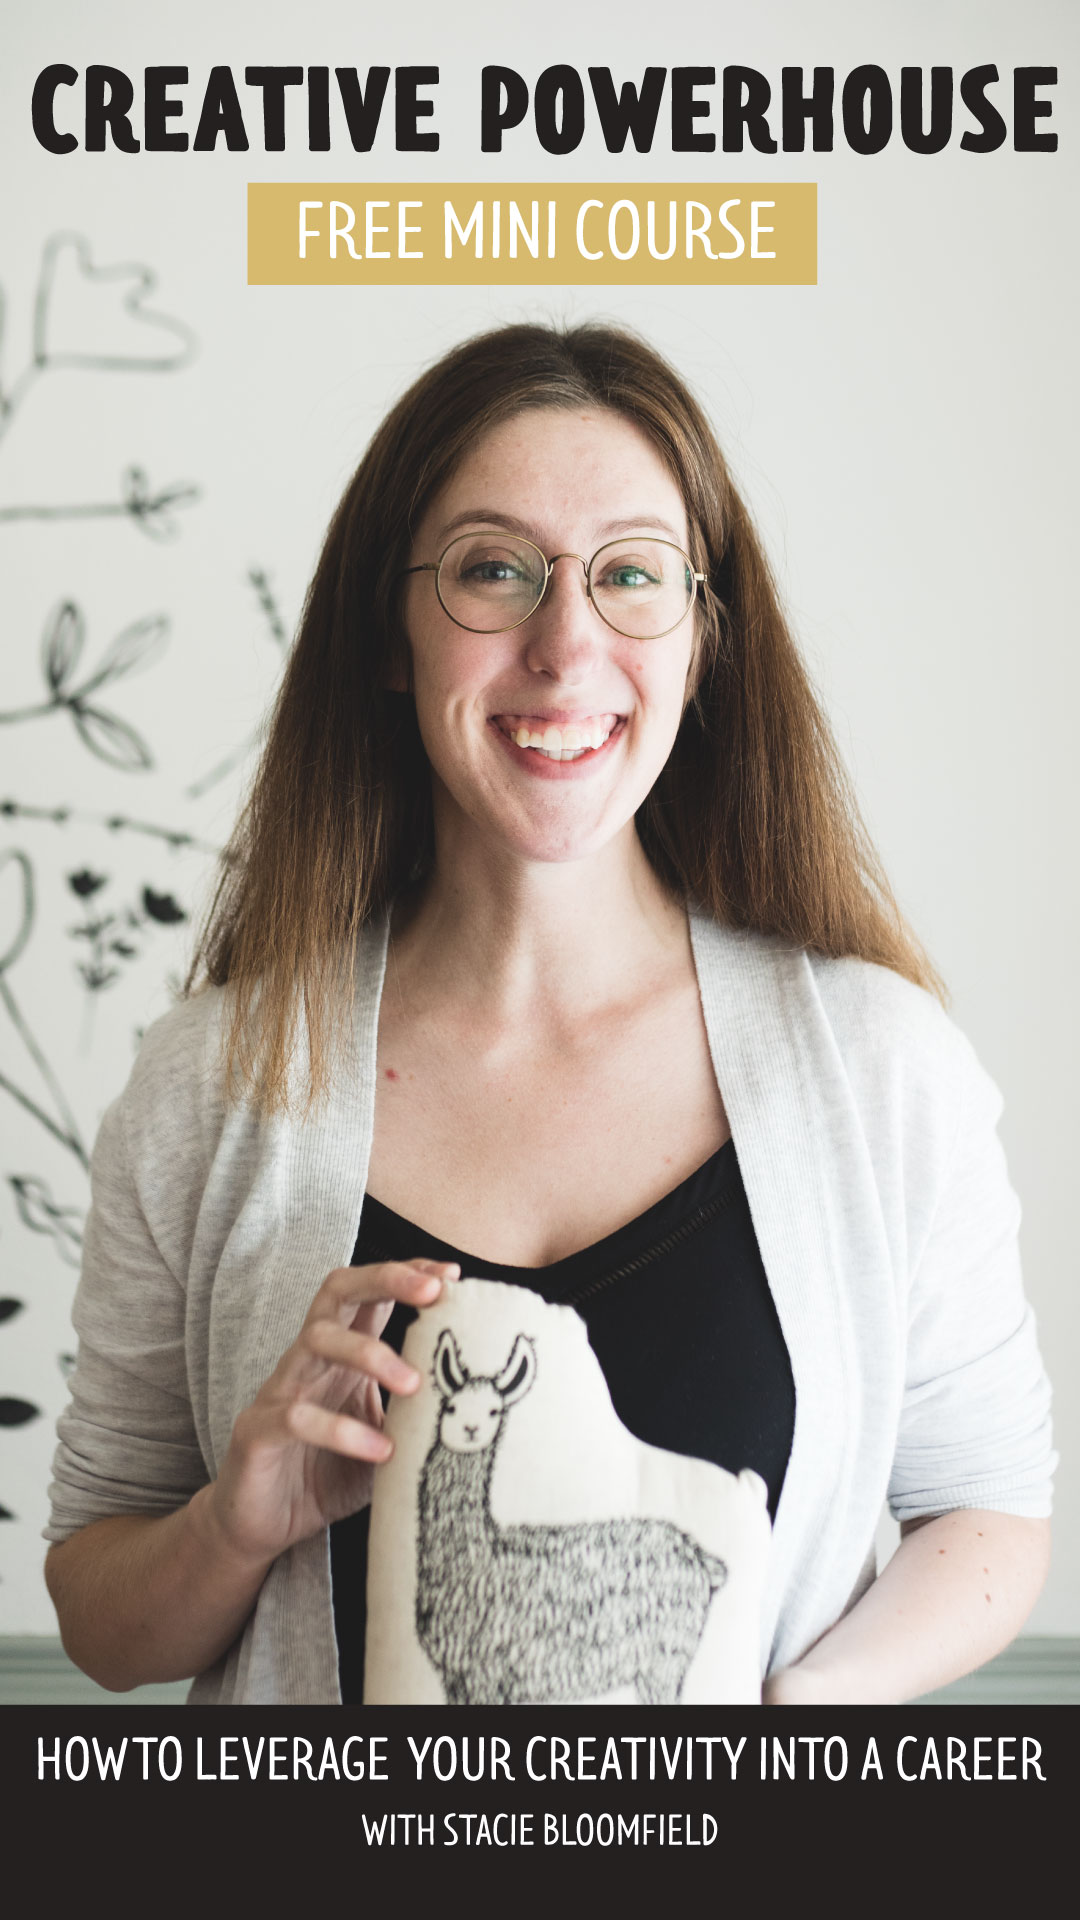 Thanks Stacie for making a class that shares some of this information with other artists and designers! Enjoy the class and your own creative journey!
#creativepowerhouse #partnerprogram #gingibercreates #artlicensing This week's block, XOXO from Lissa Alexander can be found at the Moda blog archive of Blockheads blocks. This is a great resource place to get your blocks and catch up on any you missed. 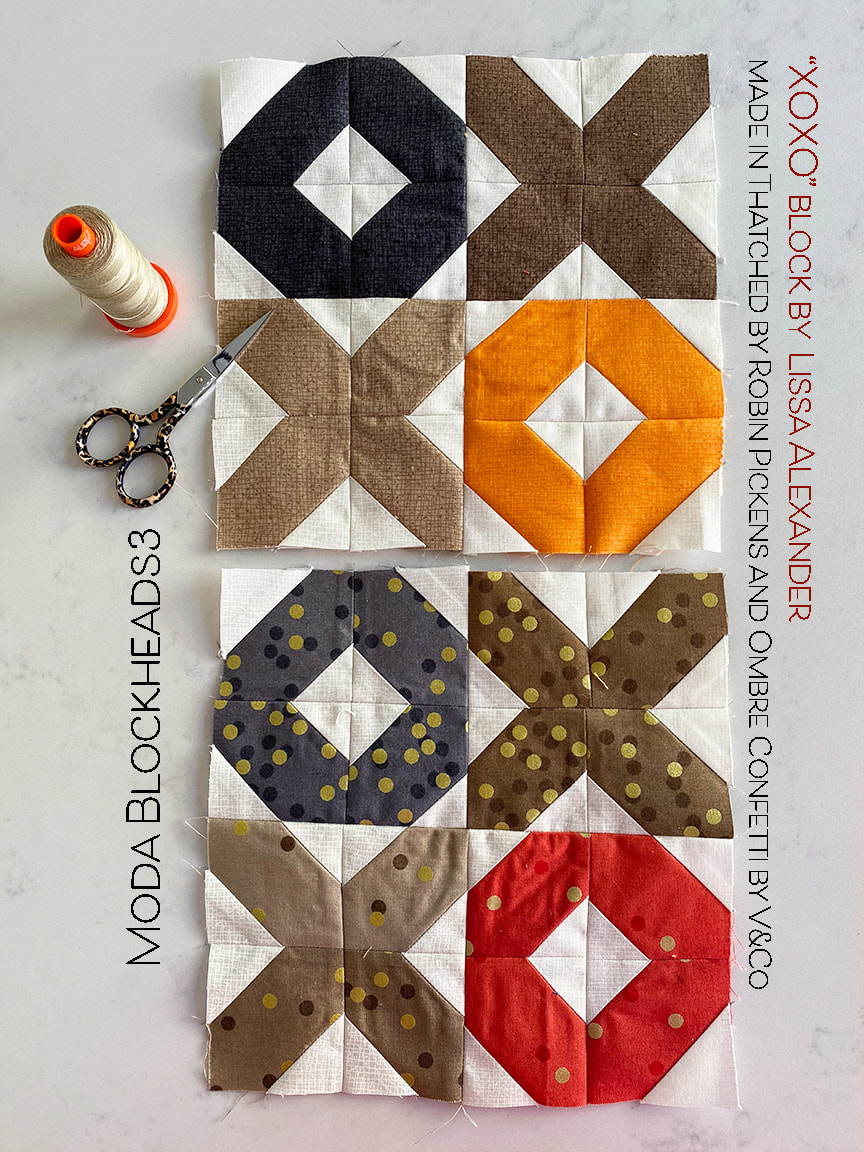 I'm still doing some browns this week so I've added a pop of orange to liven it up, and a little gray for a cooler balance. I intended to do this block with tan background corners and just white centers in the O's but I forgot and my blocks were done before I remembered. I'm sticking with these! 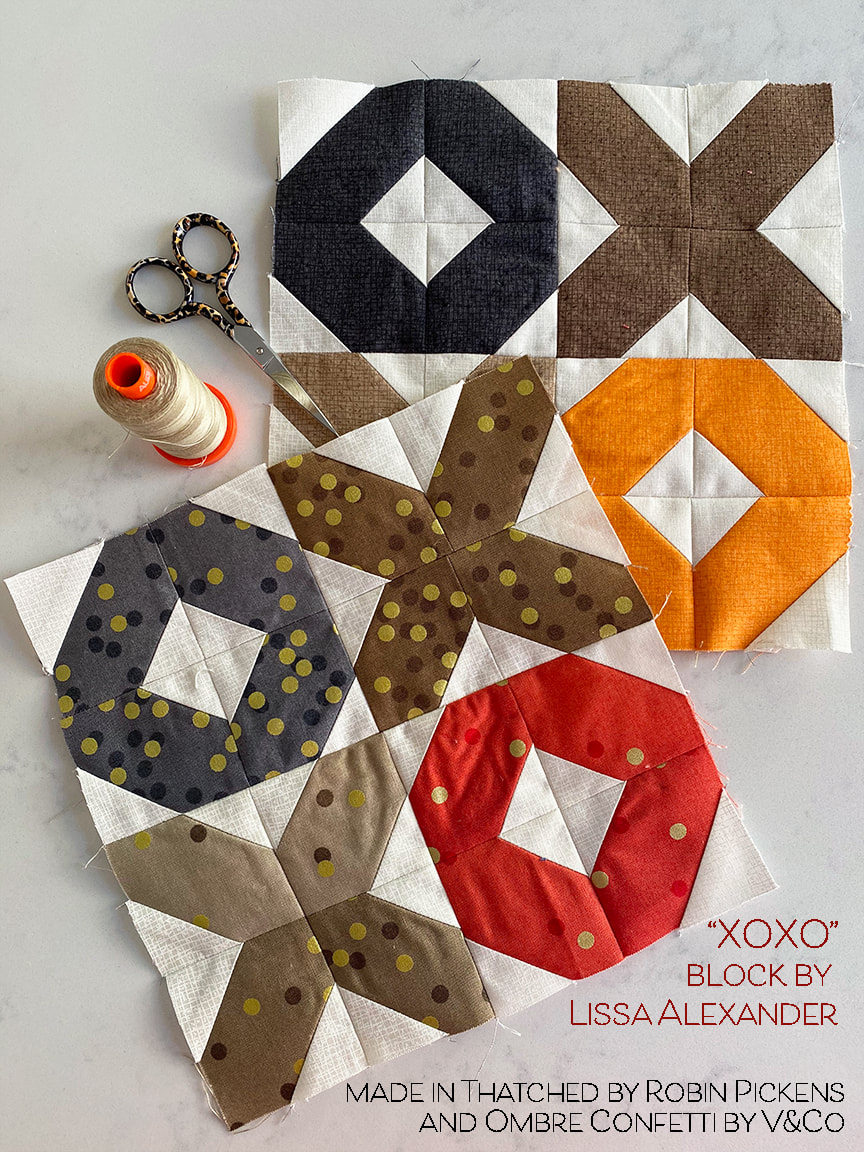 For my mixed print this week I 'm using V&Co Ombre Confetti. I just love this fabric! The density change with the dots to go with the lighter or darker value of the color is just perfect. I love that little pop of celebration and movement. And those little leopard print handle Gingher scissors...they are the first scissors I got with fun handles. I got them about 18 years ago and they were a special birthday treat I gave myself. Soooooo...want to see some color studies?? First I have my basic browns and orange. I made this in the first version since it went in with my rainbow row theme. I like looking at the richness when you add dark colors along with the light colors into those stitch-and-flip corners. And more orange, and how about playing with the orange and switching it up within the Xs and Os? If I were making the block for a fun pillow I would probably do something more mixed, like the right one on the second row. This stays with color stories- greens on top, yellow and oranges on the bottom. But each one is a mix of values within those colors and it feels like a lively mix of movement. 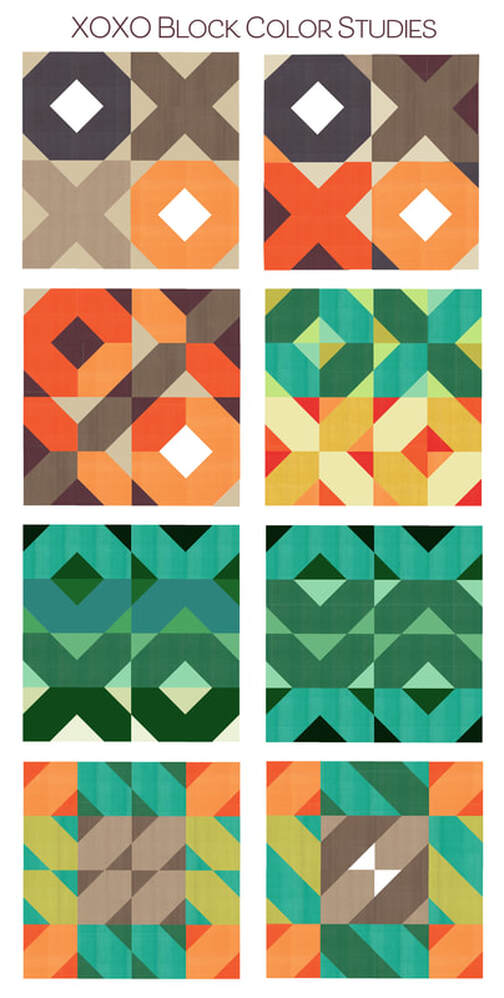 The all-green blocks have a different feel. The one on the left has the OXXO go from light on top to dark on bottom while the background does the reverse, dark to light going down each row. And next to it, the lights and darks stay the same in the top and bottom and the 2 middle rows. This emphasizes the feeling of mountains and valleys vs letters. On the last row, I've played with the browns making a center square by using one corner of each X, O block. Then consistent color above and below that, to the sides and in the corners. It creates a feeling of banded color or a transparent film of color layed over the Xs and Os. And lastly, by alternating the insides and outsides (so a chartreuse center has turquoise corners and the next one has a turquoise center with chartreuse corners) we get a continuation of the angled shape from block to block, creating a composition on angled lines that form new diamonds. The little white triangles in the center are a focal point and a bow on the package! This one really has a strong directional movement to the way the blocks read as a continual sections. This is the other one I think I'd make as an experiment. 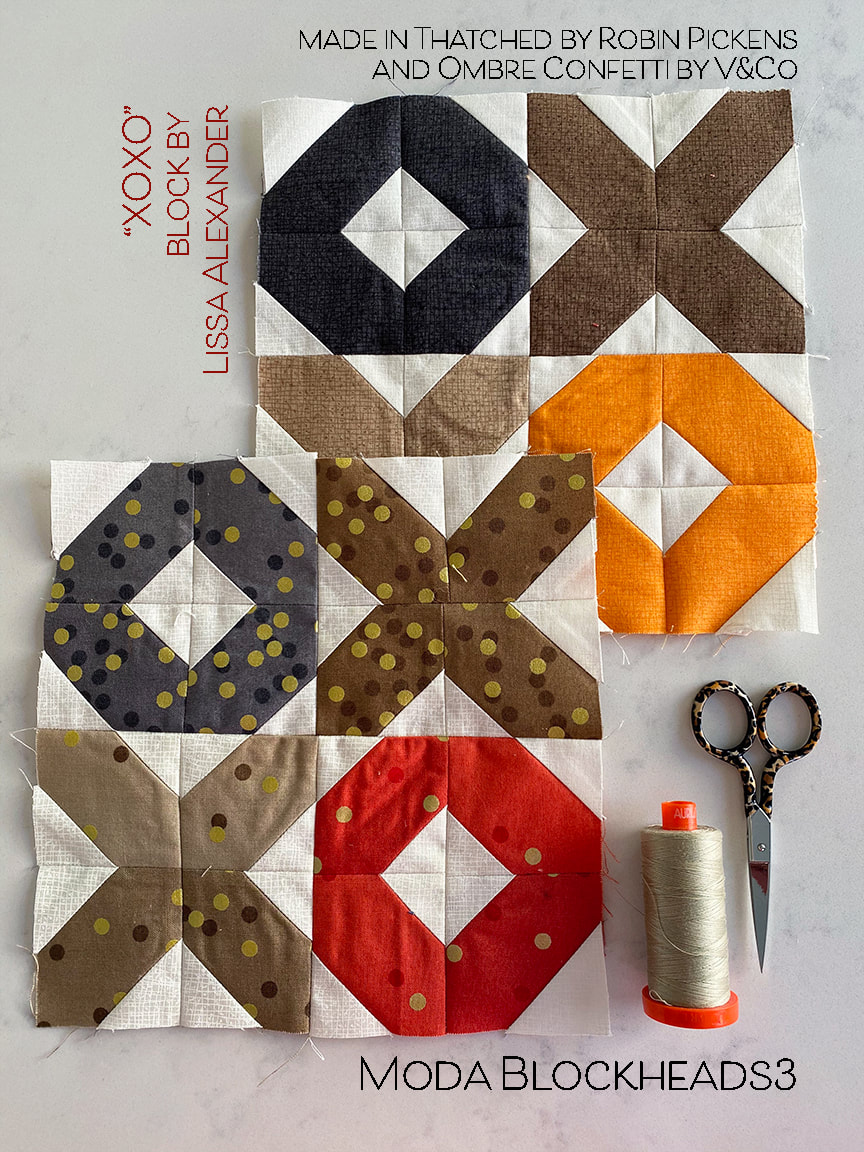 Check back on Saturday when I post some of the blocks I've been catching up on. I am really excited to share my applique bird and urn from a couple weeks ago and I did Joanna Figueroa's alternate flower too.
See you soon! If it's easier to see my posts on a feed, I am also on Bloglovin at https://www.bloglovin.com/blogs/robin-pickens-blog-20472215 |

About ROBINDesigner of colorful florals for Moda fabrics. Modern to transitional quilt designer. Illustrator, sewist, crafter. I am proud to be a designer for Moda Fabrics!


Shop Robin's Designs
 I am an affiliate for Fat Quarter Shop and may earn a small commission through my links. Thank you for your support!

Check the March 6, 2017 Episode!
Categories
All
Archives
February 2024
© Robin Pickens Inc. All rights reserved. No images may be reproduced without permission.
|
 RSS Feed

