|
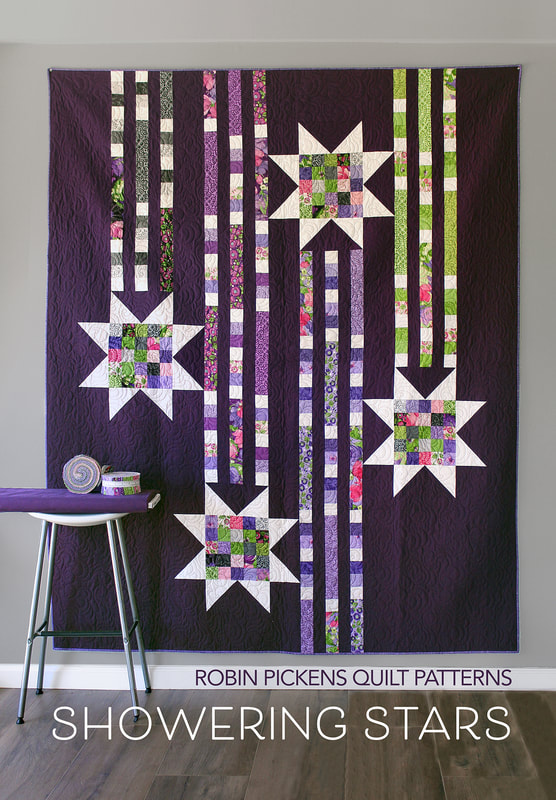
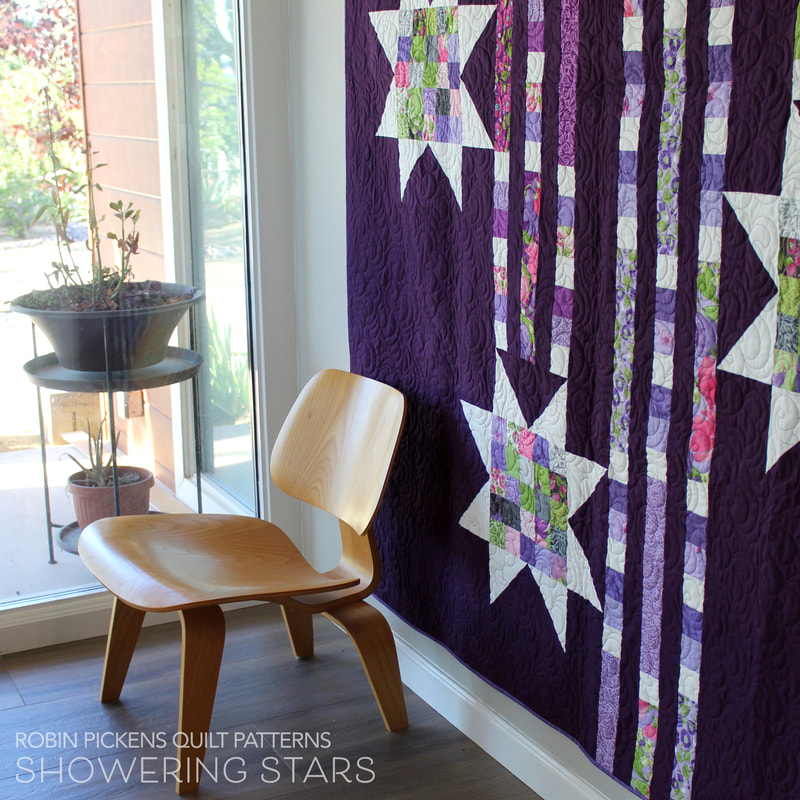
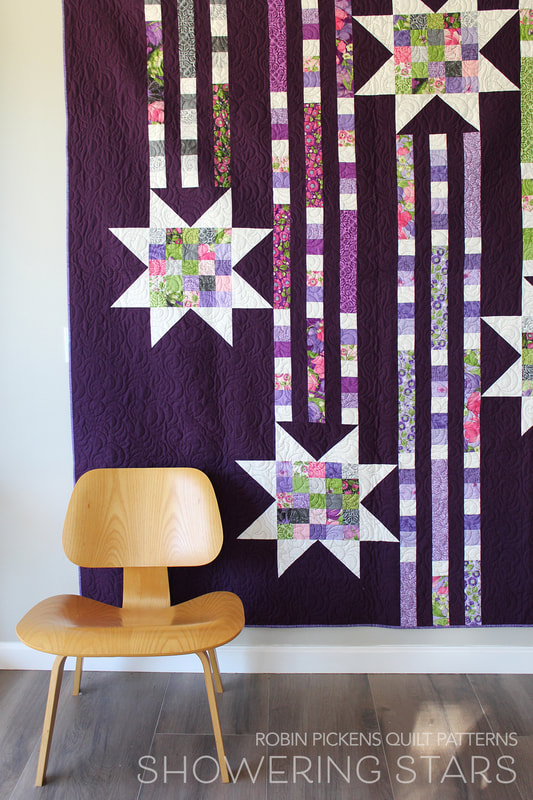
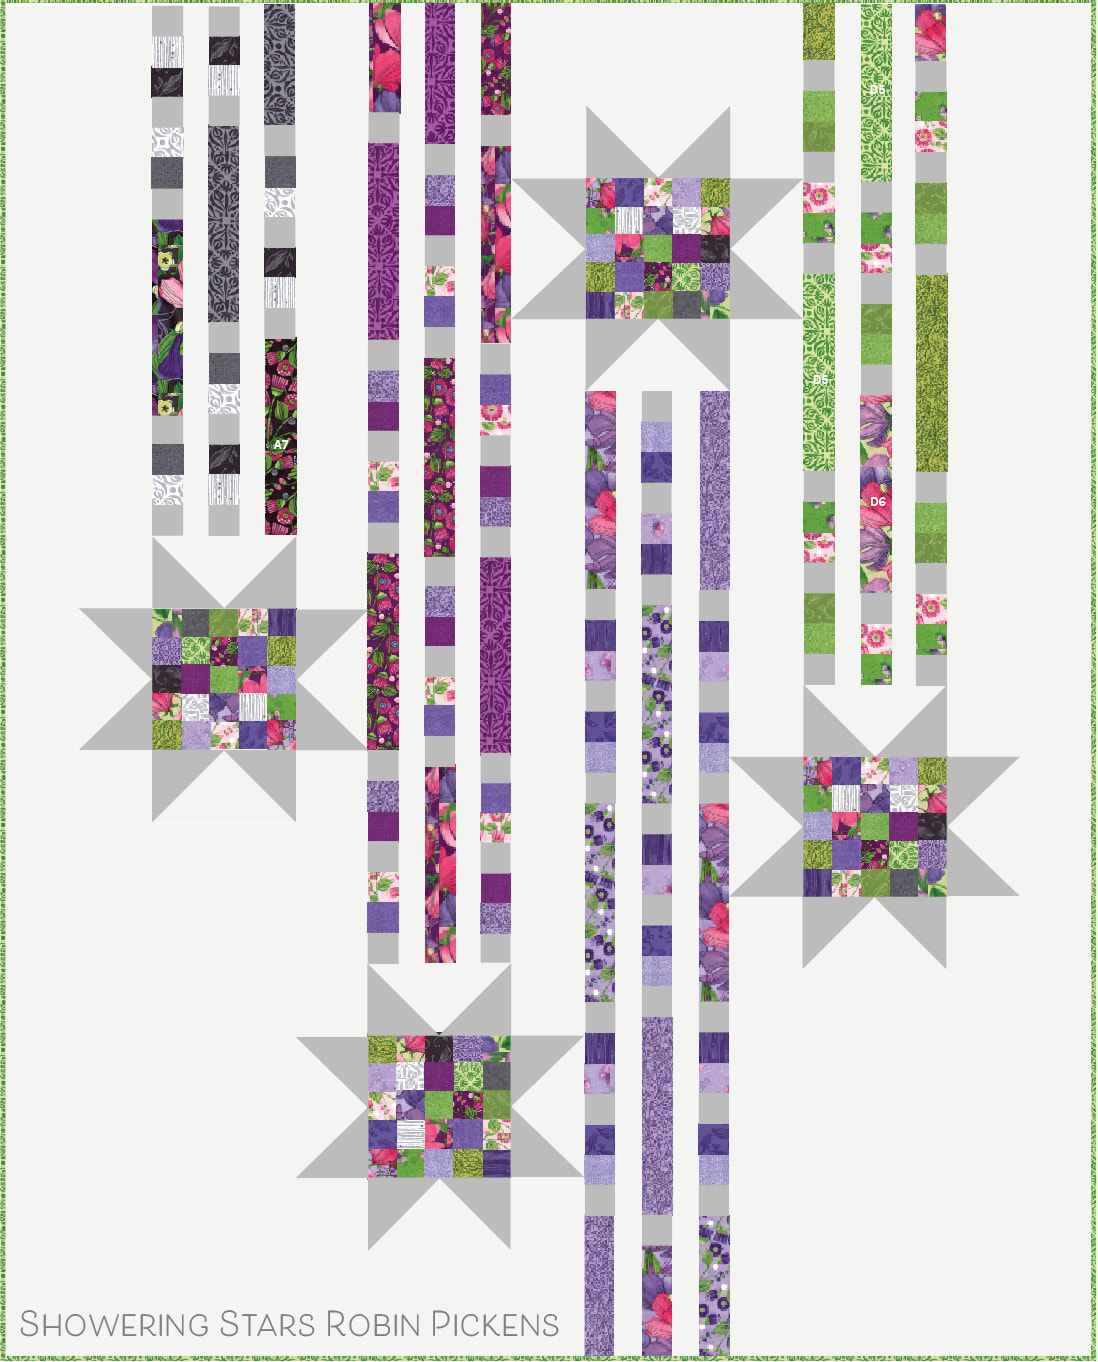
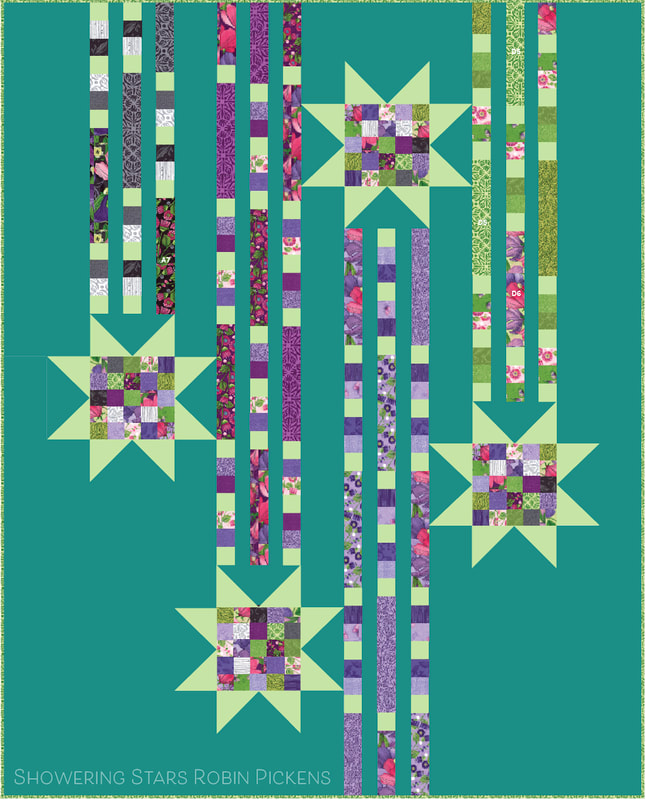
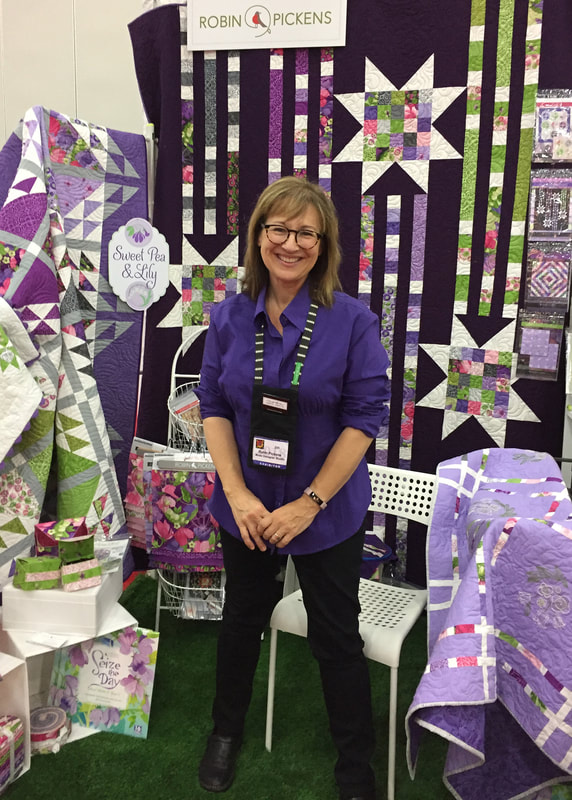
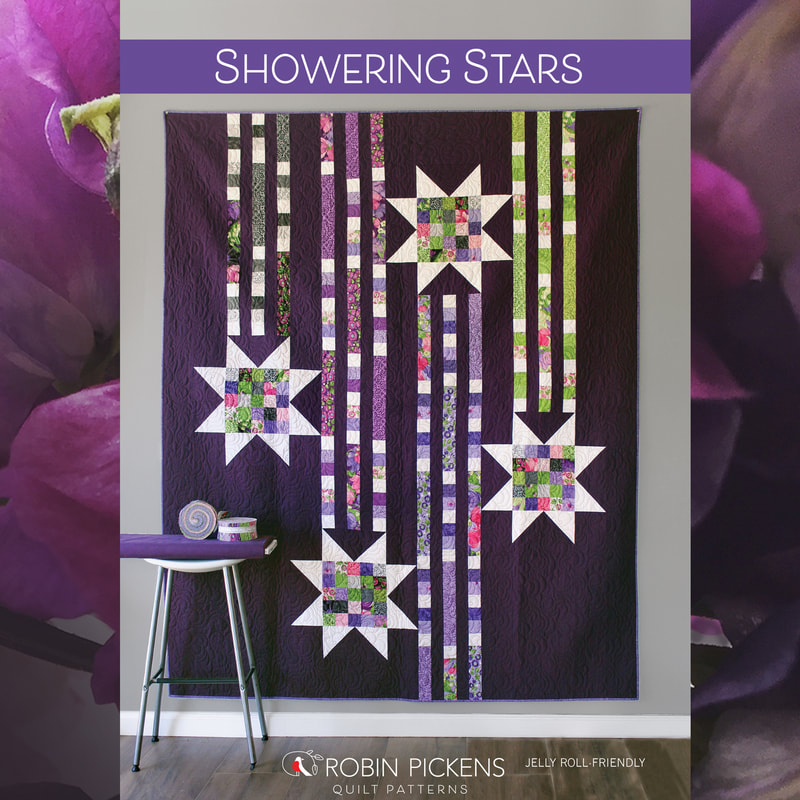
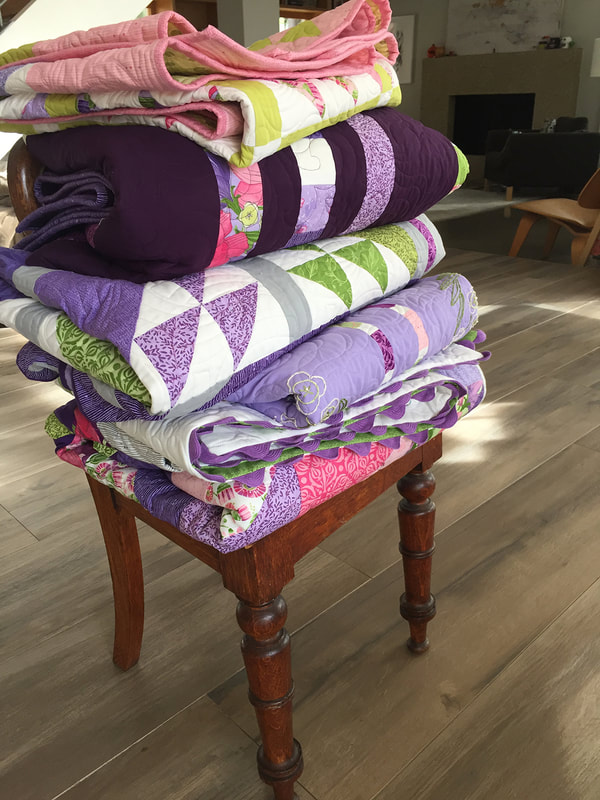
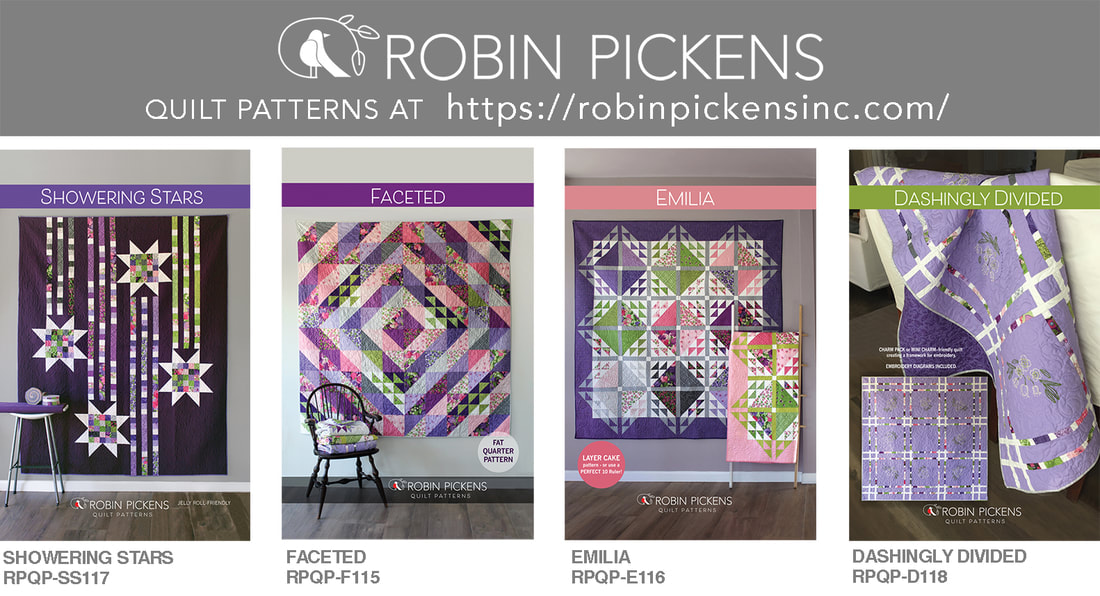
Jelly Roll-friendly and quick to piece, this Showering Stars quilt is full of drama! I knew with the Sweet Pea & Lily collection for Moda Fabrics (ships in Feb/March 2019) I wanted a quilt that used deep purple to enhance the theatrical nature of the purples in the prints. One thing I enjoy with this group is the purples are in both cool and warm purples. I needed to find the right deep purple to show off their splendor. I have now fallen in love with Moda Bella Solid PRUNE 238. Its rich and vibrant and LUSCIOUS! Its the glorious deep purple/plum color as the background. Did I mention I bought a bolt of it? Not sure what I'm doing with the rest but I can't wait to use it as an accent to other prints. But what would Showering Stars look like reversed, with a light background? I haven't made it this way (yet) but thought I'd give some computer inspiration for other colorways. I used a soft gray in the star points and dashes to let the colors in the star trails feel more colorful and sparkly. And going all-out color with this turquoise background and light green star points. Completely different look but all of these are using the same Sweet Pea & Lily prints in the star trails. This quilt was my main booth image at the Houston Quilt Market this past fall. It was fun to have such a different color play with this collection! One part I like is the greens and grays still transition through from previous collections. Check your local quilt shop for the Showering Stars pattern, along with Sweet Pea & Lily fabrics! Patterns are also available at my online shop if your local shop is not carrying it. Find a falling star and make a wish! And check back for more Sweet Pea & Lily quilts!
22 Comments
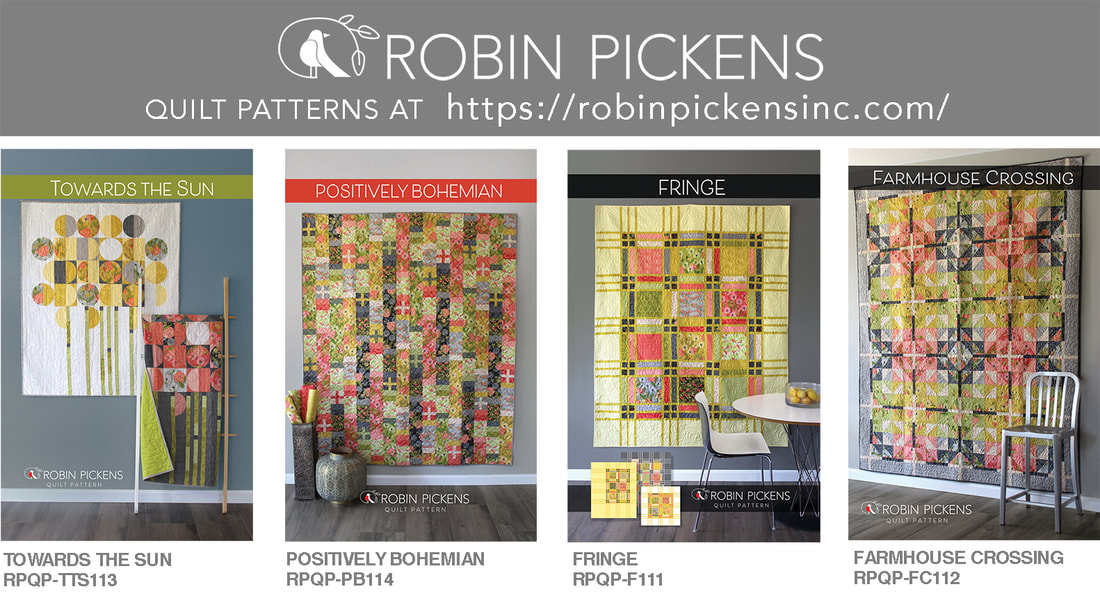
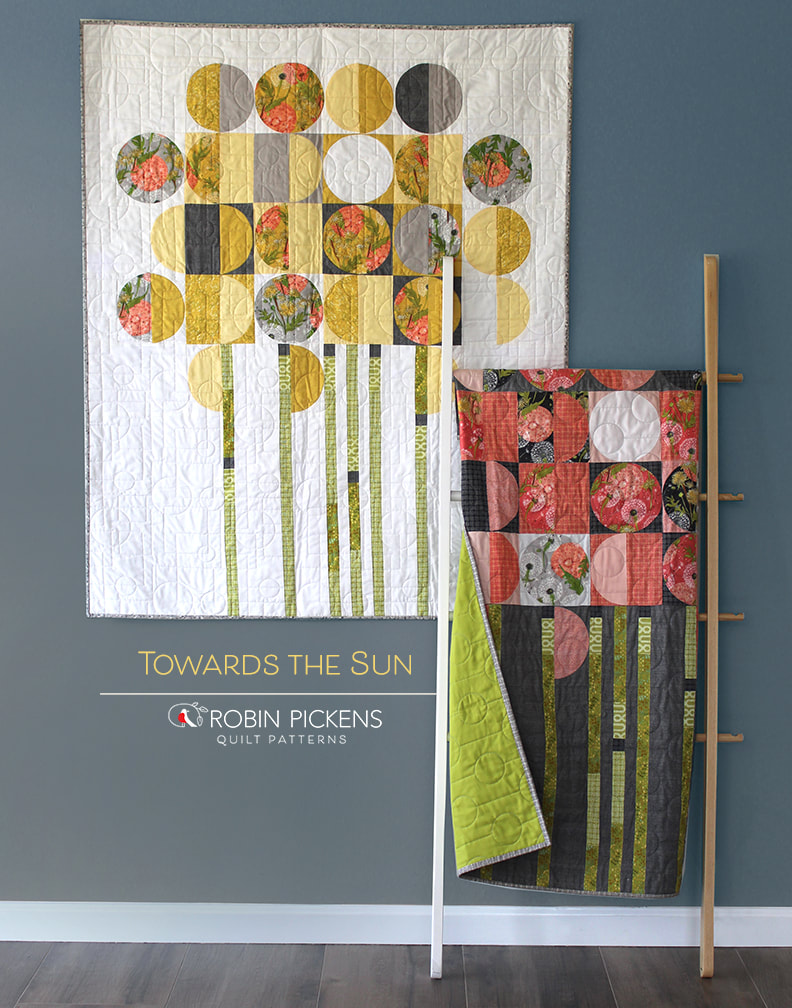
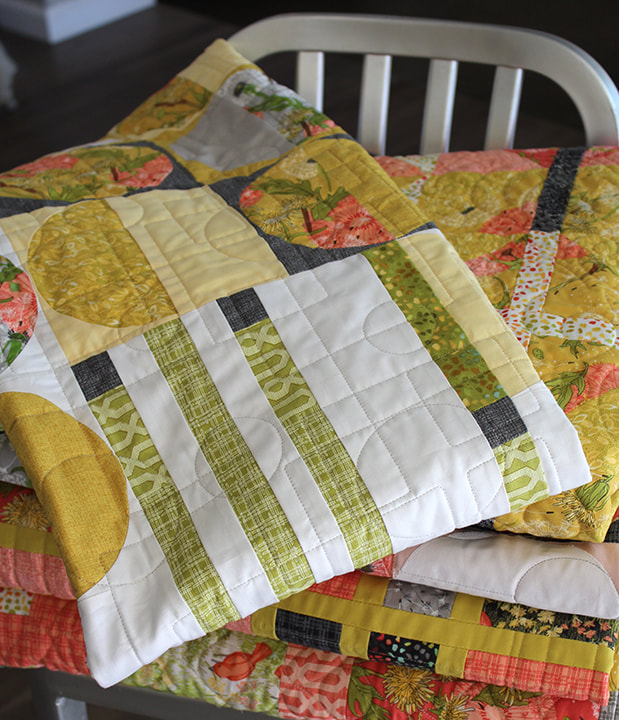
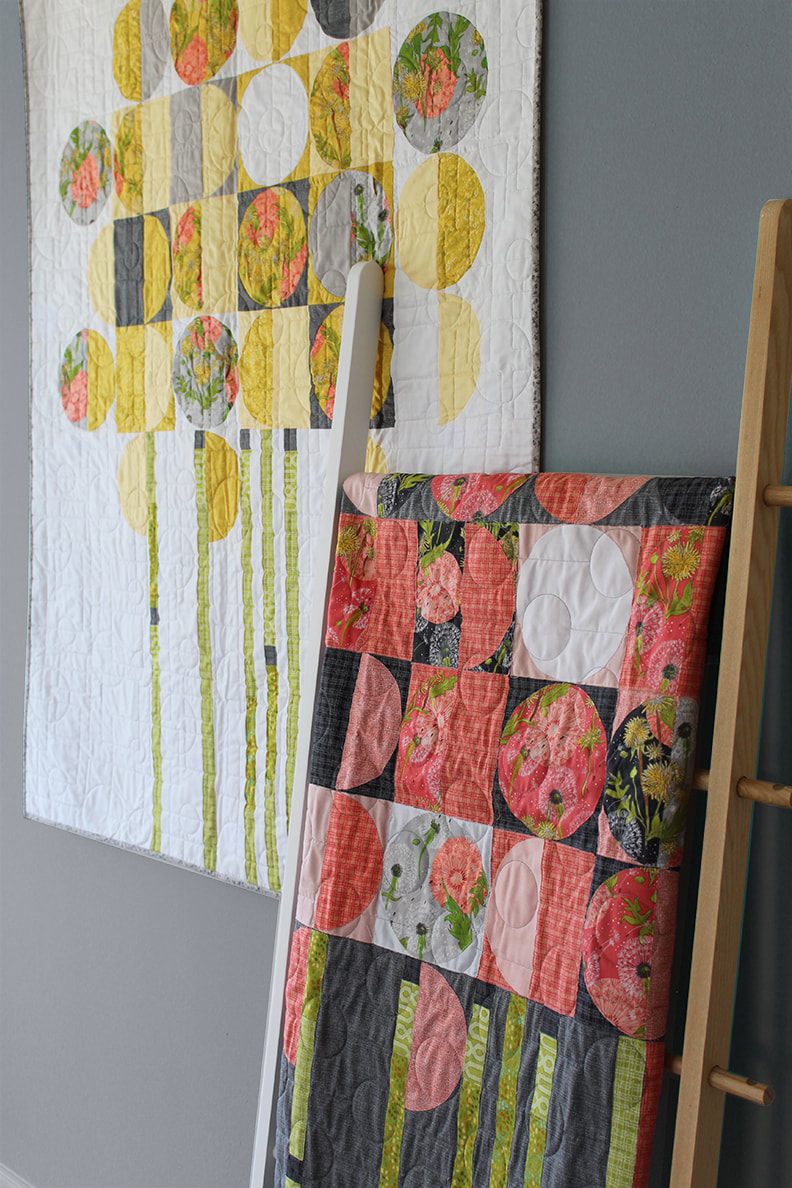
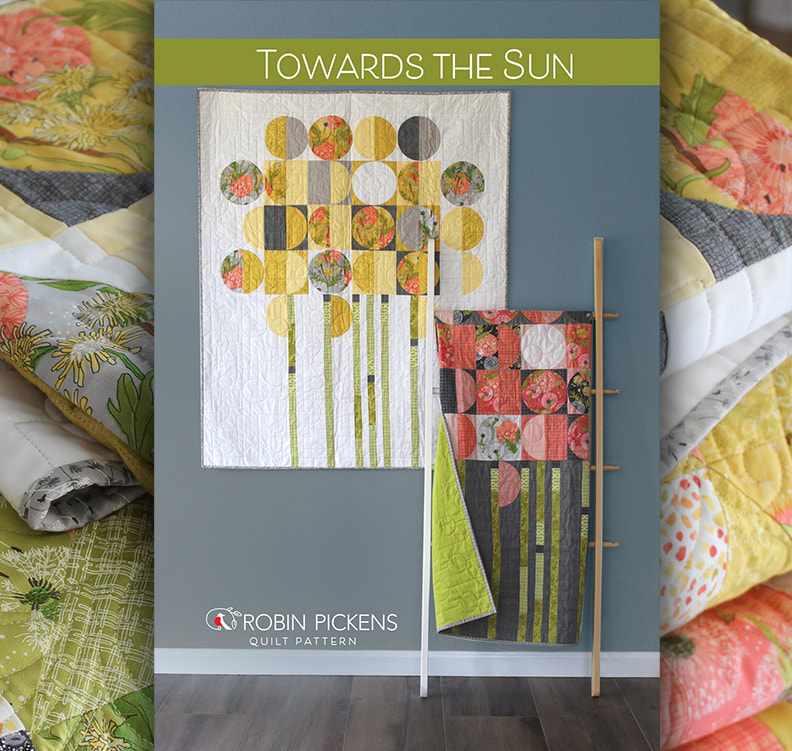
Modern graphic blooms stand tall, reaching for the sun. This is the inspiration for my Towards the Sun quilt pattern. I wanted a quilt to go with my Dandi Annie fabrics that reflected the round spheres of the mature seed puffs of the dandelions. The main prints have a play of large circles behind the plants and I thought they would play nicely within larger circle shapes. This became the overall composition for the blooms within a grid structure for mixing in coordinating prints. With such a graphic and geometric structure, I felt straight sectioned lines as stems would work well to support the blooms and add a new graphic element to contrast with all the circles. This was my first time making a quilt with half circle and full circle blocks. I created a paper template to go with the pattern that you can use for making the blocks or if you'd prefer to use a specialty ruler template I'd suggest the Creative Grids Circle Savvy Quilt Ruler (CGRSAV1). It has a large range of circular sizes and I used this ruler to make my 6" finished circle blocks. Working with circles was actually quite fun and I found I was most successful with my shapes when I slowed down my sewing a little and lengthened my stitch length to help with the give and stretch going around curves. This quilt can be made as pieced blocks or as applique, either fusible raw edge or turned edge. The white and yellow quilt here is pieced using the Creative Grids circular ruler and the pink and gray quilt is made with the fusible raw edge method. I top stitched on my machine close to the edges of the shapes after fusing.
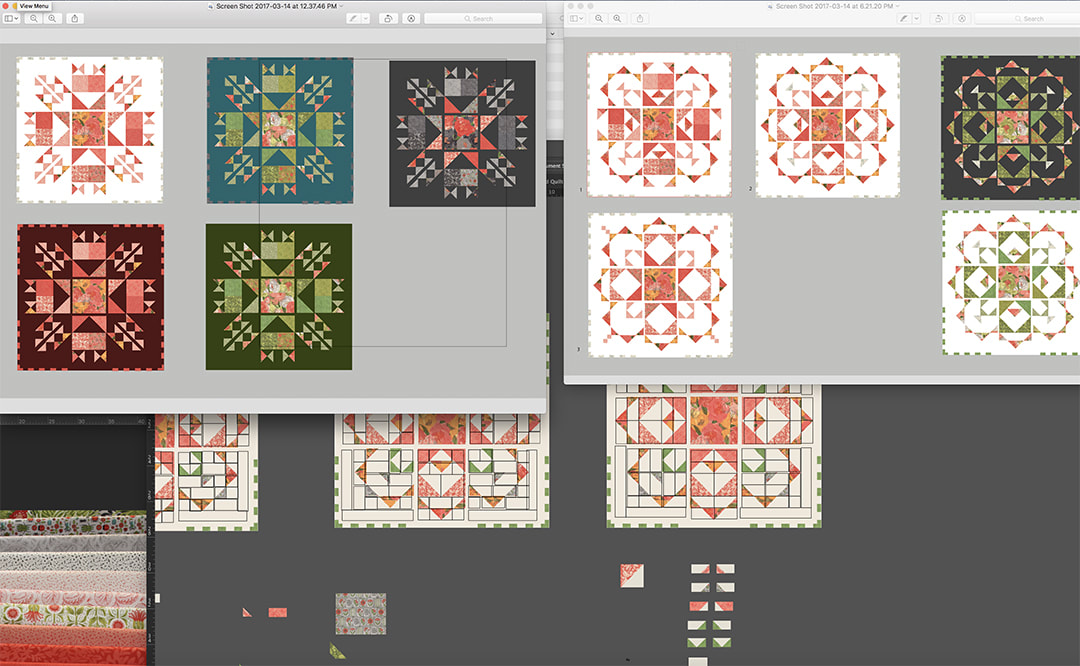
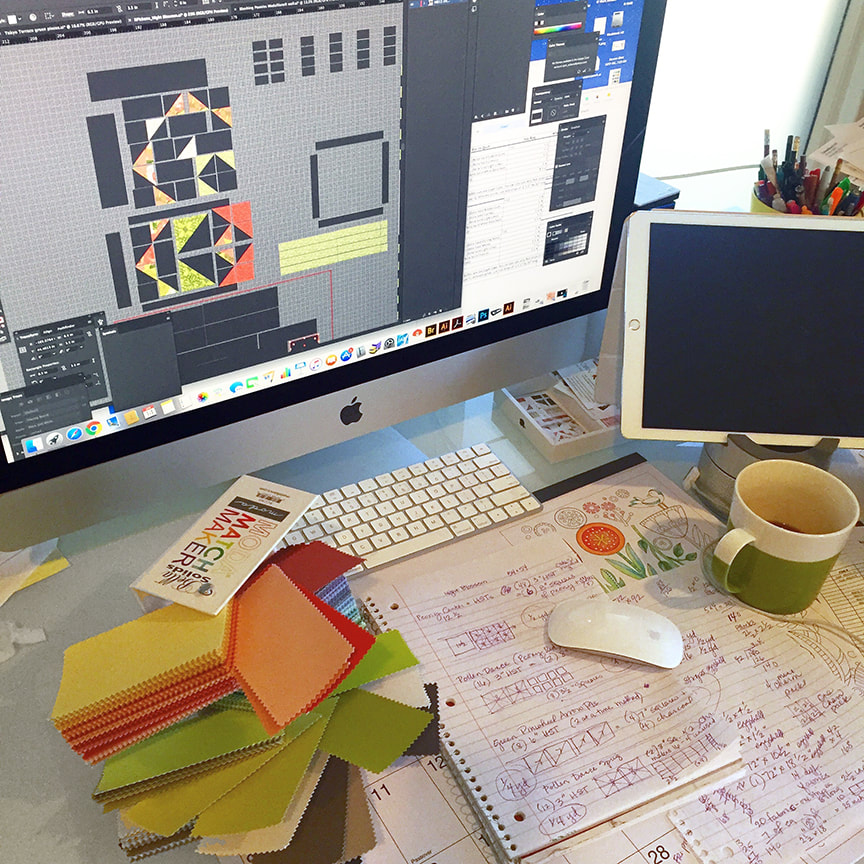
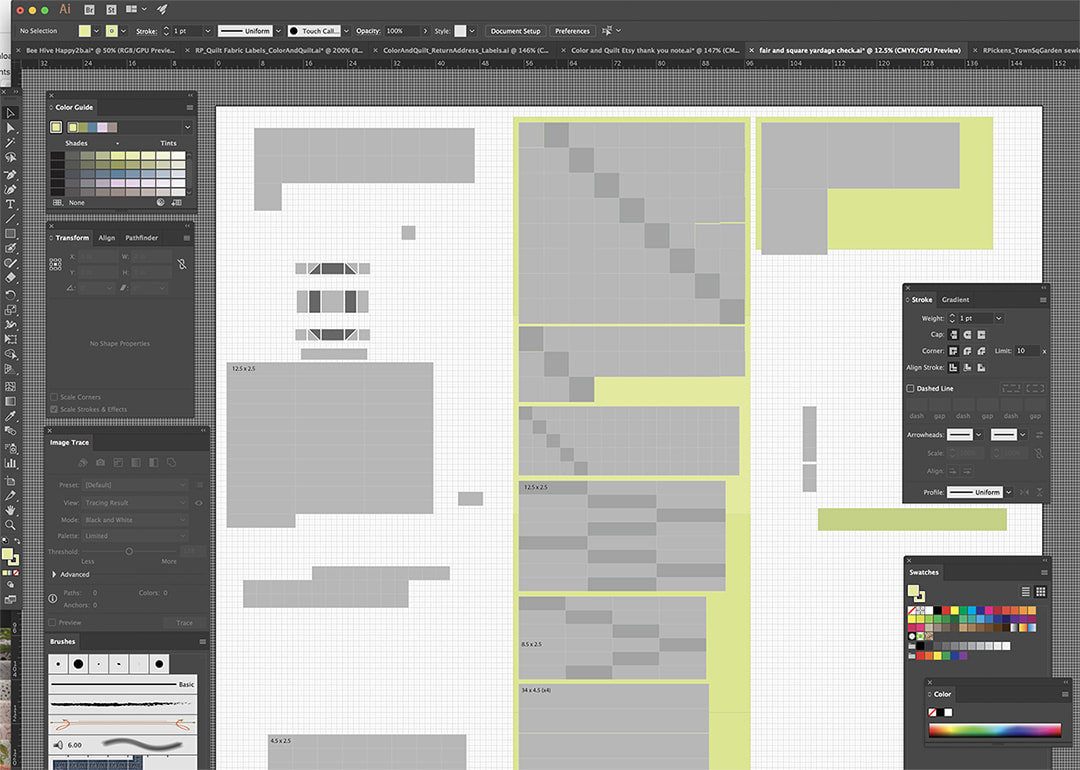
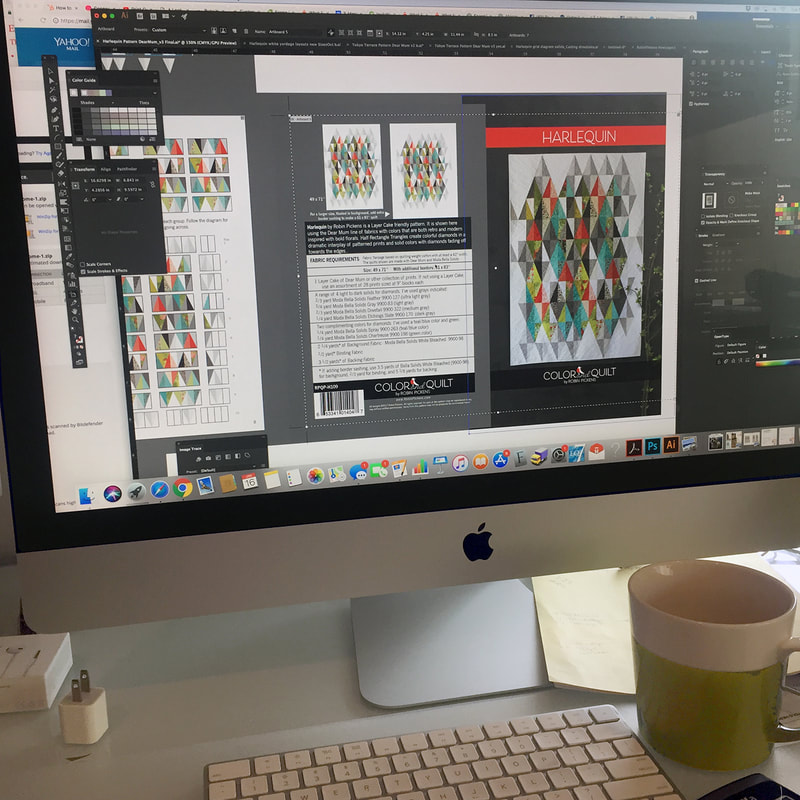
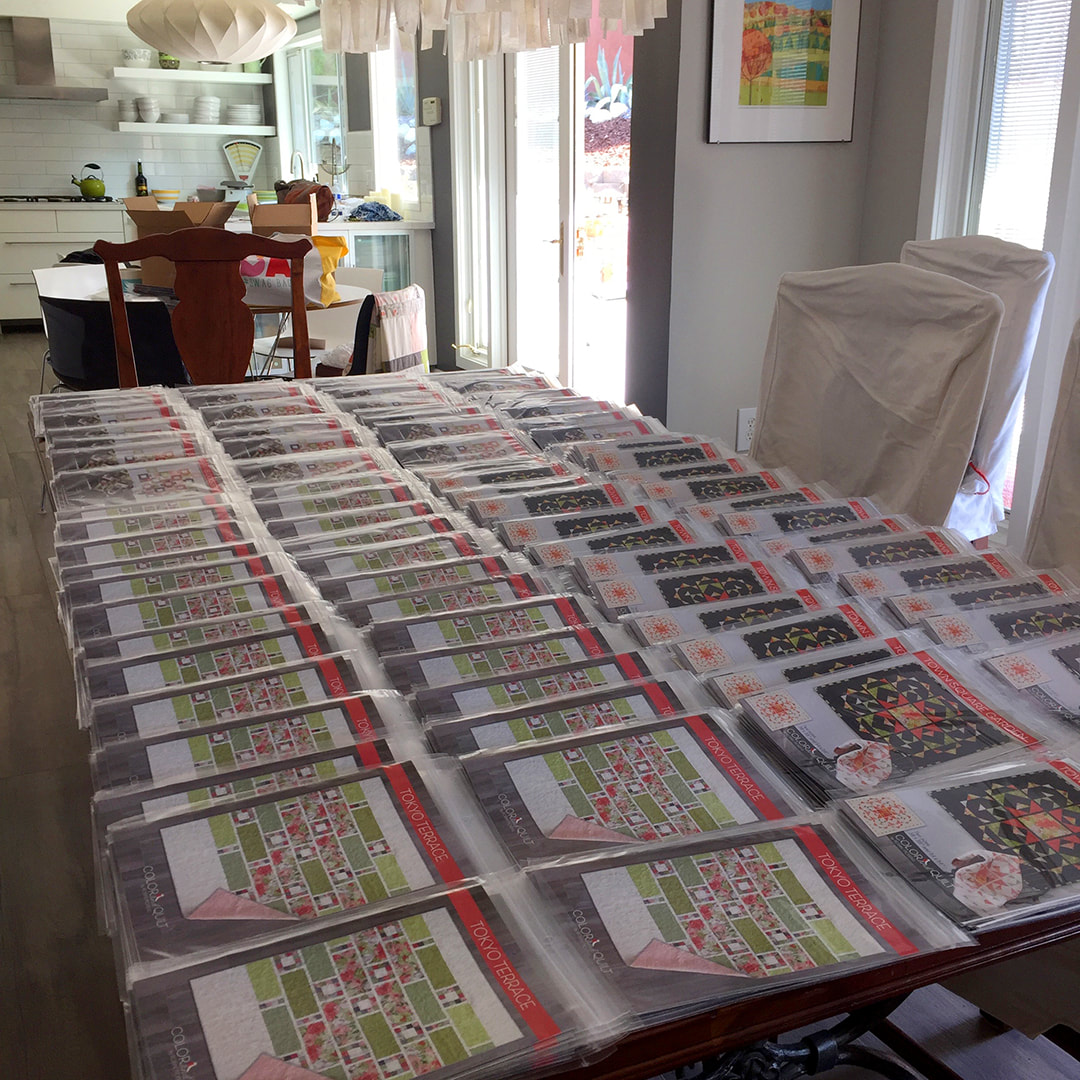
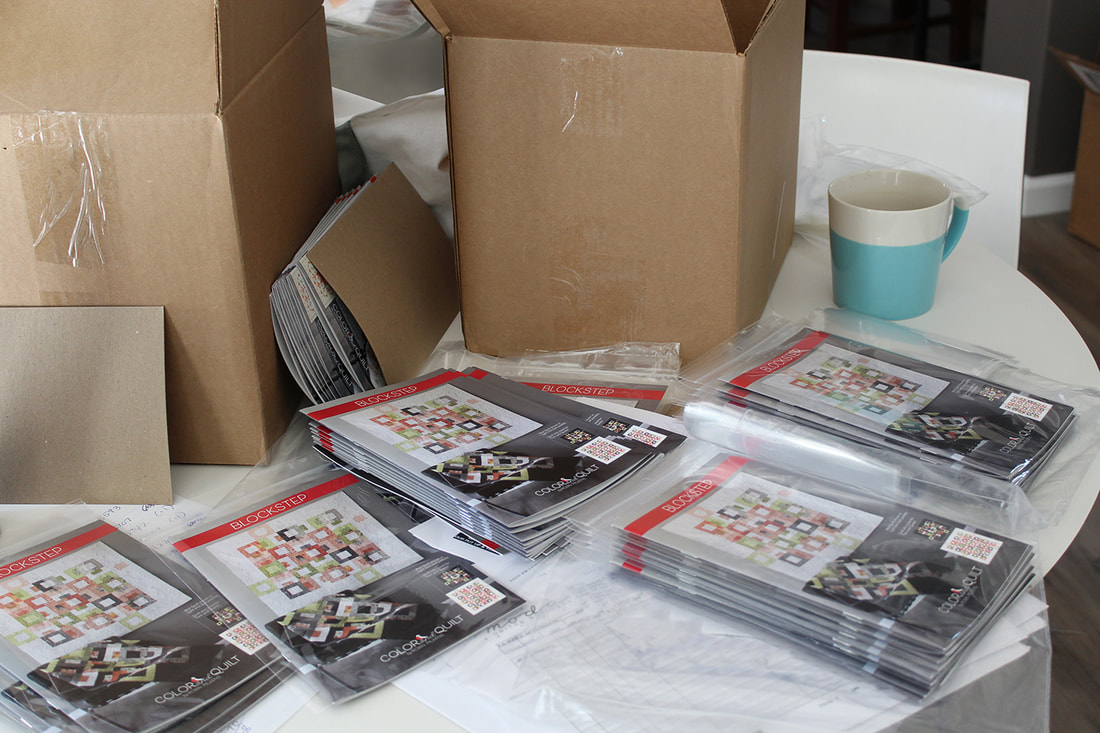
The quilts were long arm quilted by Sally at Corona Quiltworks (IG @coronaquiltworks) using pantographs that also use circular shapes and lines, further reinforcing the graphic shapes. Towards the Sun is available at Quilt shops when it ships with Dandi Annie from Moda Fabrics in November. It is also available at my etsy shop www.etsy.com/shop/robinpickensinc. If you get the digital PDF make sure you print out the template at actual size or 100% vs letting a printer resize. You can double check the sizing with the 1" marker on the template. Happy sewing! I'm deep in designing some new quilt patterns to go with my new line I'll be showing at the spring Quilt Market, but those have to stay secret for now! However, I thought it could be fun to share a little of what goes into the process of making a quilt pattern! I'm really not showing the part of making the actual quilts because you all know what it's like to make a quilt. This is the other part. I work on the computer first for my designing. Yup, nothing gets cut till I've thought it out. I use Electric Quilt 8 and Adobe Illustrator. I have used Illustrator for many years so I have the most comfort with that software. I love creating colorful florals and patterns. Each collection has a personality based on the florals and colors and I try to design quilts that go along with that in some way, either with larger panels to showcase large scale prints, or shapes of blocks that speak to some thing about the main flower. The image above shows part of the process I went through with Town Square Garden for the Blushing Peonies collection. In this case I knew I wanted to do a medallion quilt with a large center panel and started with images on the upper left. Peonies having such a beautiful rounded shape so I ended up using arcs of triangles to the outside to reference the curved softness and blooms (the images on the right). After I have the structure I like, I break it down into what blocks are the most logical to make and describe in instructions. I use Moda Bella Solids with my prints and love the range of colors that coordinate perfectly. I get a lot of use out of my Bella Solids Match Maker and color swatches. The computer allows me to try new color combinations very quickly and easily. In figuring out blocks I also do a lot of drawing and scribbling in my notebooks. Sometimes nothing beats paper to jot stuff down on! An important part of figuring out a quilt is the size, the scale, and the math of the yardage needed. I try to design some of my patterns to utilize precuts because they are such a handy way to get a whole coordinating collection with a lot of variety without having to buy tons of yardage for that much variety. If I'm using precuts, there are some parameters I stay within for piece sizes for my blocks. To figure out my yardage, I take all the little pieces I made in Illustrator and lay them out the way I would cut them on yards of fabric, as is shown on the image above. I'm sure there are faster ways to figure this out but I'm very visual in my thinking so this way works for me. Then there are the steps of making the actual quilts and finding out what doesn't happen the way I thought it would on the computer. I make revisions on instructions, finish quilts and photograph them (and that could be a whole different blog post). I've got a graphic design background so I handle all the diagrams and layouts myself. The writing of the instructions is often the most challenging part for me and I try to assume people have limited knowledge of piecing. Because I am newer to this, that's the way my brain thinks- simple steps please! I use a technical editor who goes over my patterns before printing and checks my instructions, terminology, yardage and math and any mistakes in my layouts. I get the layouts revised and it's off to press! When the patterns come back from the printer my handy helper (my dear sweet husband) and I have marathon sessions bagging patterns. The dining room table, the kitchen counters, everything gets used fill the initial larger orders. And then woosh! off they go to shops and sewing rooms! You may have noticed coffee cups in some of the shots...yes, lots of coffee when I'm deep in pattern-land! Hope you have enjoyed this little view into my process! If you'd like to check out some of these patterns they are carried in local quilt shops and on my shop. Happy sewing!!
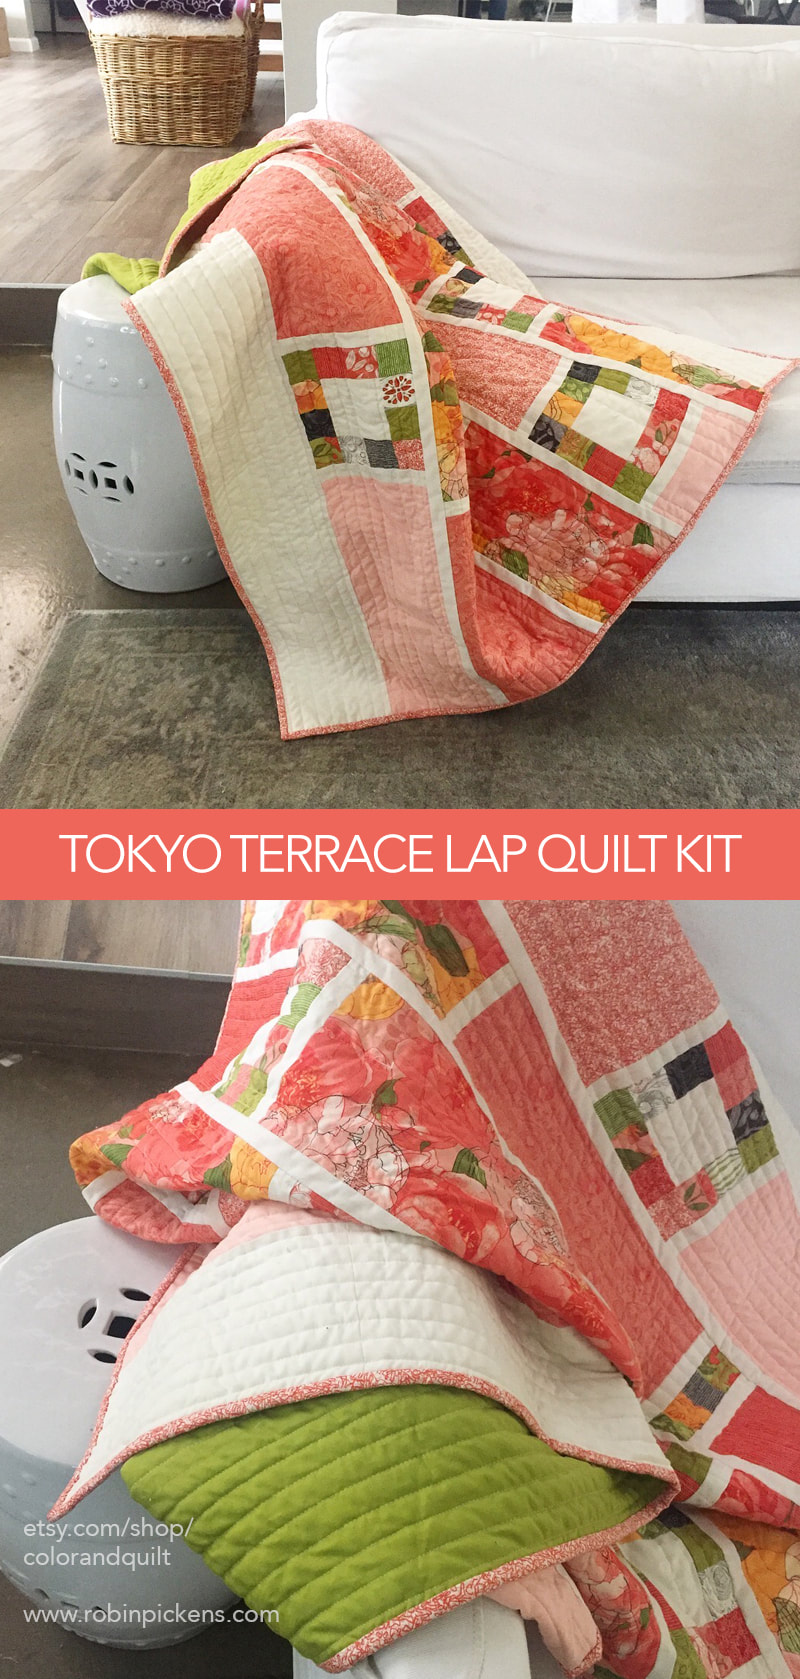
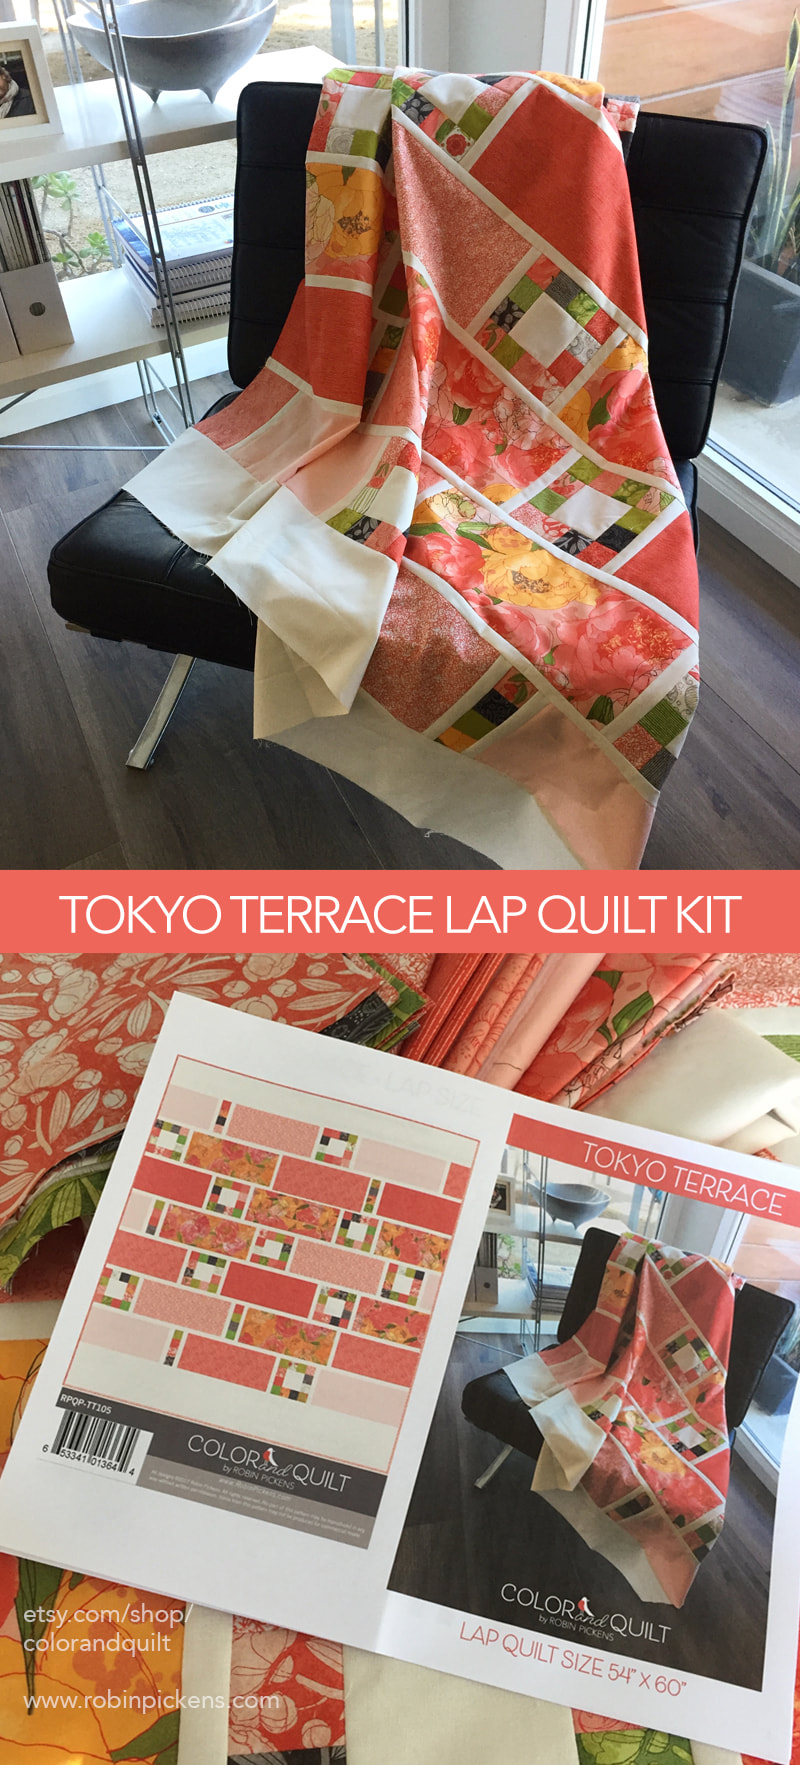
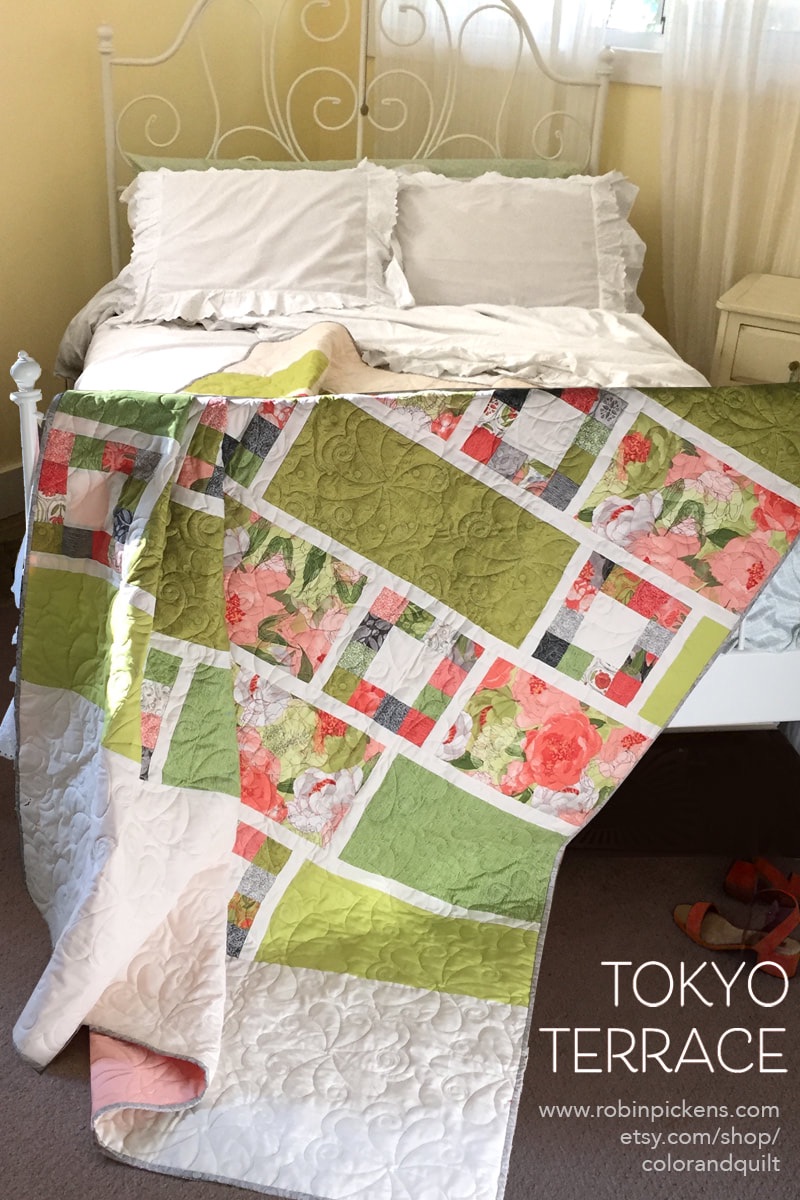
I had a request to size my Toyko Terrace quilt down to more of a lap size. I like to get feedback on my designs and I loved the idea of this as more of a lap quilt. So I resized it to 3/4 of the original size and shortened the top and bottom borders to come up with an overall size of 54" x 60". What I like about this size is I can comfortably quilt this on my home machine. Twin quilts and larger just feel too big and cumbersome for me to quilt on my home machine and they go to a long armer. This lap size I can handle. After sizing this down in the computer I decided to make one for myself. I still had not made the pink version I had originally planned in my Blushing Peonies collection so I added another fabric to the large panels for some more variety and pieced one in a weekend. I love that you can take your time with the patchwork squares or zoom through it out as a weekend project. This quilt is great for beginners. Very forgiving :) I am very happy with the range of pinks and warm colors- makes me happy! I've kitted this quilt and have it available in my etsy shop- limited quantities. If I'm out of stock just message me on etsy if you are interested and I'll make some more if I have the yardage available.
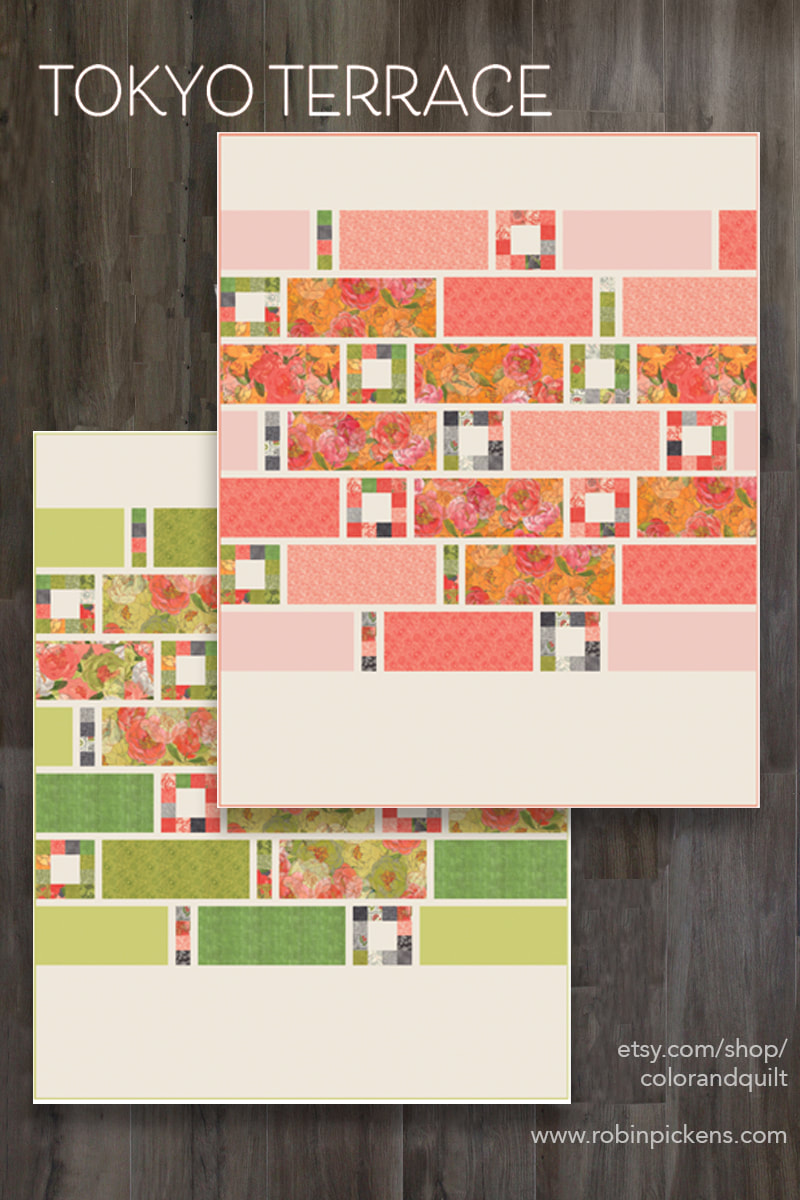
Happy sewing! If you could see my fabric stash, you’d notice I fall in love with big dramatic patterns. I love a big statement. I like big flowers. Sometimes I really want to SEE more of that big design. That is why I also like to make some quilts that give space for a powerful print to have it’s spotlight. Think of it as a gallery wall or panel of windows. I knew I wanted to show off the large scale peonies in my "Blushing Peonies" line for Moda Fabrics. That idea inspired “Tokyo Terrace”…pockets of space to display the splendor, balconies of gardens and sunlit architectural structure. This pattern plays with the contrast between large panels to showcase a bold botanical print and small 2” squares in blocks that balance the large flower blocks. When working on this quilt, I enjoyed making the blocks of small squares and playing with my placement and balance of patterns and color. Then I love the great feeling when row after row comes together quickly with larger blocks. I pieced this in a weekend and I’ve already done another color version since it comes together so easily. Here is a computer-generated version of this quilt in a pink colorway as well as the green one I made.
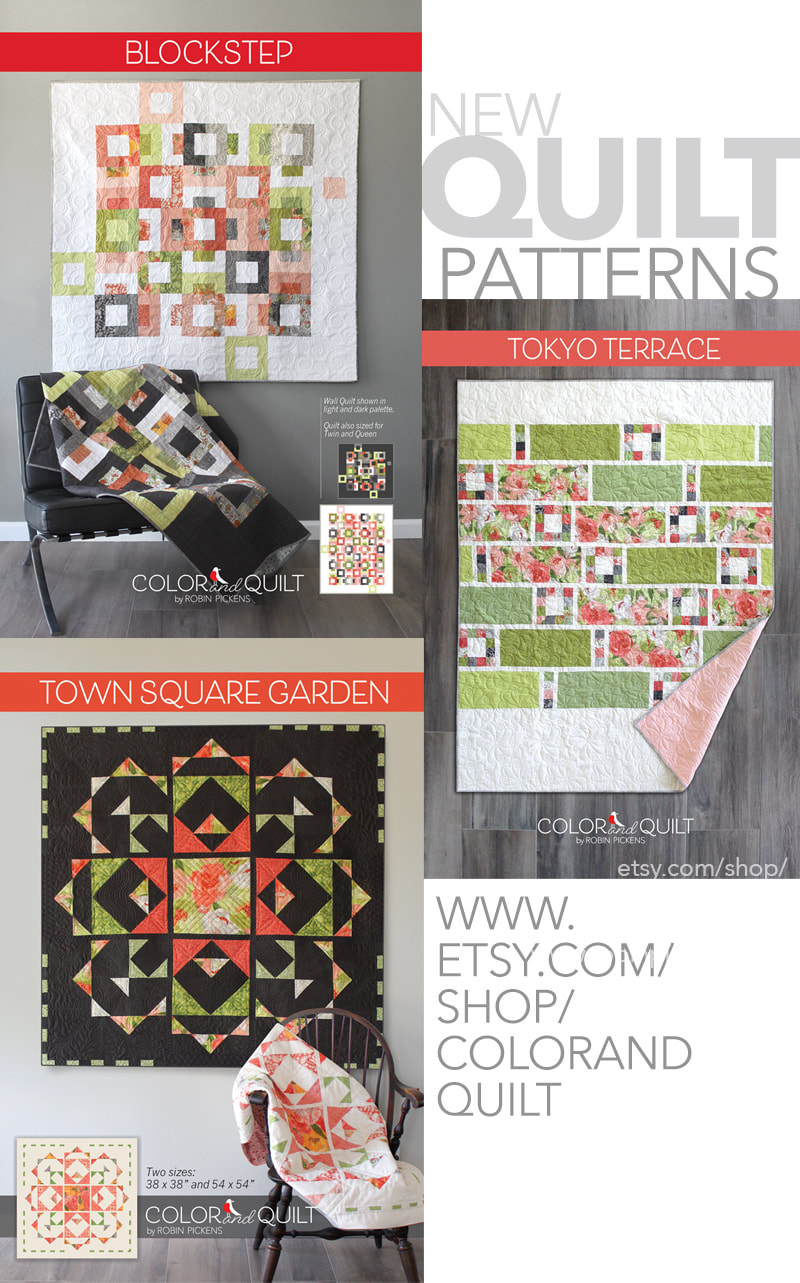
The above quilt was pieced by me but long-arm quilted by Tanya Heldman of Free Range Quilter. She used a lovely curved floral design that compliments the soft lines of the peonies and contrasts well with the geometric structure of the quilt. Blushing Peonies fabric with Moda is in quilt shops now. If your local quilt shop does not carry Tokyo Terrace pattern you can find it in my shop at https://robinpickensinc.com/ I showed three new quilt patterns with my Blushing Peonies fabrics for Moda. They are BLOCKSTEP, TOKYO TERRACE, and TOWN SQUARE GARDEN. BLOCKSTEP can be made with precuts of a single Layer Cake or a Jelly Roll for ease of coordinating your print fabrics. Precuts can also give you a shortcut on TOKYO TERRACE by using Mini Charms for the small patchwork blocks that are interspersed between the larger rectangular panels. I like doing at least one quilt with a collection of fabrics that has larger panels that make it easy to showcase larger scale motifs. I like to do large-scale florals and show them off!
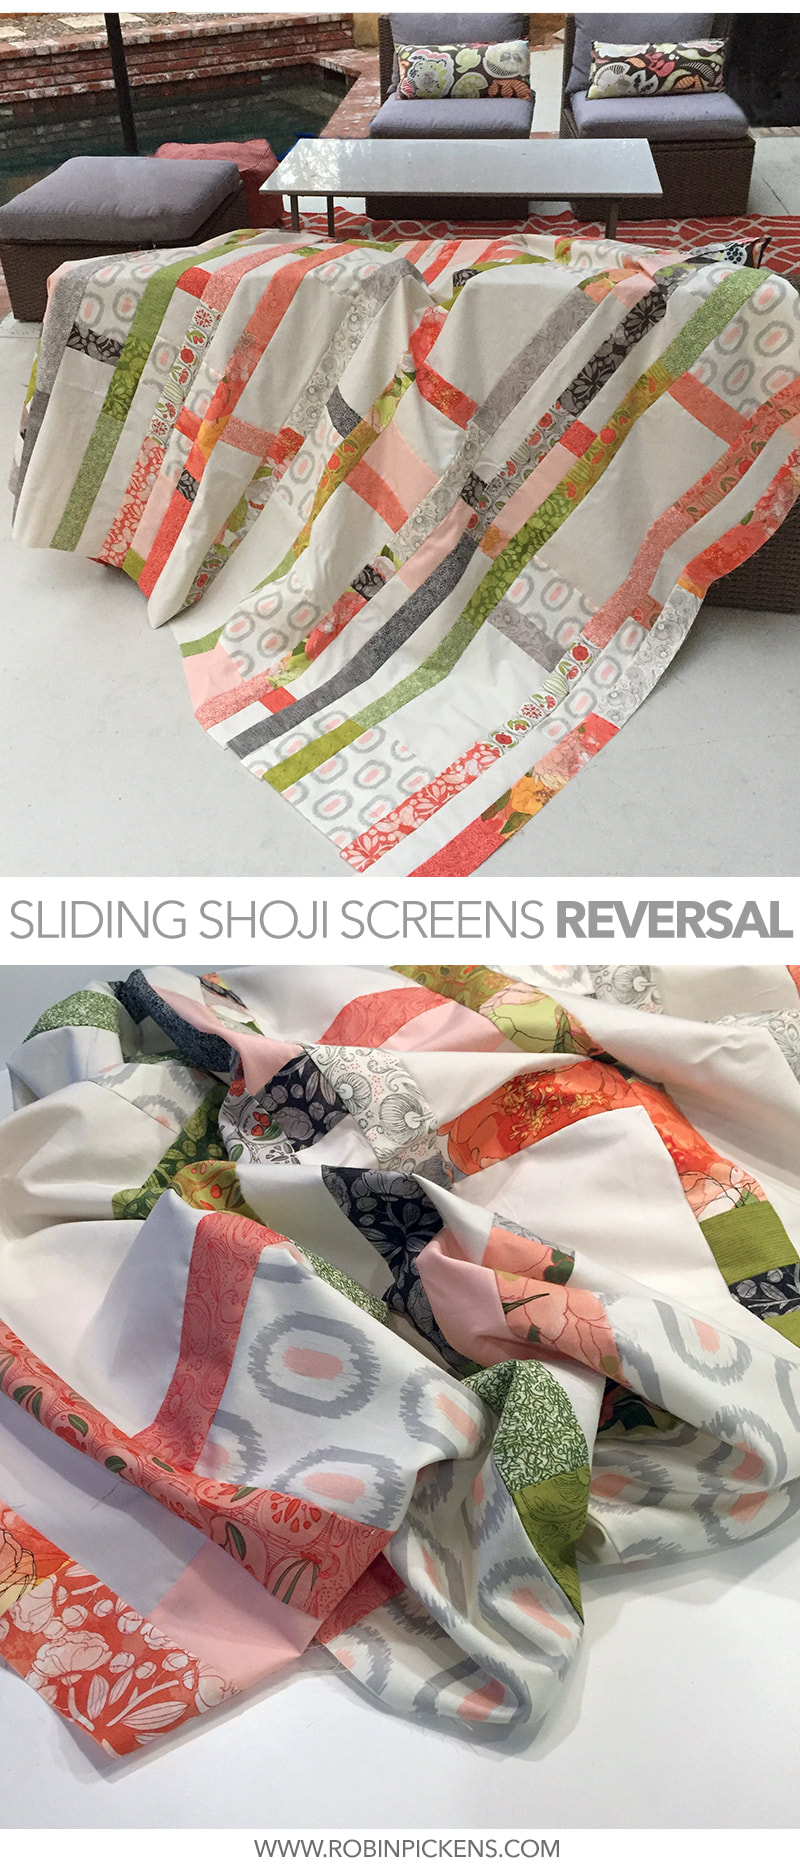
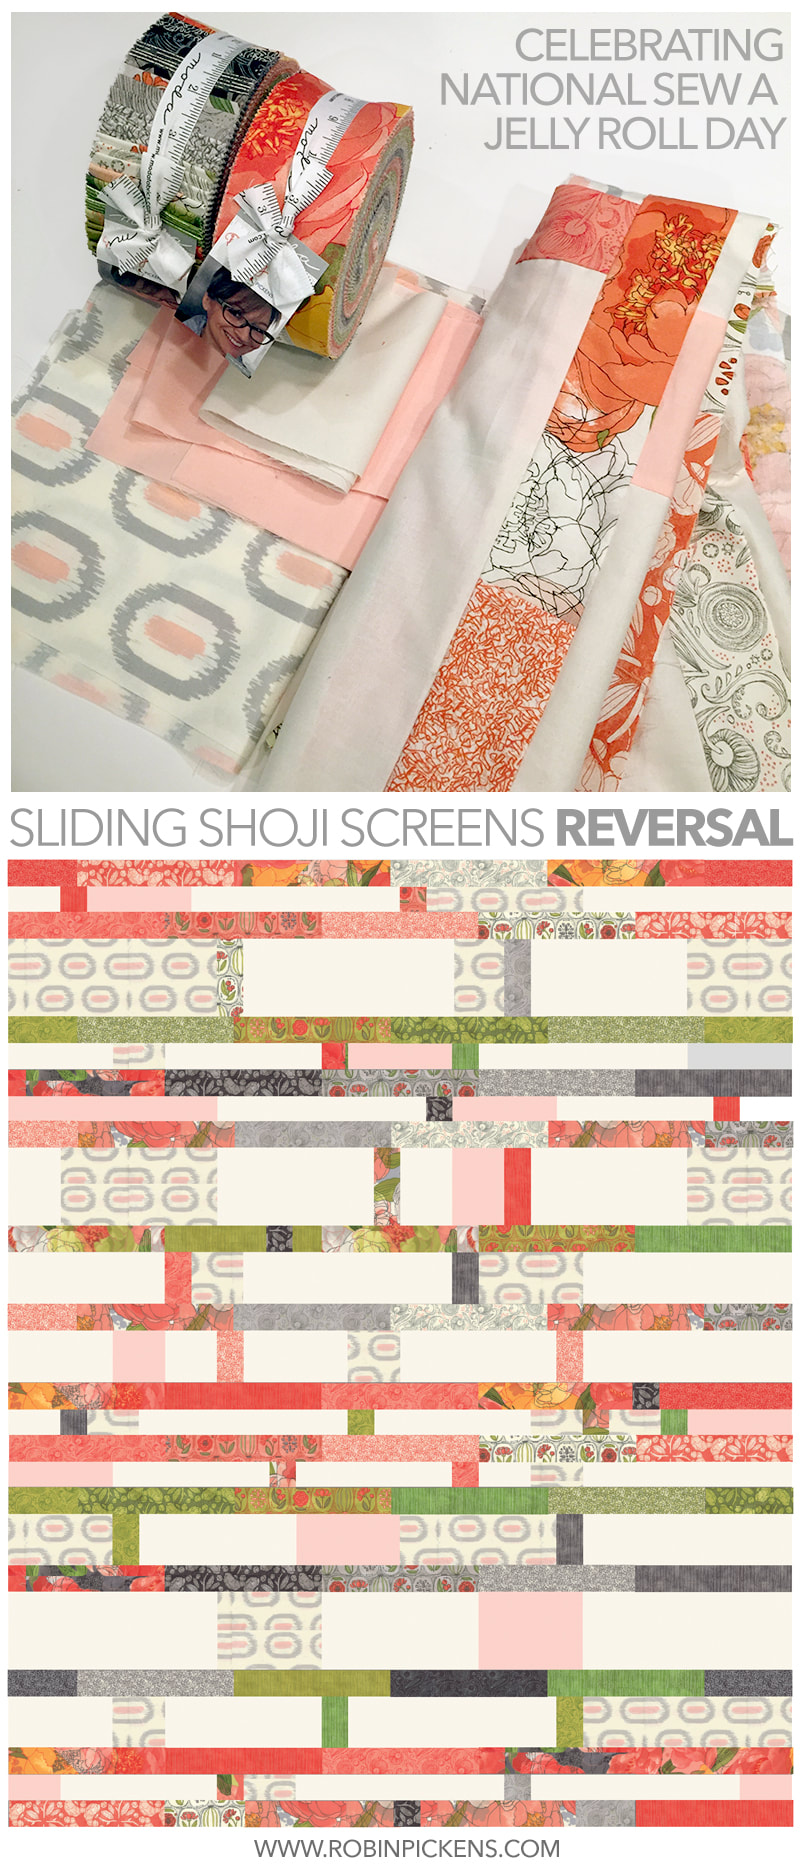
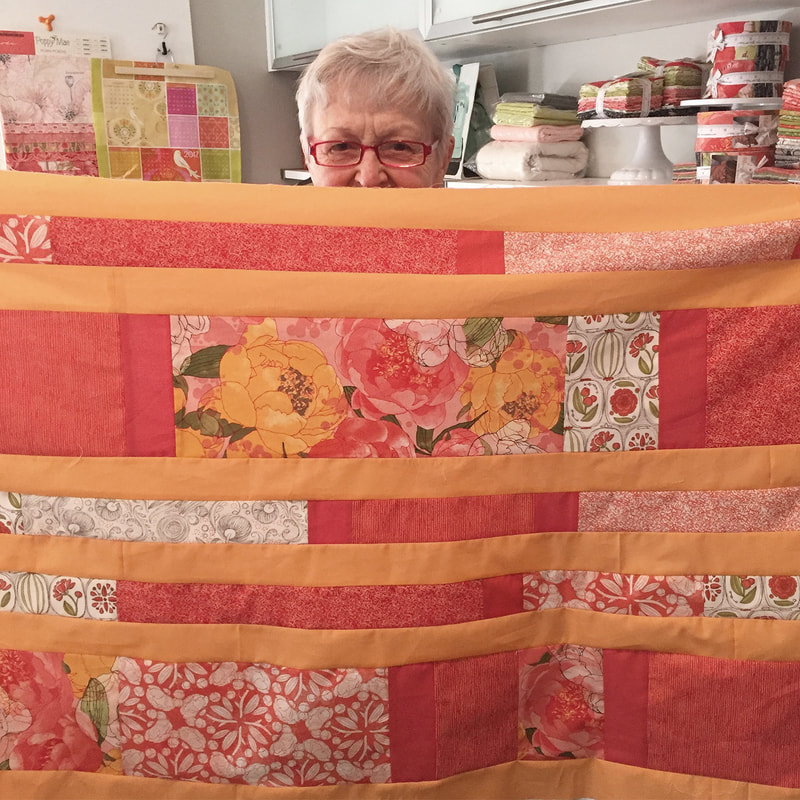
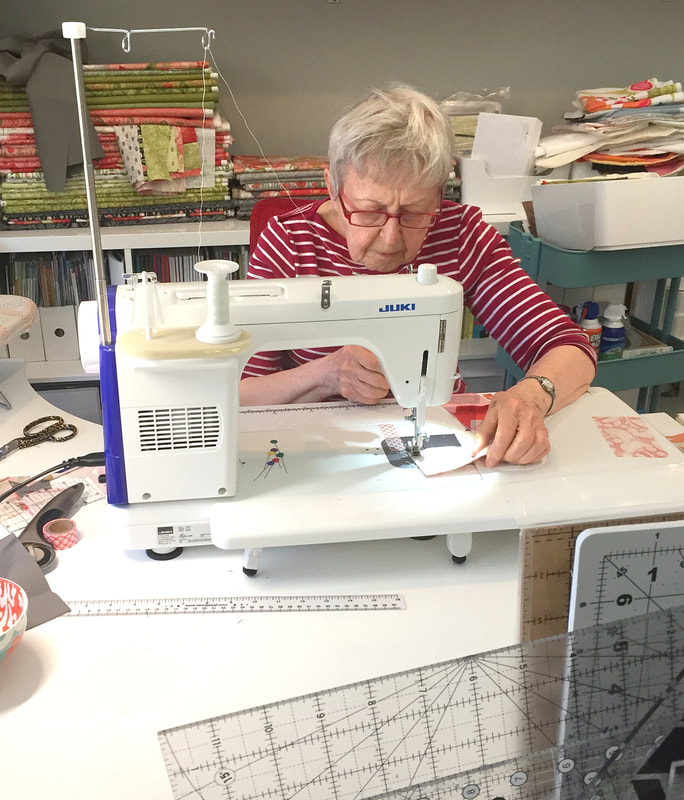
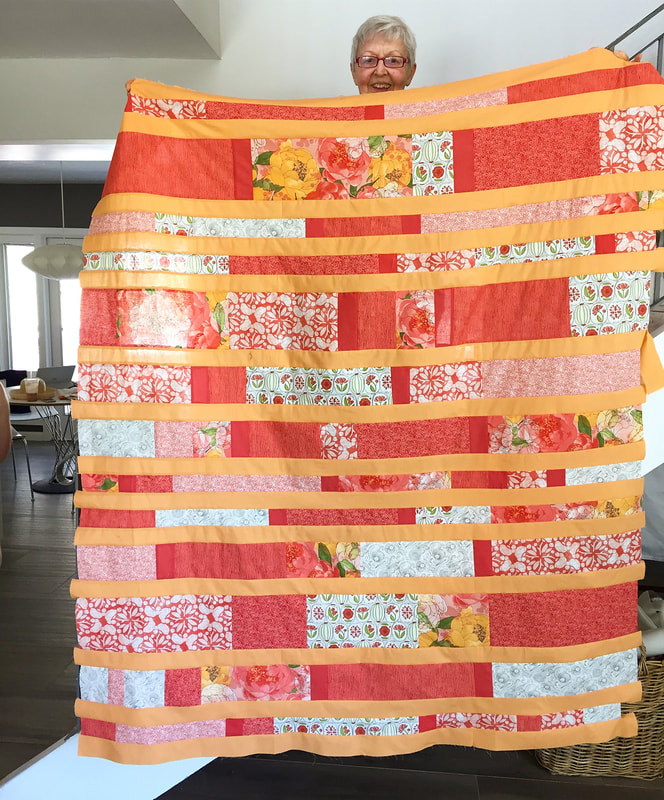
TOWN SQUARE GARDEN is my first medallion quilt and it was a lot of fun to do. I'm currently doing quilting on my home sewing machine with my walking foot on the smaller light color wall quilt (it's 38" square vs. 54" square) and I'll share some pictures when it's further along! Feel free to visit the shop or look for these at your local quilt shop. The patterns will be shipping with the Blushing Peonies collection in November 2017. Also stay connected for "color play" when I do some computer experiments with other color ways of my quilts. Sew on! September 16th was National Sew a Jelly Roll Day and I was too busy sewing to post on the blog that weekend. At least I was too busy with fun sewing! The folks at Moda started the love of precuts and they have #ProjectJellyroll to show the great projects you can do. Jelly Rolls are great for making projects quicker when you need 2 1/2 inch strips and the variety of prints you can get in a precut bundle. Sometimes you just want the ease of things that coordinate and go together fast! I decided to use my Sliding Shoji Screens pattern for this weekend project. I designed that quilt pattern to showcase my large scale floral prints with large panels of rectangles that are separated by solid Jelly Roll strips. This makes the cutting much faster. But for this version I wanted to flip the design so the patterns were in the Jelly Roll dividing strips (from my Blushing Peonies collection) and the large panels were solids. Although I liked the plan on my computer (where I often mock things up before cutting) I felt it could use a little extra "something." I decided to try Amy Ellis' Ikat from her Serenity collection and I loved the combination with my peonies! The combination of precut Jelly Roll strips with large panels of fabric really make this quilt come together quickly. It's satisfying to have a quilt top at the end of the weekend and I really enjoyed sewing along as I saw others doing their projects for National Sew a Jelly Roll Day. If you'd like to check out the Sliding Shoji Screens pattern, it is available through quilt shops or on my shop. Sew on! Lucky for me I have a mom who sews and is willing to tackle a project when visiting. Little did she know when she arrived for my daughter's graduation that she'd be piecing a whole quilt too! But that is the beauty of Sliding Shoji Screens...you really can piece it in a weekend. Thanks Mom!! Moda's Bella Solids of Amelia Apricot (9900-162) and Persimmon (9900-294) are mixed with Blushing Peonies in warm tones to make a summery quick and easy quilt. Mom wanted to try my new Juki sewing machine and I think they formed a good friendship. (And yes, when I'm working in my studio I just pile things up and drape fabric wherever- it's how I work) My mom is smiling because finally the slave-driver (me) will let her have a break. She did good. This happy quilt top is off with a long-arm quilter now. Stay tuned for more pics when the grandma-special returns!
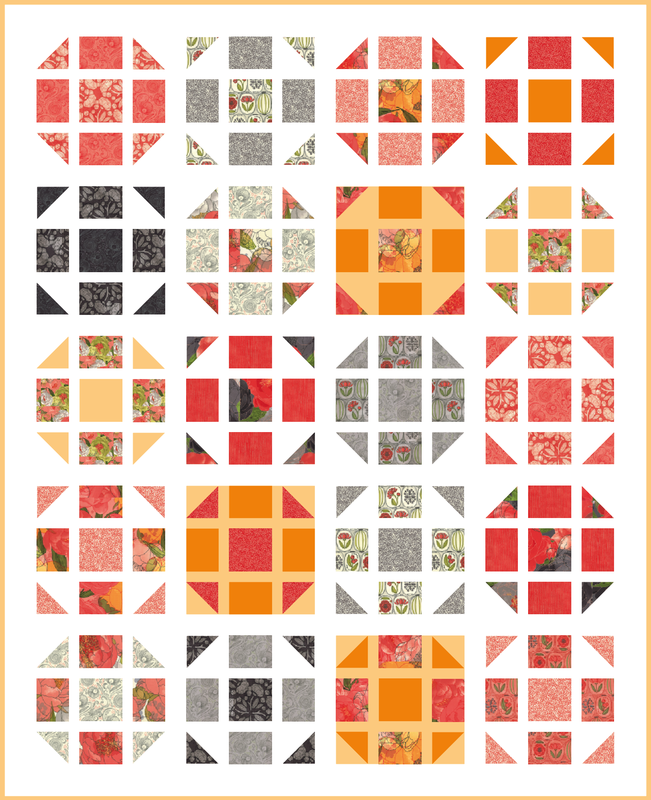
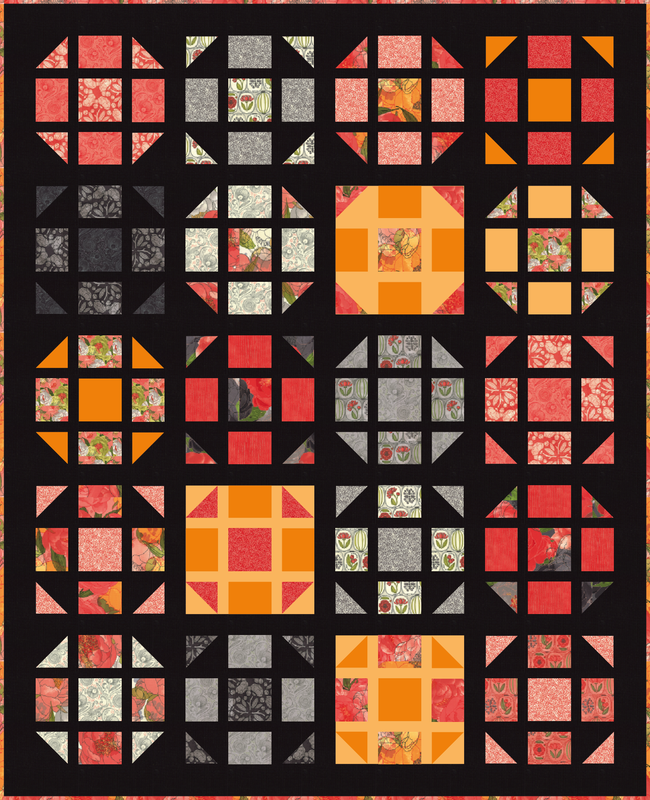
Sliding Shoji Screens is available at my shop. Color play to visualize new quilts! I wanted to see how Hopscotch Happy might look with some Blushing Peonies fabric (This line will be shipping to stores November 2017). Since I'm still in my summery mode with bright and happy hot colors, I wanted to try the red and gray families of color ways and add a little more of the peonies in the pink/orange colors. For three of the blocks, I liked making the background color a soft apricot to warm it up more. Too much charcoal gray can start to look like Halloween but a touch just adds contrast and sophistication. But what if you DO want a fun quilt that can look fall-like and transition into October and Halloween? A simple switch of background to black and my quilt now looks ready for cozy times in front of the fireplace and candy corn! Have fun playing with Hopscotch Happy! Available at my shop.
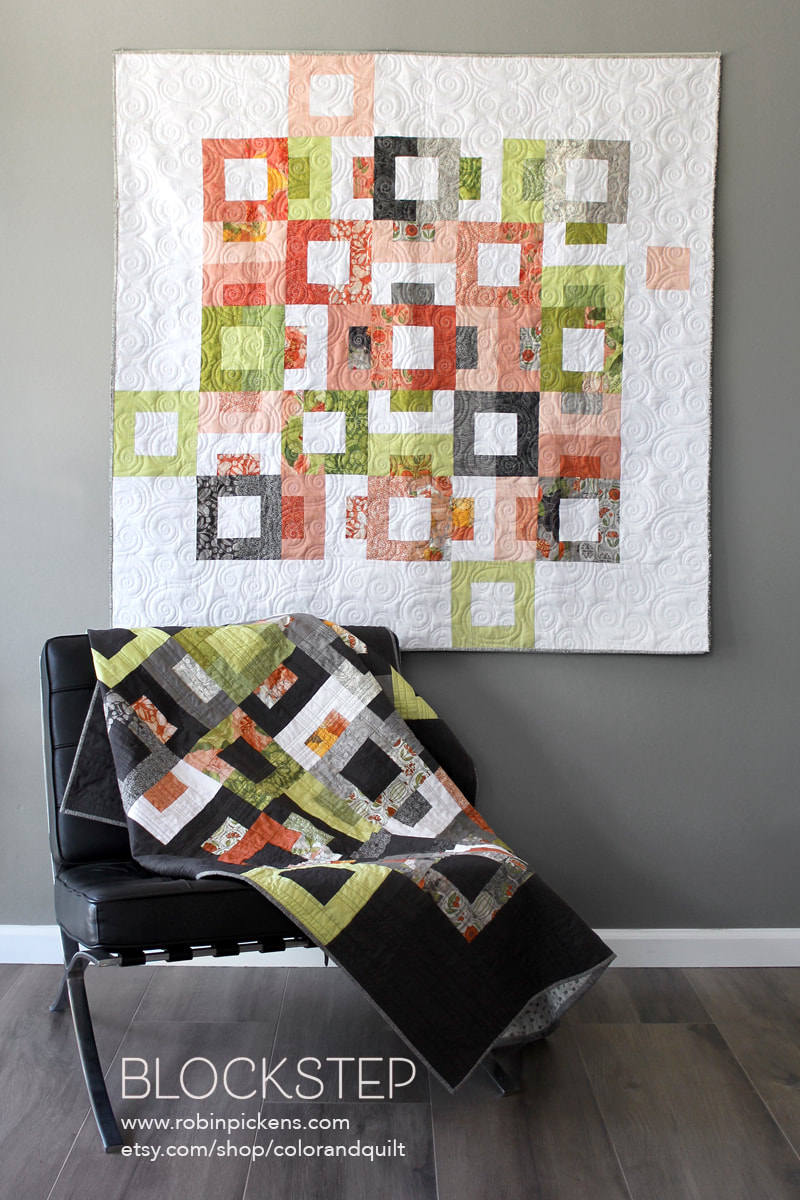
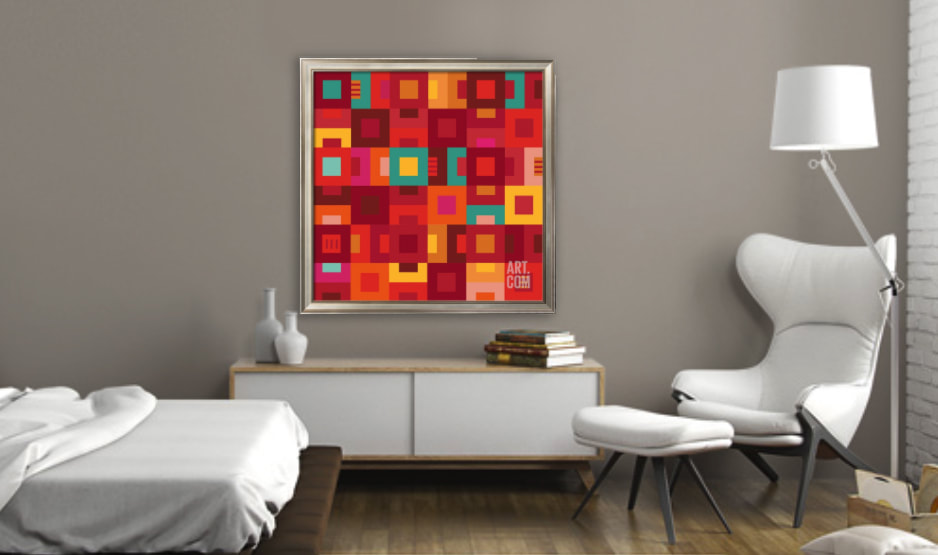
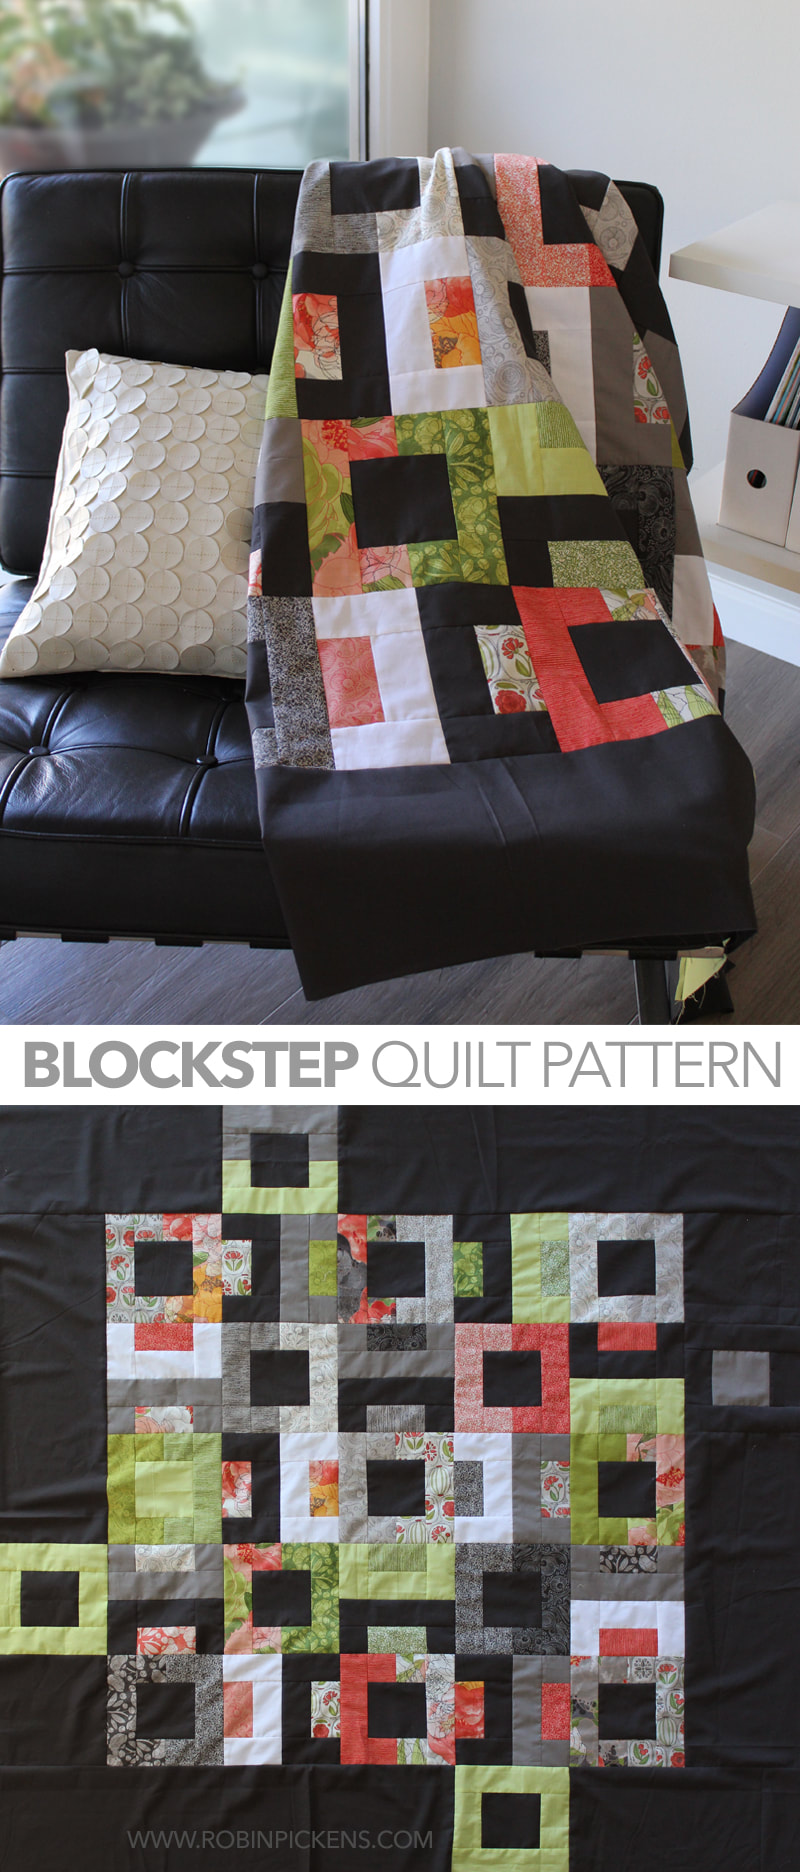
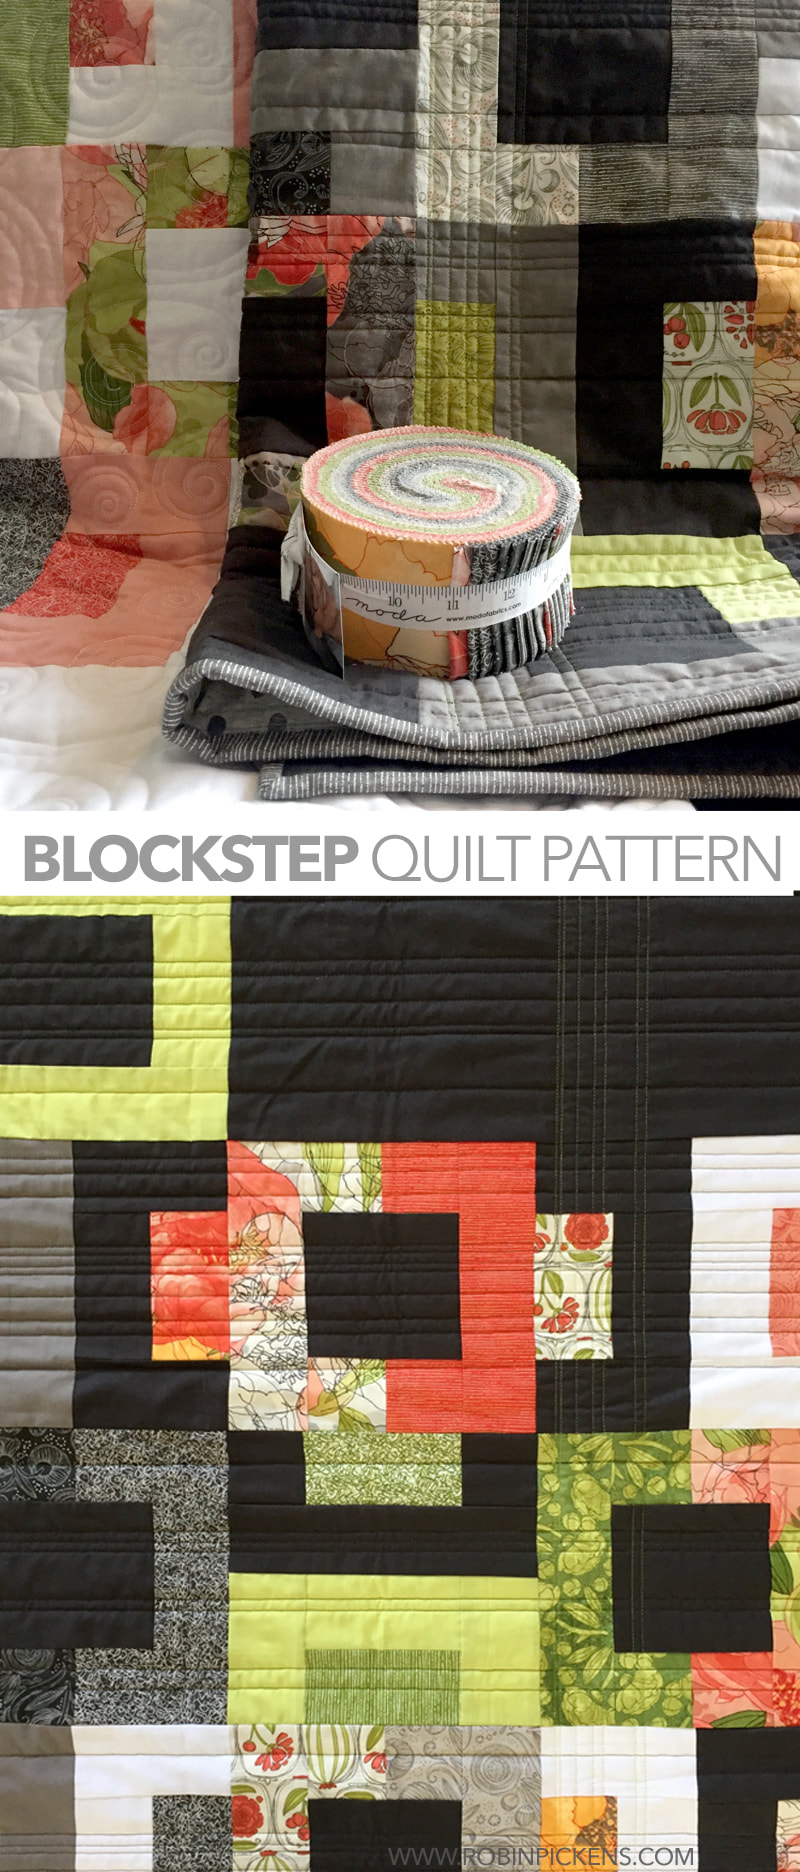
Blockstep is a flexible quilt pattern that is great for precuts like layer cakes and jellyrolls or for using up assorted scraps that are at least 2 1/2" wide. The design is an interplay of chunky square outlines and splitting them and playing with those sides, or brackets, in rotation. I first started playing with these geometric puzzle pieces when I was taking one of my first surface design classes at Otis College of Design. Repeats with rotation was part of the assignment. I printed out this pattern for some art on my kitchen wall, done in shades of olive green, khaki and some orange. I also have a red color-way print for the Christmas season to put on the wall. I also sell prints of this design at Art.com (under Robin Pickens and Geometric Abstract City Squares). It was my mother who commented that this would make an interesting quilt. I guess that suggestion hung in the back of my mind to finally come to life about 12 years later. This is the first time I have played with floral prints within the blocks and brackets and I'm really loving the versatility of this framework. It's easily scaled up and down in size and you can simple add more rows either way to move up to a queen or king sized quilt. One of my favorite experiments with this pattern was to step out into the borders with a square or block on each side. We don't always have to stay in the safe zone and out of the borders! When I had this dark version quilted by the long-arm quilter, Sally Corona of Corona Quiltworks (the white background version was long-arm quilted by Tanya Heldman of Free Range Quilter) she really worked with the geometric structure of the quilt with straight lines done in random spacing horizontally. Then Sally took one section of blocks lined up vertically and quilted them with vertical lines in lime green which add a wonderful contrast to the other gray threads. I love it!! Step this way, turn that way, have some fun with Blockstep. The pattern will be shipping to stores in November 2017 with my Blushing Peonies fabric from Moda. I've also added these to my shop!
|
About ROBINDesigner of colorful florals for Moda fabrics. Modern to transitional quilt designer. Illustrator, sewist, crafter. I am proud to be a designer for Moda Fabrics!
Shop Robin's DesignsI am an affiliate for Fat Quarter Shop and may earn a small commission through my links. Thank you for your support!
Categories
All
Archives
February 2024
© Robin Pickens Inc. All rights reserved. No images may be reproduced without permission.
|
Proudly powered by Weebly









 RSS Feed
