|
There is something so satisfying about finishing a quilt. But there is something REALLY REALLY satisfying about finishing the largest quilt you've made to date, in my case a king size quilt! 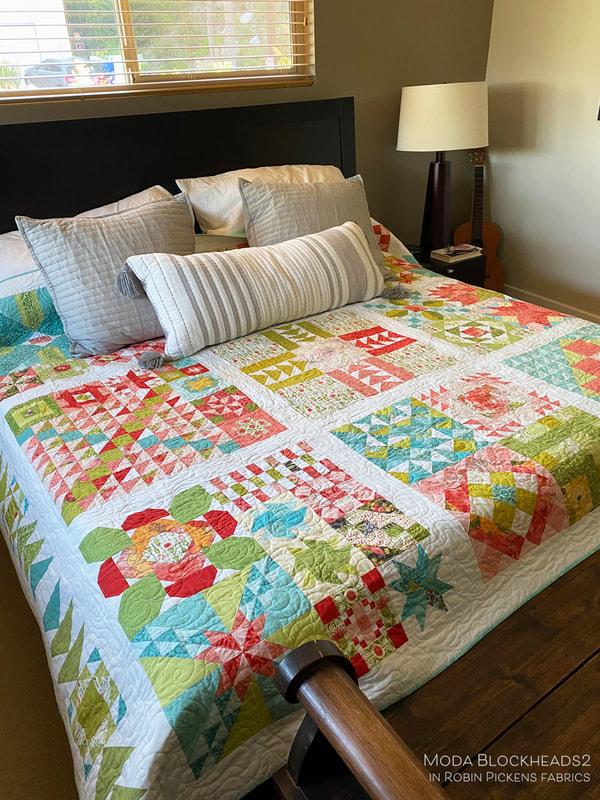 I am a designer for Moda but I didn't know about Moda Blockheads from the first round. I was a little newer to sewalongs and I had not participated in any on facebook, rather only on instagram. So when one of the sales folks invited me to join the facebook group and play along, I happily joined in. 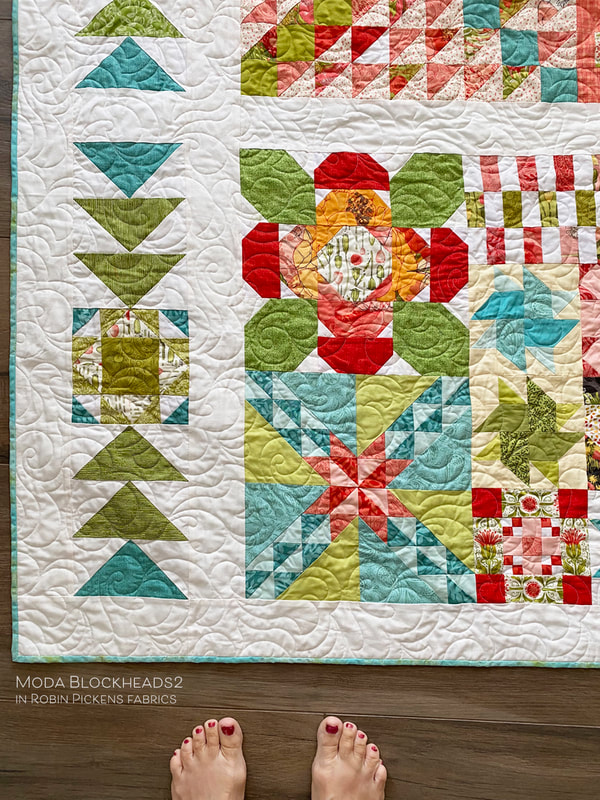 I wanted to use my first lines of Poppy Mae, Blushing Peonies and Dear Mum for my fabrics, along with some solids mixed in. My colors focused on pinks, reds, greens and teal/turquoise colors. I find as I make my blocks each week, a few stand out as my favorites. I really love this pretty block with the peony in the center and then the one with the crowns and the little pineapple! 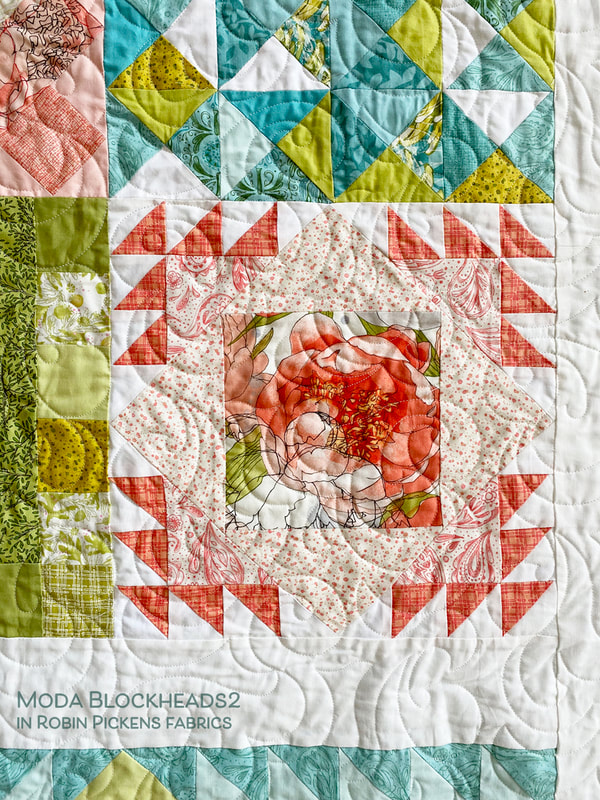 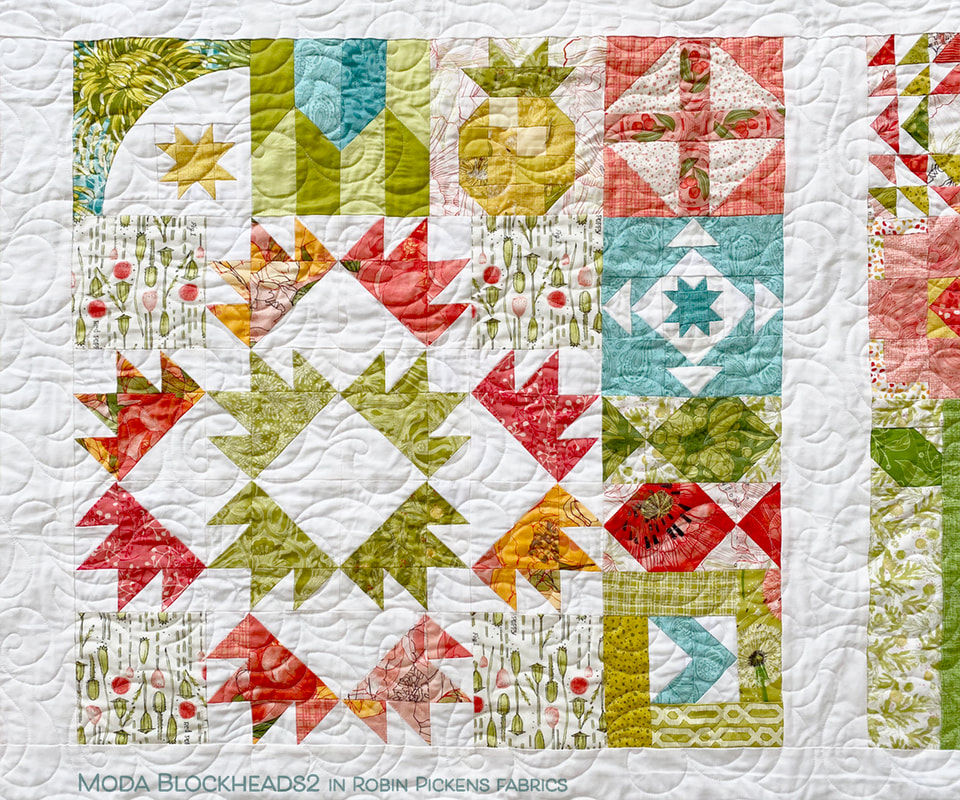 One of the big benefits of doing a sewalong like this is it really helps to build your skills. I did not know about triangle paper until I read Corey Yoder's blog post about it. And I learned a variety of other tips and tricks. But most importantly, the practice of making new blocks, week after week, makes you better at what you are doing. 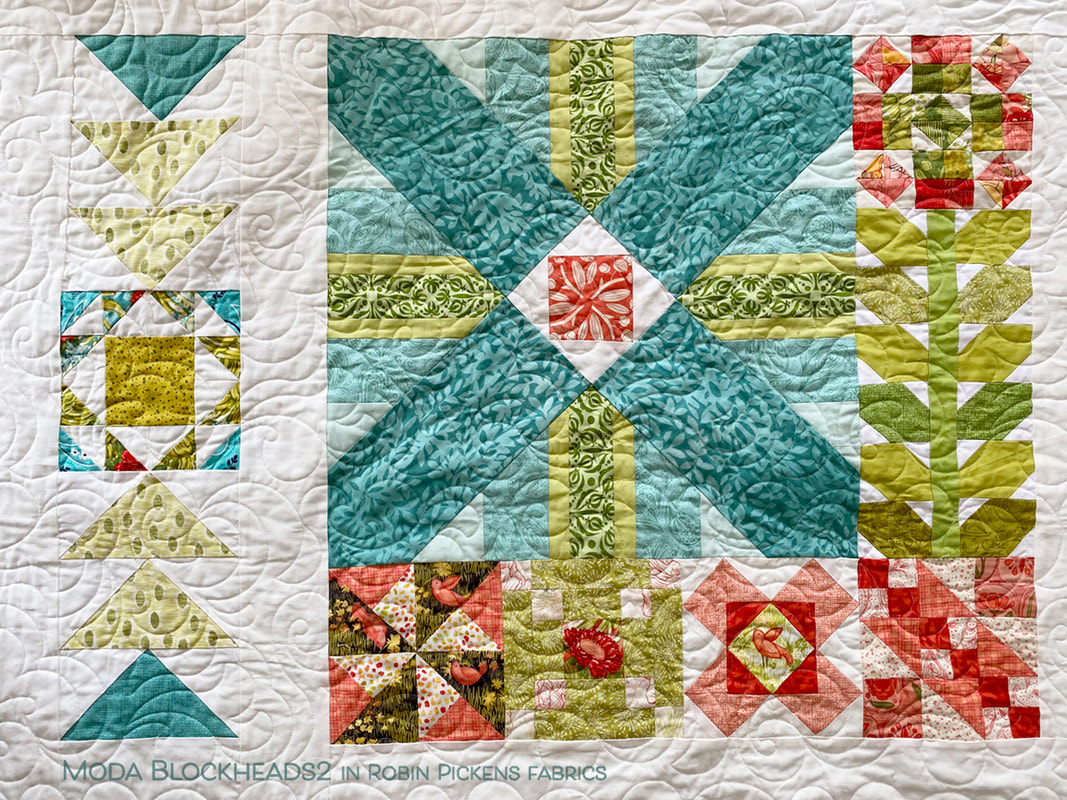 Since I wanted to make my quilt for my kind sized bed, I made additonal borders on the right and left sides of the quilt. The half square triangles are 3 x 6" finished size and the square blocks were made with leftover pieces from my other blocks in the quilt top. The small HST in those are 1 1/2" finished with a 3" square center piece. Making two rows of repeating elements of these made the quilt wide enough for me mattress. 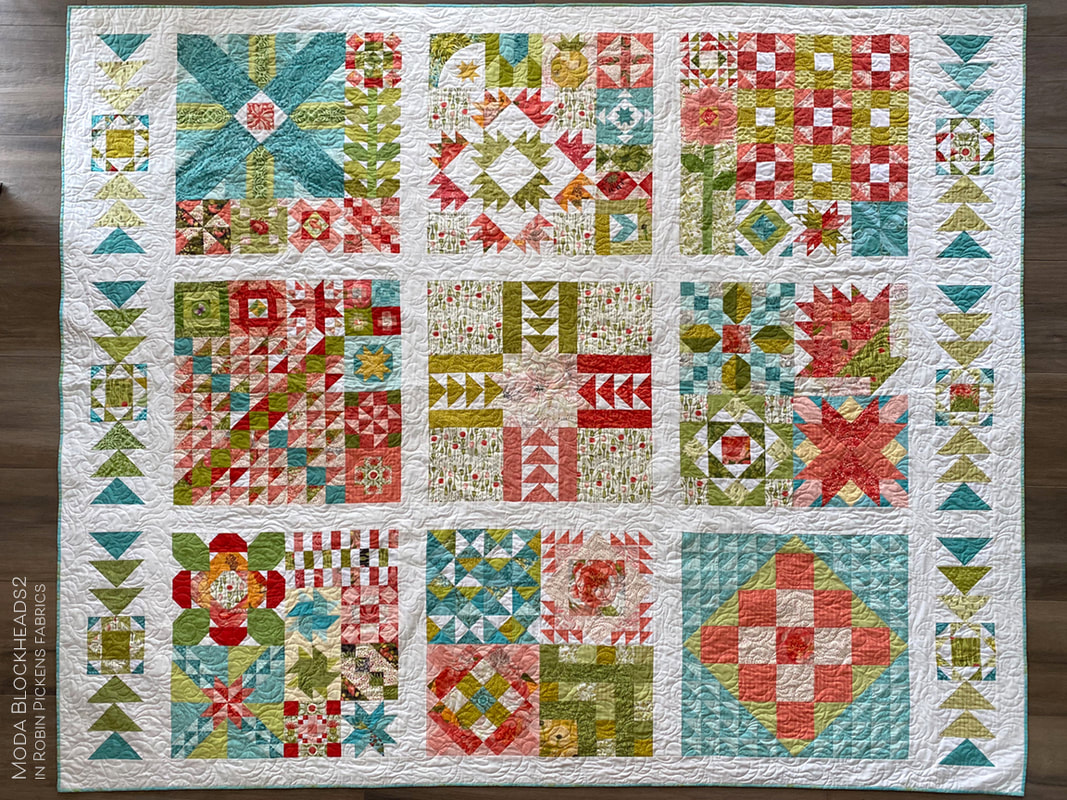 I saw another person post about their layout with blocks arranged into larger squares with sashing between those and I loved that! So I combined the smaller blocks into units and some of the sections were one of the largest blocks. I liked the structure of this and the balance. I longarm quilted this using the Whirlwind pantograph by Karen Farnsworth at Wildflower Quilting. And now, I am happily sleeping under my Moda Blockheads2 quilt! 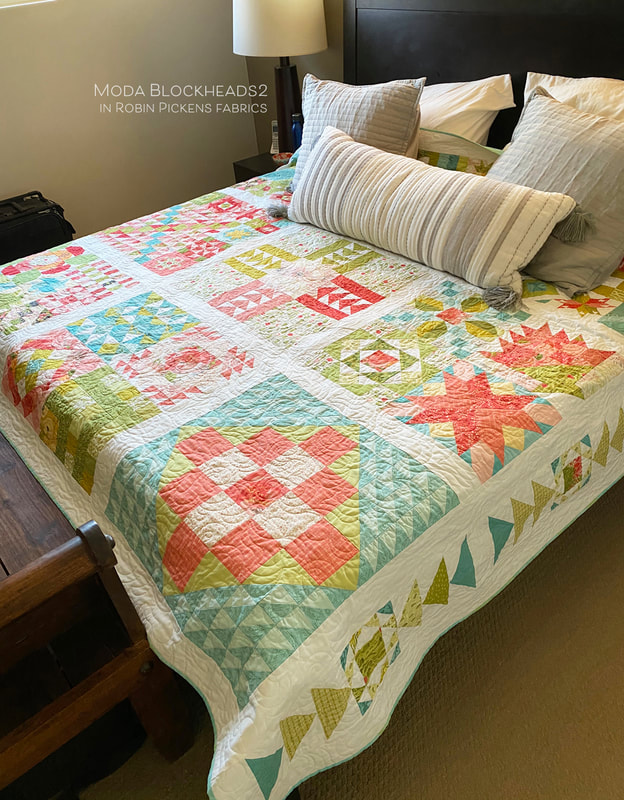
8 Comments
A quick catch-up on some Moda Blockheads2 blocks. I have learned so much while doing these blocks! I tried triangle paper for the first time (and liked it!) and I stretched myself with smaller piecing on some of these than I normally do. With every sewalong I do I feel my skills become better. I start to think more efficiently when I look at instructions and question if I can make more of the blocks in a different way (like making Half Square Triangles in the 8-at-a-time method). This first one is Sherri McConnell's block "Vintage" and I used a bunch of scraps I had from earlier blocks from my Dear Mum collection. I am pretty pleased with how this one came out. I don't have that much experience doing Quarter Square Triangles so this was good practice!  This was the alternative block designed by Corey Yoder called Rainbow Vine. Mine is not a rainbow but does have a variety of green leaves. I liked how quickly this fun block came together. Now I think I need to make sure the block above in my arrangement has a design that suggests a flower bloom!  The next block is a larger 18" one and is designed by Betsy Chutchian. Feels good to get this one completed and I really like this pattern! I used #poppymaefabric and #blushingpeonies . After making a big 18” block like this I needed to do a small one next! 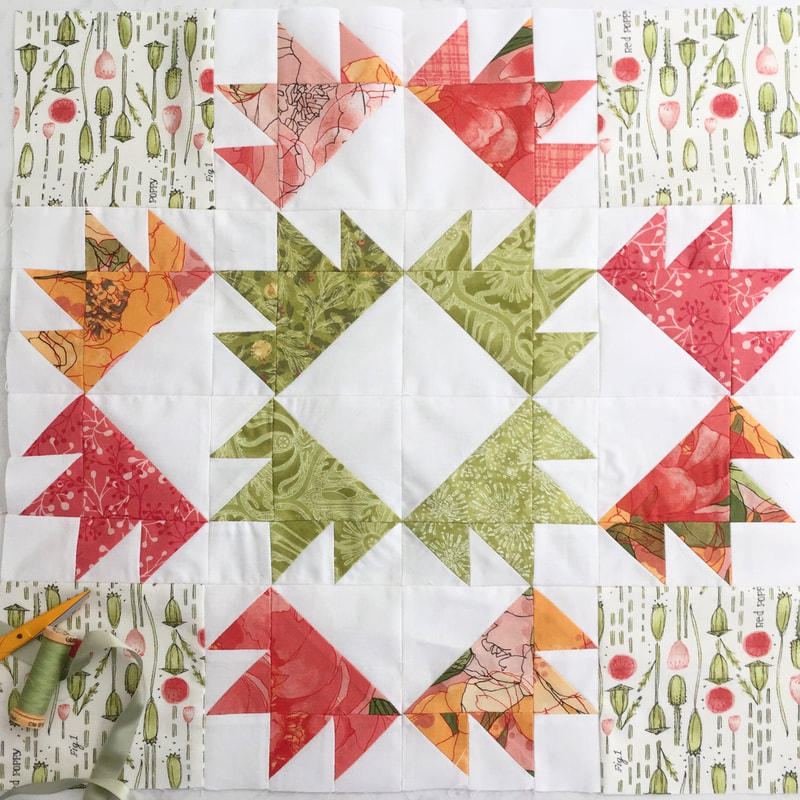 And last one to share today is this block designed by Corey Yoder. Its called Dainty Blossom and is an alternate for the Block 48 which was originally designed in applique. This is so cheery! 12 inch block with a big blooming presence! 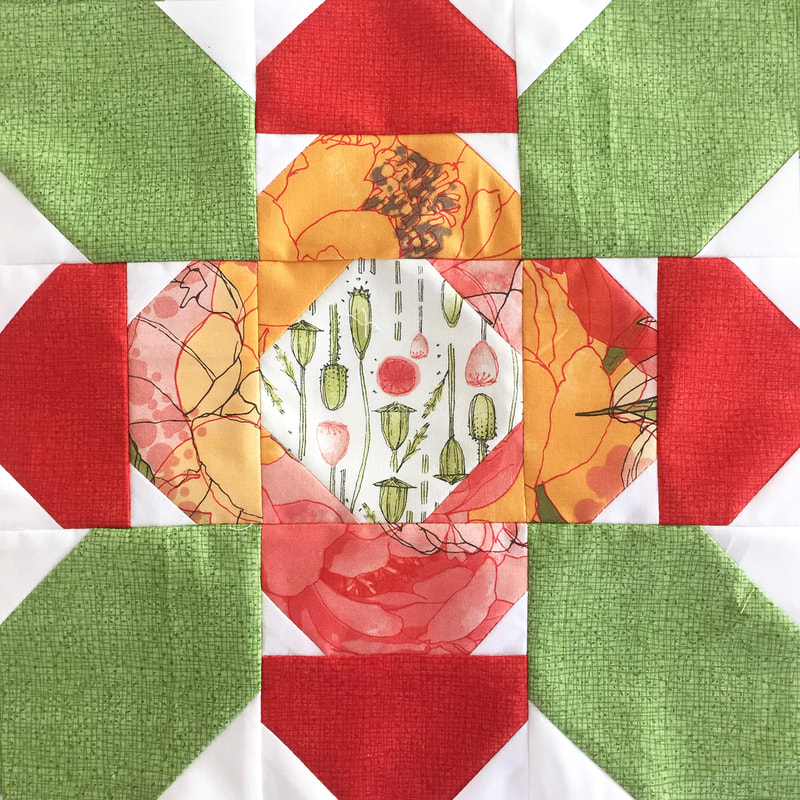 I just may be seeing my blockheads blocks wrapping up here! Time for arranging and joining!
I know its a journey and not a race. But I feel like I can see the finish line. But I'm not there yet. One step at a time...that's how progress happens. These are the things I tell myself when I'm nearing the end and need that extra push! 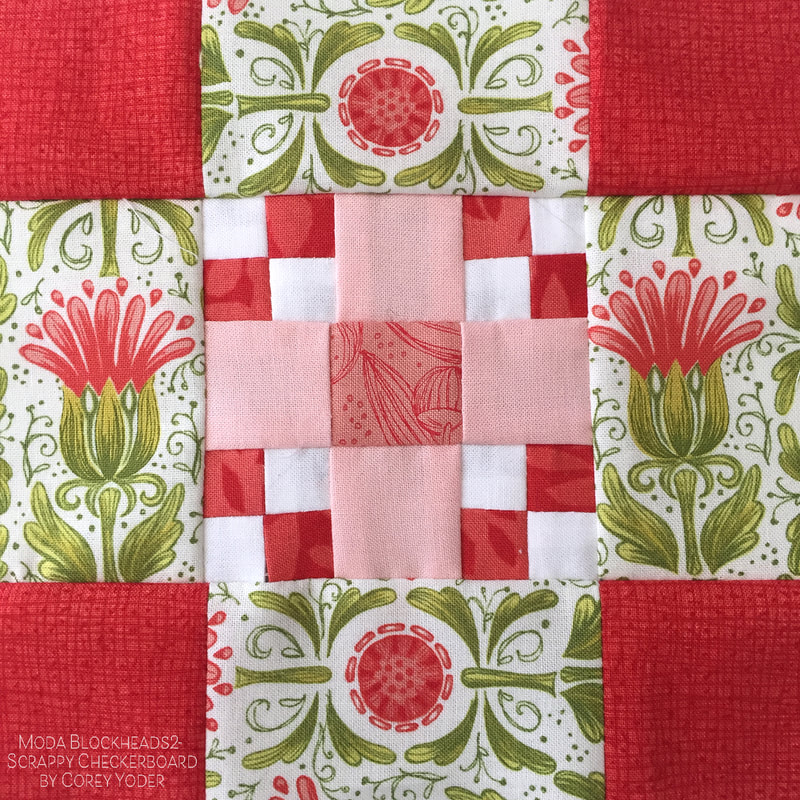 So a few more blocks here. Above its the Scrappy Checkerboard designed by Cory Yoder. Below its Ribbon Star by Lynne Hagmeier. I'm trying to take stock of what I have and what I need from a perspective of color and size. I saw a great layout on instagram that Susan @quiltingcousin did and I liked the organization of blocks in the overall quilt. I've decided to model my quilt after this layout too. 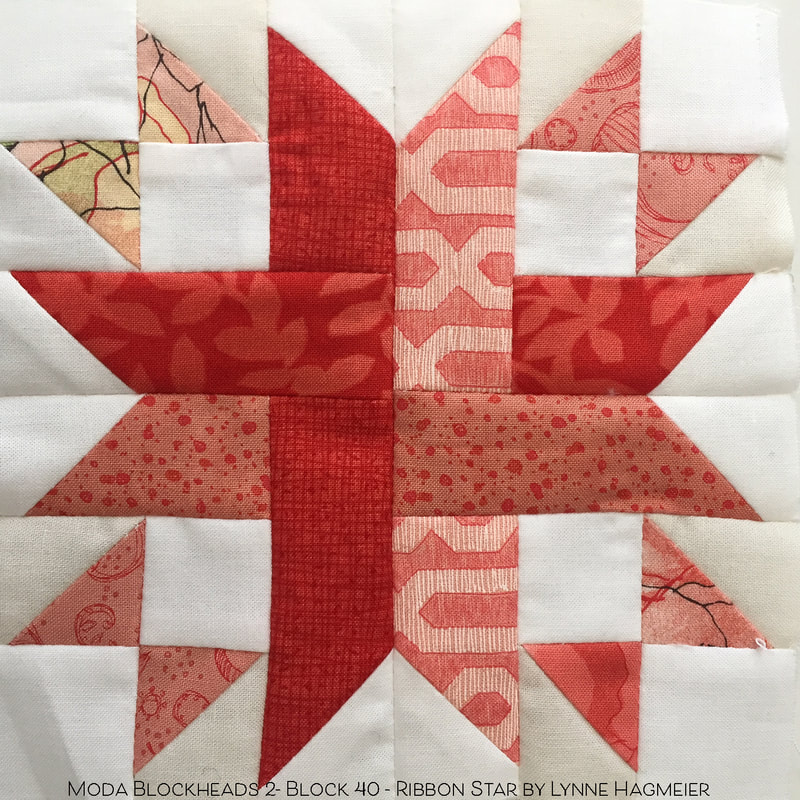 But first, finishing the blocks. I'm not done yet. But I'm keeping up the effort and I WILL FINISH! As I roll closer to the finish line I've done Fidget Spinner by Lynne Hagmeier and Bella Spinners by Me & My Sister Designs. Also Around the Corner by Carrie Nelson and On Point Star by Stacy Iest Hsu. Sew on!!! 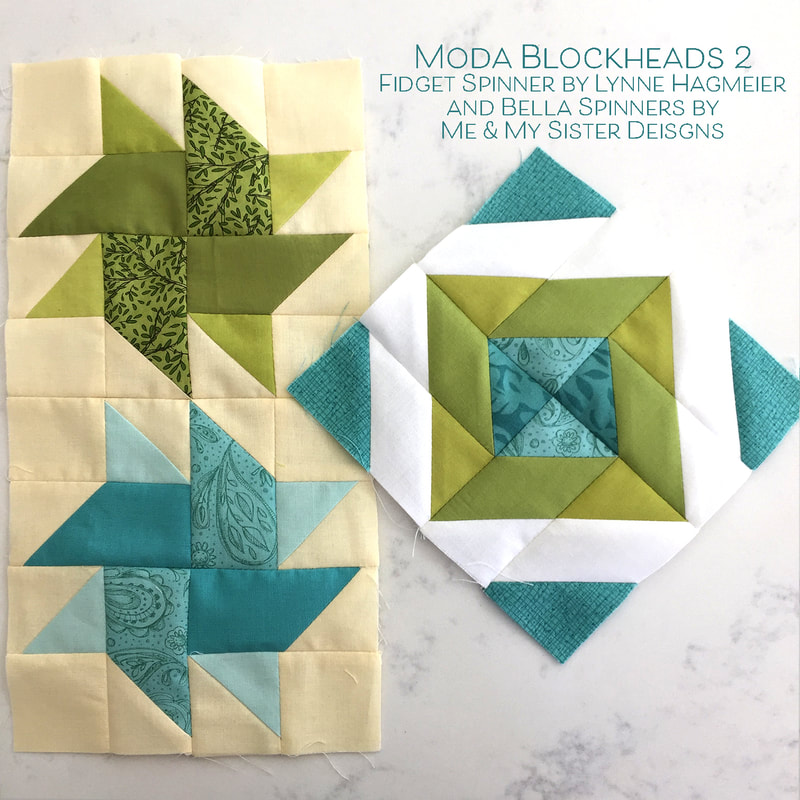 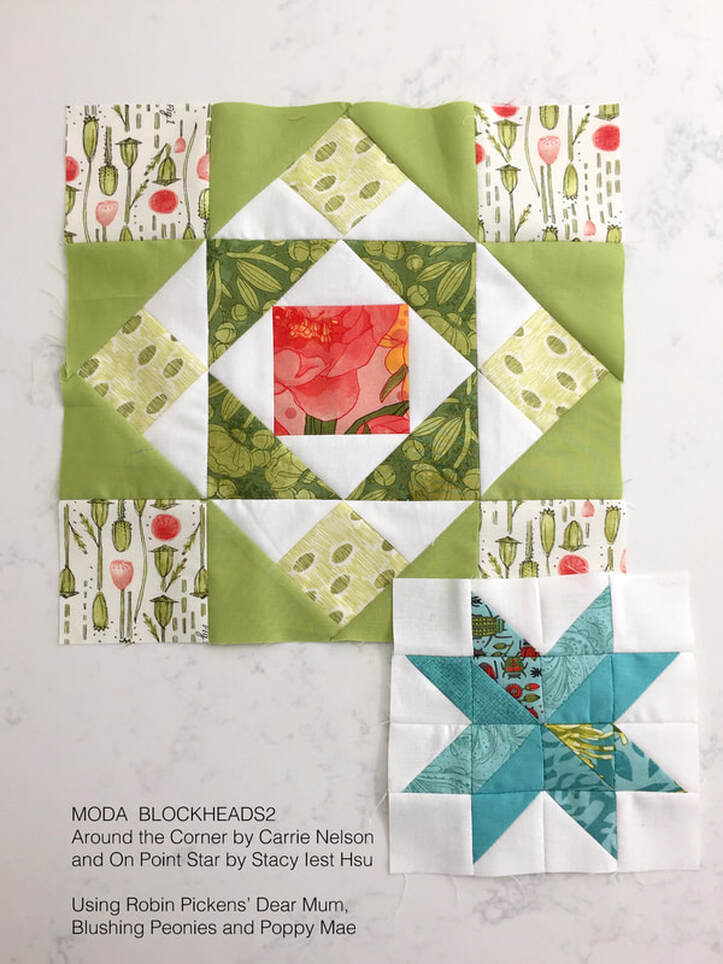 Gibby by Laurie Simpson and Rolling Stone by Jo Morton. I love how fast and easily Gibby went together. Since the pieces were 1 1/2" x 2 1/2" I had plenty of leftovers from other blocks to use! Rolling Stone was also fast due to the smaller size and easy piecing. 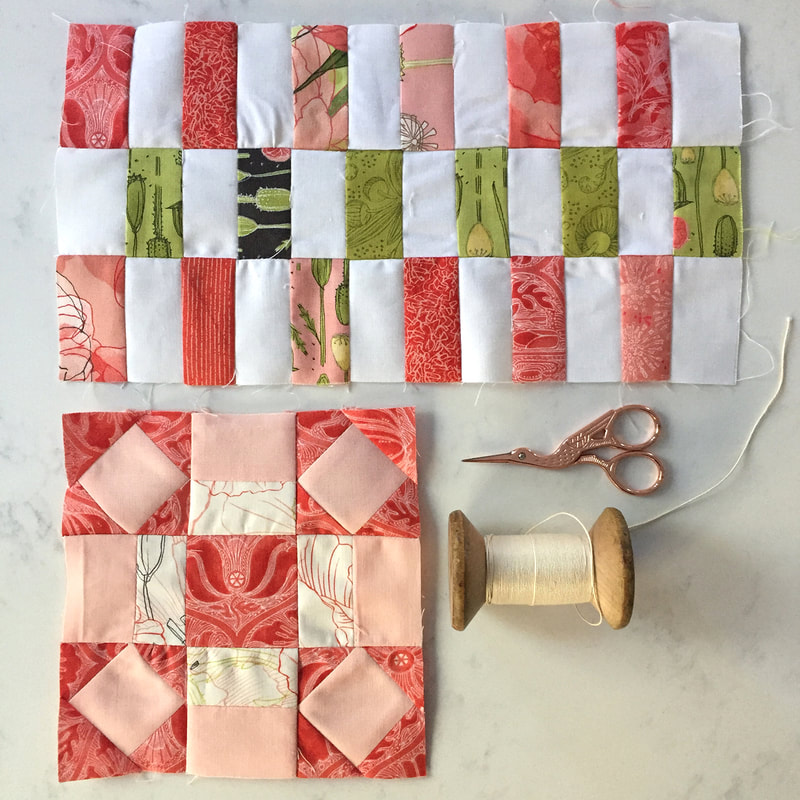 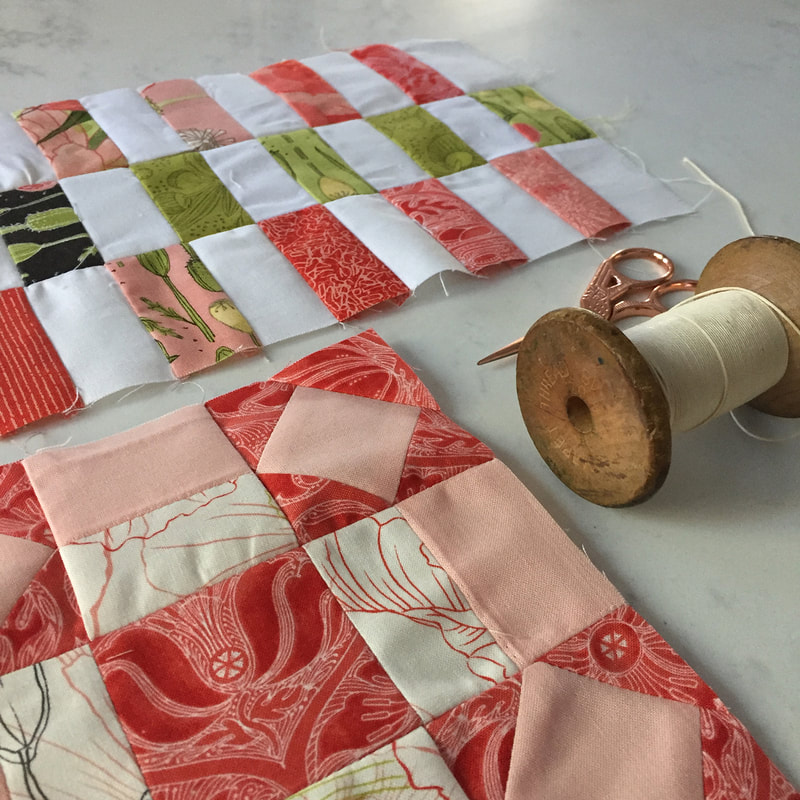 With Dreamy by Sherri McConnell I knew I could use more leftovers and go really scrappy...or take some shortcuts on making my blocks by sewing some strips and subdividing them. 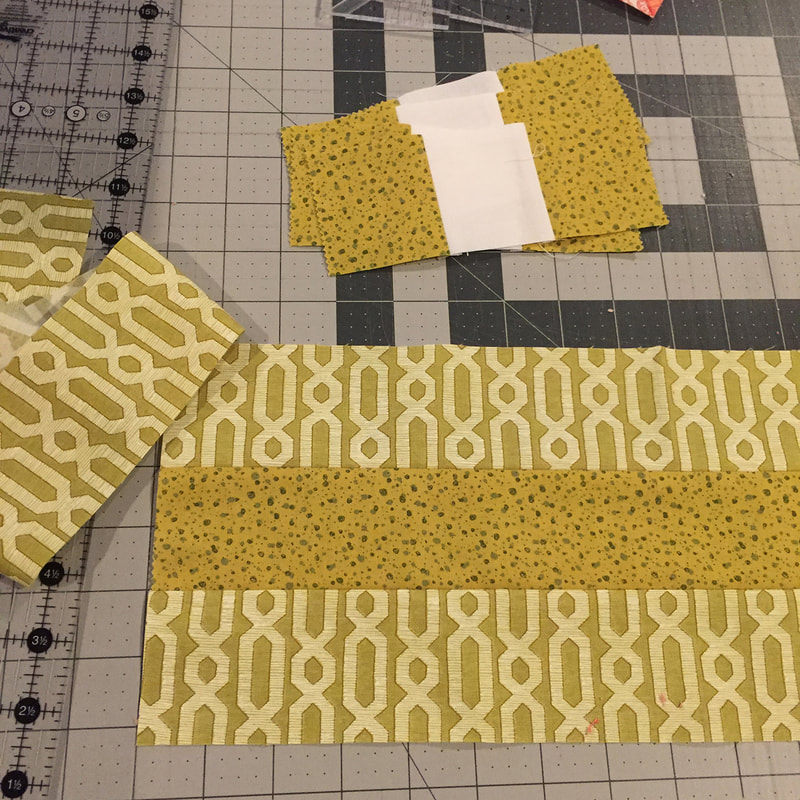 First I gathered some 2 1/2" strips and combined them in groups of three and joined them. 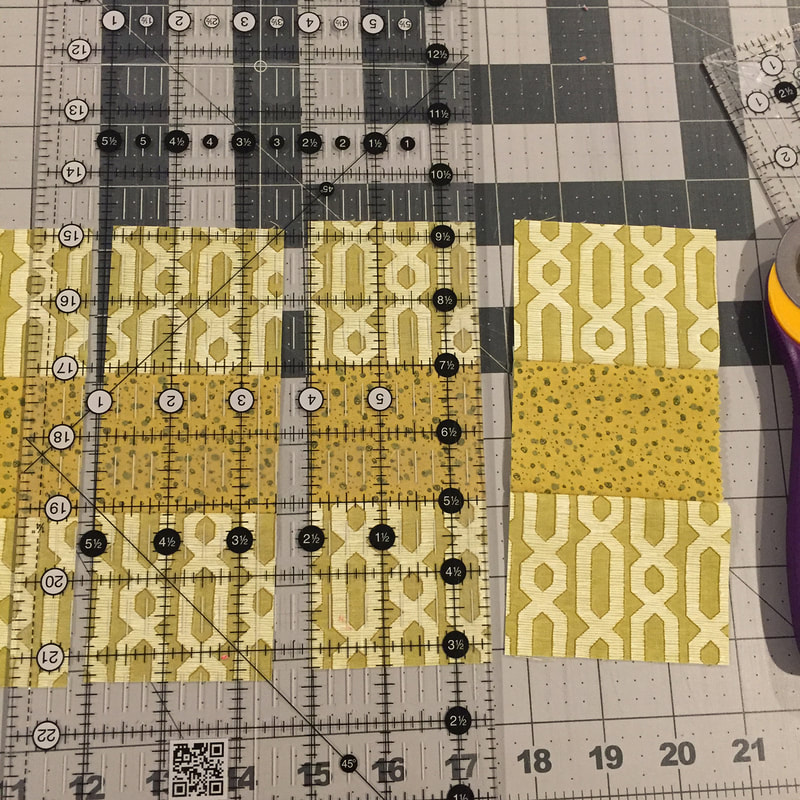 Then by lining up my Creative Grids ruler on the 2 1/2" line I could sub-cut these. Then 3 rows became my 9-patch squares. I am a big fan of Creative Grids due to that extra 1/2" side for easy lining up and measuring for cutting with seam allowances (or flip to the other side to measure from a solid inch). When making multiple blocks some steps like this can really save some time.  Are you sewing along with Moda Blockheads too? Join the facebook group and sew along!
I've been busy doing more catch up on the Moda Blockheads 2 project! When the week calls for an applique block, Corey Yoder does an alternate block that is pieced. Due to my time constraints, I went for the pieced block. Applique just takes me longer and I have a few hand sewing projects in progress now, so pieced it is!  This Happy Scrappy Baskets pattern was so fun to make. I love simple patchwork blocks and enjoyed making it into this charming basket. Corey also has a pattern for a whole quilt with this one and it looks delightful! You can check it out here! The fabrics I used for this one were a combination of Poppy Mae, Blushing Peonies and Dandi Annie. 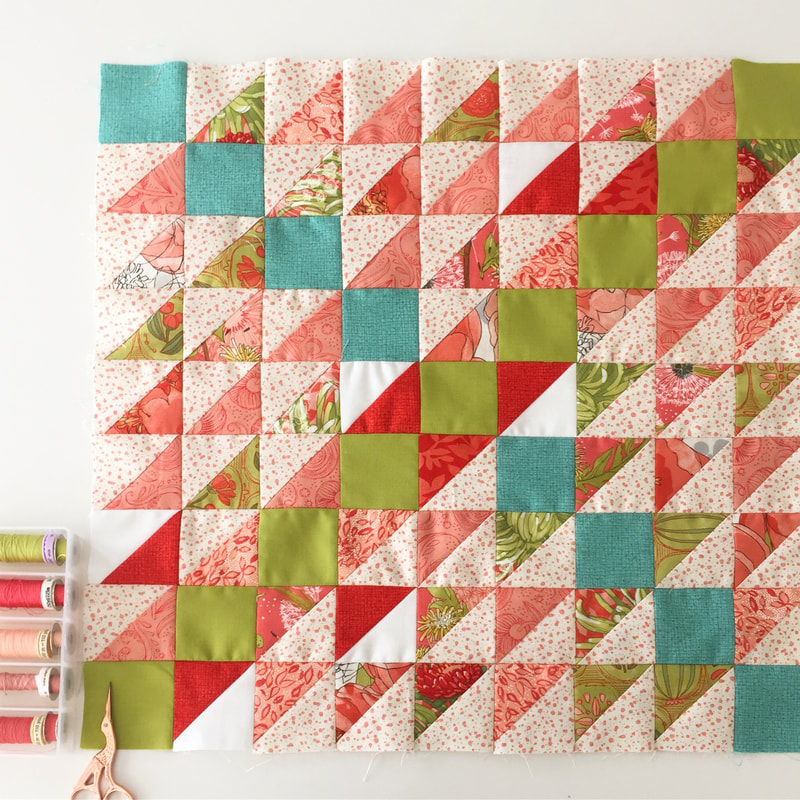 This 18 inch block "Mountain Climbing" was a block pattern from Lynne Hagmeier of Kansas Troubles Quilters. More details on her blog. It did take me awhile to make all the half square triangles and I tried doing a group of 4 or 8 each night. When I have lots of triangles to trim, I use a rotating mat and that really helps to streamline the trimming. The light spotted fabric here is from Dear Mum and I liked adding some solid white triangles too for a little additional pop of lightness. 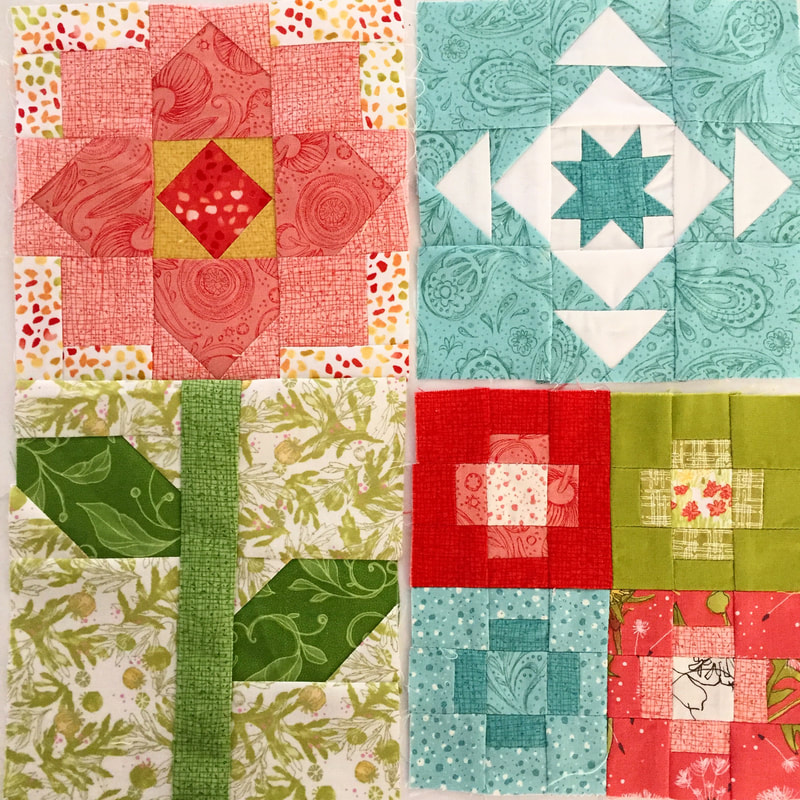 And more on the catch up list- Blocks 13- Patchwork Flower designed by Corey Yoder, Block 25 Oshkosh Star by Lisa Bongean of Primitive Gatherings, and Block 22 Economy Path by Laurie Simpson. Big flowers, tiny stars and delightful plus signs...each block has been so enjoyable to make each week. The catch up continues and I only have two more blocks to go and I will be completely caught up!
Want to join along? Visit the facebook page to get started!
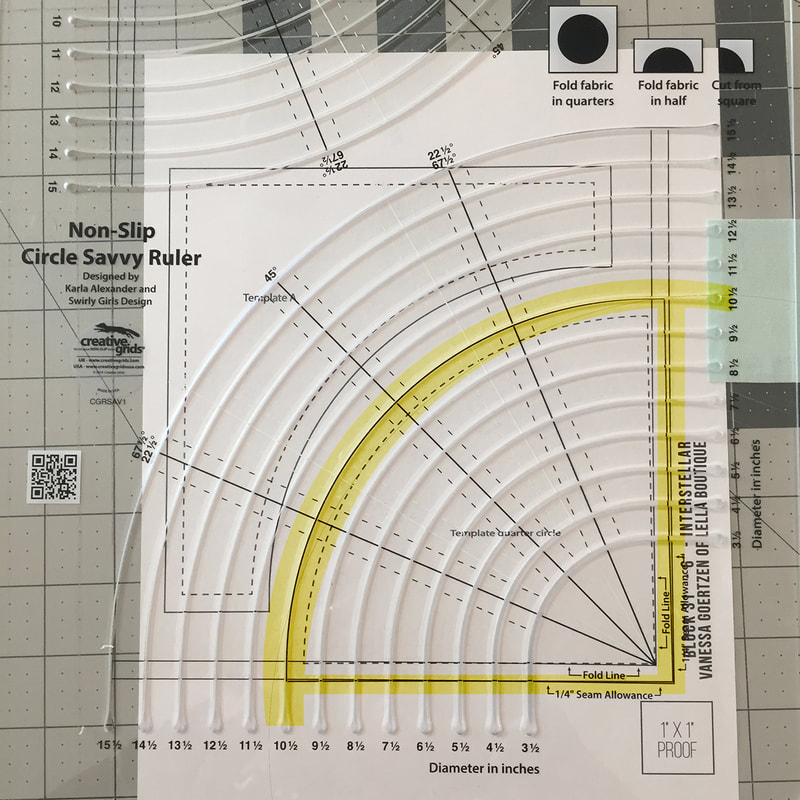
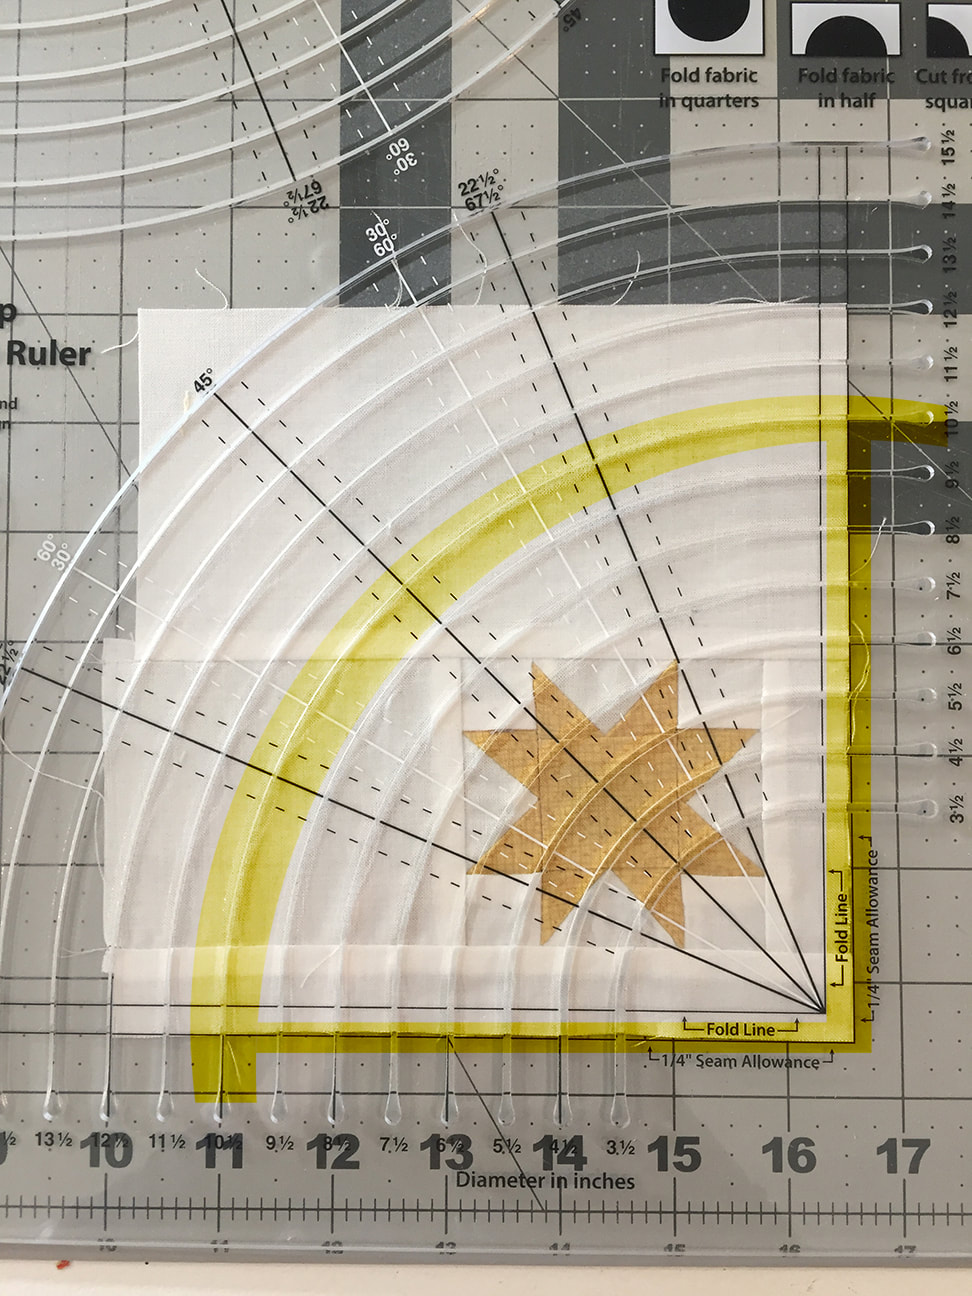
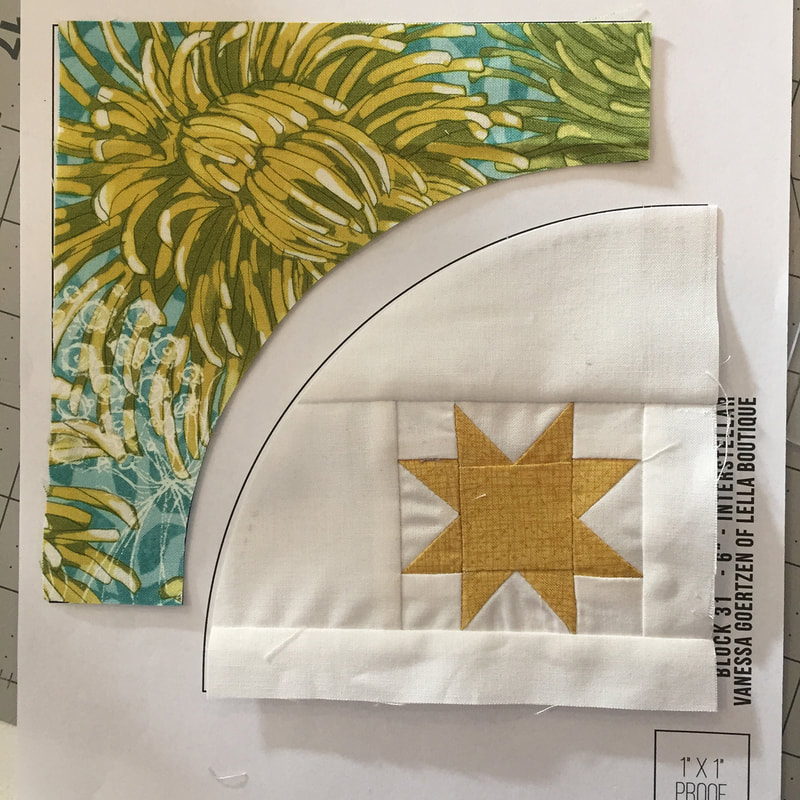
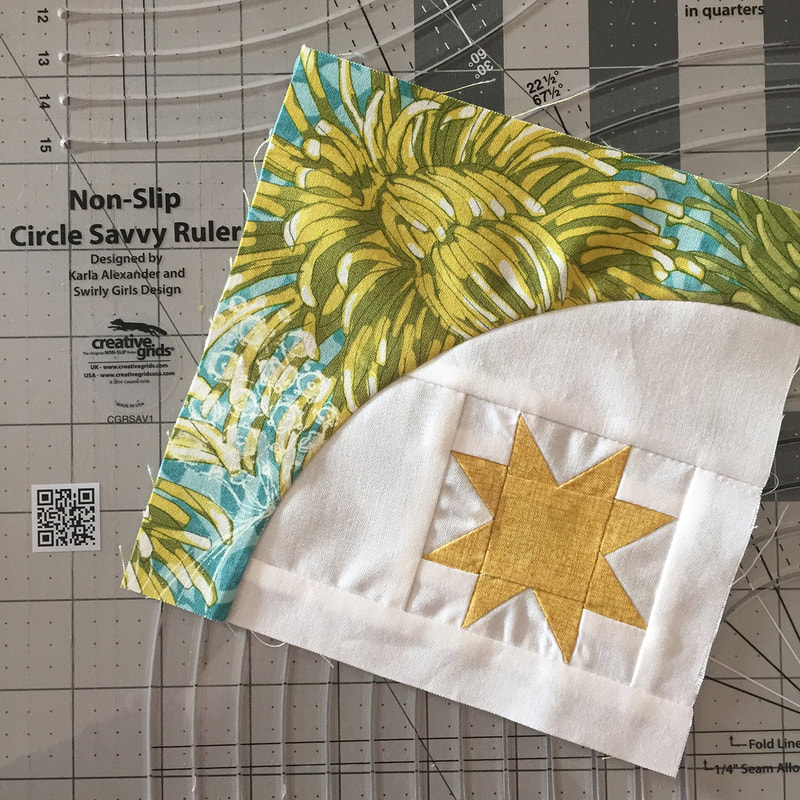
Yet another cute block for this week's Moda Blockheads! This block, Interstellar, was designed by Vanessa Goertzen of Lella Boutique. I was excited when I saw it because I recently became more comfortable with sewing circles AND I decided to use my Circle Savvy Ruler from Creative Grids to make a nice smooth arc.
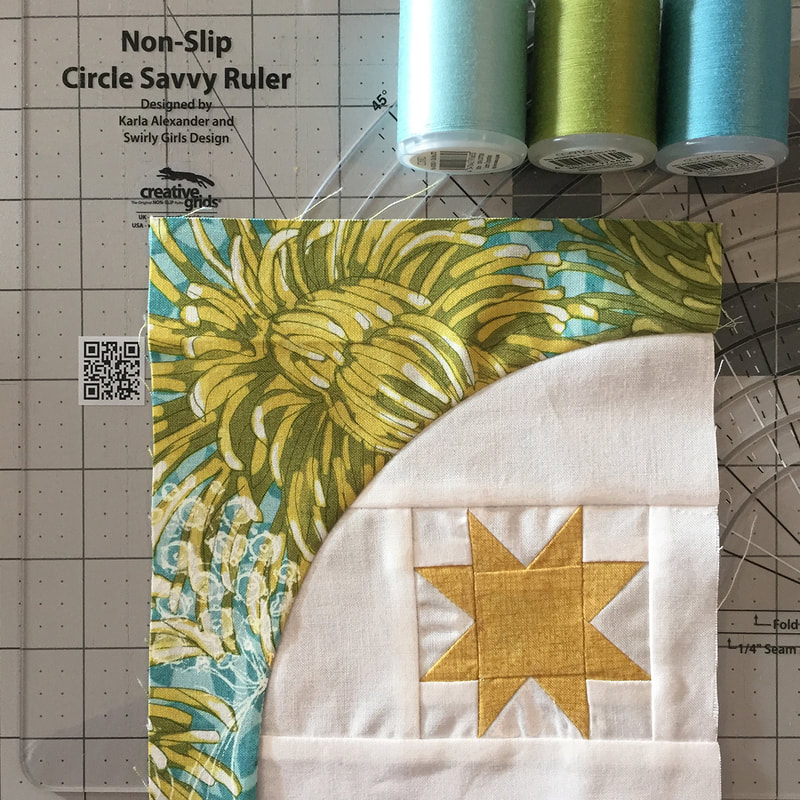
My first step was to print out the paper template that Vanessa included with her pattern. I make sure my printout is the correct size by checking the 1 inch box for reference.
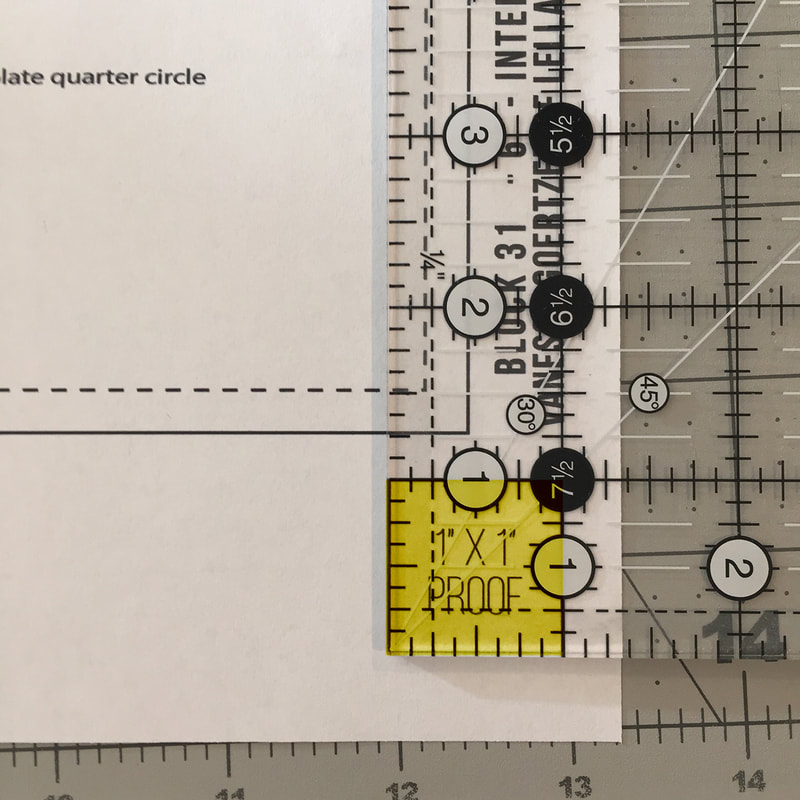
Next I line up the circle template on the lower corner (bottom and right side) of my printout shape to include seam allowance. I can then look at where my circle template cut line for the arc lines up with the printed sheet for the curve. I have highlighted the section in yellow so you can see the parts I've lined up. I can see my inside piece will be cut to the 10 1/2" circle measurement.
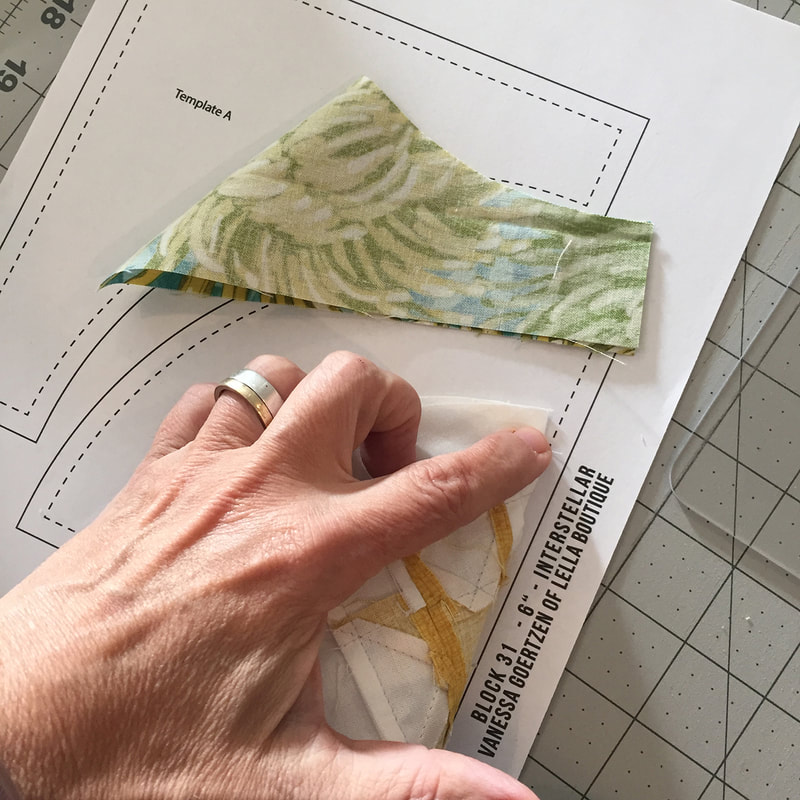
When I put my fabric under the template I again line up my lower right corner to the the lines that will include seam allowance. I cut an arc through the 10 1/2" template. This curve is large enough that I can use a normal rotary cutter but on tighter circles I prefer to use a small blade rotary cutter.
I repeat the same process for the top/outside piece by first lining up the bottom seam allowance line from my printout with the template and looking for the arc that fits. For the outside piece the 9 1/2" circle is the one I want to use.
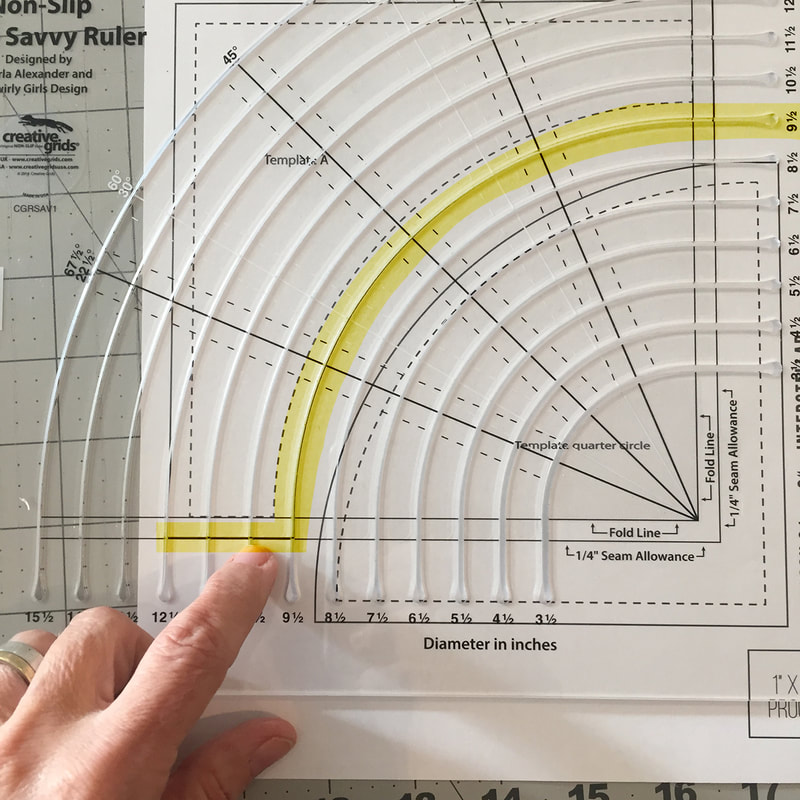
Line up to seam allowance at the lower right corner and cut the outside piece using the 9 1/2" circle template line.
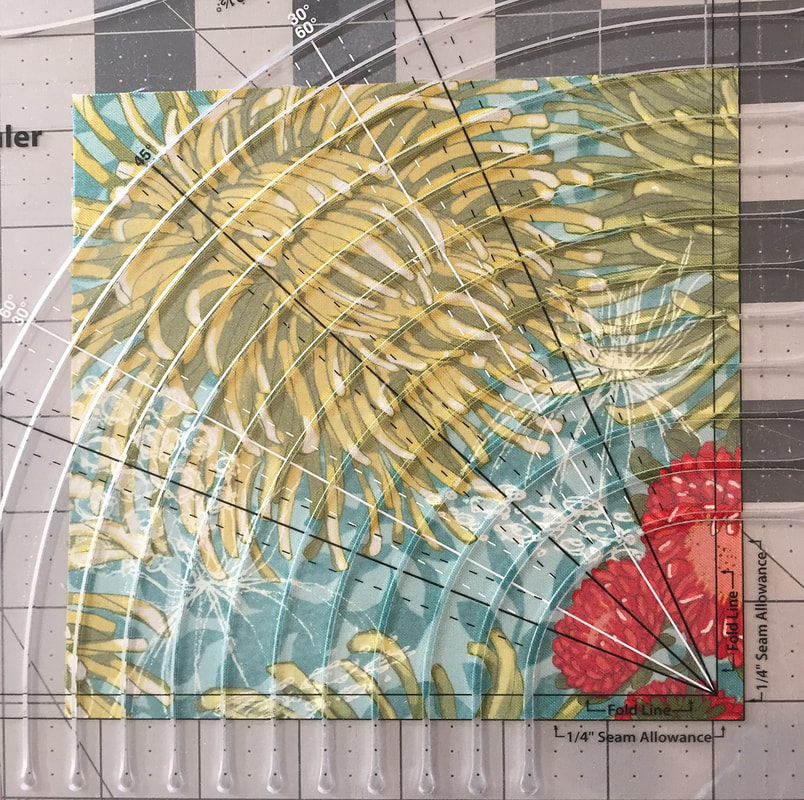
After cutting my pieces I lay them on the paper template to check them. I MAY have flipped my measurements at some point in the past and learned to double check my pieces! (that's why we buy a little extra fabric, isn't it??)
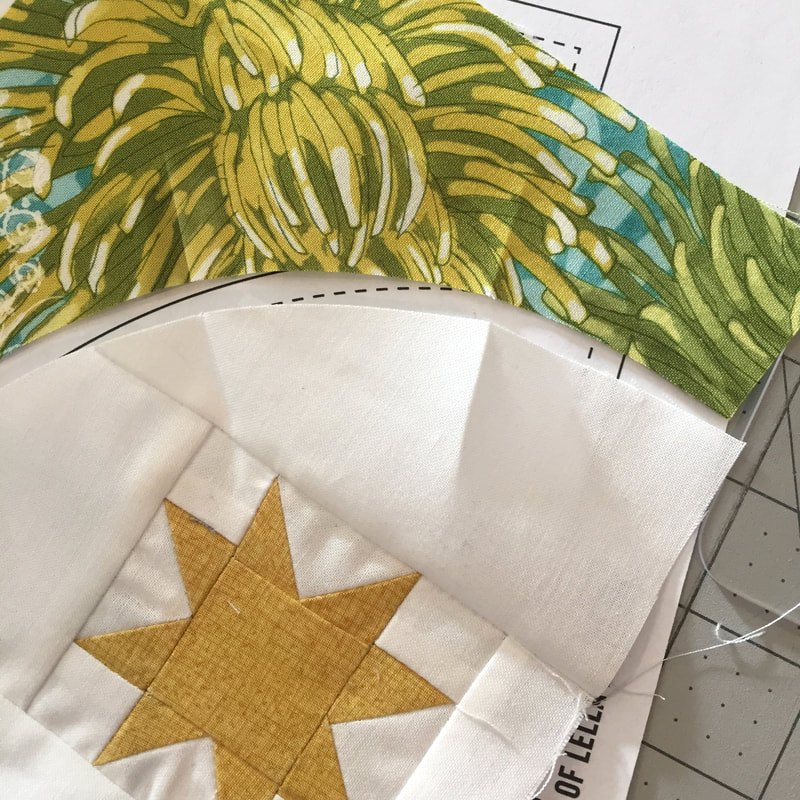
In order to help me line up the inside and outside parts of the curve for pinning and sewing, I next fold my pieces in half, matching bottom side to right side and make a little crease at the fold.
I fold again so there is an additional crease mark between the middle and edges on both the inside and outside pieces. I will line up these creases when pinning my pieces right sides together.
I pin, starting with the two outer edges, then pinning the middle, then the mid points between the middle and sides.
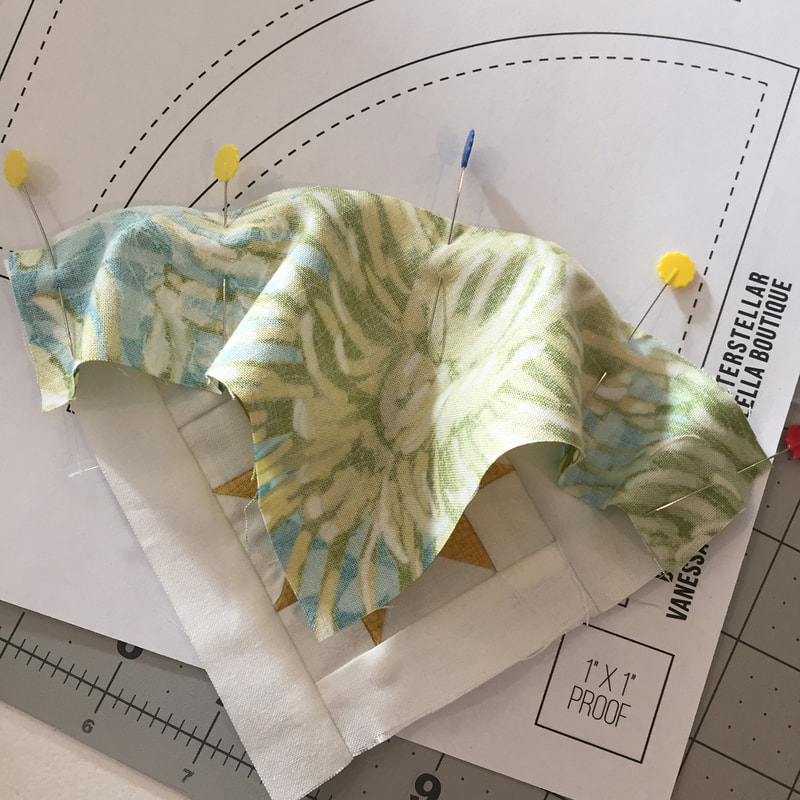
I'm ready to sew! With curves I slow down and take my time. Sometimes it helps to increase your stitch length too. With a curve of this size I didn't need to make that adjustment. I press my seam outwards and there is a nice graceful curve for my star to live in!
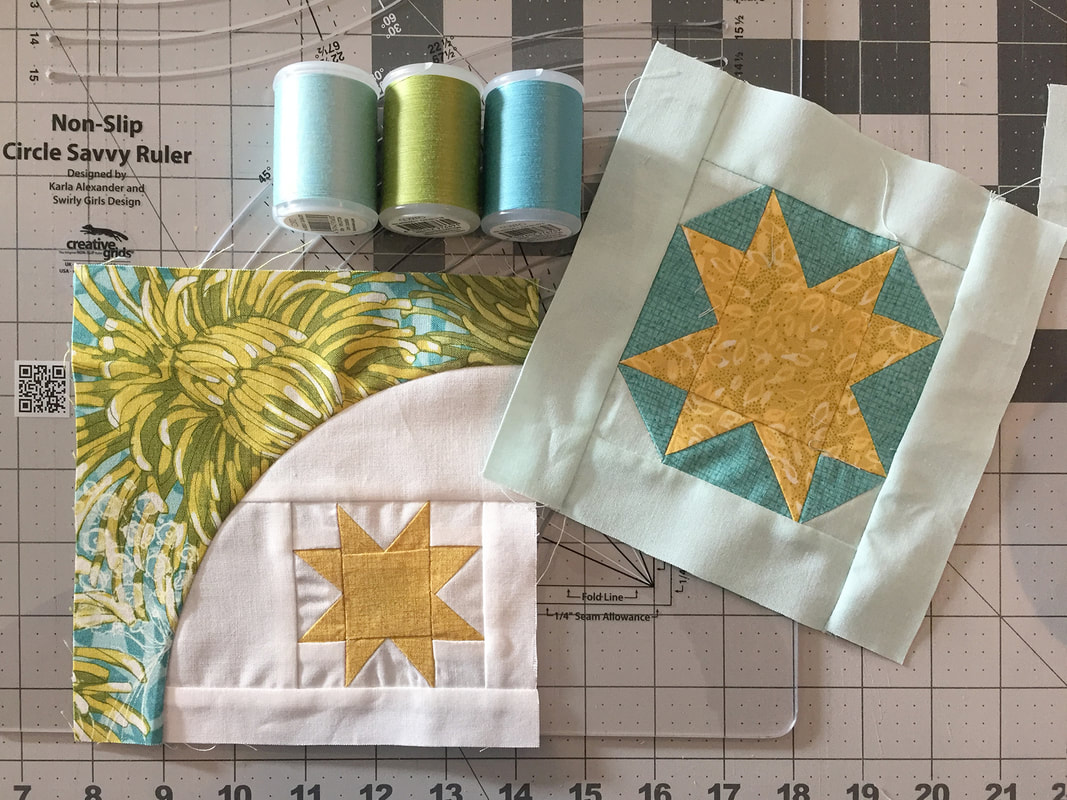
Since I've been doing a little catch-up on my blocks I also did the Corey Yoder version of the star block number 21 (pieced vs applique and you can find it on Corey's blog at corianderquilts.com/blockheads-wednesday/) so I'm feeling the stars today! For both of these blocks I used Dear Mum fabric and yellows from Dandi Annie by Moda.
Hope this helps if you are using the Creative Grids ruler! I love it and used it for my pattern "Towards the Sun." The pattern has a paper template but I like to use a ruler. You can check your local quilt shop for it and if they don't carry it, you can also find it on amazon or other online sellers. Happy curved sewing! |

About ROBINDesigner of colorful florals for Moda fabrics. Modern to transitional quilt designer. Illustrator, sewist, crafter. I am proud to be a designer for Moda Fabrics!


Shop Robin's Designs
 I am an affiliate for Fat Quarter Shop and may earn a small commission through my links. Thank you for your support!

Check the March 6, 2017 Episode!
Categories
All
Archives
February 2024
© Robin Pickens Inc. All rights reserved. No images may be reproduced without permission.
|
 RSS Feed

