|
My week with my second SEWCIALITES block is here! Celebrate "ABUNDANT"! I've got some variations and a fun project you can make with more blocks! 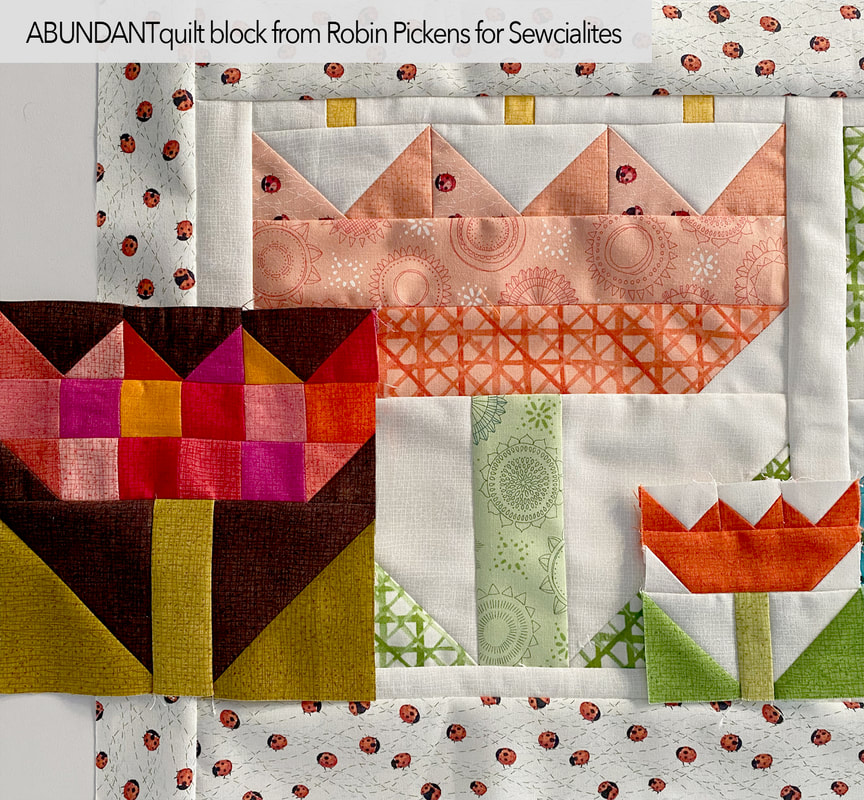 I've made blocks this week from all three of the sizes- the 9", 6" and 3". In honor of SPRING arriving and Easter around the corner, I've made a project for a cheery table runner from three of the 9" flower blocks. I used the Solana fabric line for the blocks and border since it felt so happy and summery and I just could not resist some of those busy ladybugs. One variation that I made on my runner blocks, was to make the flower base out of two strips of fabric as horizontal bands vs one body color. This allows you to add more dimension or prints into the flowers or you could make the bottom green and the top band the petal colors. If you would like to do this, take the finished size of the flower base, divide in half, then add your 1/2" for two 1/4" seam allowances on sides. On the 9" block you would use (2) 9 1/2 x 2" strips, the 6" uses (2) 6 1/2 x 1 1/2" strips, and the 3" uses 3 1/2 x 1" strips.   Each of my flowers for the runner use two strips for the base. I picked colors of peach, blue and yellow for the prints from Solana for my blocks. I also wanted to give my petals (made with the flying geese) two fabrics to suggest a little more dimension. To keep it looking like a cohesive unit, I chose stems and leaves in similar fabrics for all three flowers. If you are making the flower base with two pieces as shown below, I suggest joining them first, then add your stitch and flip corner to the joined unit. I find my seams will press flatter this way (vs corner first then joining the two strips). 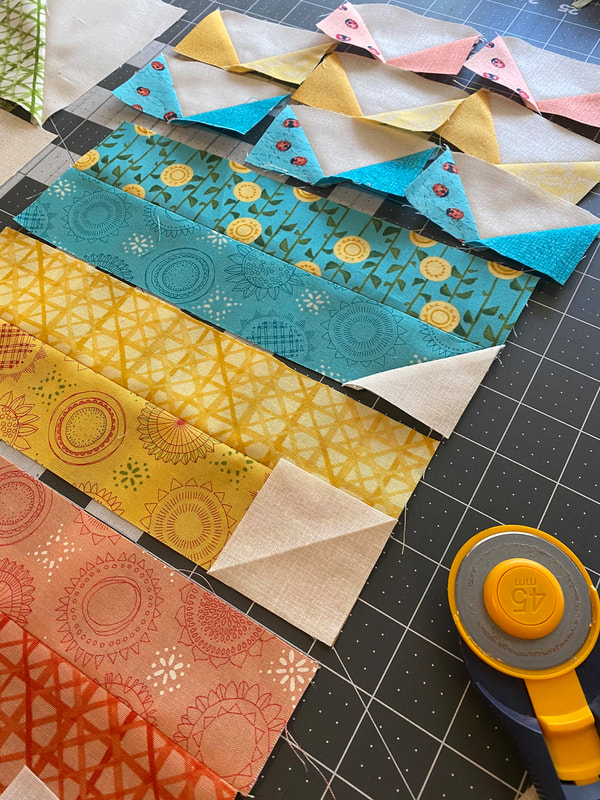 My runner also adds little pollen dots on top of each flower. The pollen pieces are made from 1" squares joined by background strips and that row is placed on top of the flying geese. To balance the flowers and make the bases and leaves line up when flipping, I've also added a 1" strip to the bottom of the flowers.  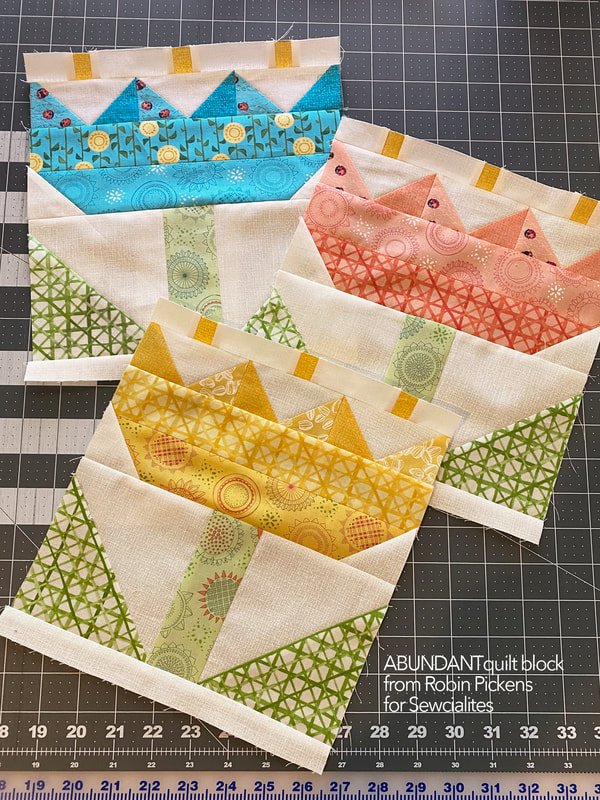 Each of the flower blocks are joined, side by side, with 10 1/2 x 1 1/2" strips to make the body of the table runner. A 2" border surrounds the group. 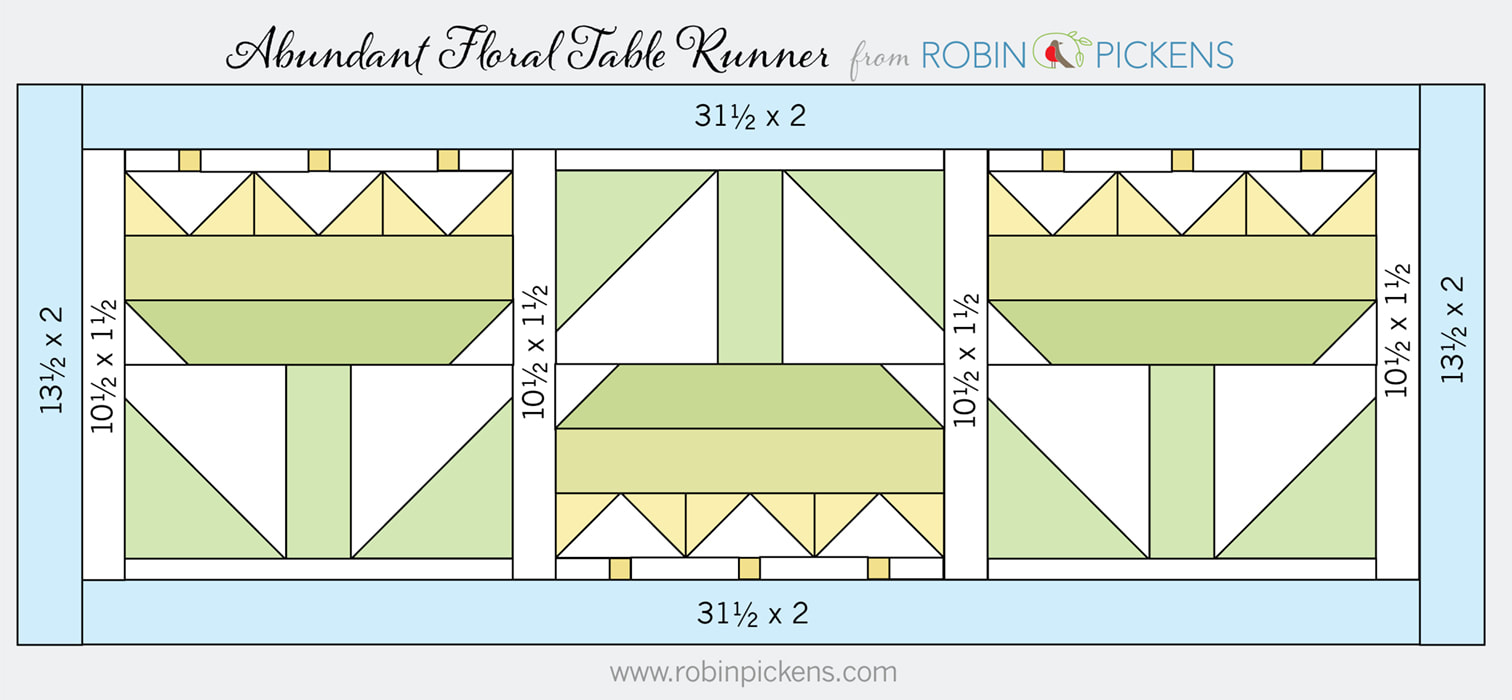 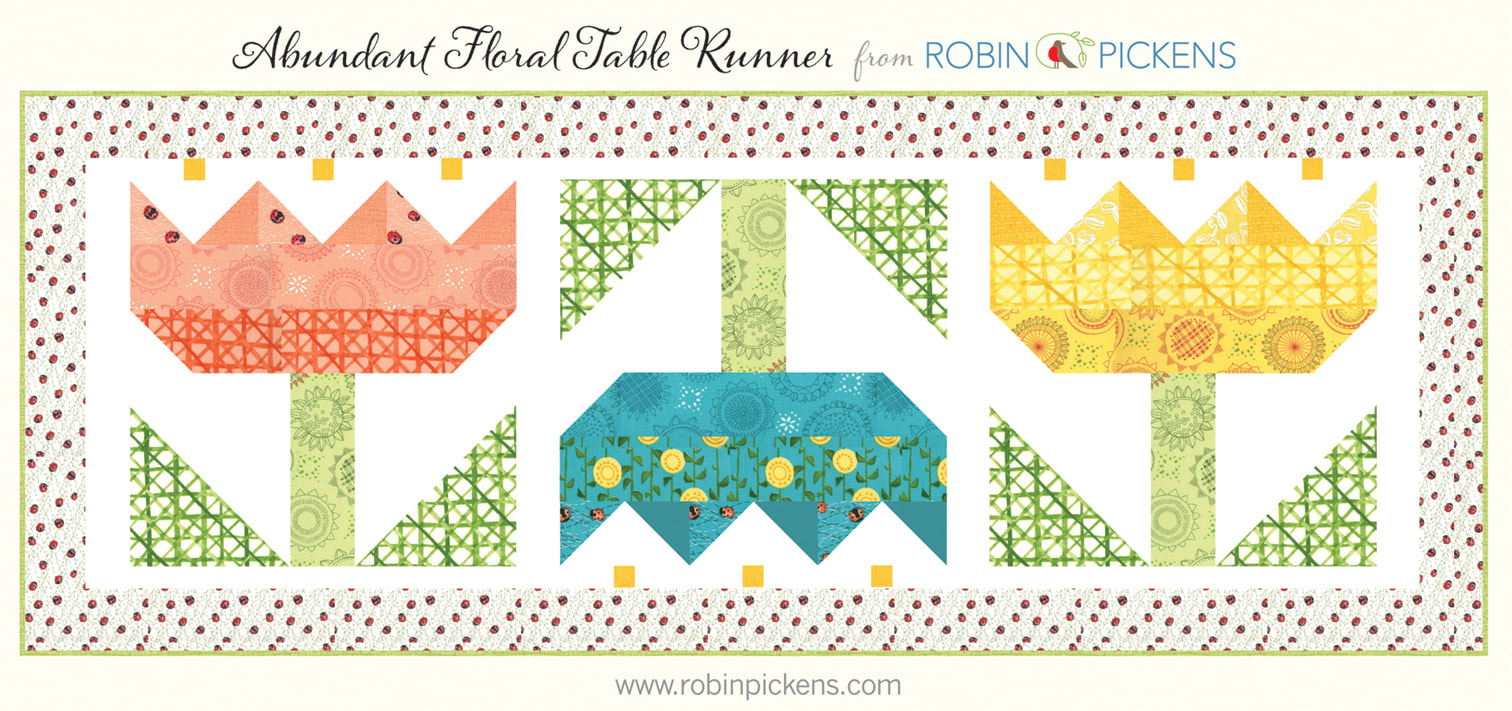 Here is my pieced top. It still needs quilting and binding but I can get that done by Easter. It adds a pop of spring to the table. I'm planning on binding in the light green Thatched from Solana. 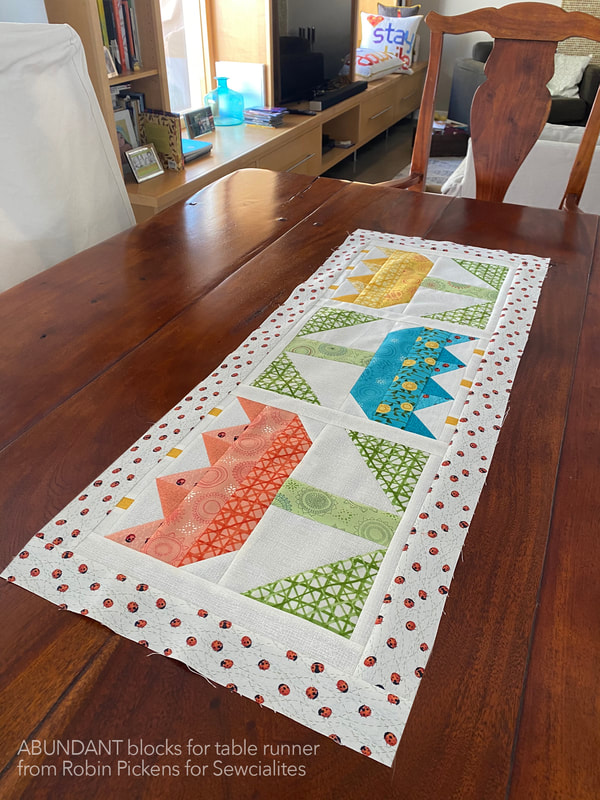 These could be so cute as white or light colored flowers on a dark blue, dark green or purple background. Or play around with string quilting pieces in the leaves? 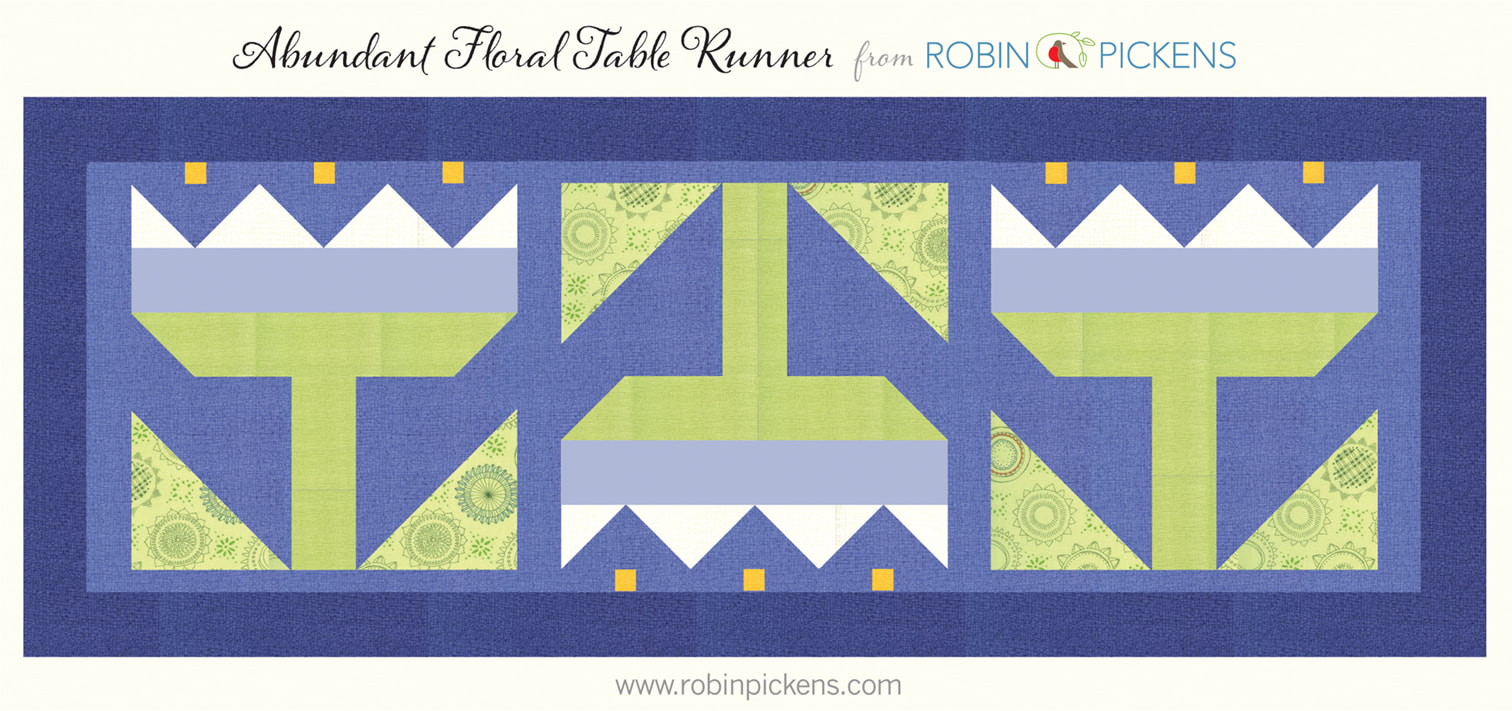 I also think a longer runner with more flowers that drapes over the edge of a chest or table could be nice! 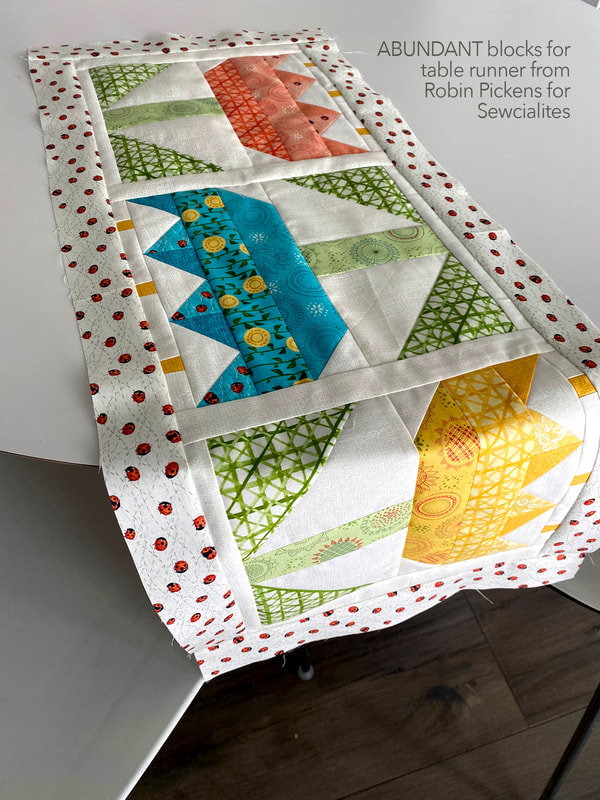 But I'll just enjoy this Solana version this spring and maybe make another one later! One more variation idea for this Abundant quilt block. I wanted to try patchwork squares within my flower to get a mix of warm pink, orange and red shades. Using the same formula for figuring out the horizontal bands for the flower body works for size of squares. This shows if you keep one a solid band on the underside of the bloom vs all patchwork squares.  This 6" sample is done with some of my new Thatched colors! The background is Chocolate Bar and the leaves are Green Curry and Olive. The flower uses Peach, Pink Grapefruit, Sugar Rose, Fuchsia, Apricot, Tangerine, Rose and Crimson. The Fat Quarter Shop is carrying the Thatched colors, including the new additional range, as well as Solana fabrics. 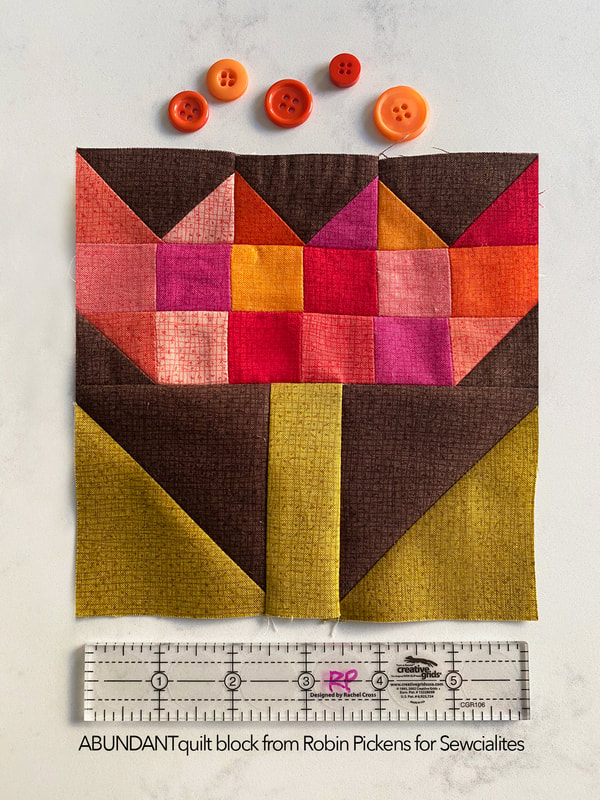 If you want to make patchwork squares, use 2", 1 1/2", or 1" squares for the 9, 6 or 3" blocks. 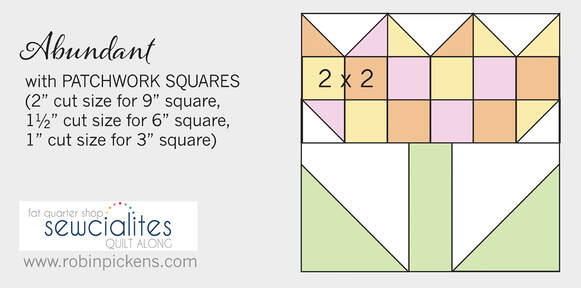 My overall Sewcialites quilt is made with 3" blocks in Thatched in grays with three of the blocks in color. For this quilt with the small blocks, Abundant is one of the color ones! The other is the heart block from Corey Yoder and the third one will be the sewing machine from Lori Holt. 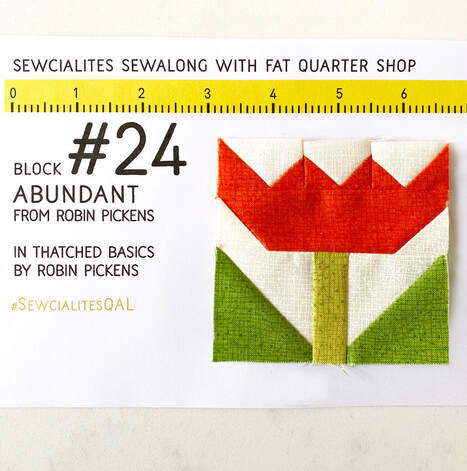 Want the FREE pattern for the ABUNDANT block? It is on the Fat Quarter Shop page about SEWCIALITES! I hope you have as much fun with this block as I am having. Keep it simple or add to the blooming delight! And thank you to the Fat Quarter Shop for organizing this sewalong and thank you for including me. Happy sewing everyone! 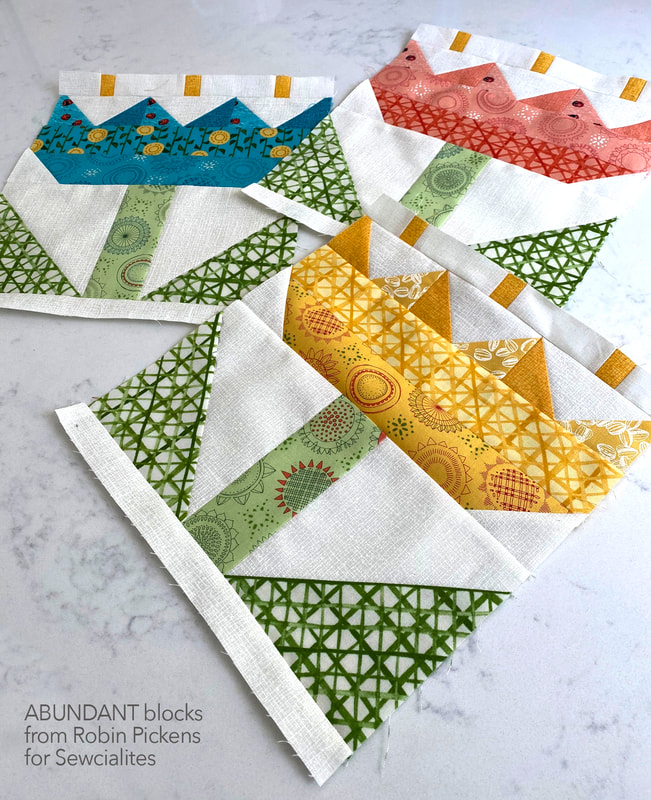
6 Comments
I am so happy to announce that the last of the new patterns that accompany the Cottage Bleu fabric line have finally arrived! To celebrate, I am releasing my brand-new quilt designs which are called Wind Drifter and The Collector! 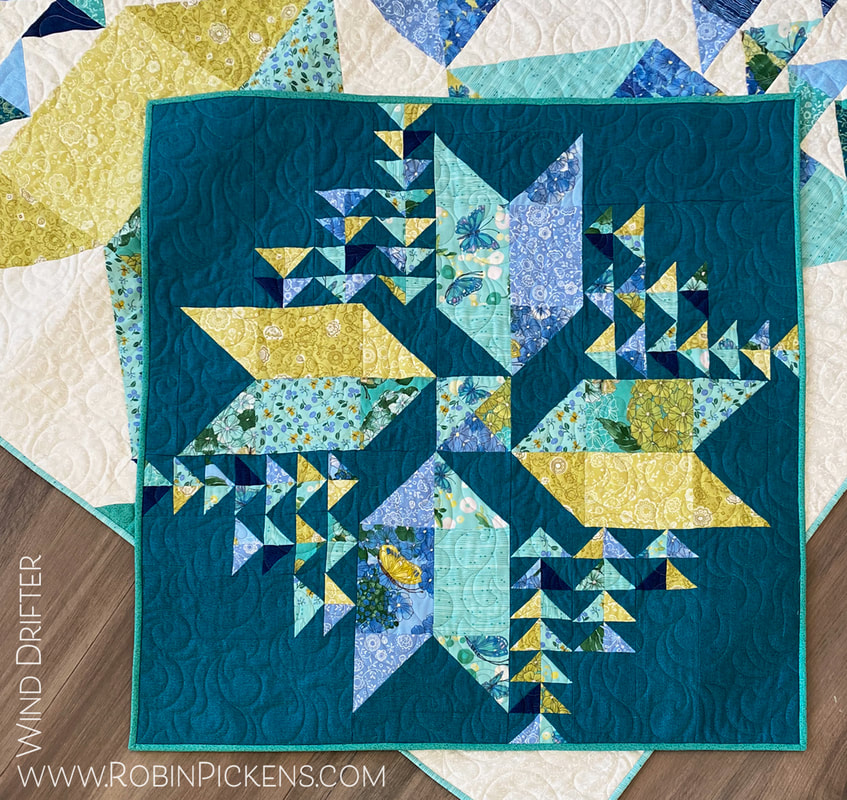 First, let's talk about Wind Drifter! If you are a beginning quilter and are wanting to make your first half-square triangle quilt, this pattern would be a perfect place to start. This is because Wind Drifter is an easy quilt pattern that uses half square triangles (or HST blocks) paired up and stacked in lines to make pinwheels of motion! They remind me of rows of flying geese blocks but with more dimension by using the two fabrics of the HST. When designing Wind Drifter, I wanted to combine rows of triangles, basic blocks, and individual triangles, to create a fun quilt design that looked complex but was still easy to put together. I JUST finished putting the binding on the small version of Wind Drifter and have been trying it out around the house. I intended for the small one to be a wall quilt but I think it also makes a lovely table topper! I think you could add large borders and make a lovely baby quilt or crib quilt as well. 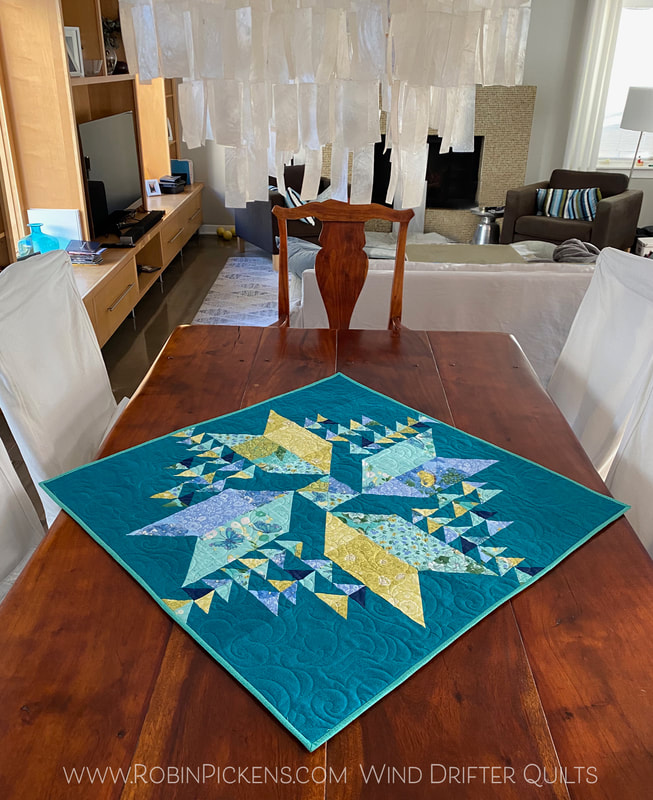 I enjoy seeing the smaller quilt paired with the larger Wind Drifter quilt and the combination of dark and light. The background fabric I have used on the small one is a new Thatched color in the Cottage Bleu group called Pond 48626 145. It is such a nice deep tealish green. The medium green on the small binding is Horizon 48626 144.  When it comes to the size of the quilt, Wind Drifter can be made in two different sizes. The large quilt size is 65" square and the small is 32 3/4" for the small. Below you can see the finished quilt in both sizes. For the larger version, I've used the same color palette as I did in the smaller version. The biggest change that I made was using the white/cream tonal Floral Fling print as my background fabric. Using this particular print, gave such a nice, subtle texture in those open spaces. Both of these quilt directions are written for using Fat Eighths. However, when it comes to fabric choices, the possibilities are endless! You could easily make different variations of this quilt using solid colors, prints, or even textured fabric. Plus, I love the idea of using a larger, scrappier mix of different fabrics for the half square triangles. If you have a stash like mine, you can imagine making the entire quilt top as a scrappy triangle quilt! Since we are on the topic of fabric and triangles, I did want to point out one thing about this pattern. If you are looking for a great way to show off bigger prints within this pattern, try placing them in the sections which have the larger triangles or arrows. They create a balance between large and small. The combination of arrow directions leads your eye around the quilt and to the center where the Quarter Square Triangle Block lives. 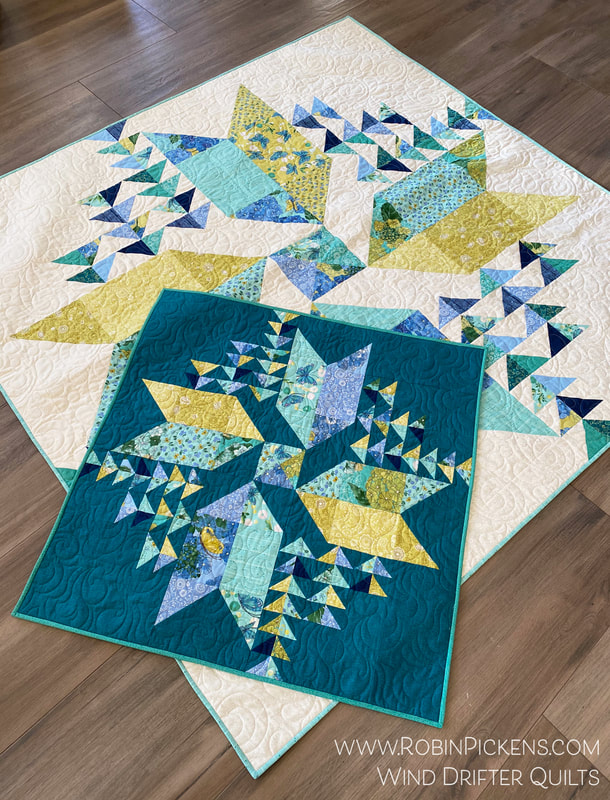 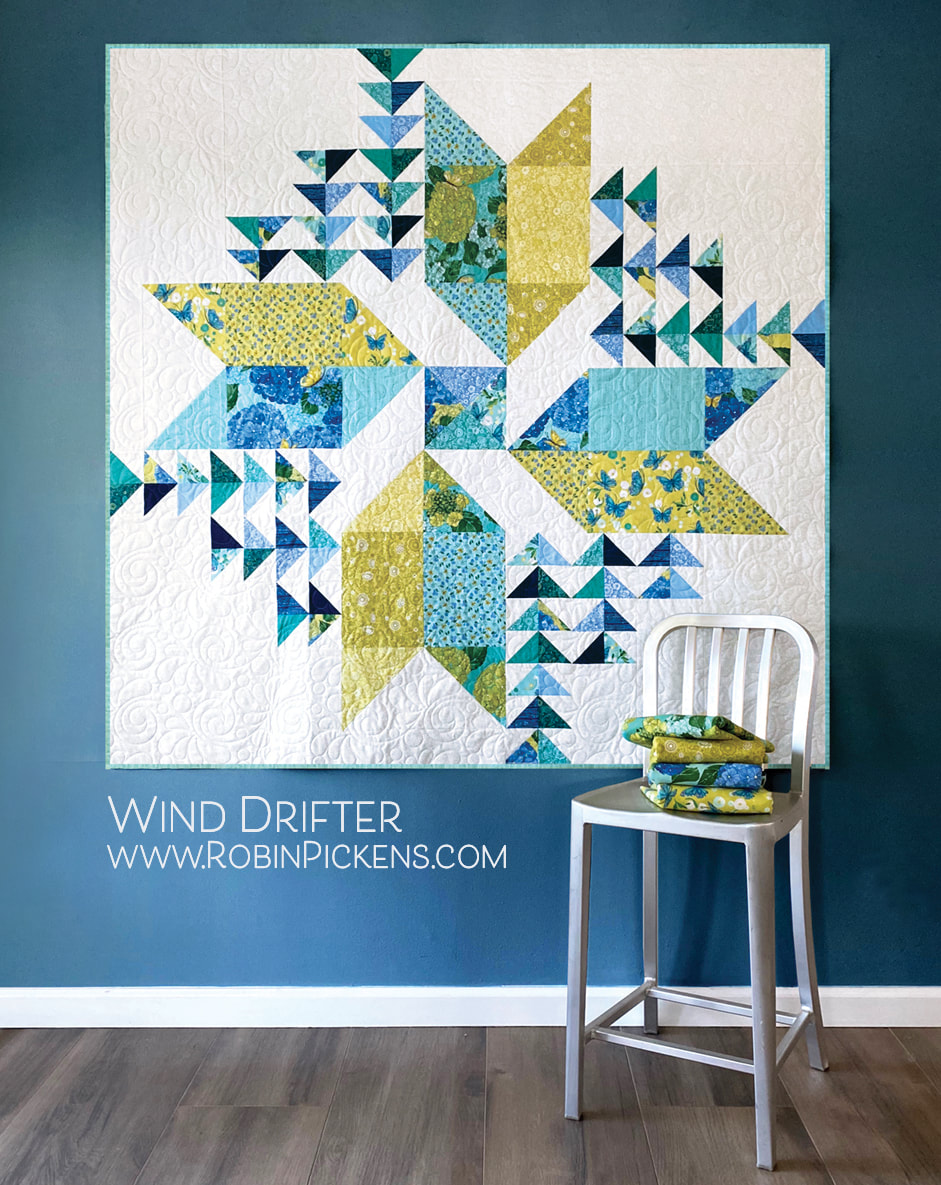 Moda Fabrics is kitting Wind Drifter in the large size with the cream background. The kits will have triangle paper on a roll, which makes the paper piecing of the small half square triangles so fast! I love triangle paper. There is less trimming and they are so accurate. You do not need to make a drawn line on the backs of your squares. Just follow the sewing lines. They also make creating a half square triangle quilt such a breeze! My other new pattern, The Collector, was a really fun project with vases, jars and bowls to show off pretty prints. I went with a chinoiserie feel with my vases, thinking of lovely blue and white ceramics. but I also think these would be super cute in novelty fabrics like cookies and pickles and crackers in the pantry...just flip the wide vase angled top upside down and you have a wide jar with a lid instead of a vase. Is your collection of sewing items? Fill your vessels with buttons, thimbles and threads. Or maybe you like toy airplanes, marbles and jacks? So many different ways to show your treasures in these collector jars. 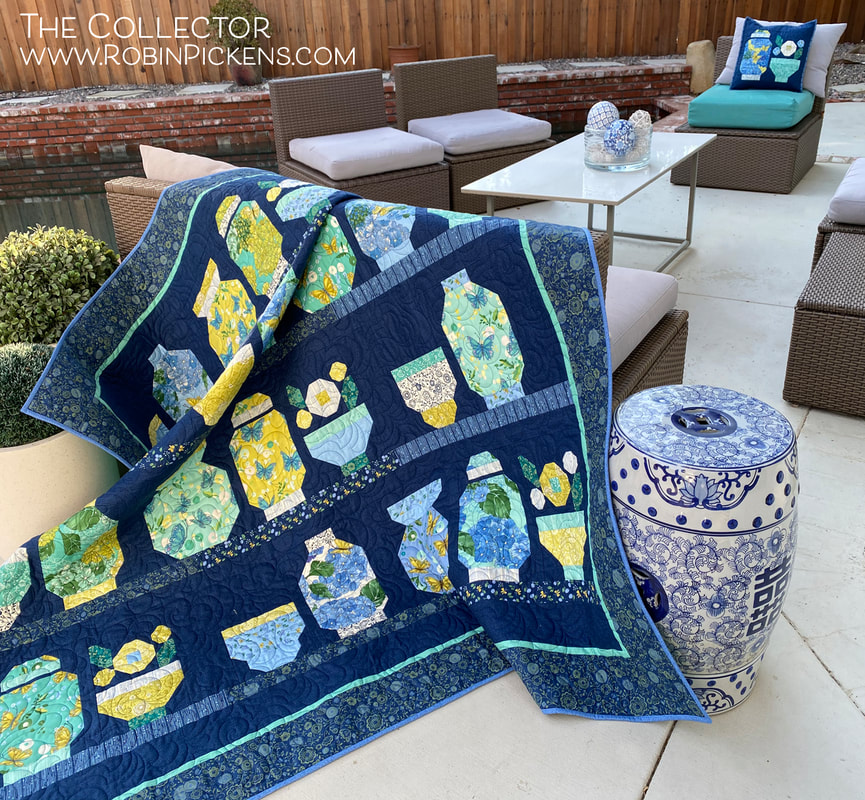 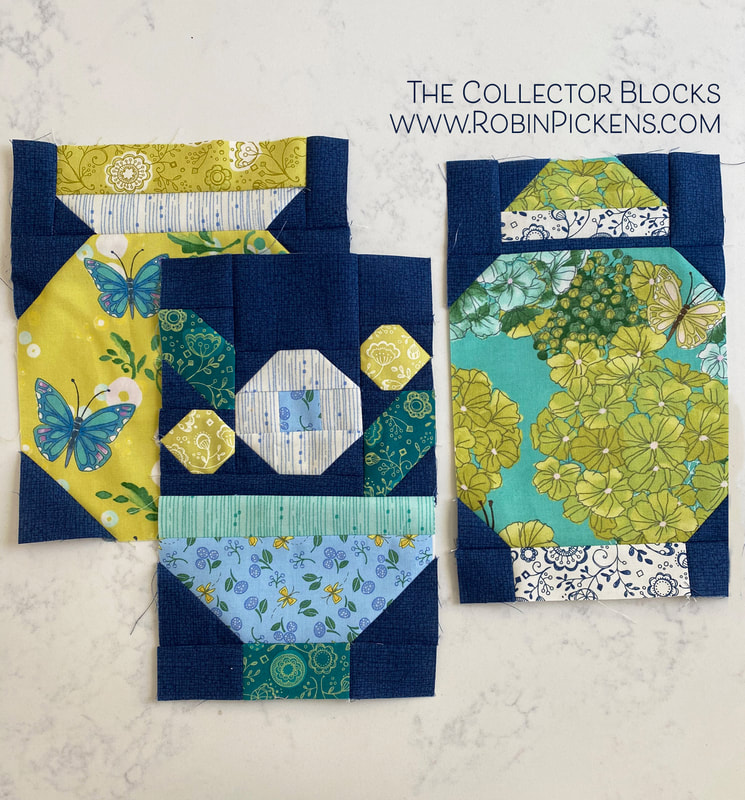 These vessels are arranged into sets of 2 or 3 units, then repeated. I had sewn together one strip and put it on the dining room table. Wouldn't that make an interesting table runner? 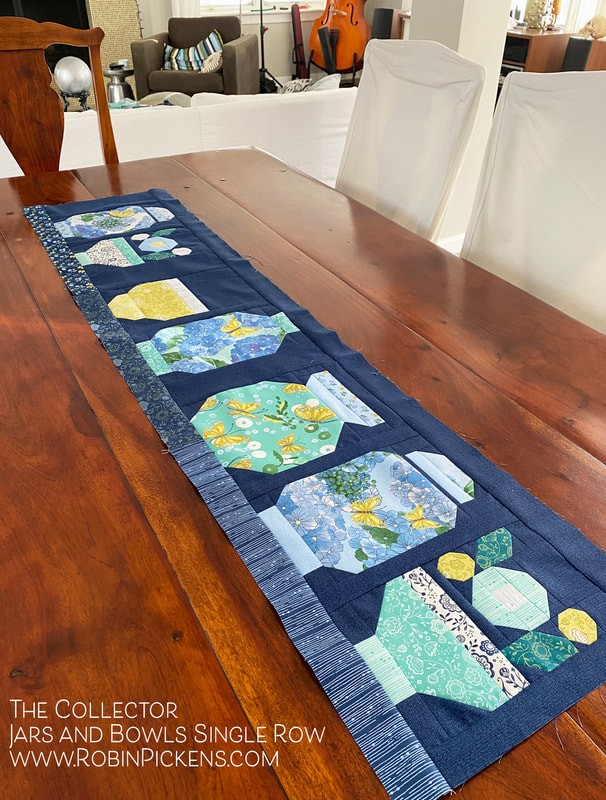 And I used a couple extra blocks I made to make a coordinating pillow with my quilt. 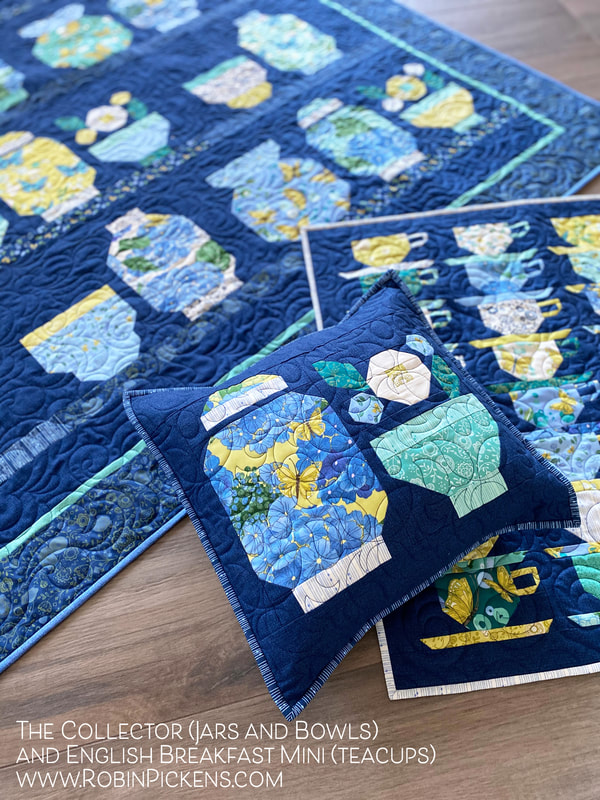 The Collector is sized 67 1/2 x 65" and is also made from Fat Eighths with background and border fabrics added. This would also be a good scrappy project (especially if you have a piece of fabric that you have been saving for a ''special project''). Look for pieces for your vessels that are 8 1/2" high and 8 1/2 wide to fit the larger jars and vases. Also, if you have a bunch of fat quarters in your craft stash, this would be the perfect quilt to use them in! 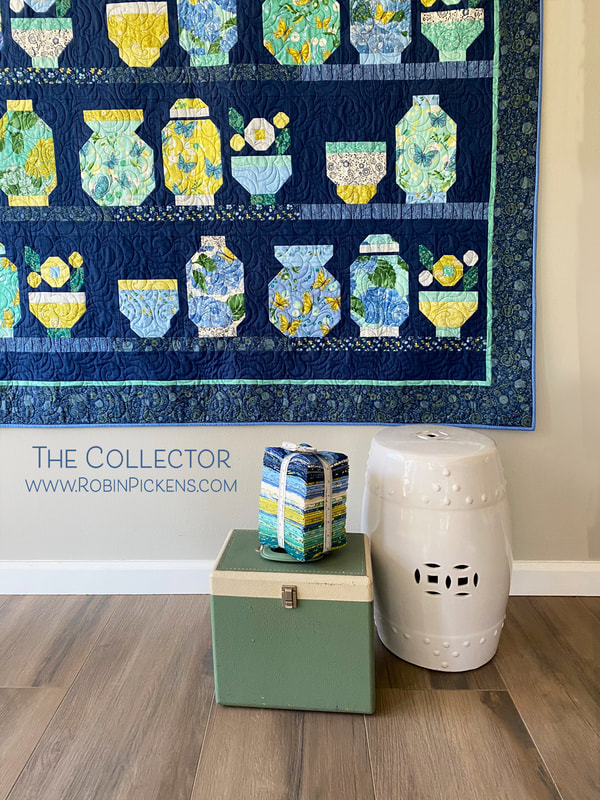 The quilts shown here are using Cottage Bleu, which should be shipping from Moda Fabrics in April. This quilt also goes well with English Breakfast mini quilt with tea cups. I enjoyed a little home decor theme with this collection and had fun with those big hydrangeas in bursts of blue splendor. I hope you have as much fun as I've had with these patterns and I'll share more as other versions are done with new fabrics. I've been gathering fabrics to make one like jam jars (so fruit themed fabrics) and one with sewing notions (I'm still looking for the perfect buttons!). And I might even do a spooky Halloween one with curiosities in the jars! Stay tuned for that one! Happy quilting! 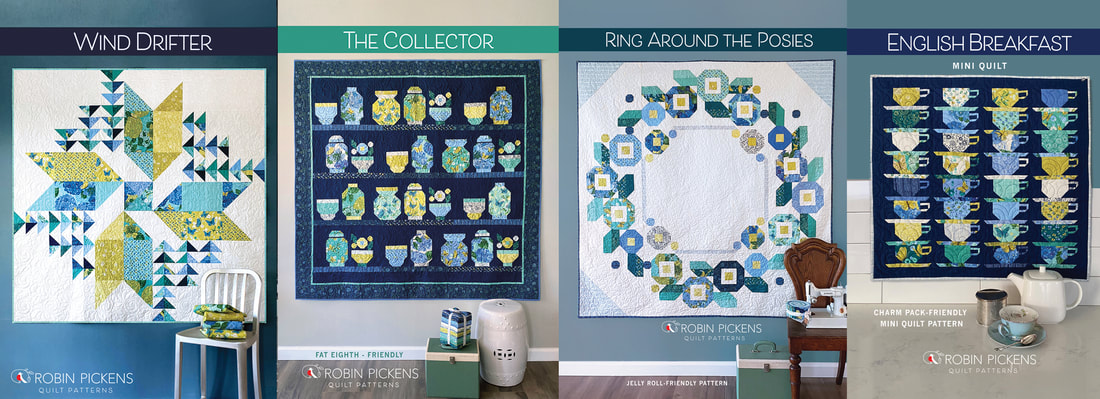
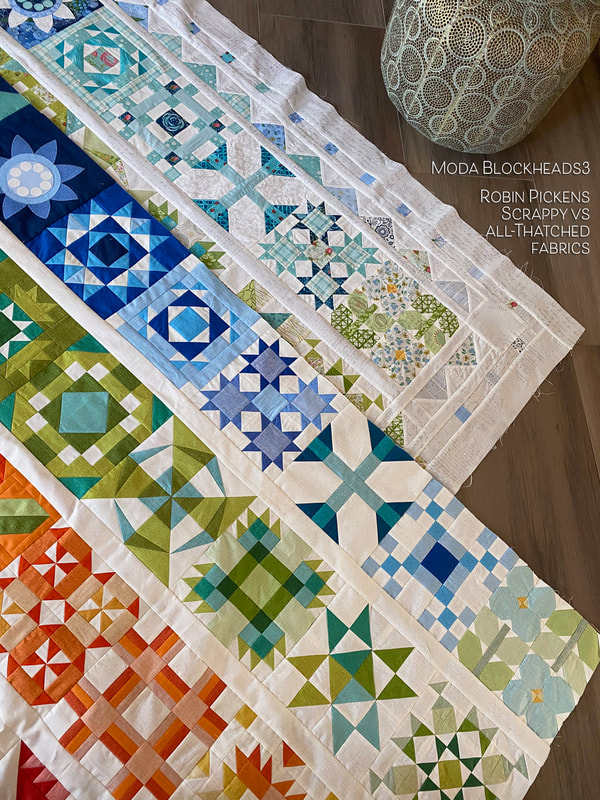
After joining my Moda Blockheads quilt tops, I felt like the scrappy version needed something a little extra and fancy to go with all those prints and prettiness. I thought a border based on flying geese and little squares provided a nice "fringe" to play off the rows and colors.
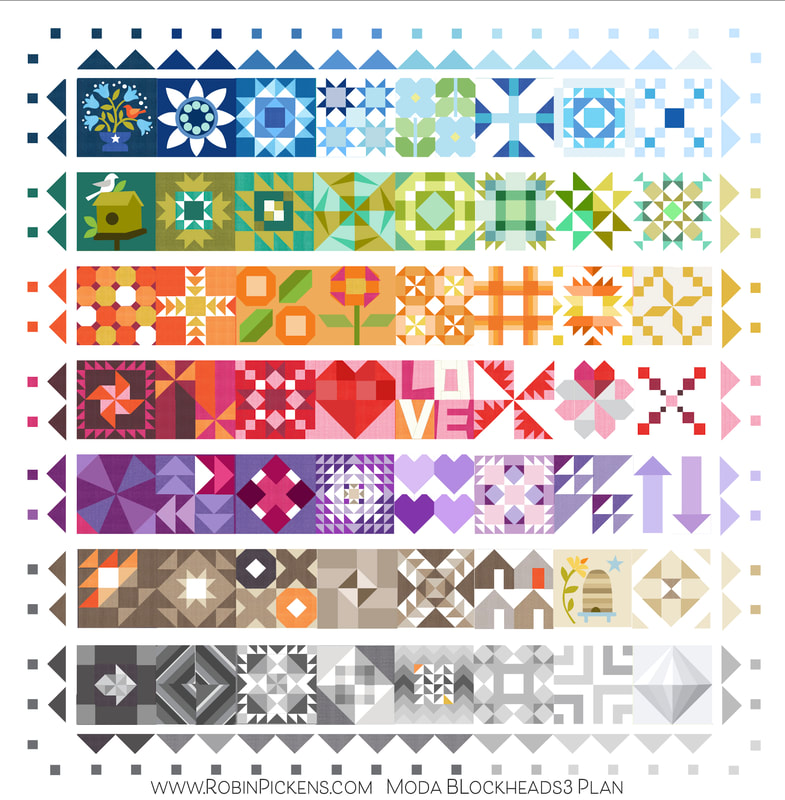
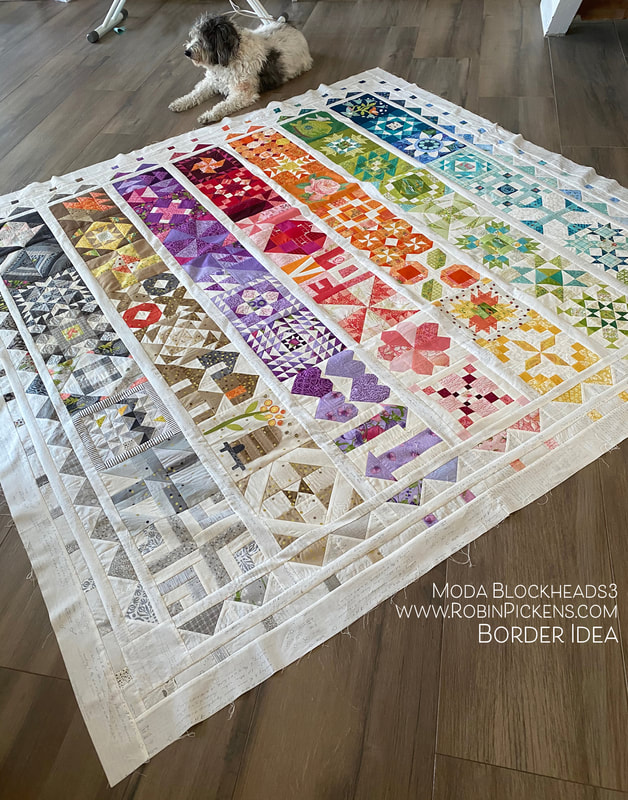
From computer plan to quilt top, I think it went pretty much as planned. I wanted to follow the dark to light scheme and reflect that in the flying geese and squares. I've changed colors as the rows have changed from blue to green to orange and so on.
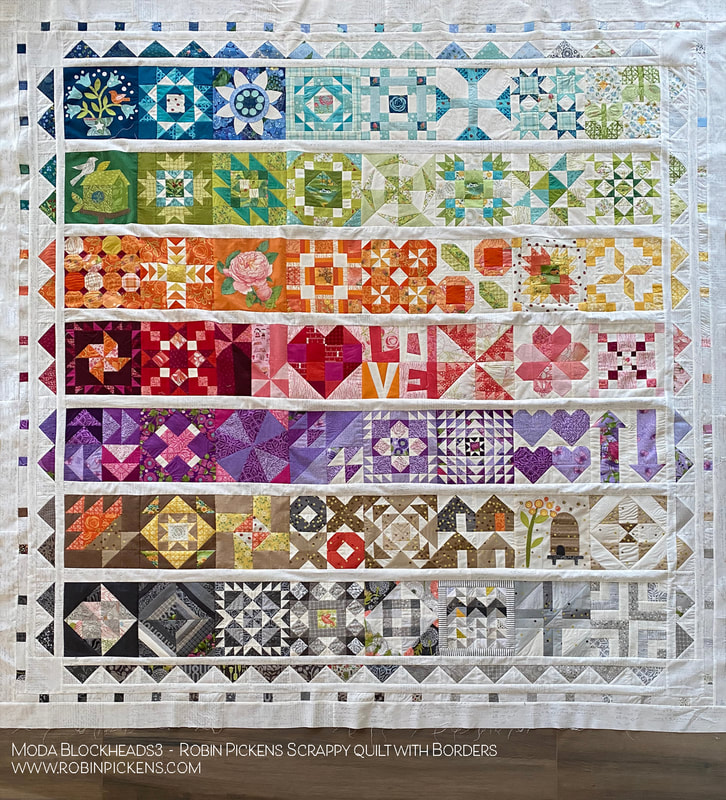
The flying geese on the sides are in pairs with the same sashing width between pairs. Along the bottom, as the blocks are side by side with no sashing separation going across, so are the flying geese.
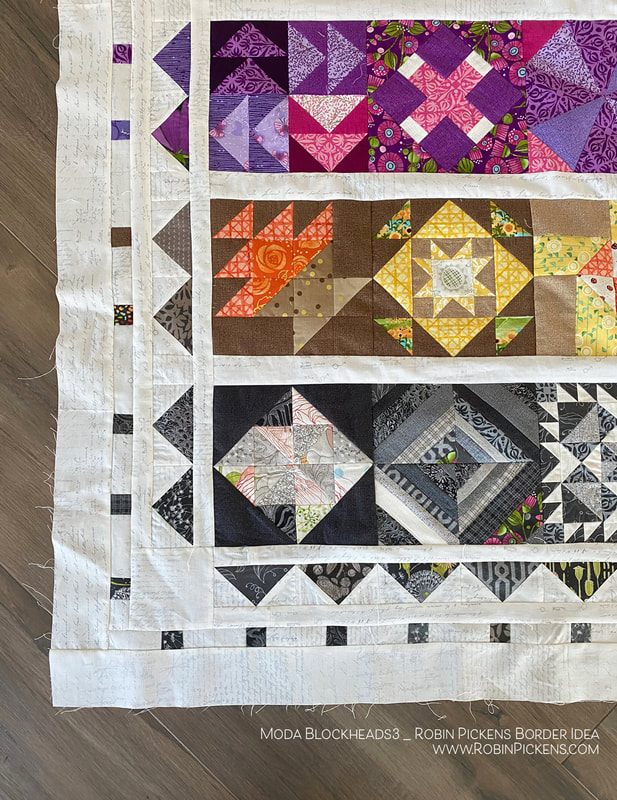
My blocks were the 8" size. Therefore my flying geese are 2 x 4 finished size. The spaces between the 1" finished squares are 3 x 1" and with the sashing spaces on sides, those are 1 x 41/2". 4 x 4" squares go in the corners and 2 1/2" borders line the outsides (all finished sizes. Cut sizes are marked on diagram as well).
The flying geese with 1" sashings are added to quilt top first. The bottom and tops have the 4 x 4" added when attaching those. Small squares with background rectangles and outer border are added next. The fabric I have use for the sashings and borders background color is Modern Background Paper 1581 11 by Zen Chic. It is such a nice low volume background fabric. 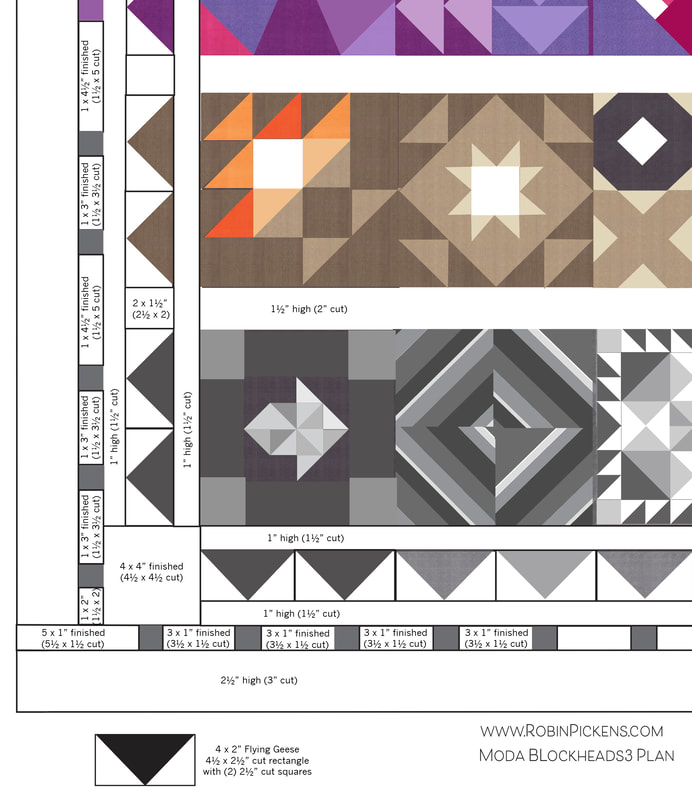

I like to see the difference of how the little squares and flying geese look in the darker values vs the lighter shades.
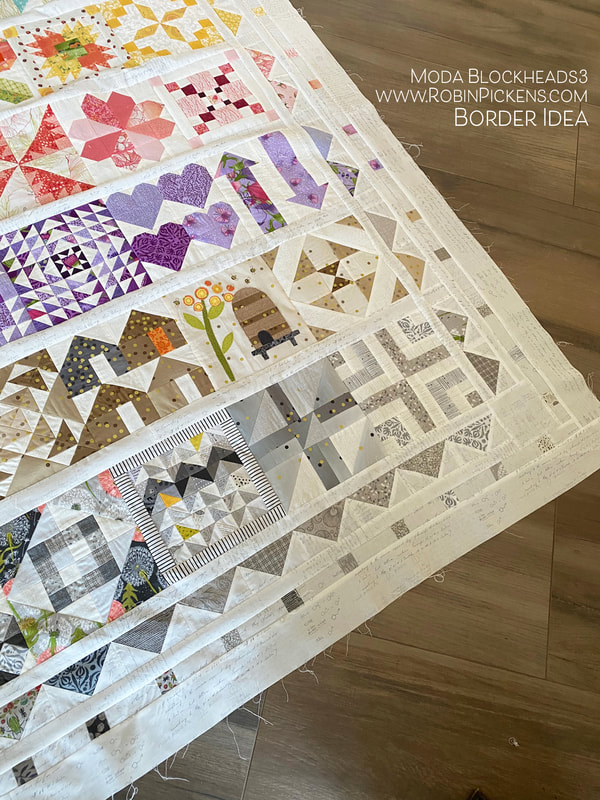
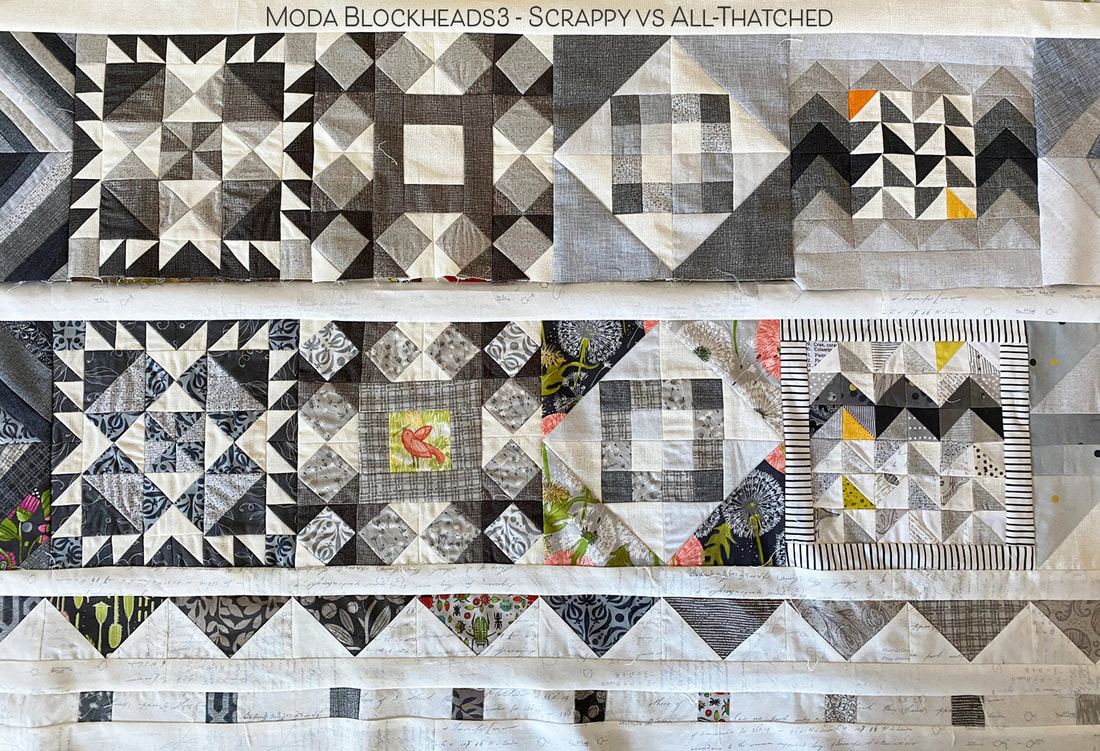
I also like to see the differences in the scrappy fabric quilt top vs the all-Thatched version. I think the border on one and not the other will help to create differences between the two, as well as different quilting. Another change between the quilts is I used piecing for most of the applique blocks on the all-Thatched version. The scrappy quilt used the applique designs. Notice the darkest blue and green blocks have the original designs for flowers and birds and birdhouse. The Thatched quilt has pieced blocks from Joanna Figueroa of the tulip, house and posie (which replaces the applique rose that I used Abby Rose fabric for).
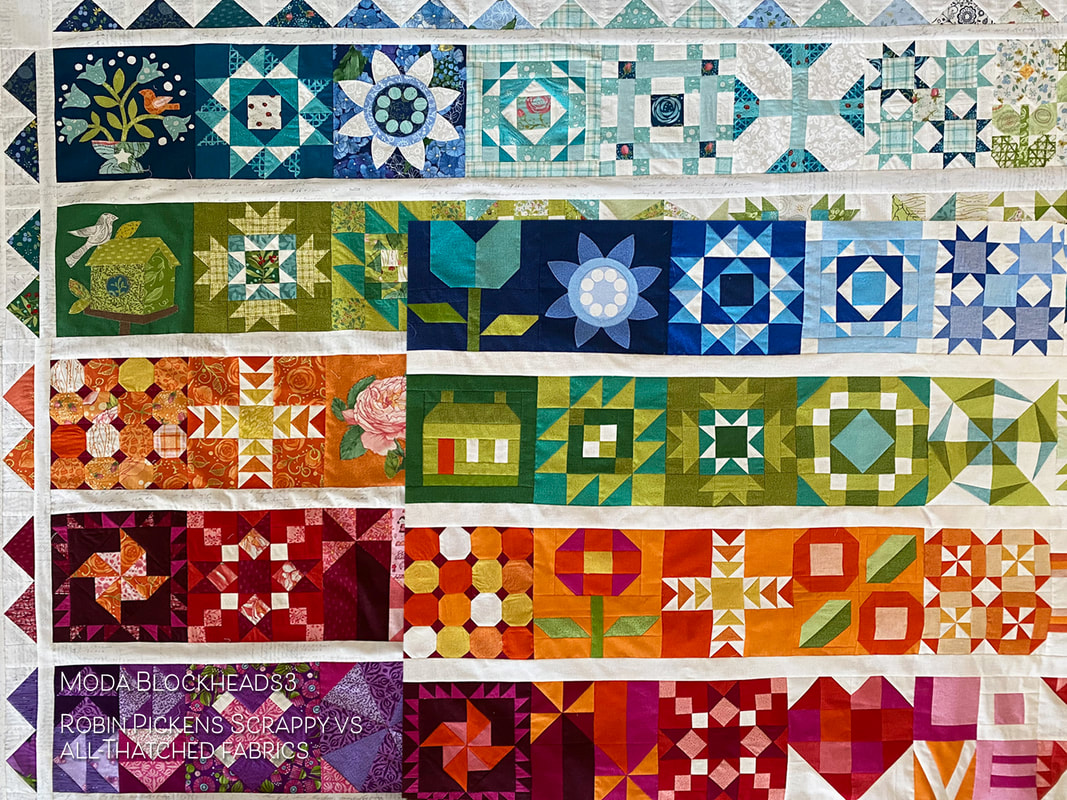
Sometimes the fabric choices for scrappy provided a different mix of light and dark so I rearranged some blocks within rows between the two types of quilt tops. The blue row especially flipped positions of some blocks.
I liked adding the little bird in the center of the Fixer Upper block from Vanessa Goertzen. Small peeks of color help to tie the gray blocks in with other rows.
Time for quilting on these tops. The finish line is in sight! Hope you are having fun with wherever you are in the process!
|

About ROBINDesigner of colorful florals for Moda fabrics. Modern to transitional quilt designer. Illustrator, sewist, crafter. I am proud to be a designer for Moda Fabrics!


Shop Robin's Designs
 I am an affiliate for Fat Quarter Shop and may earn a small commission through my links. Thank you for your support!

Check the March 6, 2017 Episode!
Categories
All
Archives
February 2024
© Robin Pickens Inc. All rights reserved. No images may be reproduced without permission.
|
 RSS Feed

